Configure your Profile and Account
Configure your profile
This guide helps you set up your personal profile with your image/avatar, display name, personal message signature, and more.
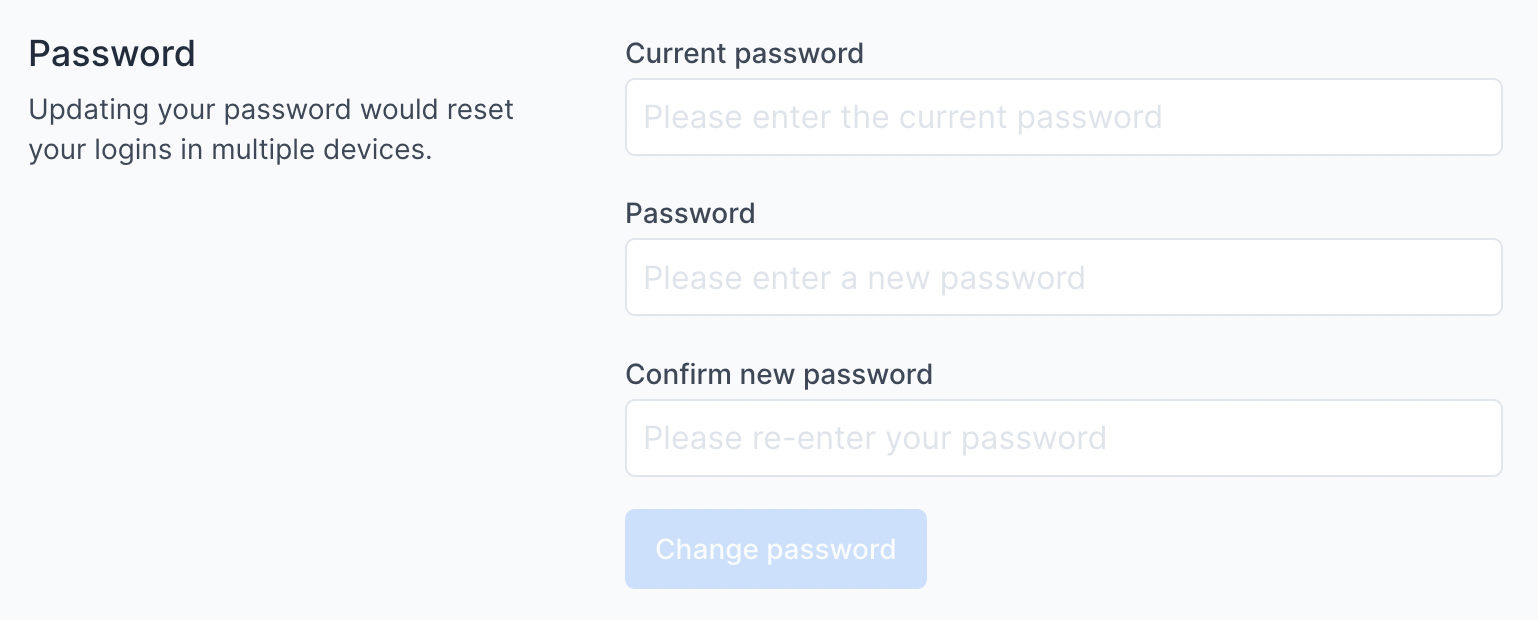
You can also change your password on this page.
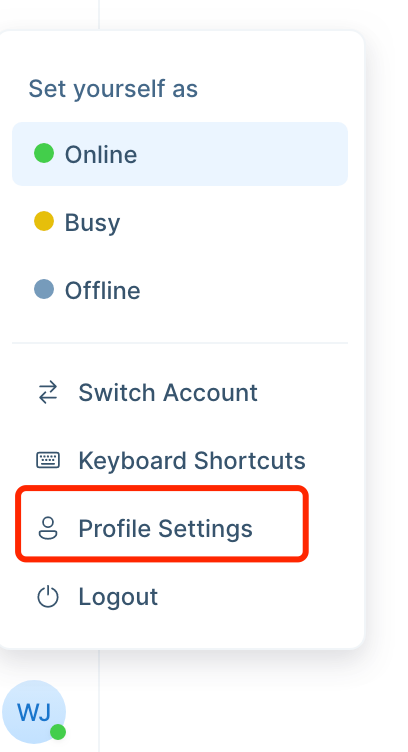
You can find the Profile Settings page on the bottom left corner of your dashboard.

Update your profile
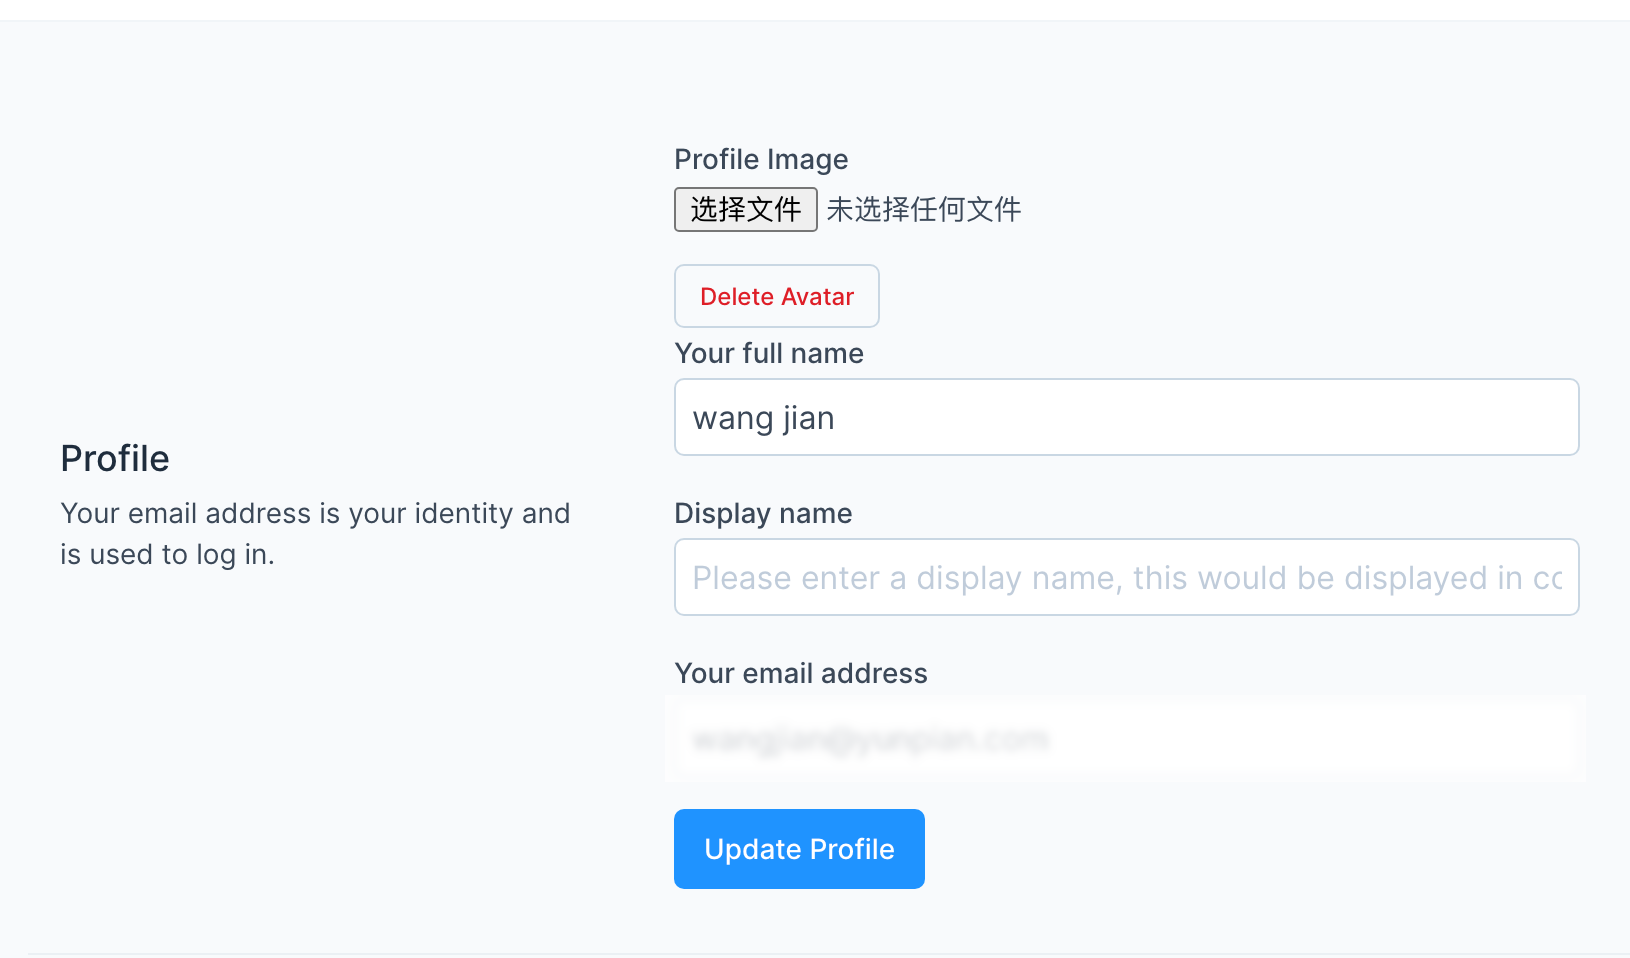
This section will help you to update your agent profile. This updated information will be used on the dashboard.

The fields in the form are described below.
| Field Name | Description |
|---|---|
| Profile image | A square image that suits your profile. If no image is provided, then the system would take Gravatar Image if available |
| Your full name | Provide your full name. |
| Display Name | Provide a name that you want to be displayed on the chat |
| Your email address | This email address will be used to send notifications |
Click on Update Profile to save the changes. If the changes are successful, you will see a message "Your profile has been updated successfully."
Set your personal message signature
You can create your personal message signature. This will get added to all the messages you send from your email inbox configured on YCloud Inbox.
Change your password
As a security measure, you need to provide your existing password to change the password. If you forgot the old password, you can log out of the system and reset the password.
Password must contain at least one uppercase character (A-Z), at least one numeric character (0..9), and at least one special character (!@#$%^&*()_+-=[]{}|'"/^.,<>:;?~)`.
ps: Only agents can change the password

Notifications settings
You can go through the Notifications settings and check the boxes according to your preferences.
Configure your general account details
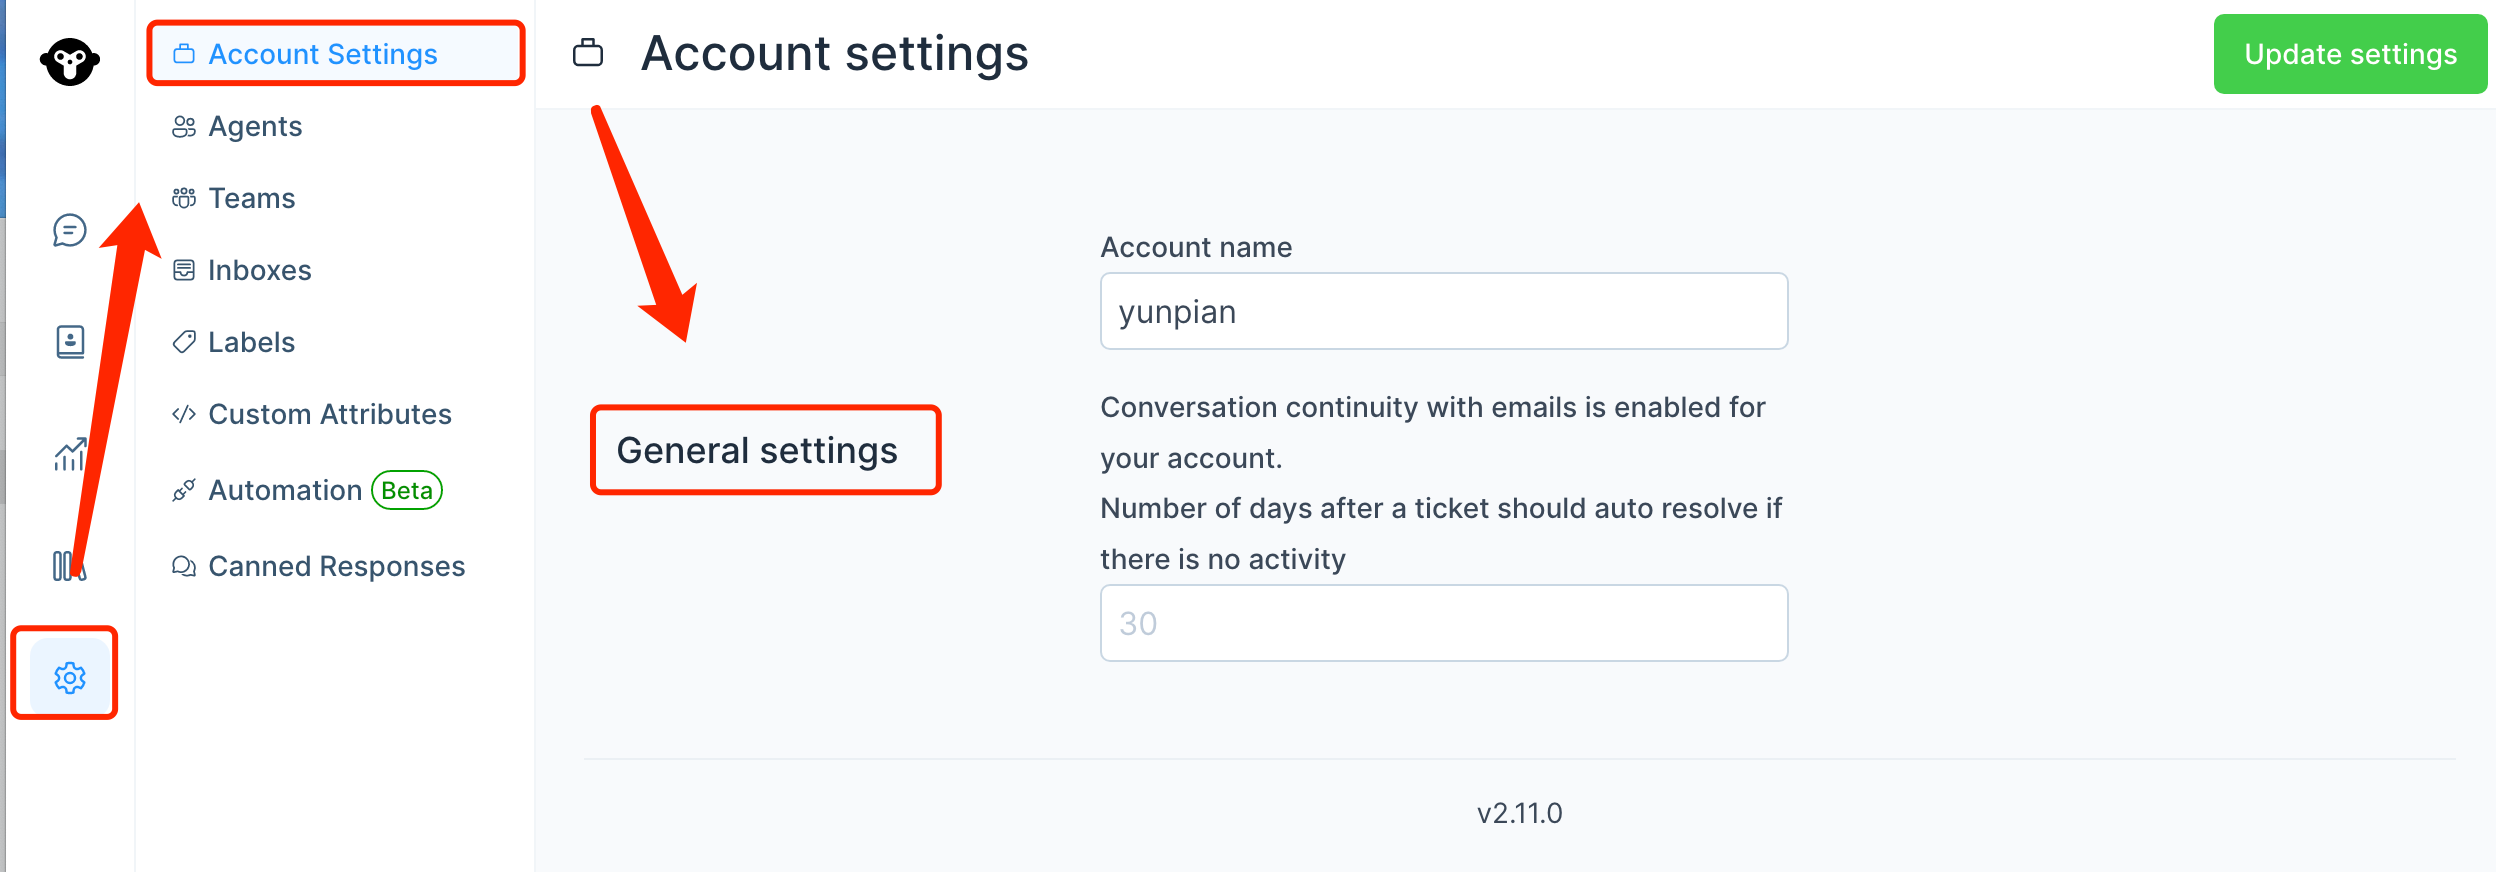
You can update your organization’s info on this screen. You can update the name or language used in the account by changing the settings as shown below.
To update account details, click on Settings -> Account Settings. The available settings are shown below.

| Field Name | Description |
|---|---|
| Account Name | Enter the name of your Account. |
| Number of days after a ticket should auto resolve if there is no activity | Give the number of days after which the ticket or conversation will be marked as resolved eg: 30 - This is given in case the customer does not have any further queries but has not given closure also. |
Click on Update Settings Button on the right hand top side of the screen. Wait for the 'Successfully updated account settings' message.
Updated 4 months ago
