Domain
To access the service, you must configure your own sending domain on the YCloud platform and obtain the DNS record for verification. After obtaining the DNS record, you will need to apply it to your hosting provider to verify your domain. This is an important step to ensure the security and authenticity of your emails.
Step1: Login
Login your account, visit Domains page.
Step2: Add your domain
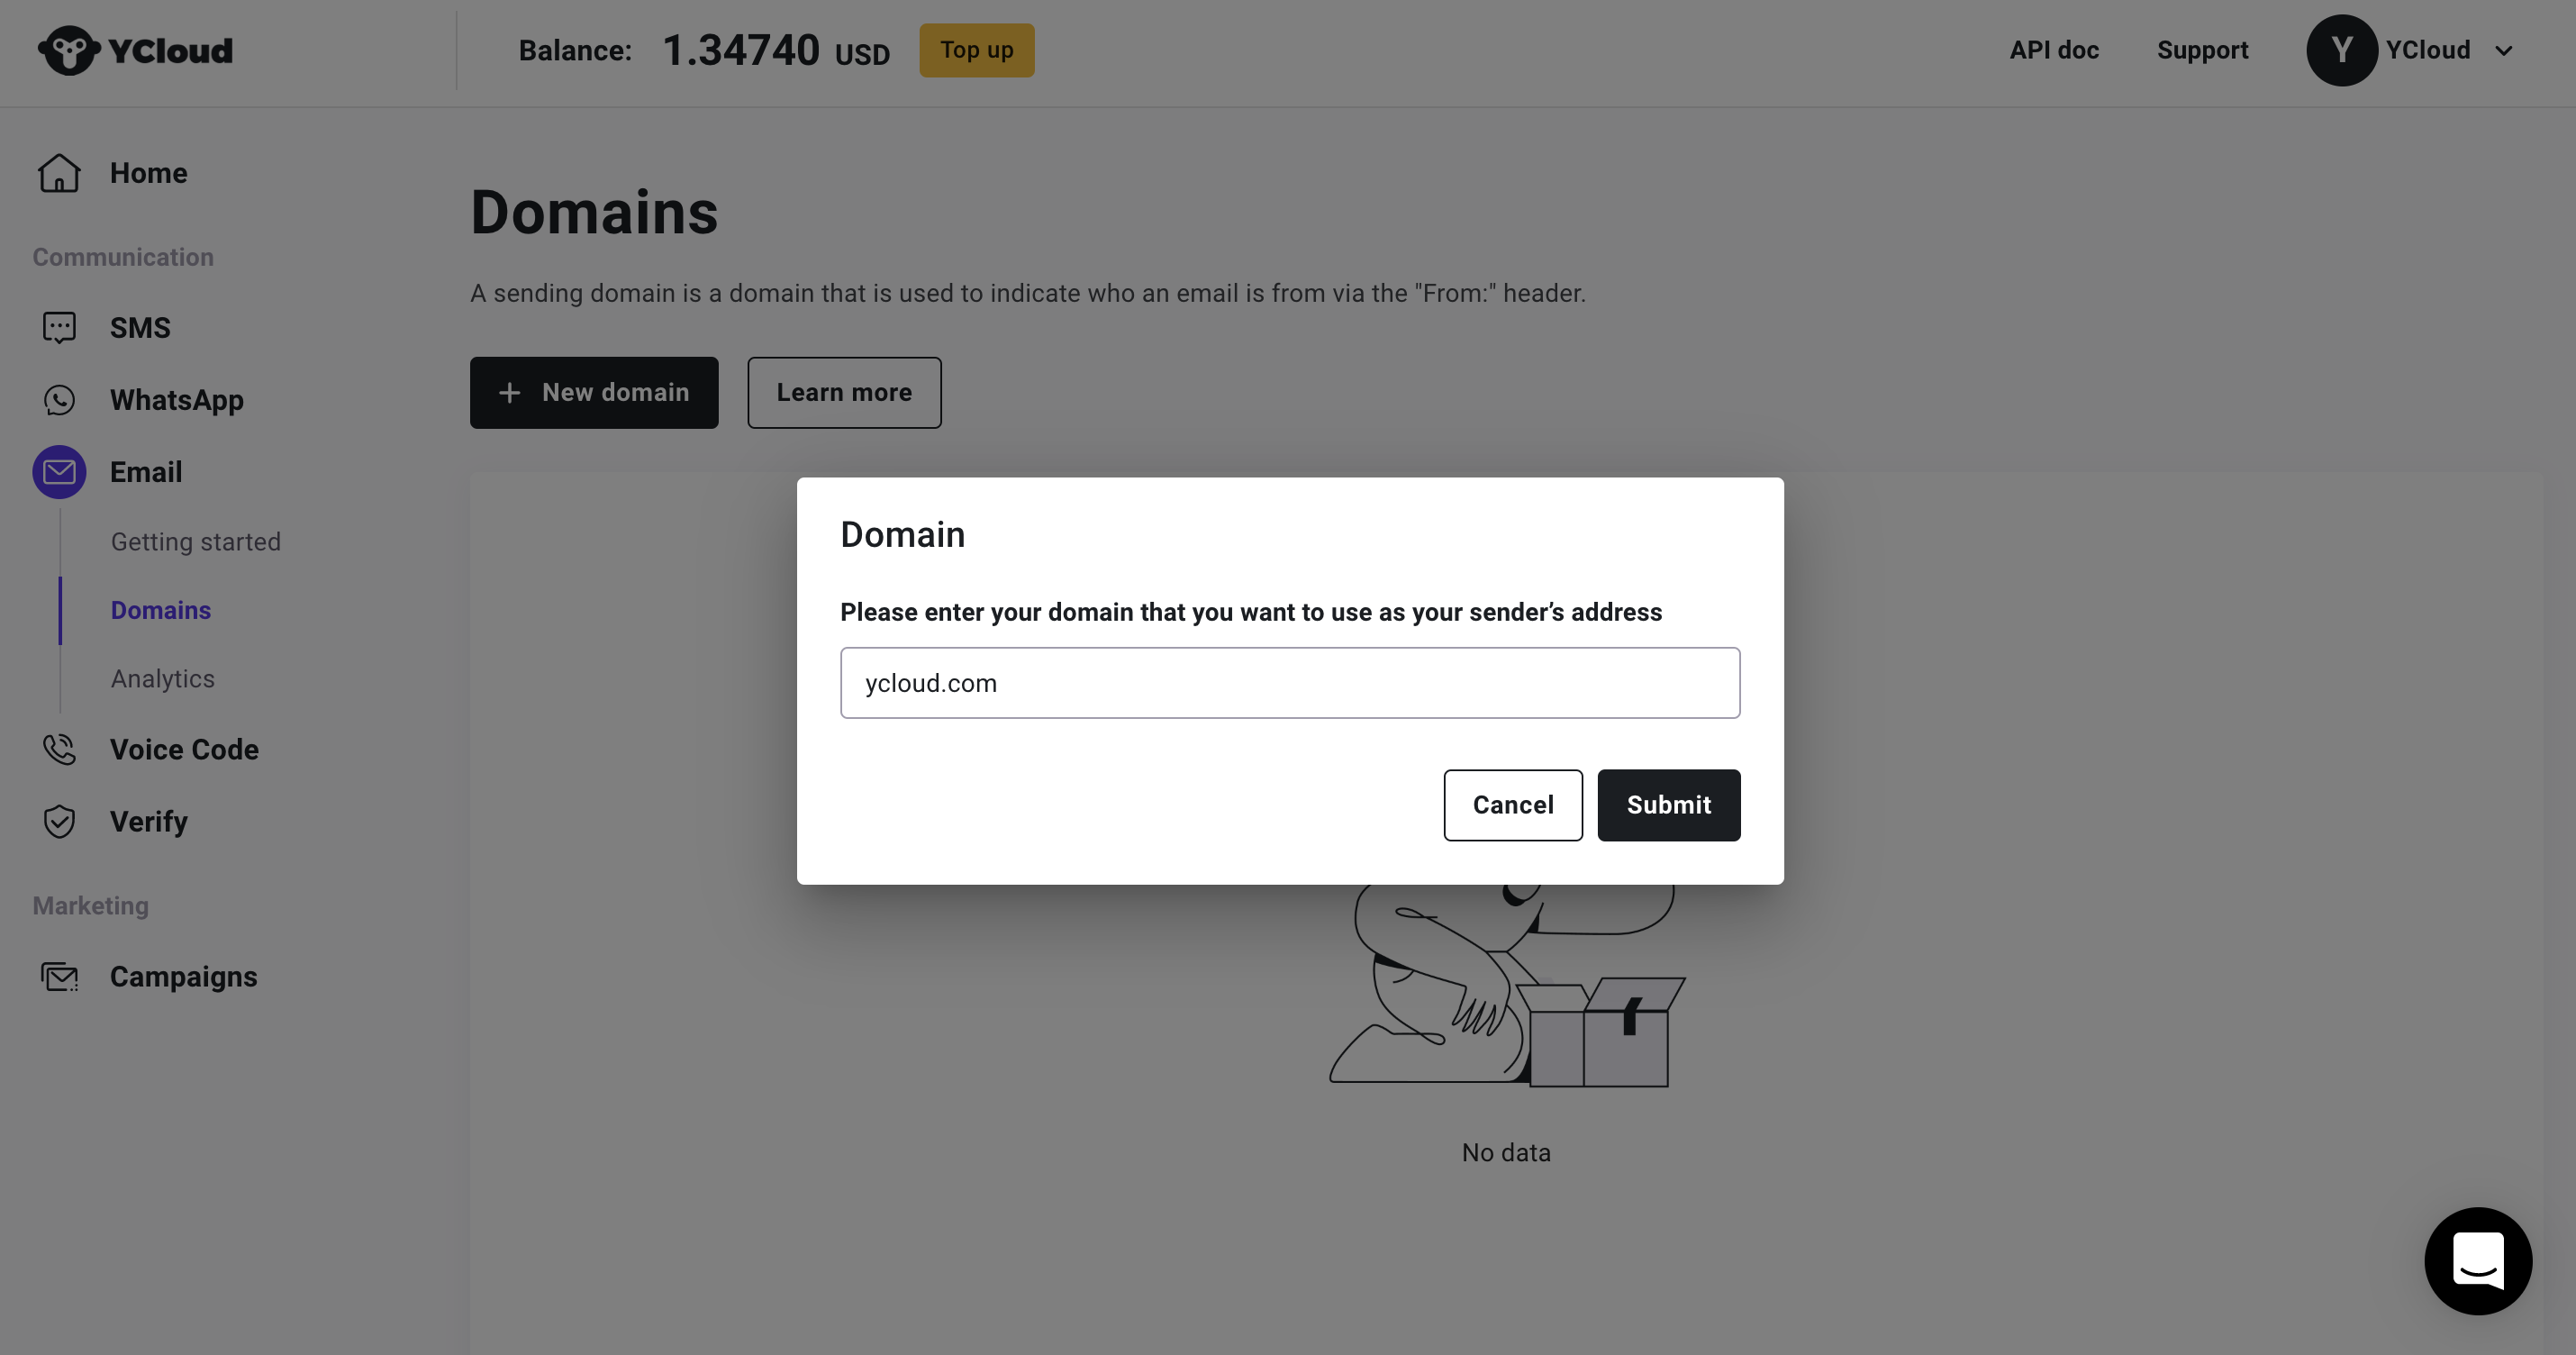
Add the domain you want to send from.
For example, I want to use [email protected] to send email, then I need add the domain names ycloud.com.

Add your domain
Step3:DNS configuration
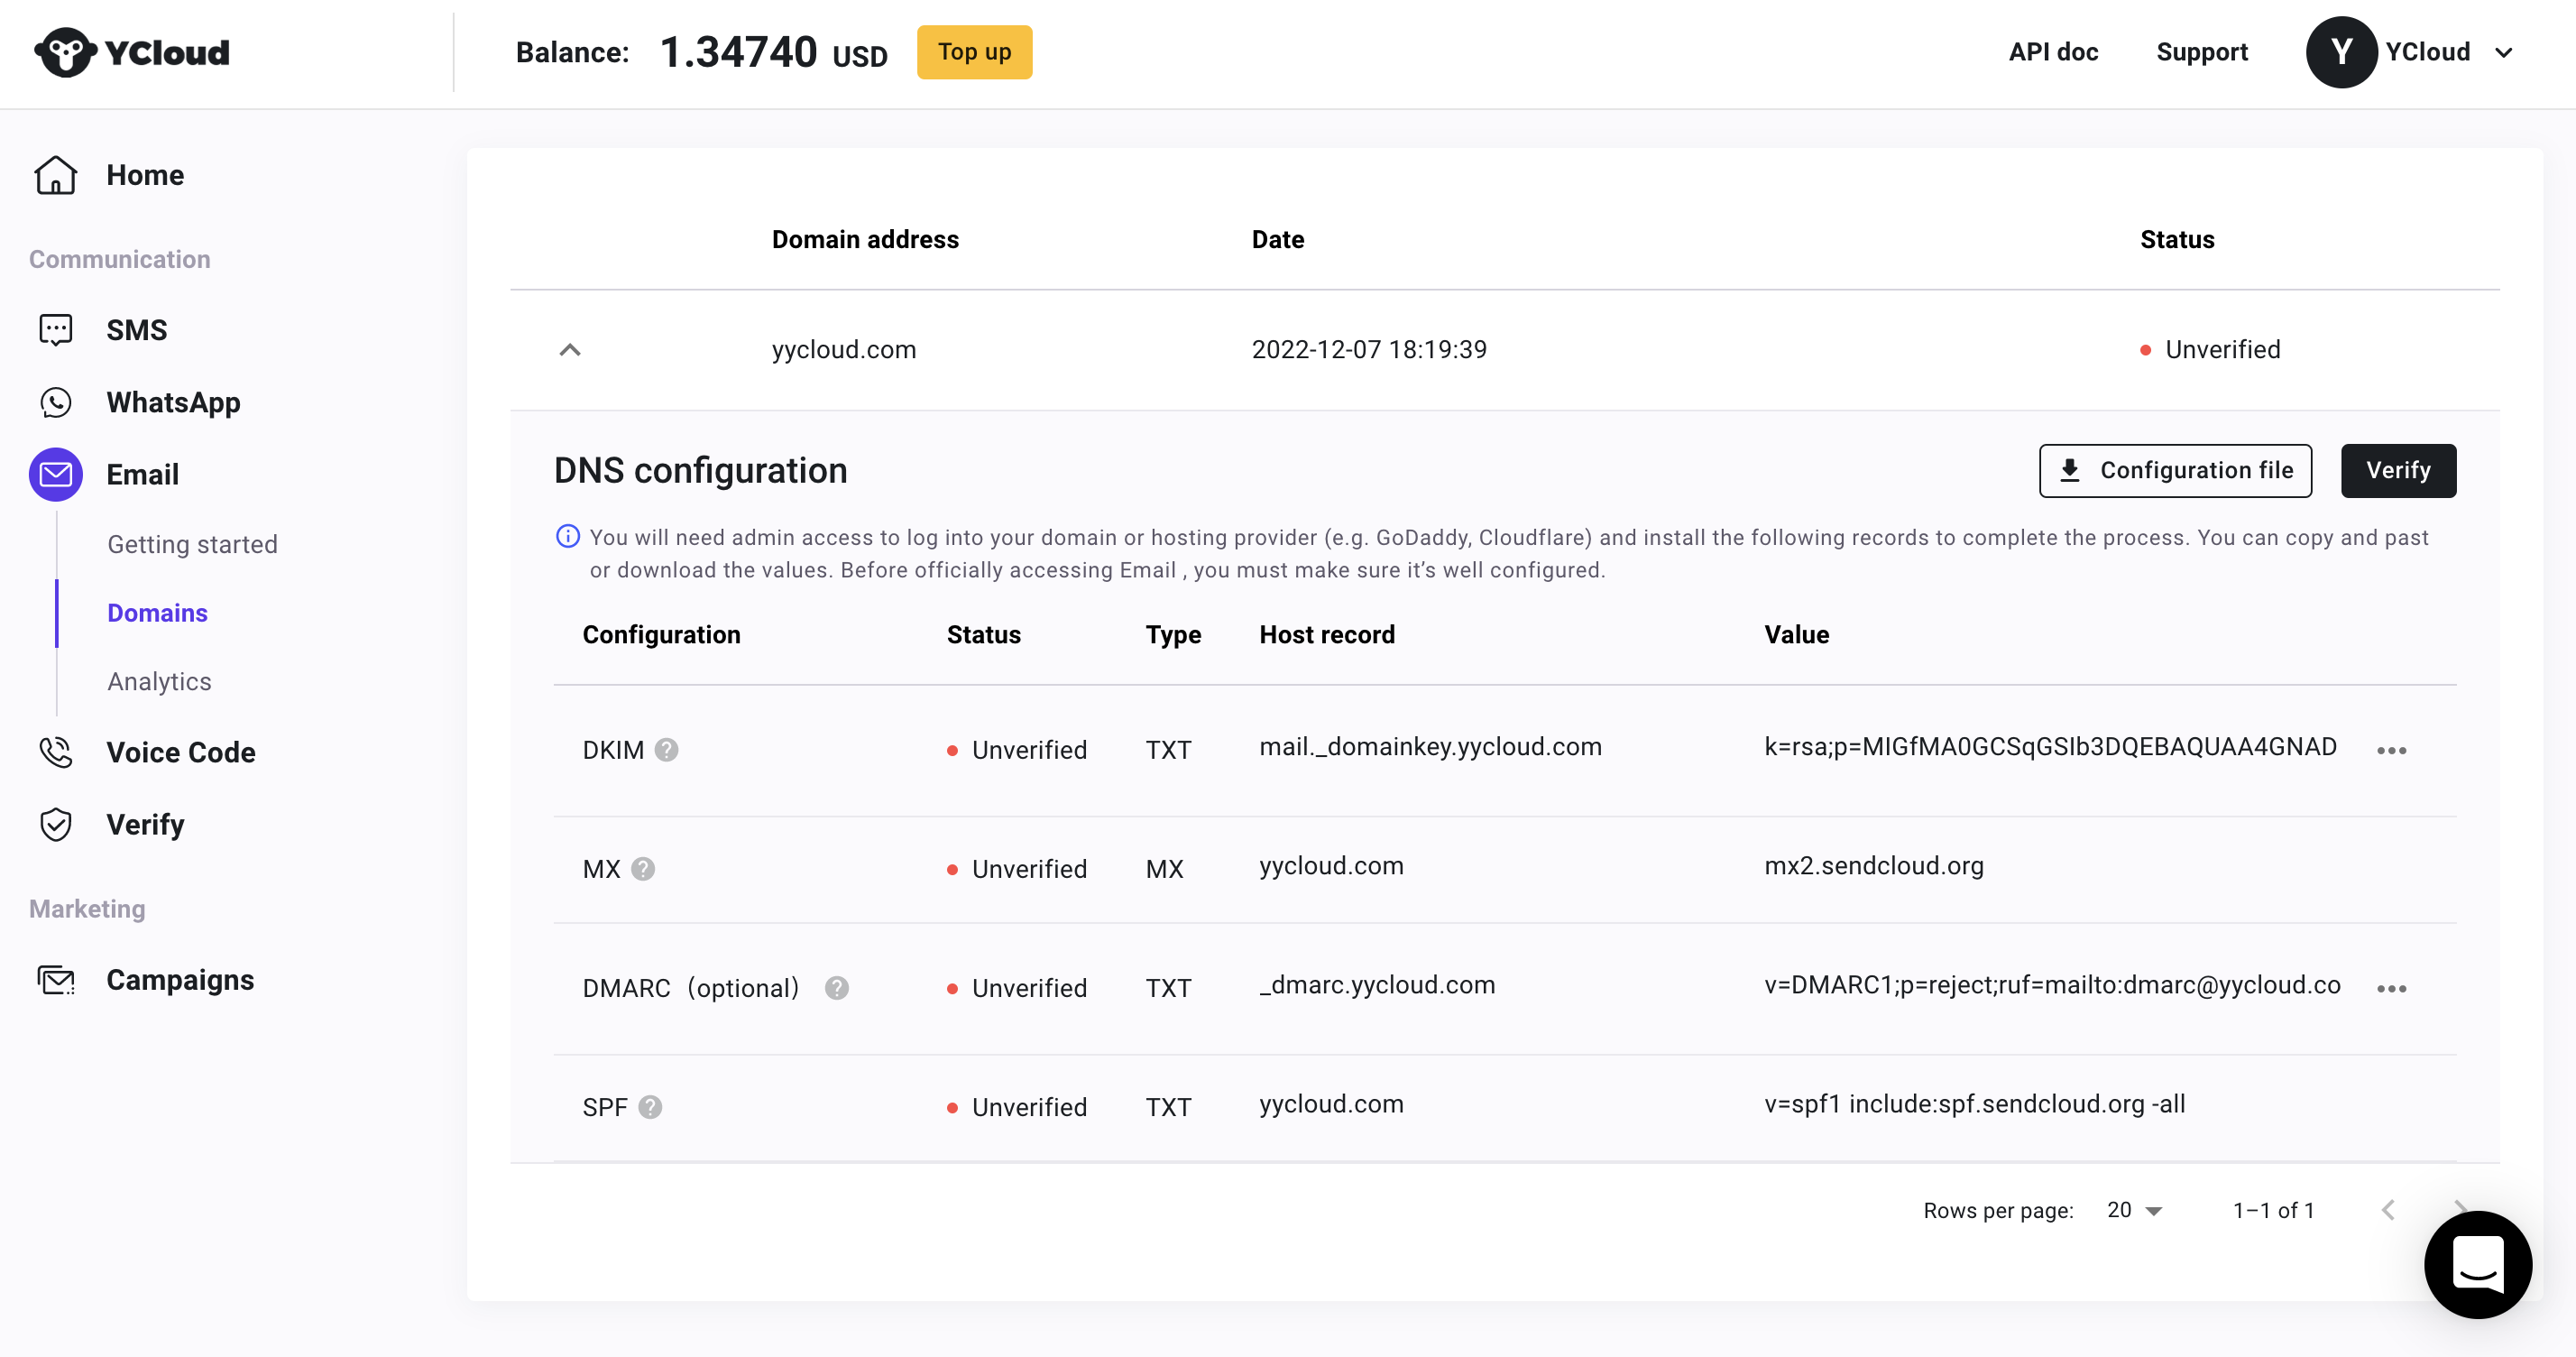
You need to add all of the TXT records on this domain to your DNS host.
If you don't have access to modify your company's DNS records, you can click the "Download the data" button and send the file to your co-worker.

DNS configuration
Step4: Verify the domain
After finishing the DNS configuration, YCloud will detect if the domain is active, or you can come back to the YCloud platform and click the Verify button.
But please aware that it may take several minutes or hours after the configuration.
And When the domain's status changes to Active, you can use the domain to send emails.
Updated about 1 year ago
