Invite Agents
Add Agents
An Agent is a member of your Customer Support team.
Agents will be able to view and reply to messages from your users.
Click on Add Agent to add a new agent. Agent you add will receive an email with a confirmation link to activate their account, after which they can access YCloud Inbox and respond to messages.
Access to YCloud Inbox's features are based on the following roles.
Agent
Agents with this role can only access inboxes, reports, and conversations. They can assign conversations to other agents or themselves and resolve conversations.
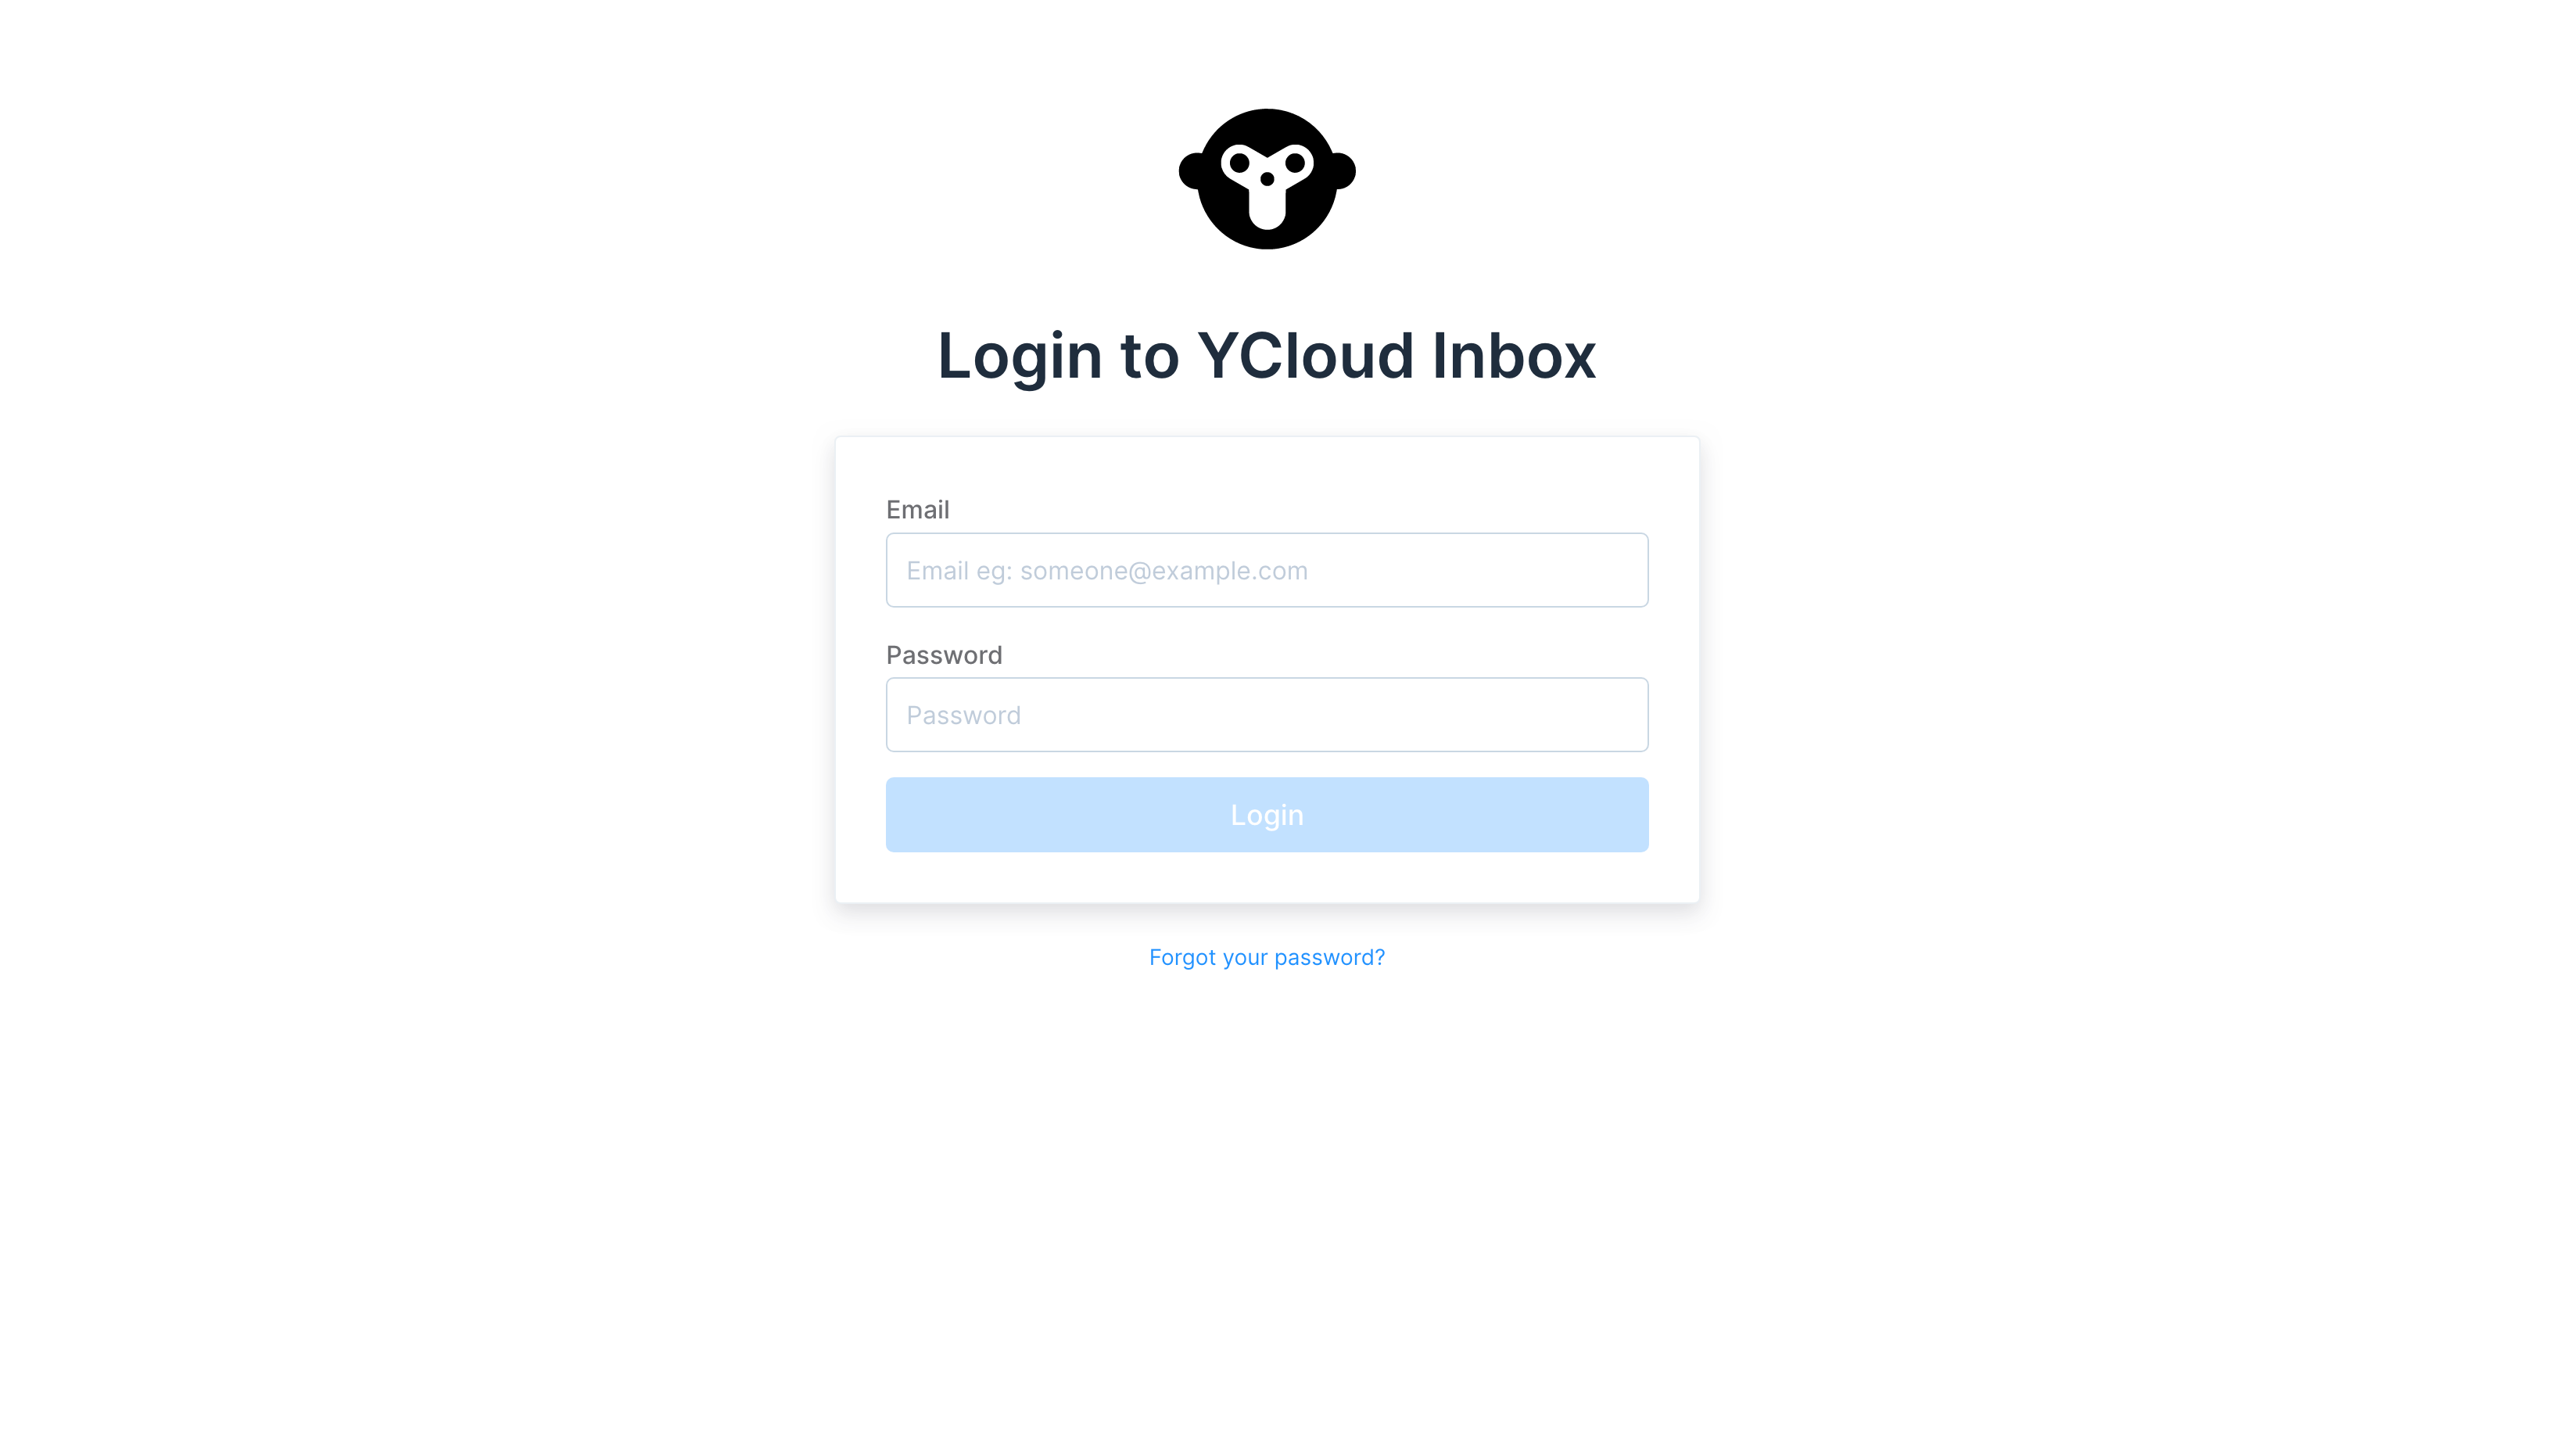
The agents are only allowed to log in to Inbox, not YCloud. This is the agent login address, https://inbox.ycloud.com/app/login
Administrator
Administrator will have access to all YCloud Inbox features enabled for your account, including settings, along with all of a normal agents' privileges.
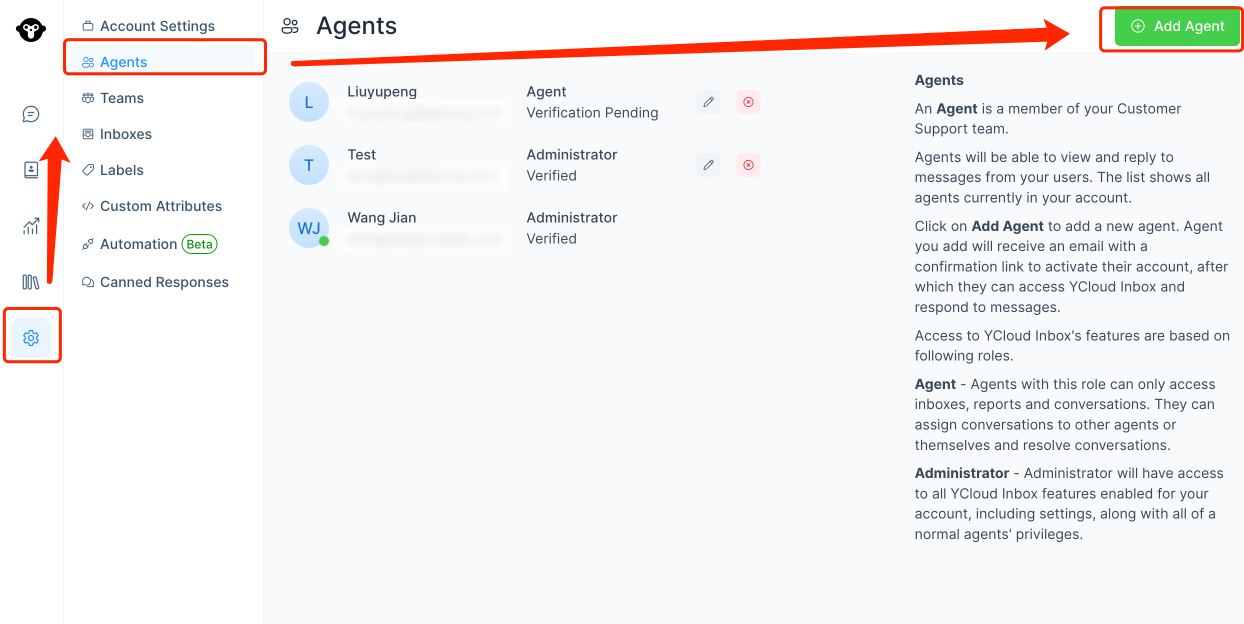
Step 1. Click on Settings → Agents.
You will be redirected to the Agents management page as shown below.
Your Name will be listed by default as Administrator. Administrators have access to all Inbox features enabled for your account, including Settings.
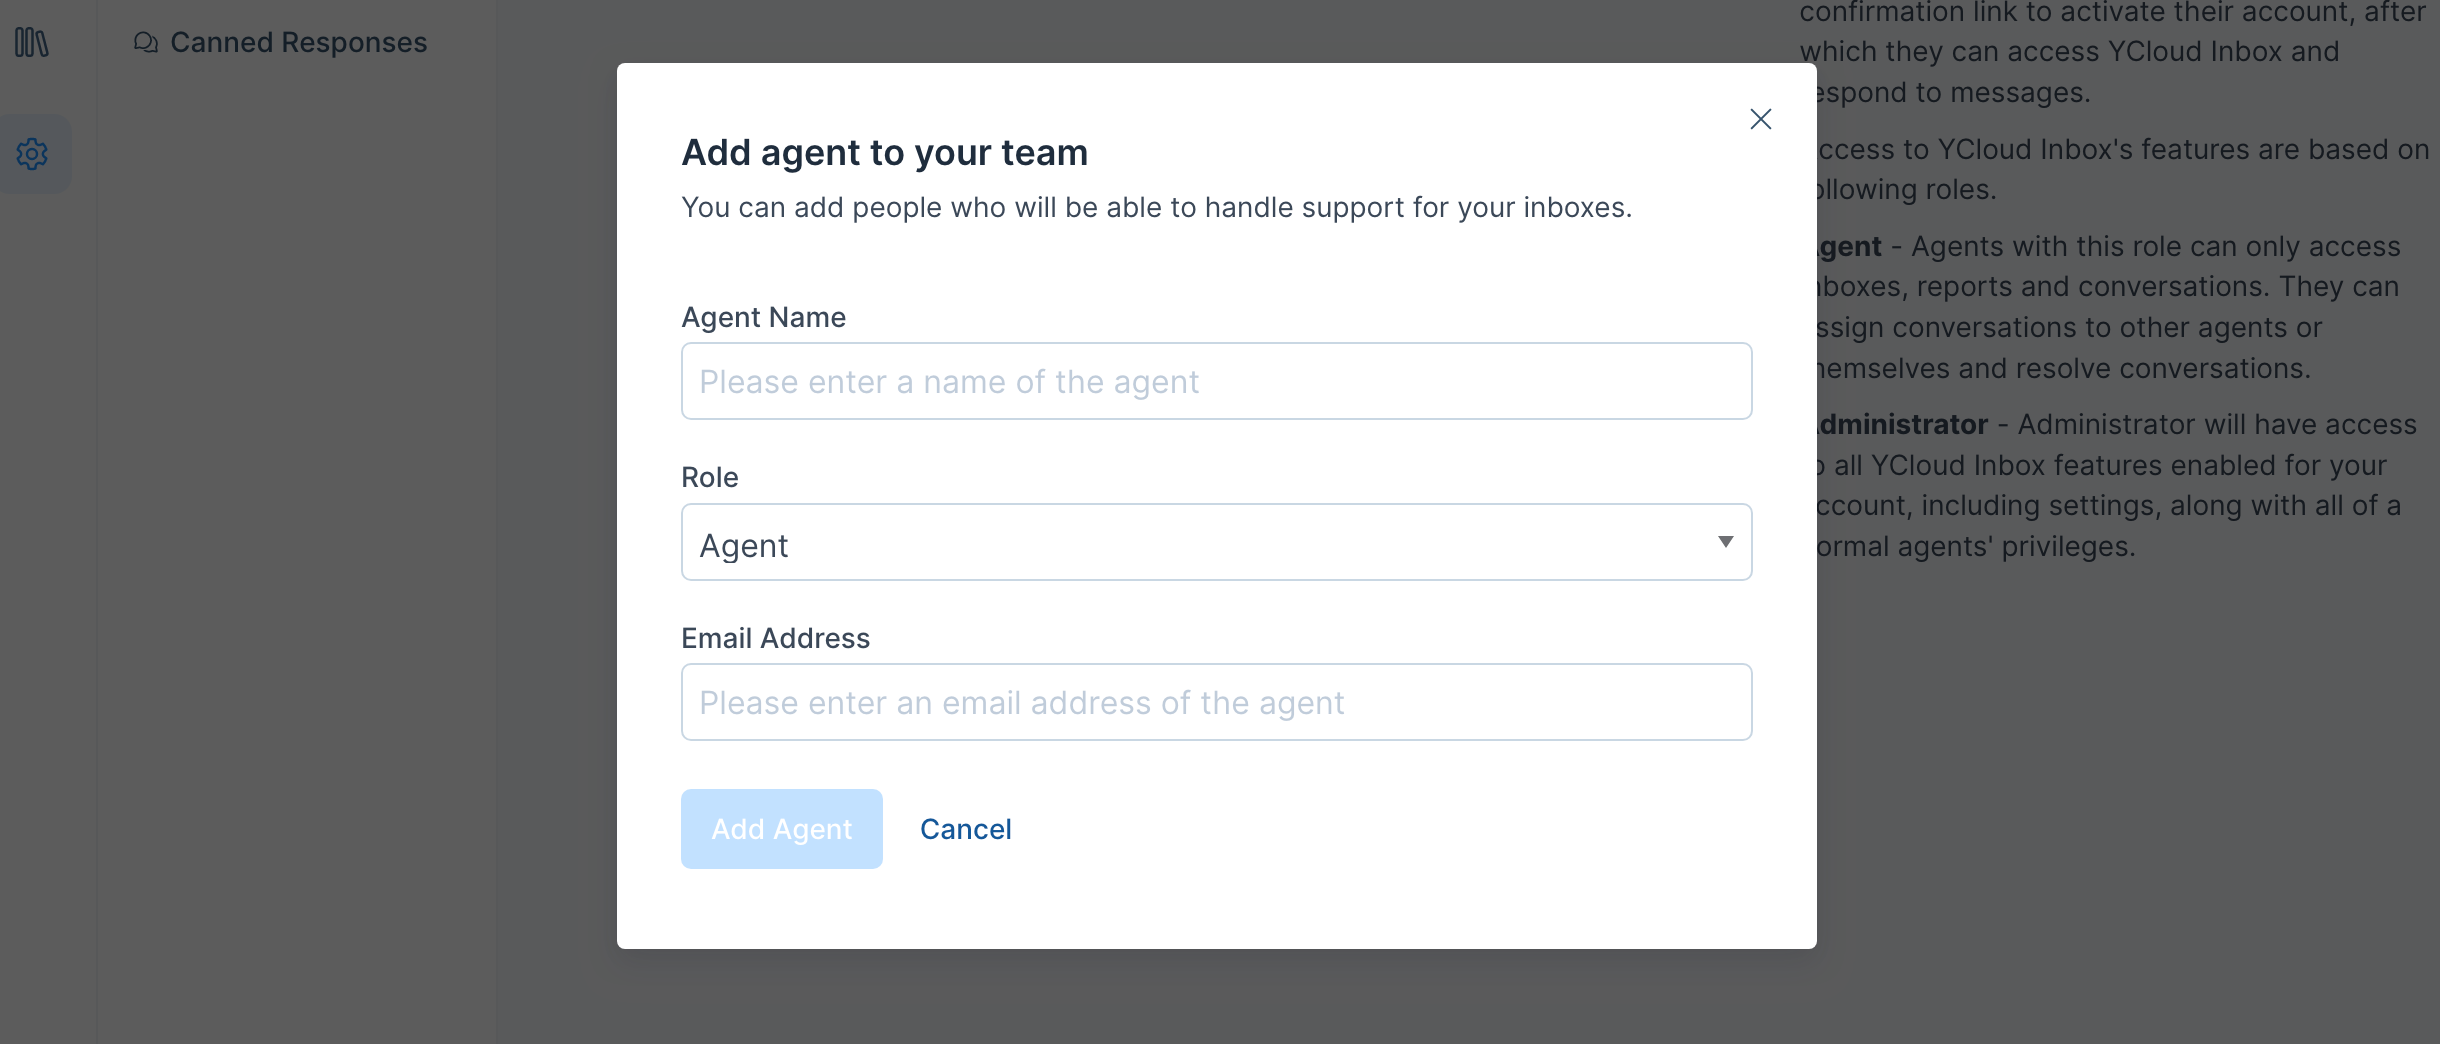
Step 2. Fill in the pop up window
A pop up window will open in which you can enter the details of the Agent like name, role and email address.
| Field Name | Value | Remarks |
|---|---|---|
| Agent Name | Enter Name of the Agent | - |
| Role | Enter the Role - Agent or Administrator | Agents can only access inbox, reports, and conversations. Administrators have all privilages of agents and have access to all features |
| Your e-mail address | Enter the e-mail id you registered | - |
Edit
You can also use the edit option given along with the Agent’s name to change details.
Delete
In case, the particular agent no longer works with you, you can use the delete button to delete the agent from the dashboard.
Agents login address
Note:The invited agents can login to the YCloud inbox through this URL
Add Teams
Teams let you organize your agents into groups based on their responsibilities. A user can be part of multiple teams. You can assign conversations to a team when you are working collaboratively.
Step 1. Create new team
To start adding teams, go to Settings → Teams → Create new team.
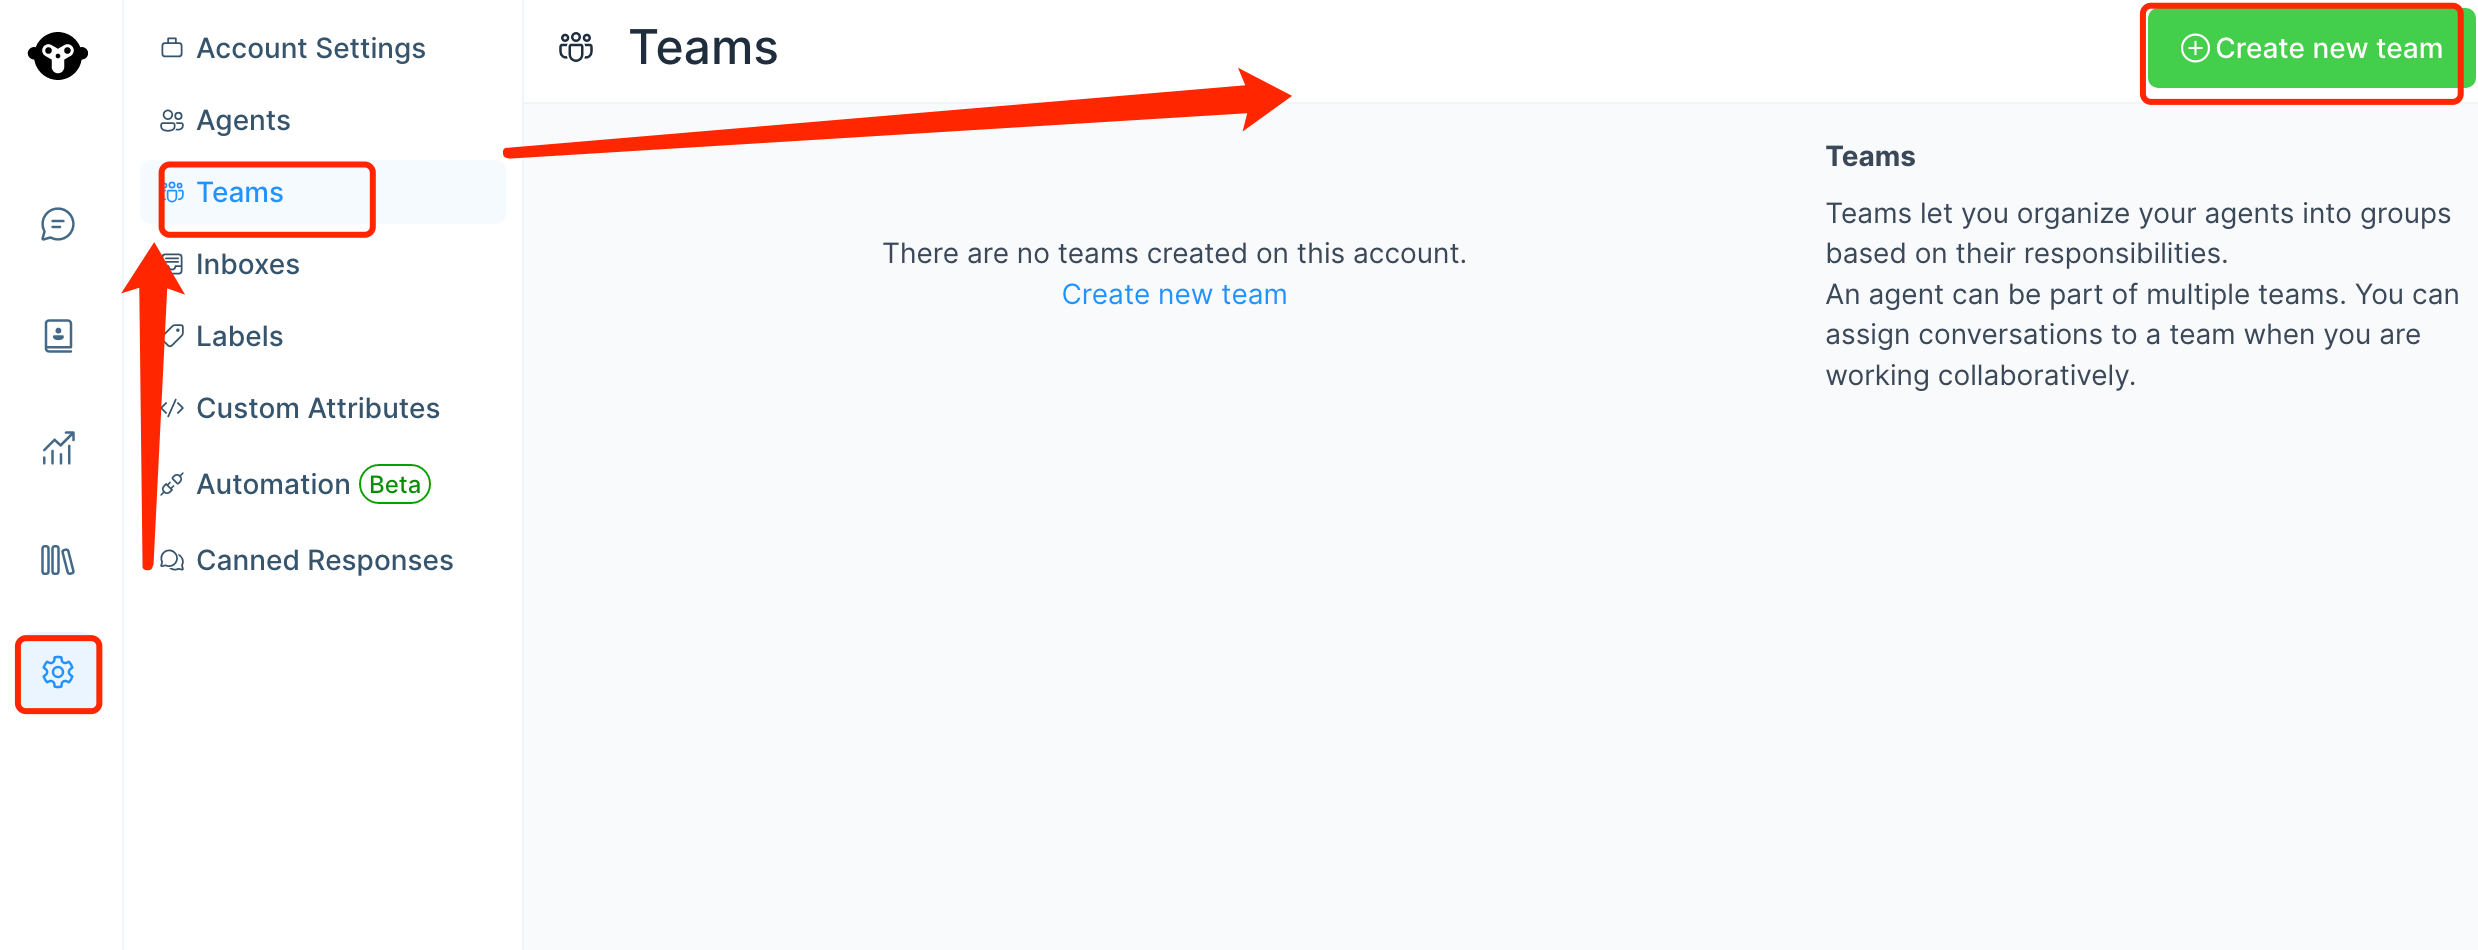
You will see the screen shown below. Add Teams as per your need. Create Teams and group the issues/tickets to several groups such that assigned agents need to work in relevant teams only
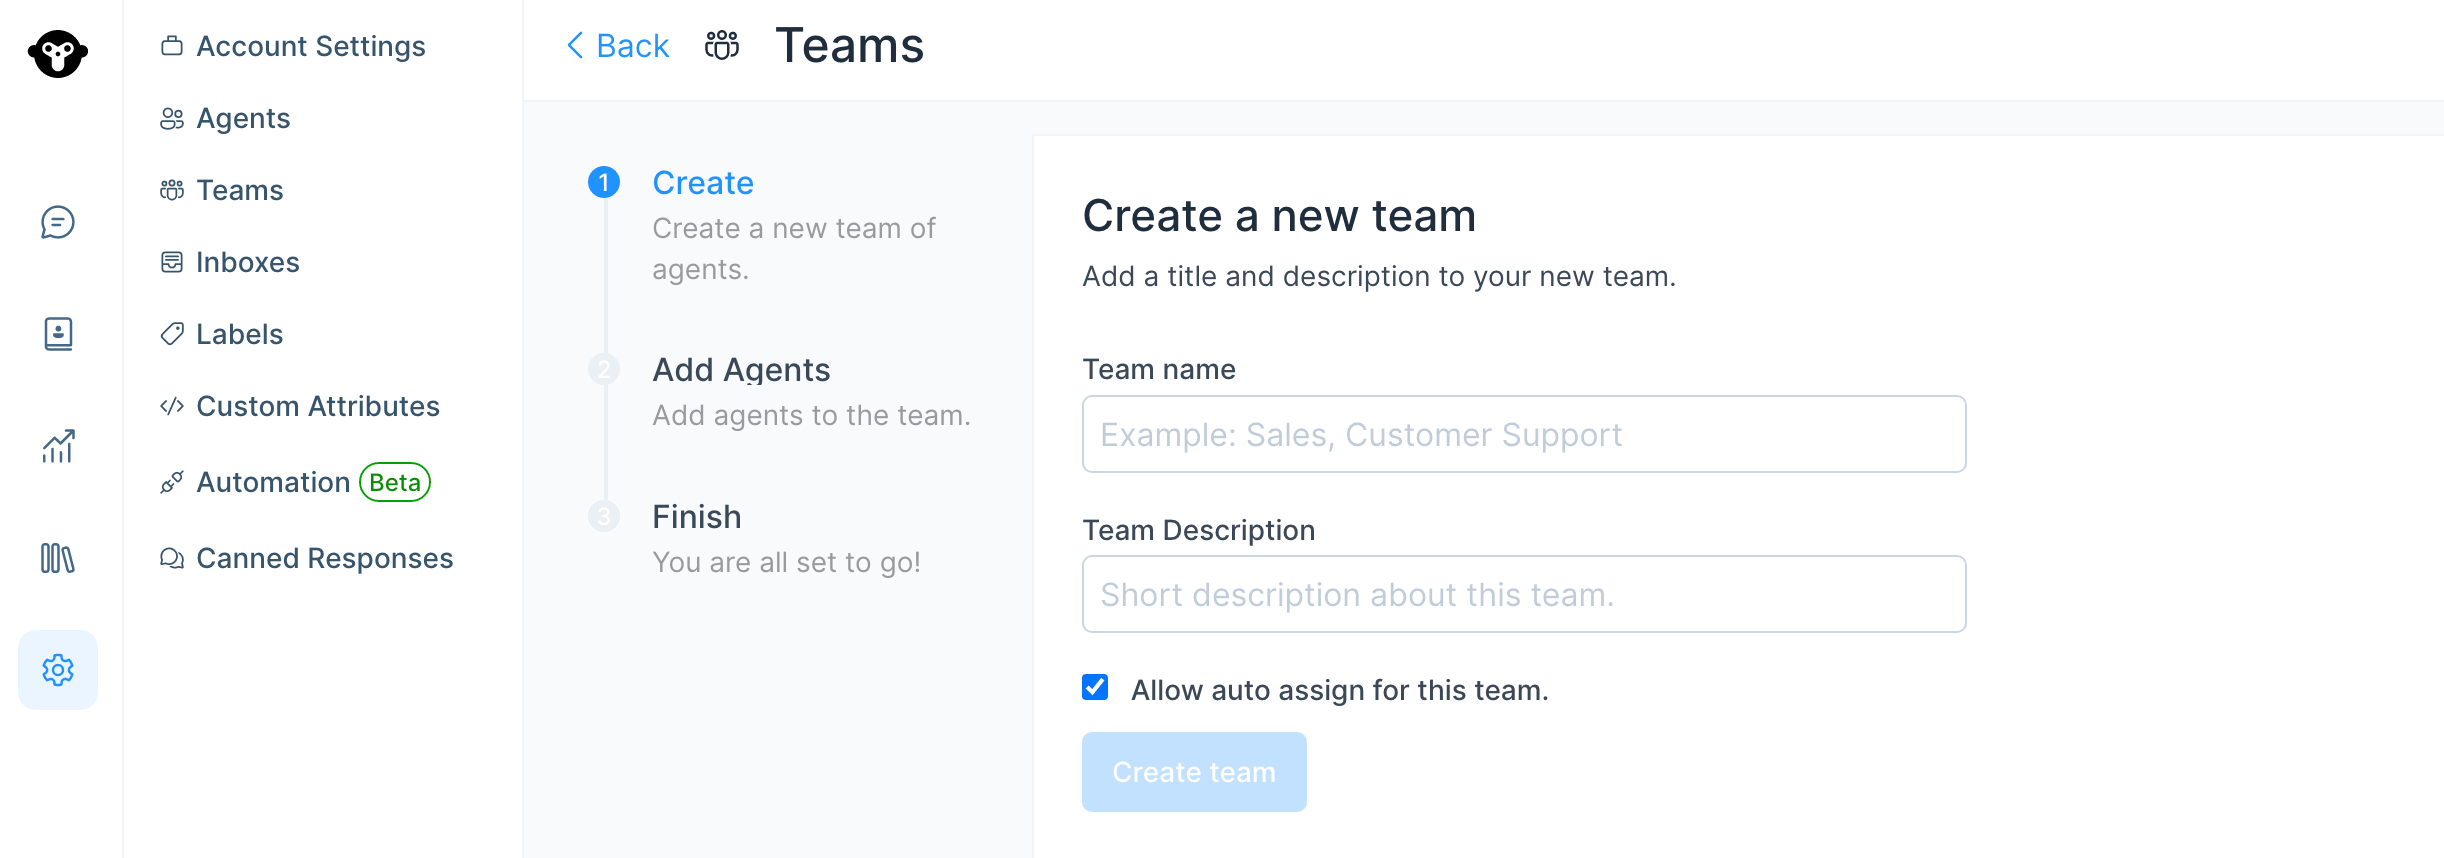
| Field Name | Value | Remarks |
|---|---|---|
| Team Name | Assign a name for the team | eg: Sales, Support |
| Team Description | Give a short description about the team | eg: Team to resolve queries related to sales of Hopkins products |
| Check box | Tick this box if you would like to auto assign the conversations in this team | If this is not ticked, the conversation will remain as unassigned. |
Click on ‘Create Team’.
Step 2. Add agents to this team.
Whenever a conversation is assigned to this team, all the added agents will be notified.
Select the Checkboxes for Agents needed for this team.
Click on ‘Add Agents’. Only these agents will be able to see these teams on their screen.
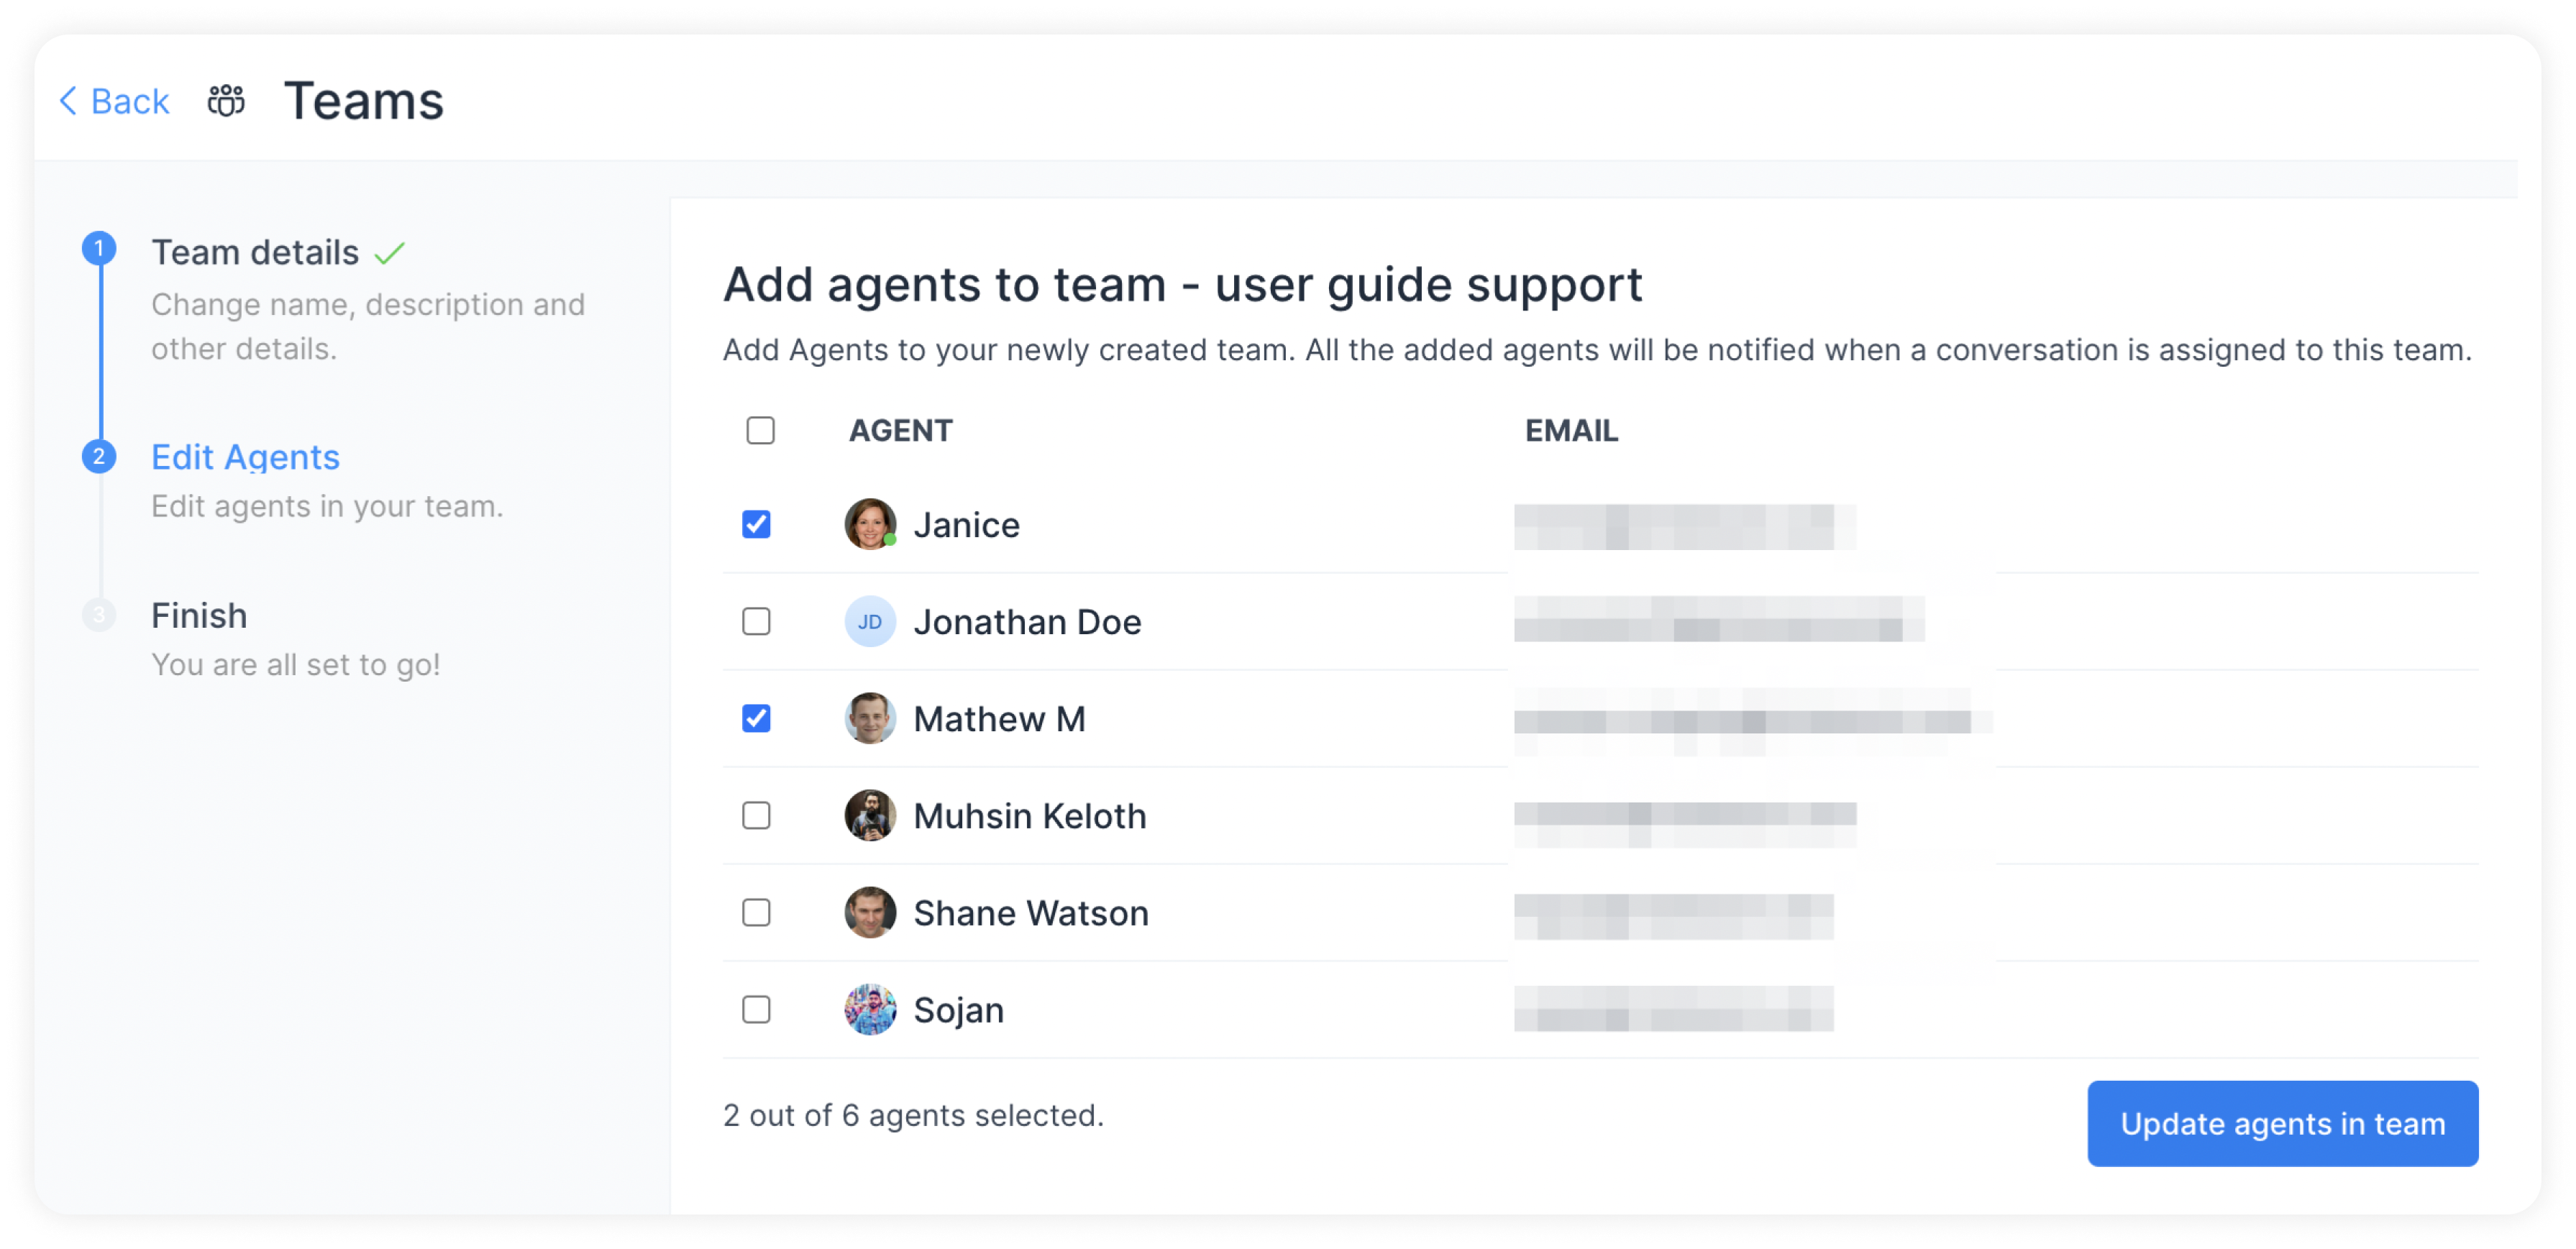
Step 3. Click on 'Finish' on the next screen.
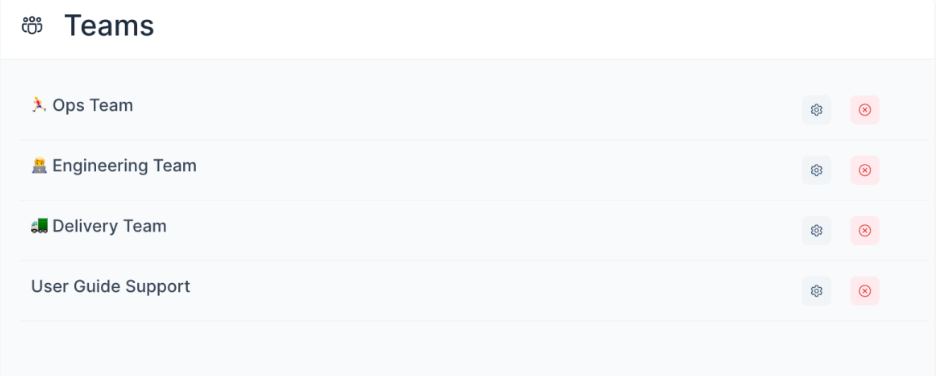
You will be able to see the team added to your list of teams. You can edit or delete this team anytime you would like to.
Updated 4 months ago
