> ## Documentation Index
> Fetch the complete documentation index at: https://docs.ycloud.com/llms.txt
> Use this file to discover all available pages before exploring further.
# Users and Teams
Manage users. Invite team members, assign roles, and control user permissions.
Entrance: Settings>[ User & teams](https://www.ycloud.com/console/#/app/globalSettings/general/usersAndTeams)
## Default Roles
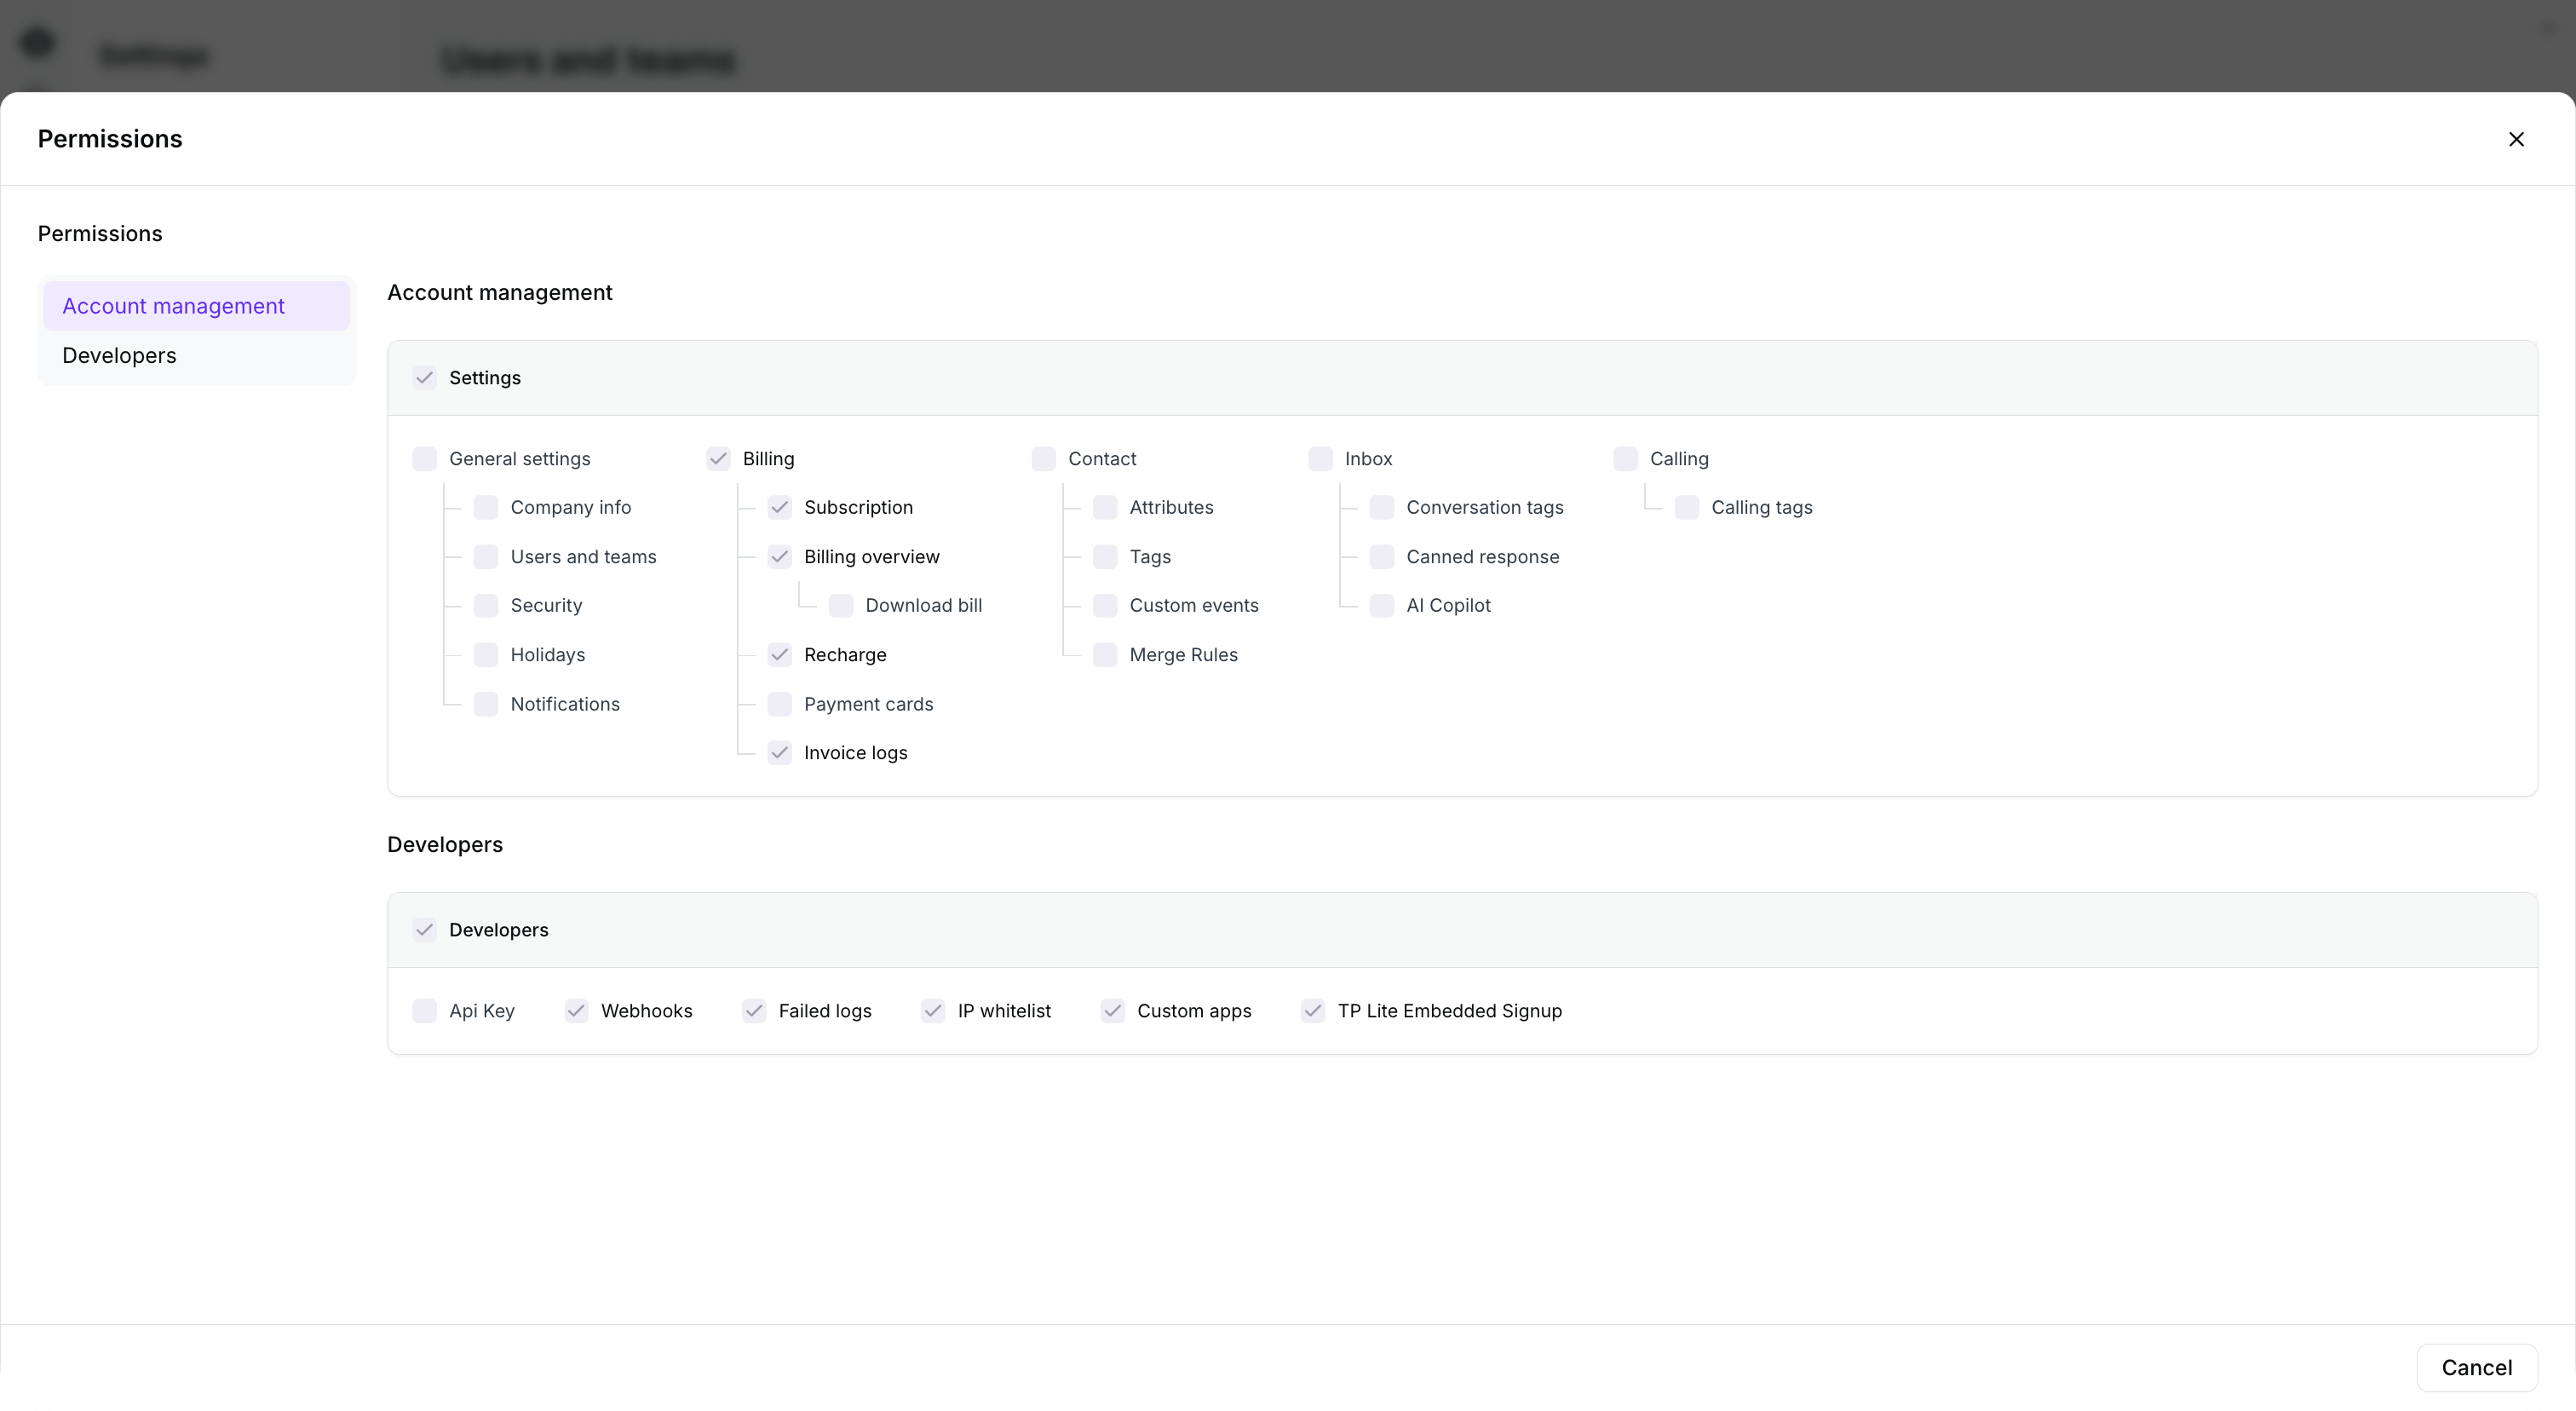
YCloud provides 6 system roles which are Admin, Operator, Developer, Inbox Manager, Service, Sale.
The permissions of default roles can be viewed by clicking Check permissions when inviting users, and system role permissions cannot be edited. If you need custom permissions, please create a custom role.
 ## Customized roles
Customized roles are only available for Pro or higher versions.
You can create your roles and configure different permissions for those roles. Creation tutorial:
1. Visit [User & teams](https://www.ycloud.com/console/#/app/globalSettings/general/usersAndTeams), and click Add roles.
## Customized roles
Customized roles are only available for Pro or higher versions.
You can create your roles and configure different permissions for those roles. Creation tutorial:
1. Visit [User & teams](https://www.ycloud.com/console/#/app/globalSettings/general/usersAndTeams), and click Add roles.
 2. Configure the role info including Role name, Description, and Permissions. You can choose a system role for quick configuration and make permission changes based on it. Save after finishing the settings.
 ### Team supervisors
In Teams, the system supports setting up Team supervisors for each Team. Users with this role can supervise team members’ conversations Inbox and calls in Calling.
### Inviting Users
To add users to your account, follow these steps:
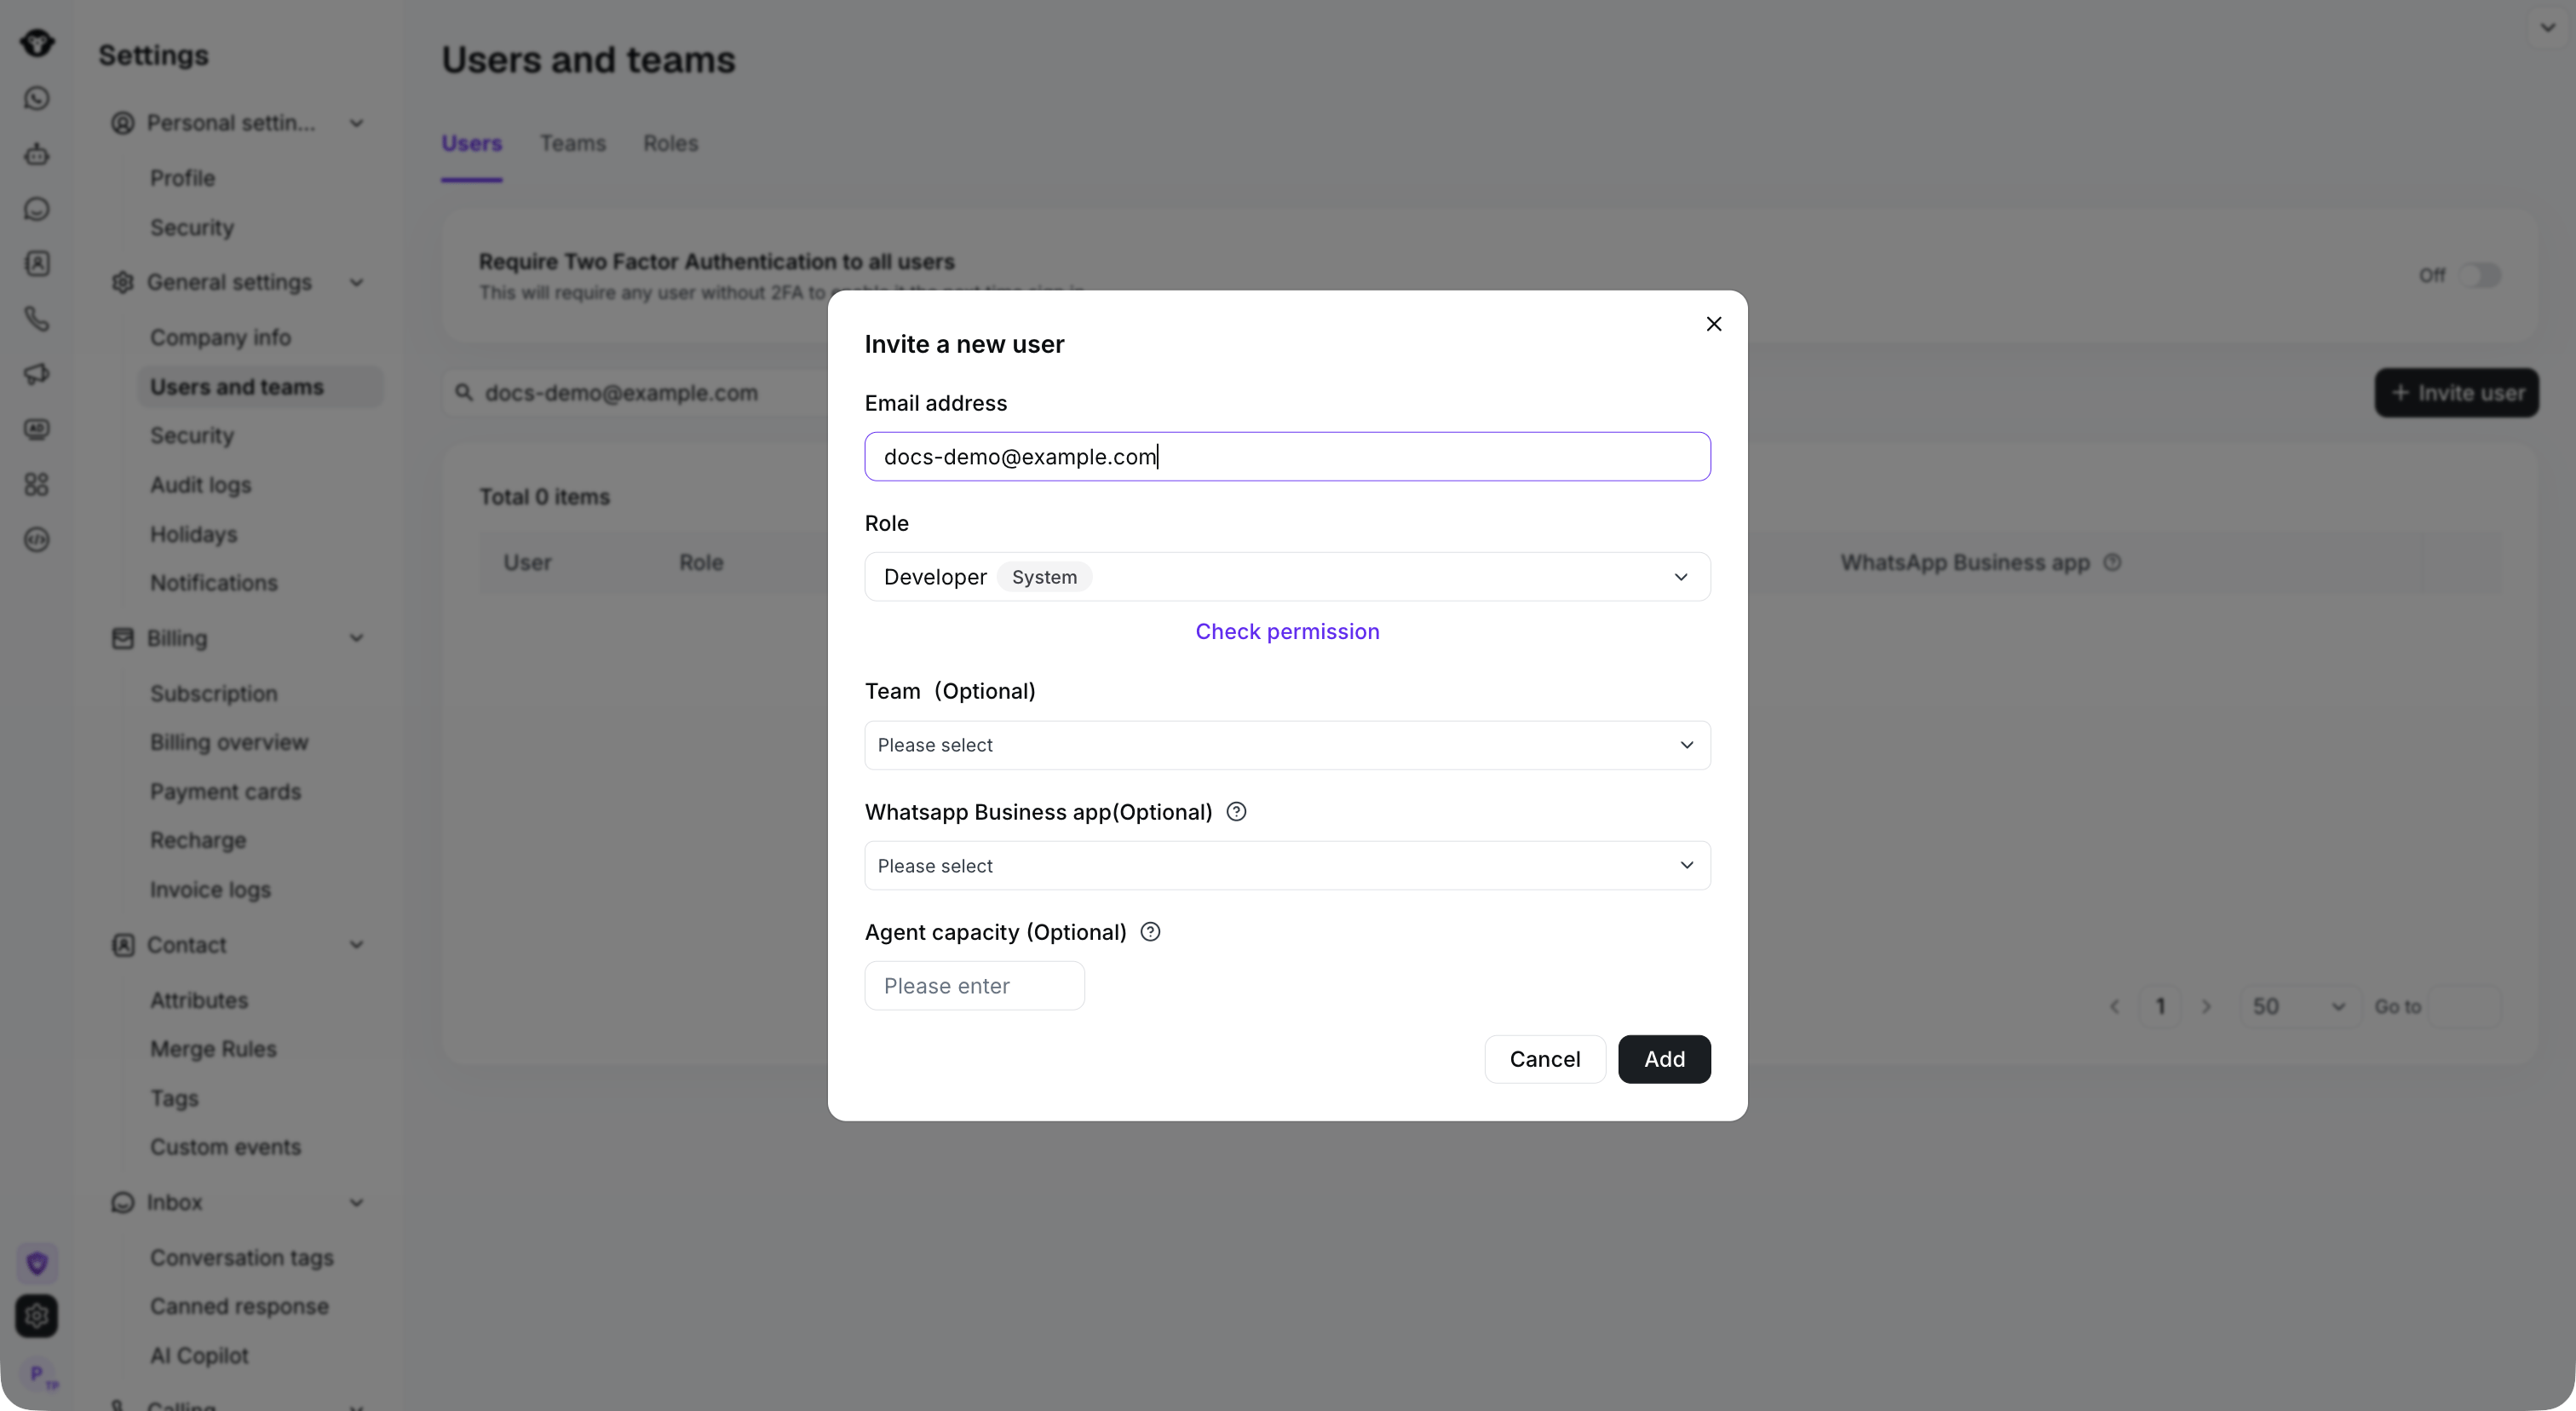
1. Visit [User & teams](https://www.ycloud.com/console/#/app/globalSettings/general/usersAndTeams) and click the "Invite user" button on the page.
### Team supervisors
In Teams, the system supports setting up Team supervisors for each Team. Users with this role can supervise team members’ conversations Inbox and calls in Calling.
### Inviting Users
To add users to your account, follow these steps:
1. Visit [User & teams](https://www.ycloud.com/console/#/app/globalSettings/general/usersAndTeams) and click the "Invite user" button on the page.
 2. Fill in the basic information of the member to be invited and click the "Add" button. The system will send an activation email to the member's email.
 3. Team members accept the invitation
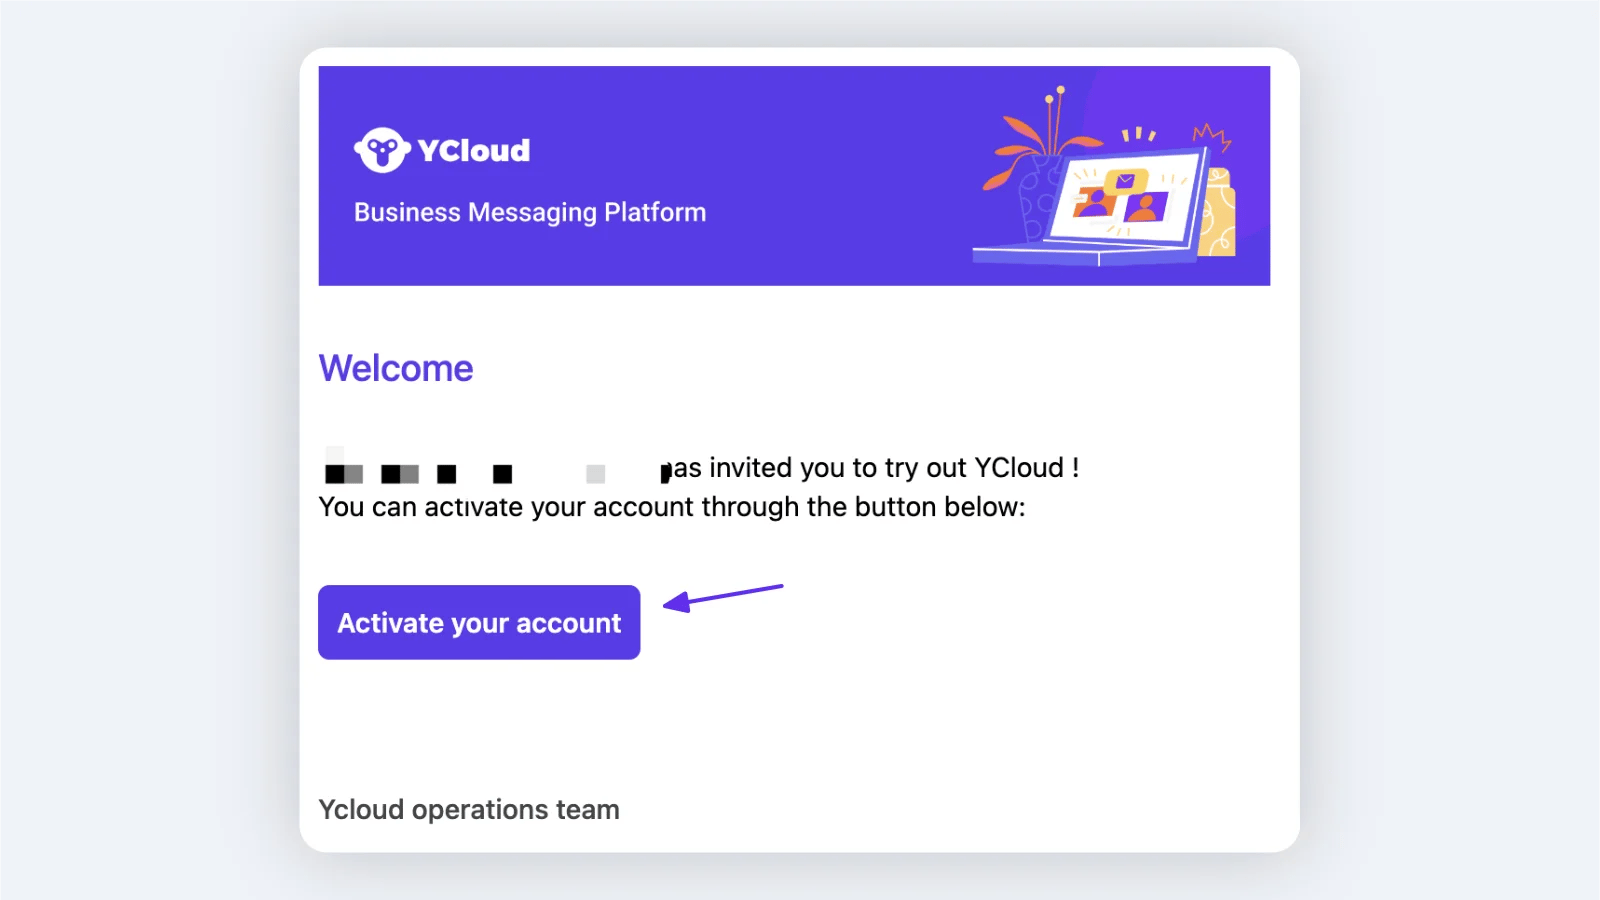
Members find the corresponding activation email and click the "Activate Account" button to accept the invitation and complete the account activation.
3. Team members accept the invitation
Members find the corresponding activation email and click the "Activate Account" button to accept the invitation and complete the account activation.
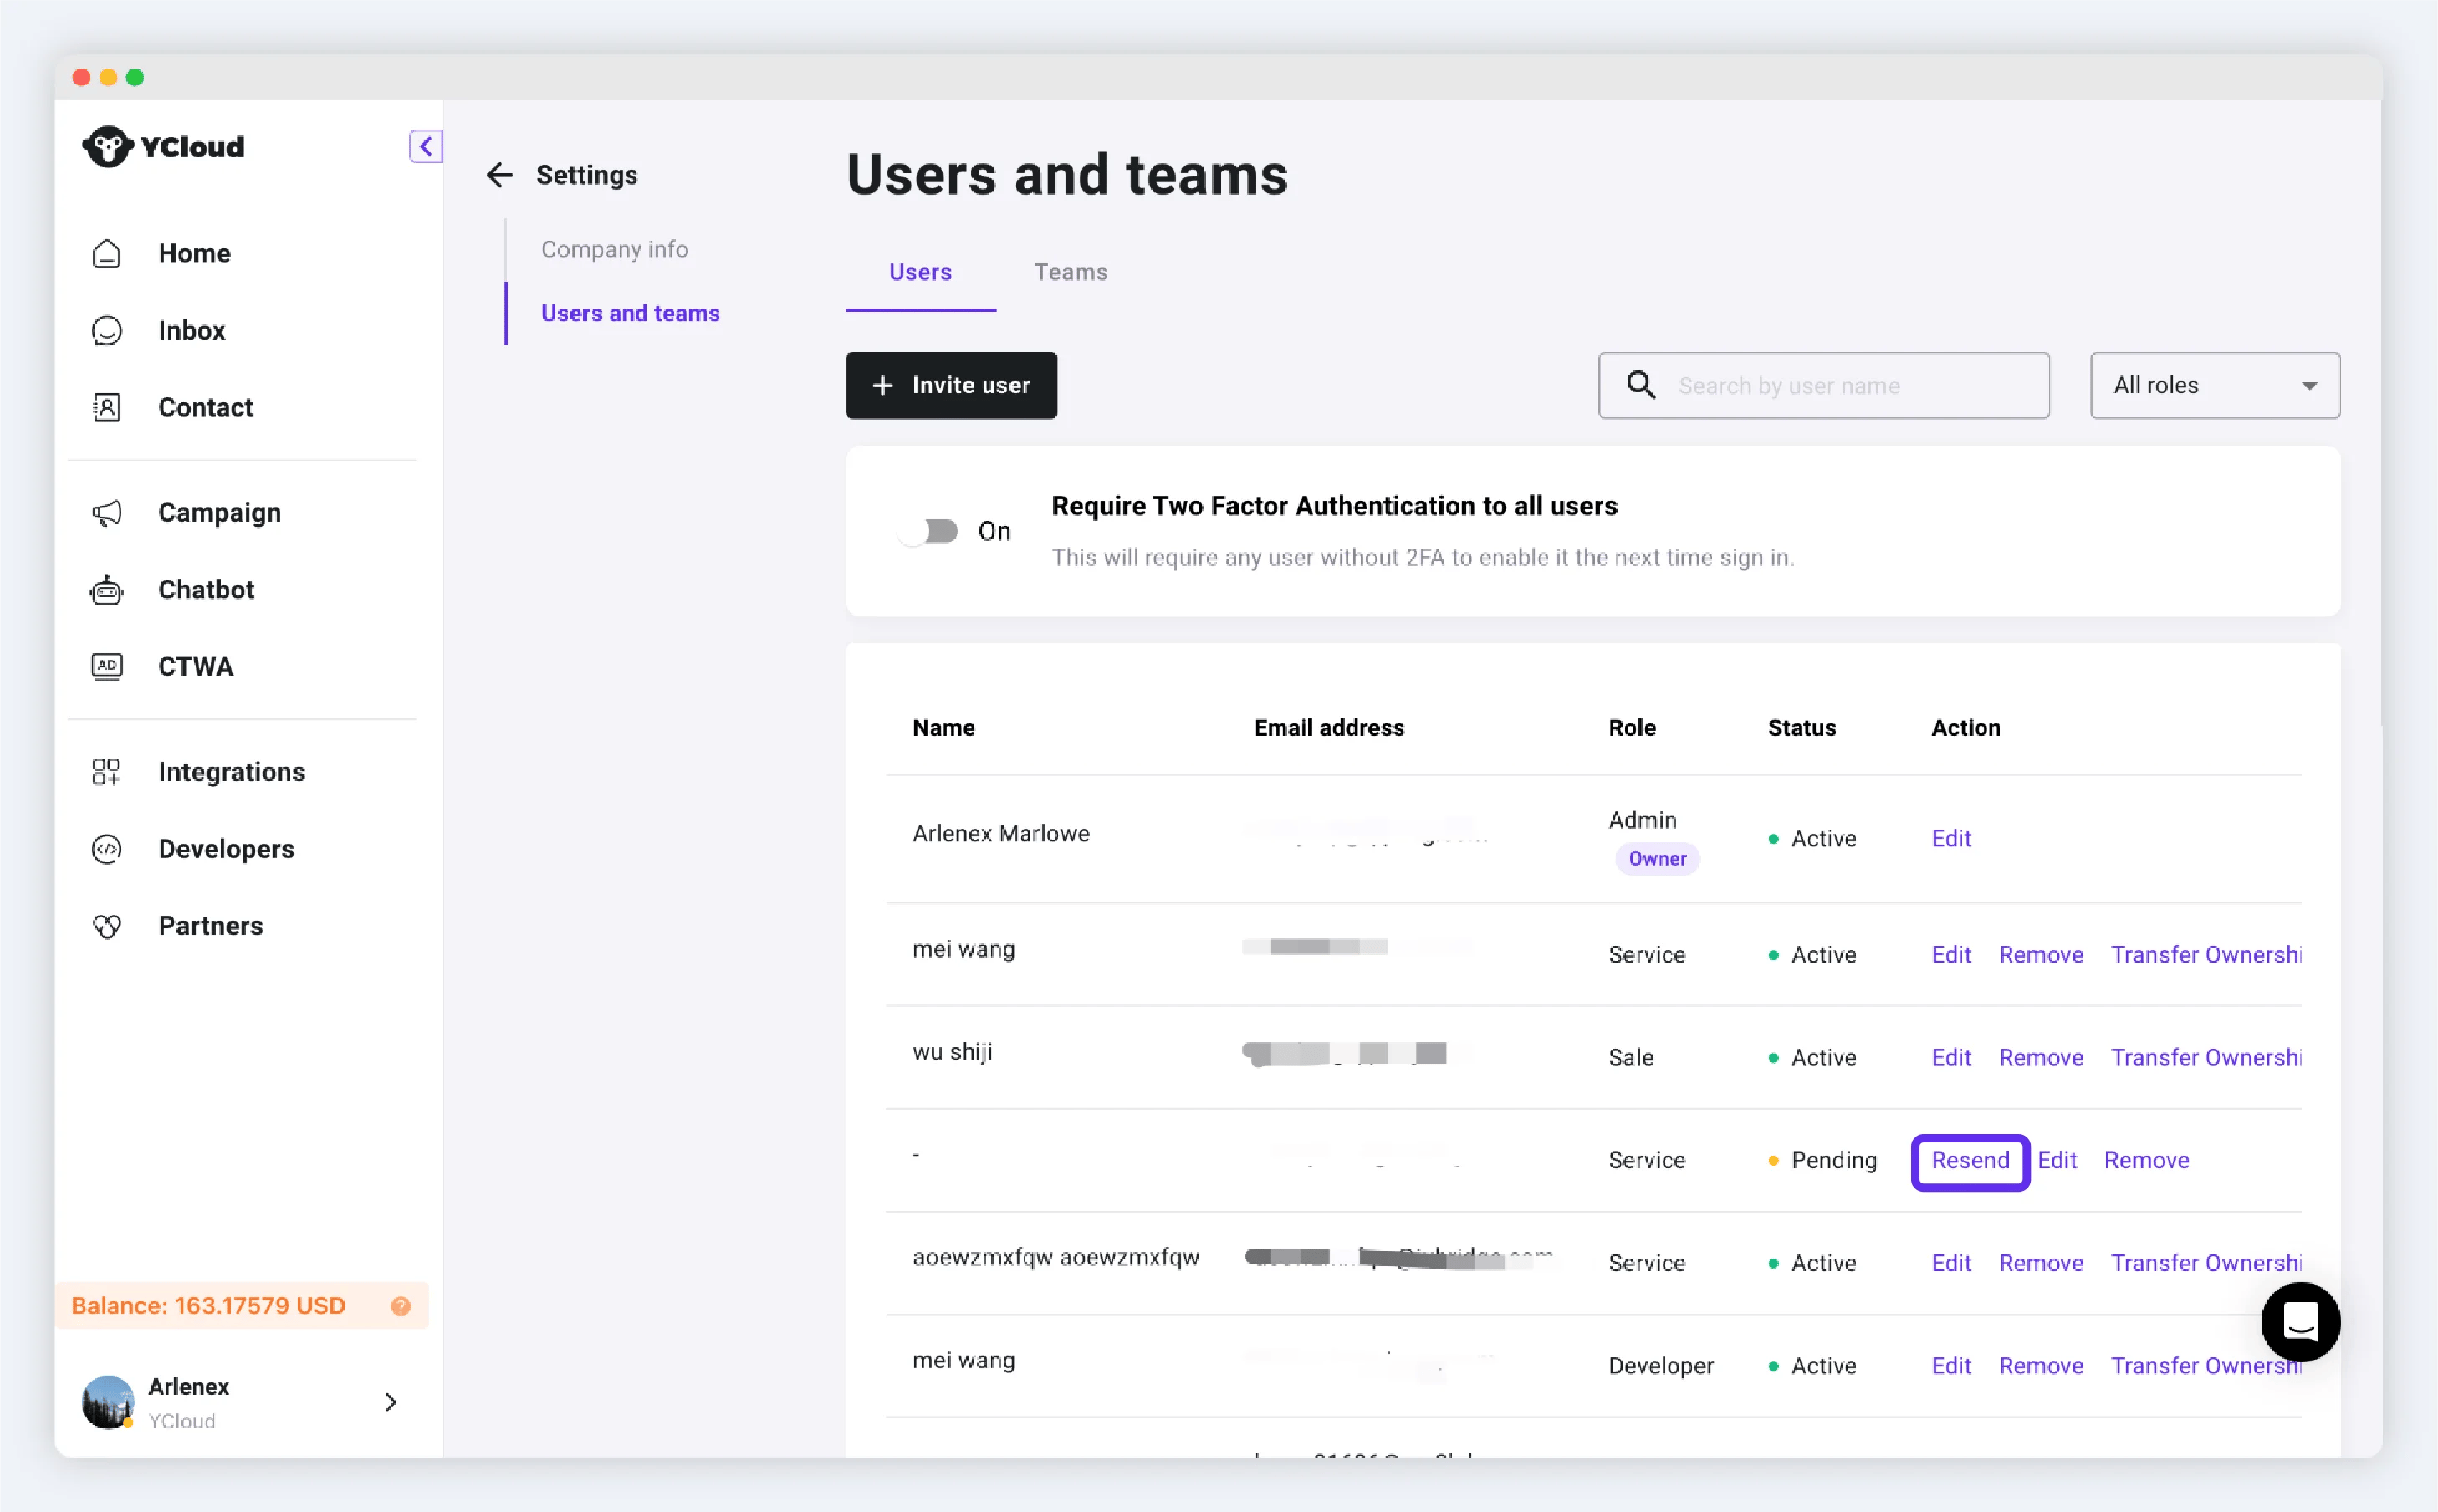
 PS: If the member's status is pending for a long time or if they have not received the invitation email, you can click the "Resend" button.
 ### Deleting Users
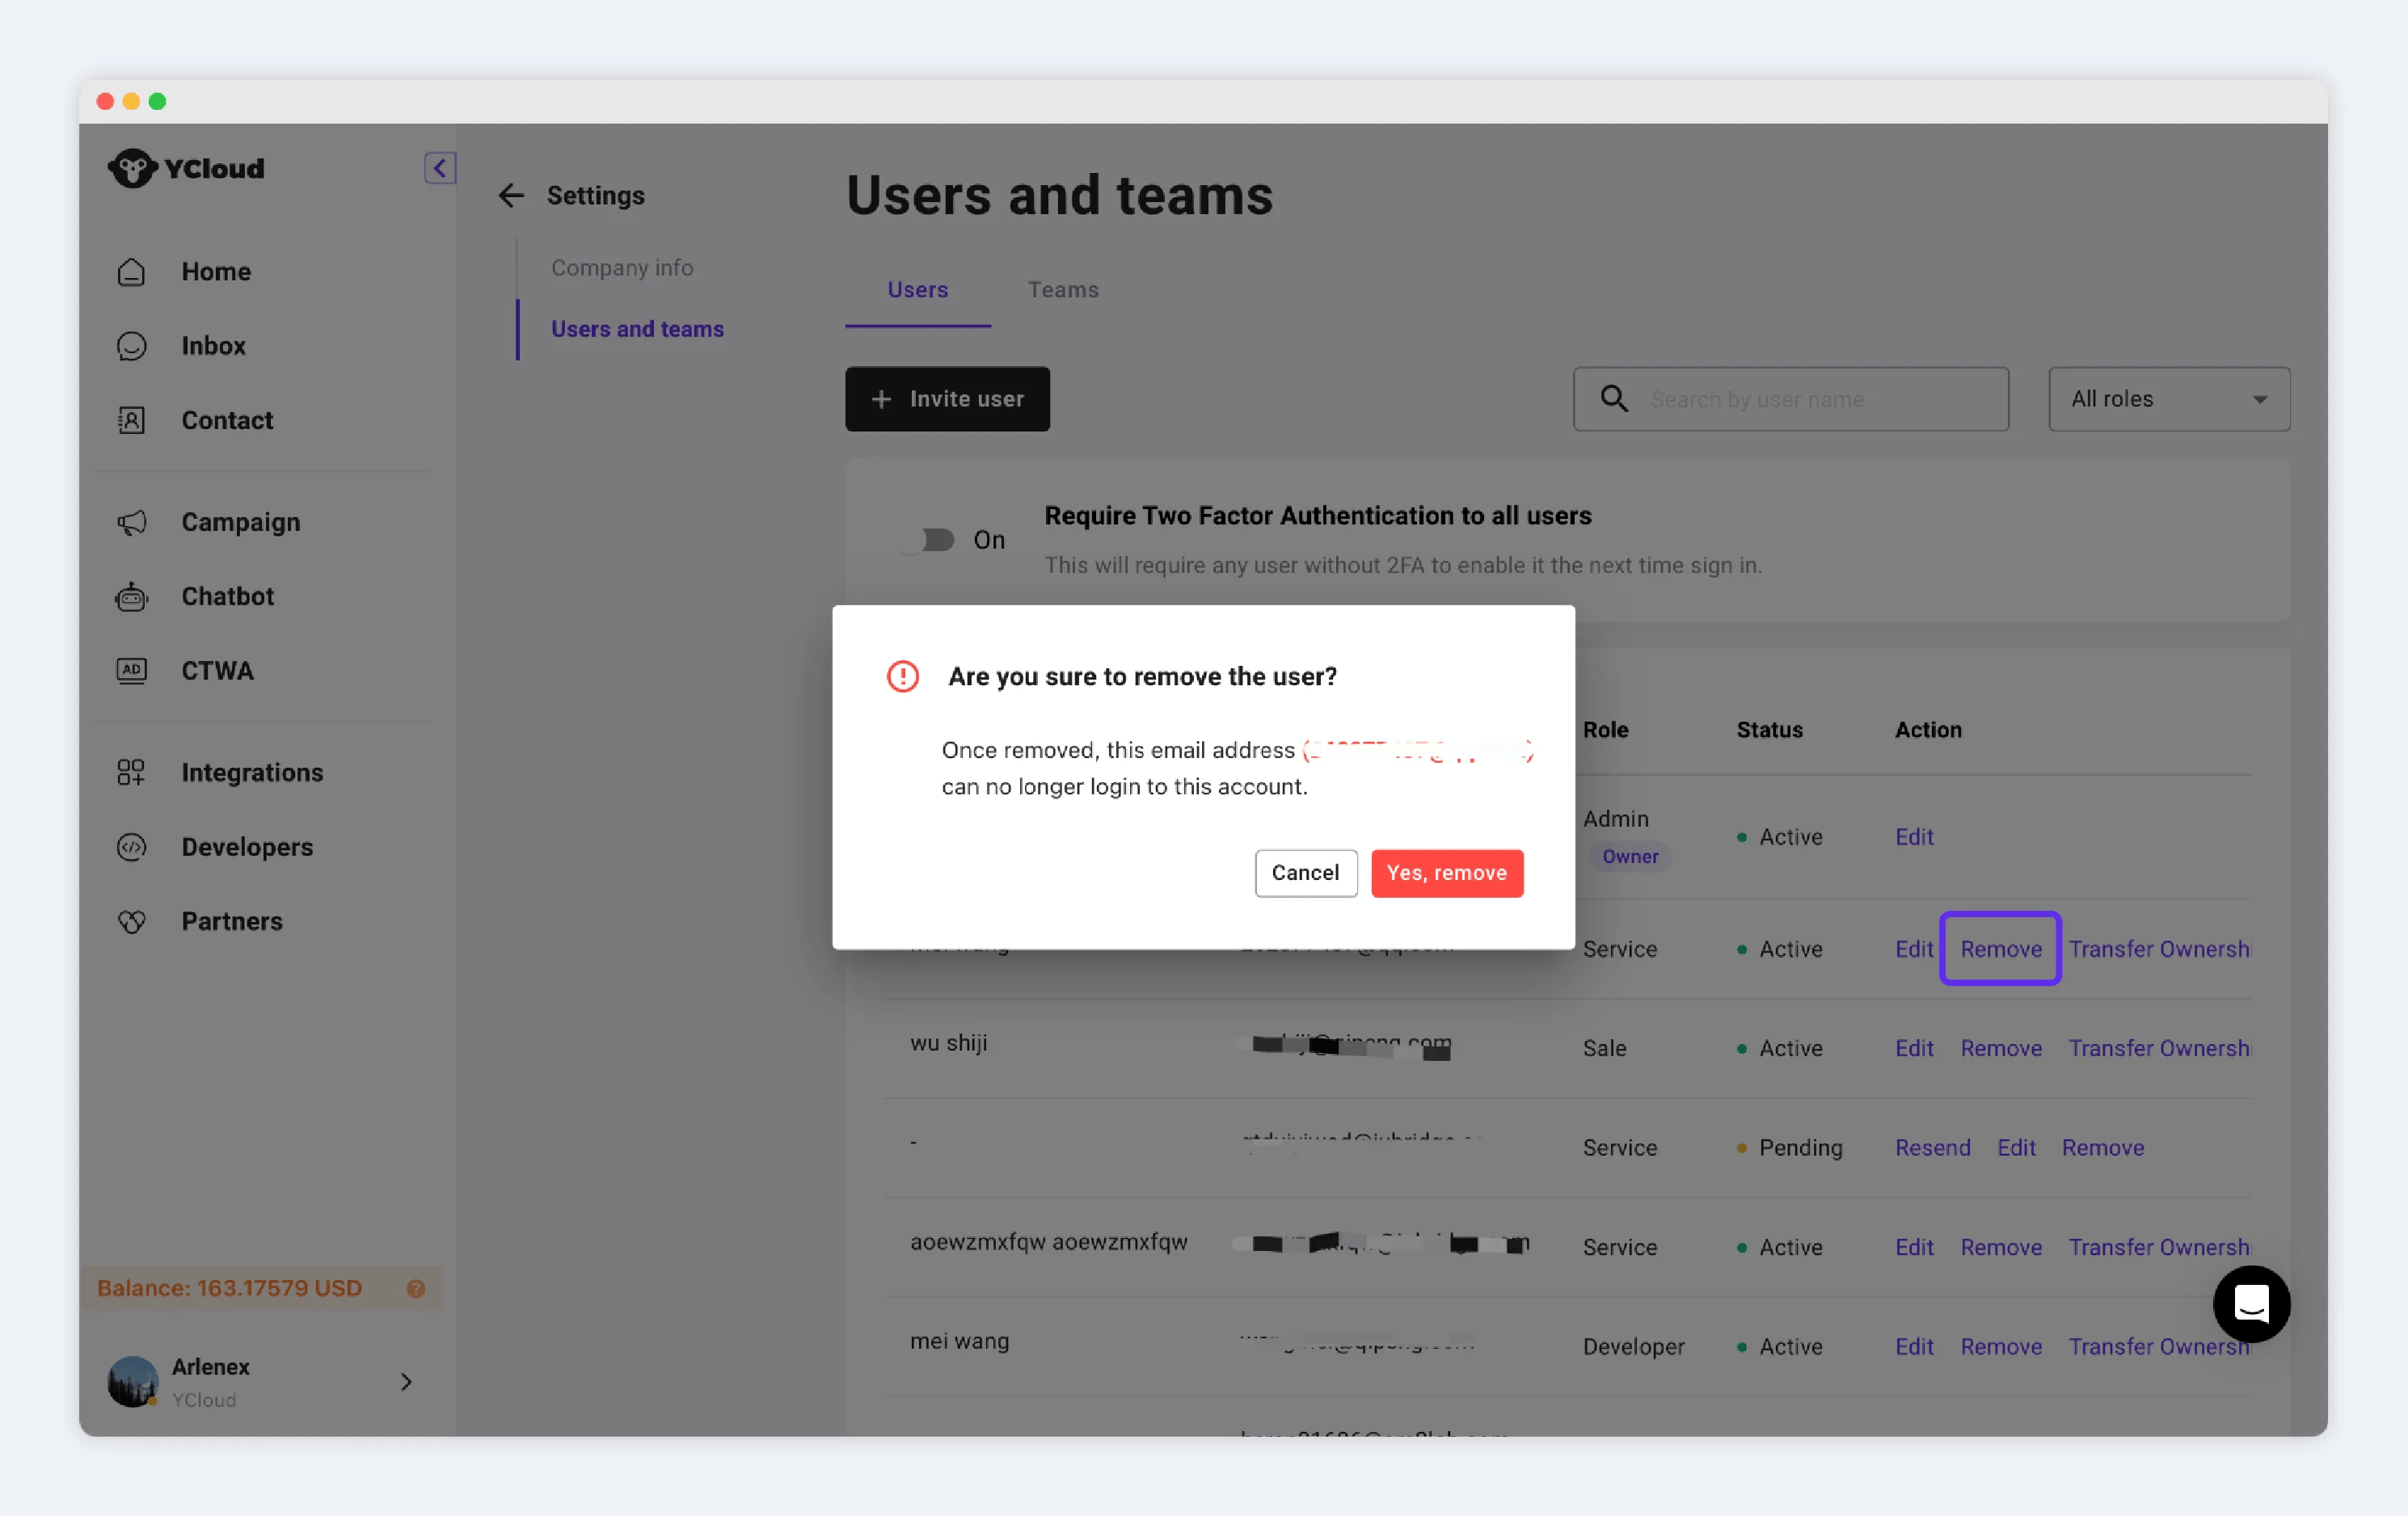
Click the "Remove" button corresponding to the user row to permanently remove the user.
### Deleting Users
Click the "Remove" button corresponding to the user row to permanently remove the user.
 ### Editing Users
#### Modify user role
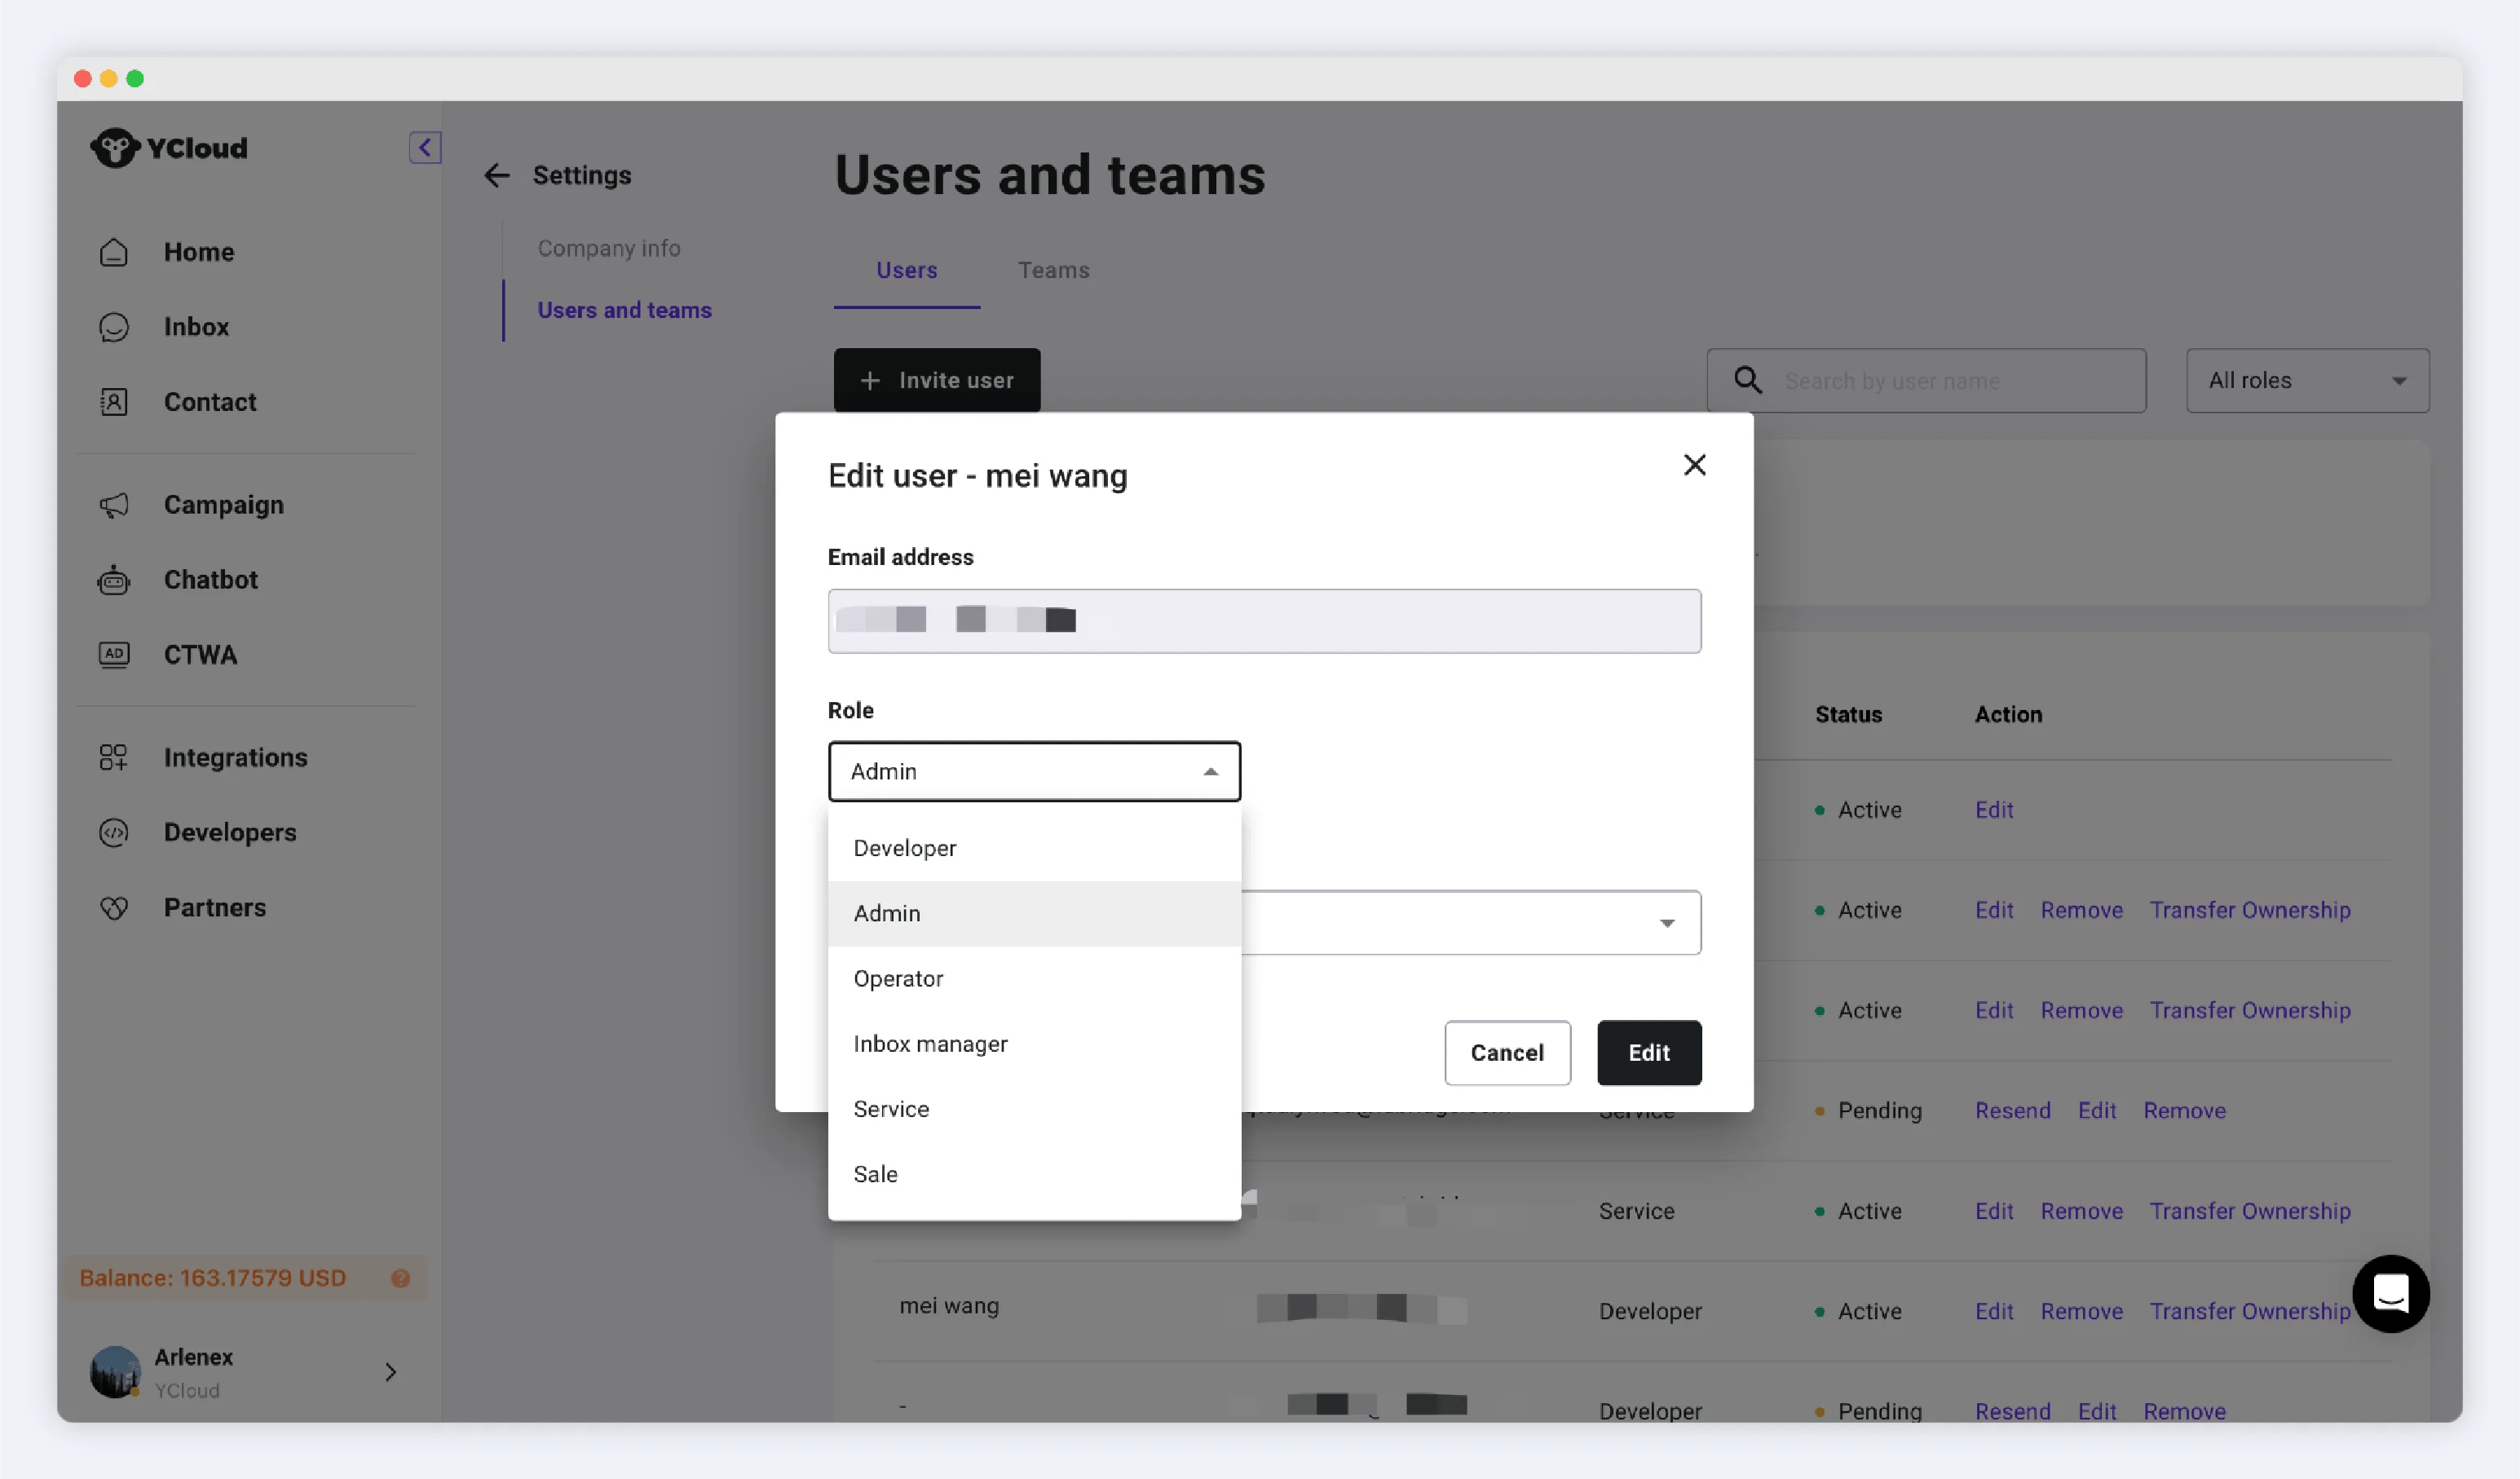
Click the edit button in the operation area, and in the pop-up window, you can modify the role and team corresponding to the user. The user's email cannot be modified. After making the changes, click Edit.
### Editing Users
#### Modify user role
Click the edit button in the operation area, and in the pop-up window, you can modify the role and team corresponding to the user. The user's email cannot be modified. After making the changes, click Edit.
 **Set Reception Capacity**
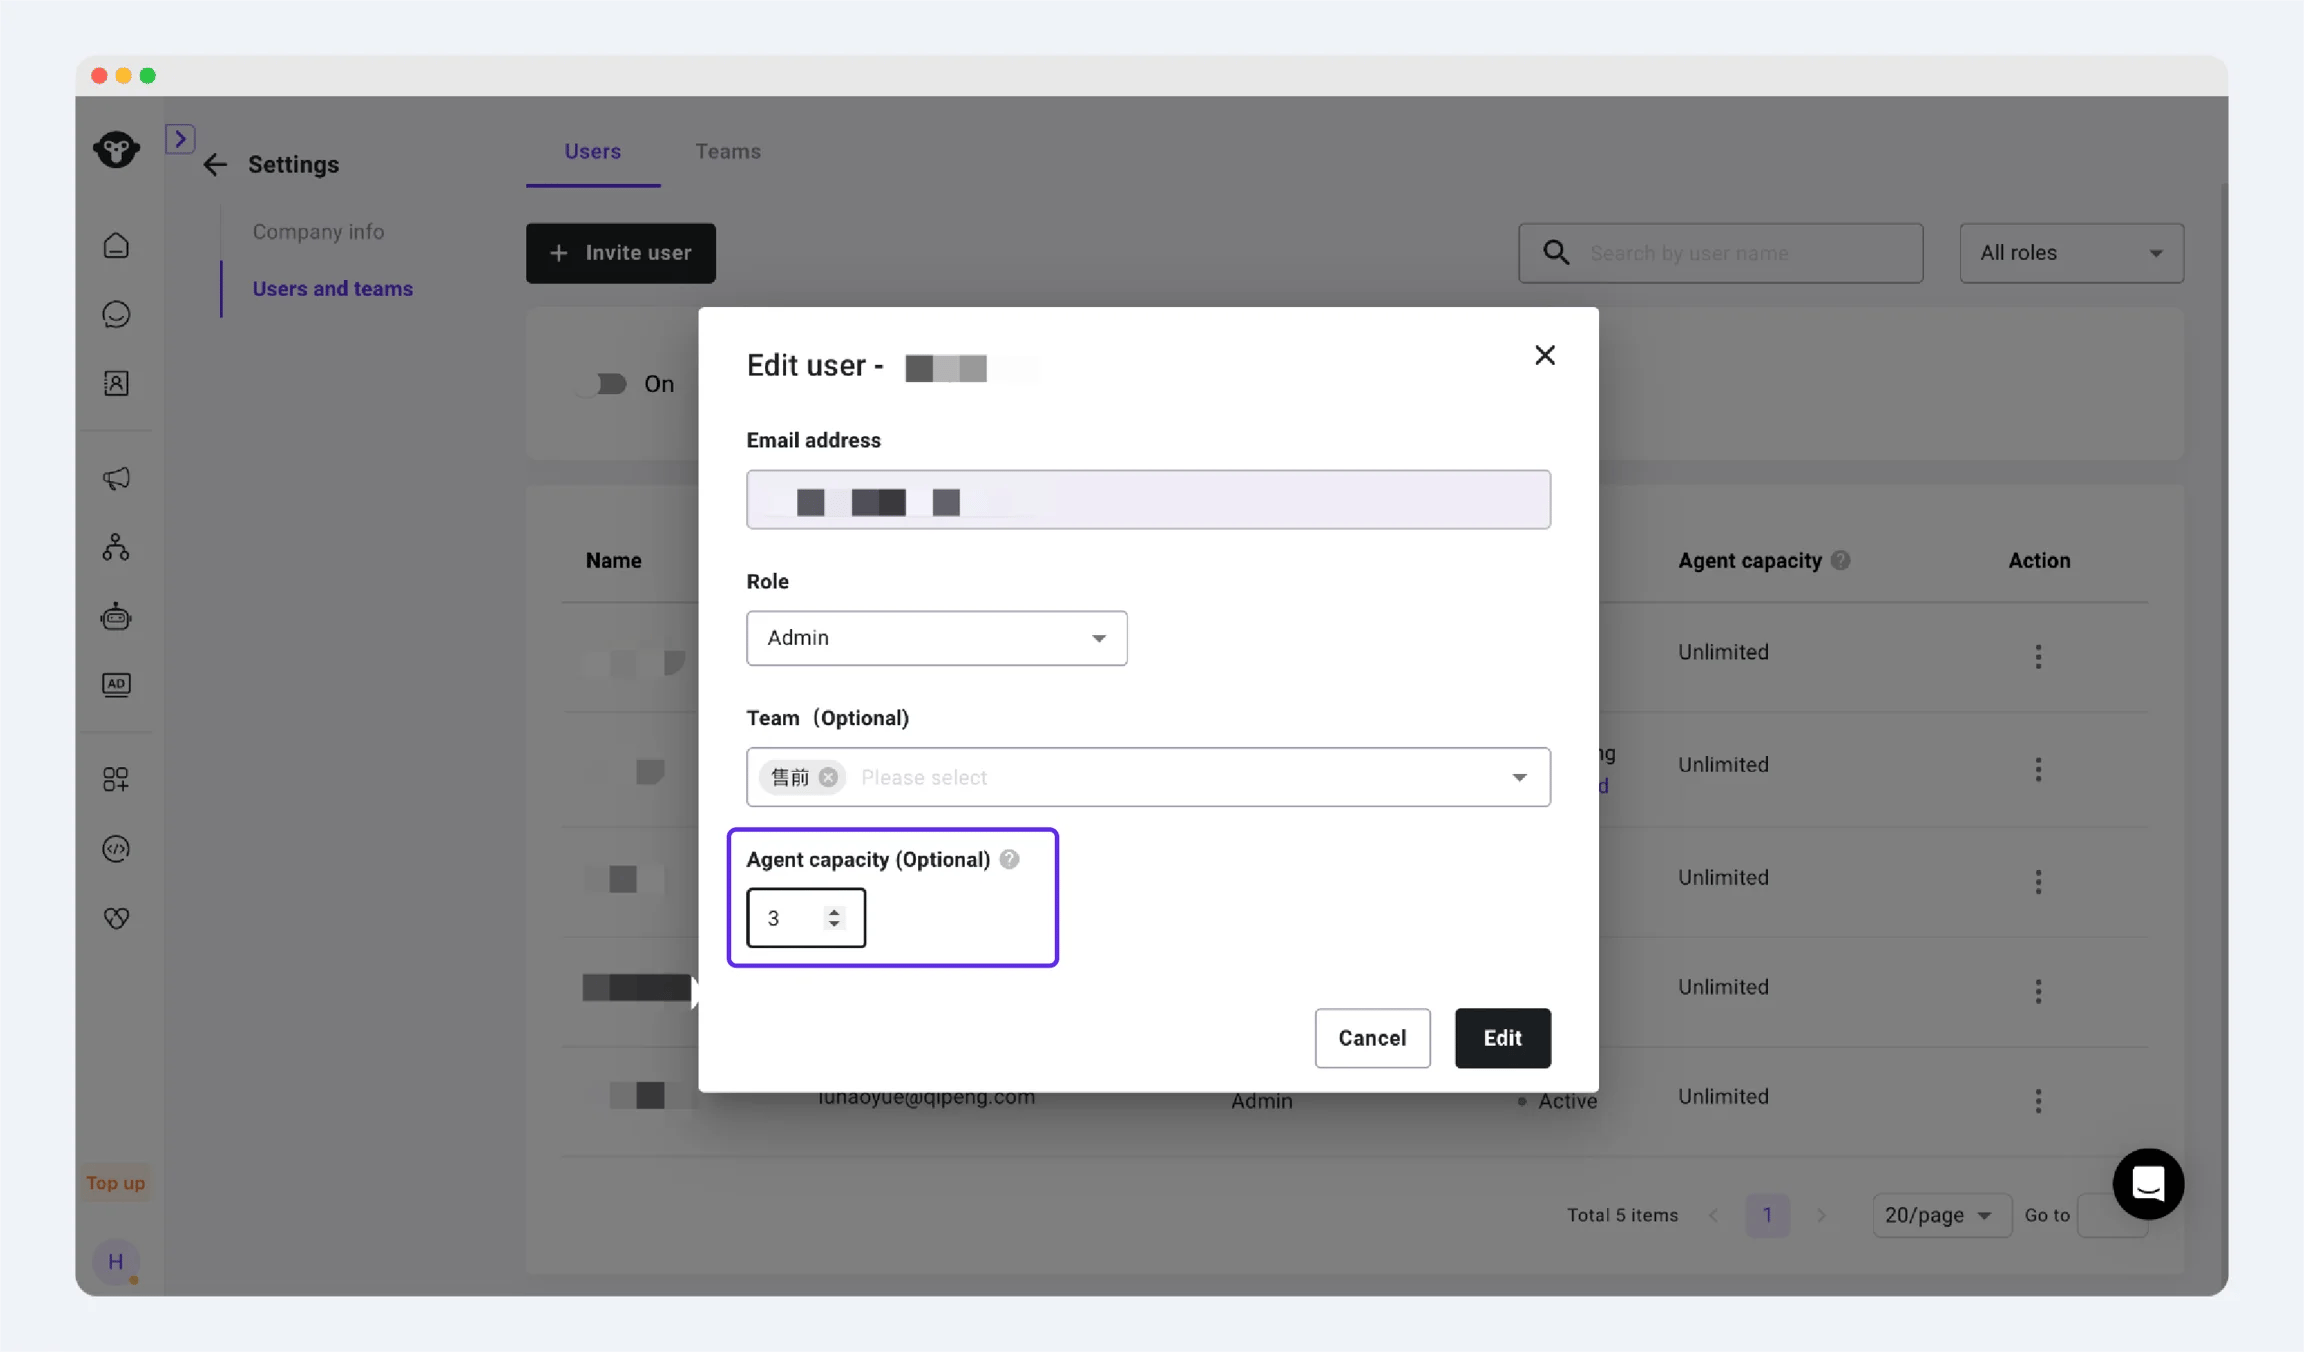
In the Actions column, select **Agent capacity** to set the maximum number of ongoing conversations that a user can receive through team assignment.
Agent capacity applies only when the user belongs to a team and conversations are distributed to that user through the team's assignment rule. When the user reaches their capacity, additional conversations wait in the team queue until the user has available capacity.
Agent capacity does not apply when an assignment rule routes a conversation directly to a specific user. In this case, the conversation is assigned immediately and appears in that user's **Assigned to me** view, even if the user has already reached their configured capacity.
 ### Transferring Ownership
The account Owner cannot be removed while they still hold the Owner role. Only the **current Owner** can transfer account ownership; having an Admin role alone is not sufficient.
Ownership can be transferred in either of the following ways:
* **Select an existing user:** Transfer ownership to a user who is already a member of the account.
* **Invite a new user:** Enter an email address to invite someone who is not currently a member of the account and make that person the new Owner.
To transfer ownership:
1. As the current Owner, go to **Settings > Users and teams > Users**.
2. Open the Action menu for the current Owner and select **Transfer Owner**.
3. Choose **Select existing users** or **Invite new user**.
4. Select the existing user or enter the new user's email address.
5. Review the change and confirm the transfer.
After the transfer, the selected or invited user becomes the Owner and receives full account access. The previous Owner immediately loses Owner permissions.
**Check your available user seats before inviting a new Owner.** If the account does not have an available seat for the new user, YCloud removes the previous Owner from the account to make room for the new Owner. Purchase an additional seat before the transfer if the previous Owner must retain access.
If the account has enough seats, the previous Owner remains in the account with **Admin** permissions, but is no longer the Owner.
### Enabling 2FA for All Members
To better protect account security, if users have not enabled 2FA, the account administrator can set the 2FA verification switch to require all members to perform 2FA verification when logging into the enterprise account.
### Transferring Ownership
The account Owner cannot be removed while they still hold the Owner role. Only the **current Owner** can transfer account ownership; having an Admin role alone is not sufficient.
Ownership can be transferred in either of the following ways:
* **Select an existing user:** Transfer ownership to a user who is already a member of the account.
* **Invite a new user:** Enter an email address to invite someone who is not currently a member of the account and make that person the new Owner.
To transfer ownership:
1. As the current Owner, go to **Settings > Users and teams > Users**.
2. Open the Action menu for the current Owner and select **Transfer Owner**.
3. Choose **Select existing users** or **Invite new user**.
4. Select the existing user or enter the new user's email address.
5. Review the change and confirm the transfer.
After the transfer, the selected or invited user becomes the Owner and receives full account access. The previous Owner immediately loses Owner permissions.
**Check your available user seats before inviting a new Owner.** If the account does not have an available seat for the new user, YCloud removes the previous Owner from the account to make room for the new Owner. Purchase an additional seat before the transfer if the previous Owner must retain access.
If the account has enough seats, the previous Owner remains in the account with **Admin** permissions, but is no longer the Owner.
### Enabling 2FA for All Members
To better protect account security, if users have not enabled 2FA, the account administrator can set the 2FA verification switch to require all members to perform 2FA verification when logging into the enterprise account.
 ## Creating and Managing Teams
A team groups agents who handle the same type of customer conversations, such as Sales, Customer Support, or a regional service team. When you create a team, YCloud also creates a corresponding **Team Inbox** in Inbox.
When configuring conversation assignment, you can route a conversation to a specific team. YCloud then uses the team's assignment rule to decide whether and how to assign the conversation to a team member.
To create a team, follow these steps:
1. Visit [User & teams](https://www.ycloud.com/console/#/app/globalSettings/general/usersAndTeams) and click the "Add a team" button on the page.
2. Enter the team name and add the agents who should belong to the team.
3. If needed, select one or more team supervisors from the team's agents. Team supervisors can supervise their team members' conversations in Inbox and calls in Calling.
4. Select a **Team Inbox Assignment Rule**:
* **Unassigned:** Conversations routed to the team are not assigned automatically. They remain unassigned until an agent or supervisor assigns or accepts them.
* **Evenly distributed:** Conversations are assigned to team members in sequence, regardless of whether a member is available or away.
* **Round Robin:** Conversations are assigned in sequence among team members who are currently available.
* **Balanced:** Conversations are assigned to an available team member with the fewest open conversations.
5. Save the team. You can later edit the team name, members, supervisors, and assignment rule, or delete the team from the Actions column.
## Creating and Managing Teams
A team groups agents who handle the same type of customer conversations, such as Sales, Customer Support, or a regional service team. When you create a team, YCloud also creates a corresponding **Team Inbox** in Inbox.
When configuring conversation assignment, you can route a conversation to a specific team. YCloud then uses the team's assignment rule to decide whether and how to assign the conversation to a team member.
To create a team, follow these steps:
1. Visit [User & teams](https://www.ycloud.com/console/#/app/globalSettings/general/usersAndTeams) and click the "Add a team" button on the page.
2. Enter the team name and add the agents who should belong to the team.
3. If needed, select one or more team supervisors from the team's agents. Team supervisors can supervise their team members' conversations in Inbox and calls in Calling.
4. Select a **Team Inbox Assignment Rule**:
* **Unassigned:** Conversations routed to the team are not assigned automatically. They remain unassigned until an agent or supervisor assigns or accepts them.
* **Evenly distributed:** Conversations are assigned to team members in sequence, regardless of whether a member is available or away.
* **Round Robin:** Conversations are assigned in sequence among team members who are currently available.
* **Balanced:** Conversations are assigned to an available team member with the fewest open conversations.
5. Save the team. You can later edit the team name, members, supervisors, and assignment rule, or delete the team from the Actions column.

 ## Frequently asked questions
First, determine whether the same person will continue using the account or whether access needs to be handed over to another colleague.
* **The same person will continue using YCloud:** Go to your Profile page and change your own login email address. See [Personal Preferences Settings](/en/documentation/account-management/personal-preferences-settings). Changing only your personal email address does not change your existing login password.
* **A different colleague will use YCloud:** Go to **Settings > Users and teams** and invite the colleague to the YCloud account. If the colleague also needs to become the account Owner, use **Transfer Owner**. An invited colleague activates their own account and sets their own password.
Do not change your personal login email merely to let another person use the same credentials. Invite that person as a separate user so that access and permissions can be managed correctly.
No. YCloud currently does not support restricting an individual user so that they can manage only specified WhatsApp Business Accounts (WABAs).
If your business requires strict management isolation between WABAs, create a separate YCloud company account for the WABAs that must be managed independently.
This documentation is built and hosted on [Mintlify](https://mintlify.com), a developer documentation platform.
## Frequently asked questions
First, determine whether the same person will continue using the account or whether access needs to be handed over to another colleague.
* **The same person will continue using YCloud:** Go to your Profile page and change your own login email address. See [Personal Preferences Settings](/en/documentation/account-management/personal-preferences-settings). Changing only your personal email address does not change your existing login password.
* **A different colleague will use YCloud:** Go to **Settings > Users and teams** and invite the colleague to the YCloud account. If the colleague also needs to become the account Owner, use **Transfer Owner**. An invited colleague activates their own account and sets their own password.
Do not change your personal login email merely to let another person use the same credentials. Invite that person as a separate user so that access and permissions can be managed correctly.
No. YCloud currently does not support restricting an individual user so that they can manage only specified WhatsApp Business Accounts (WABAs).
If your business requires strict management isolation between WABAs, create a separate YCloud company account for the WABAs that must be managed independently.
This documentation is built and hosted on [Mintlify](https://mintlify.com), a developer documentation platform.