> ## Documentation Index
> Fetch the complete documentation index at: https://docs.ycloud.com/llms.txt
> Use this file to discover all available pages before exploring further.
# Connect external app content
> Connect Feishu or Notion content to your AI Agent knowledge base.
In addition to creating or uploading knowledge directly in YCloud, you can connect content from an external app. YCloud currently supports Feishu and Notion.
## Open external app connections
1. Open your AI Agent and select **Knowledge**.
2. Click **Add knowledge**.
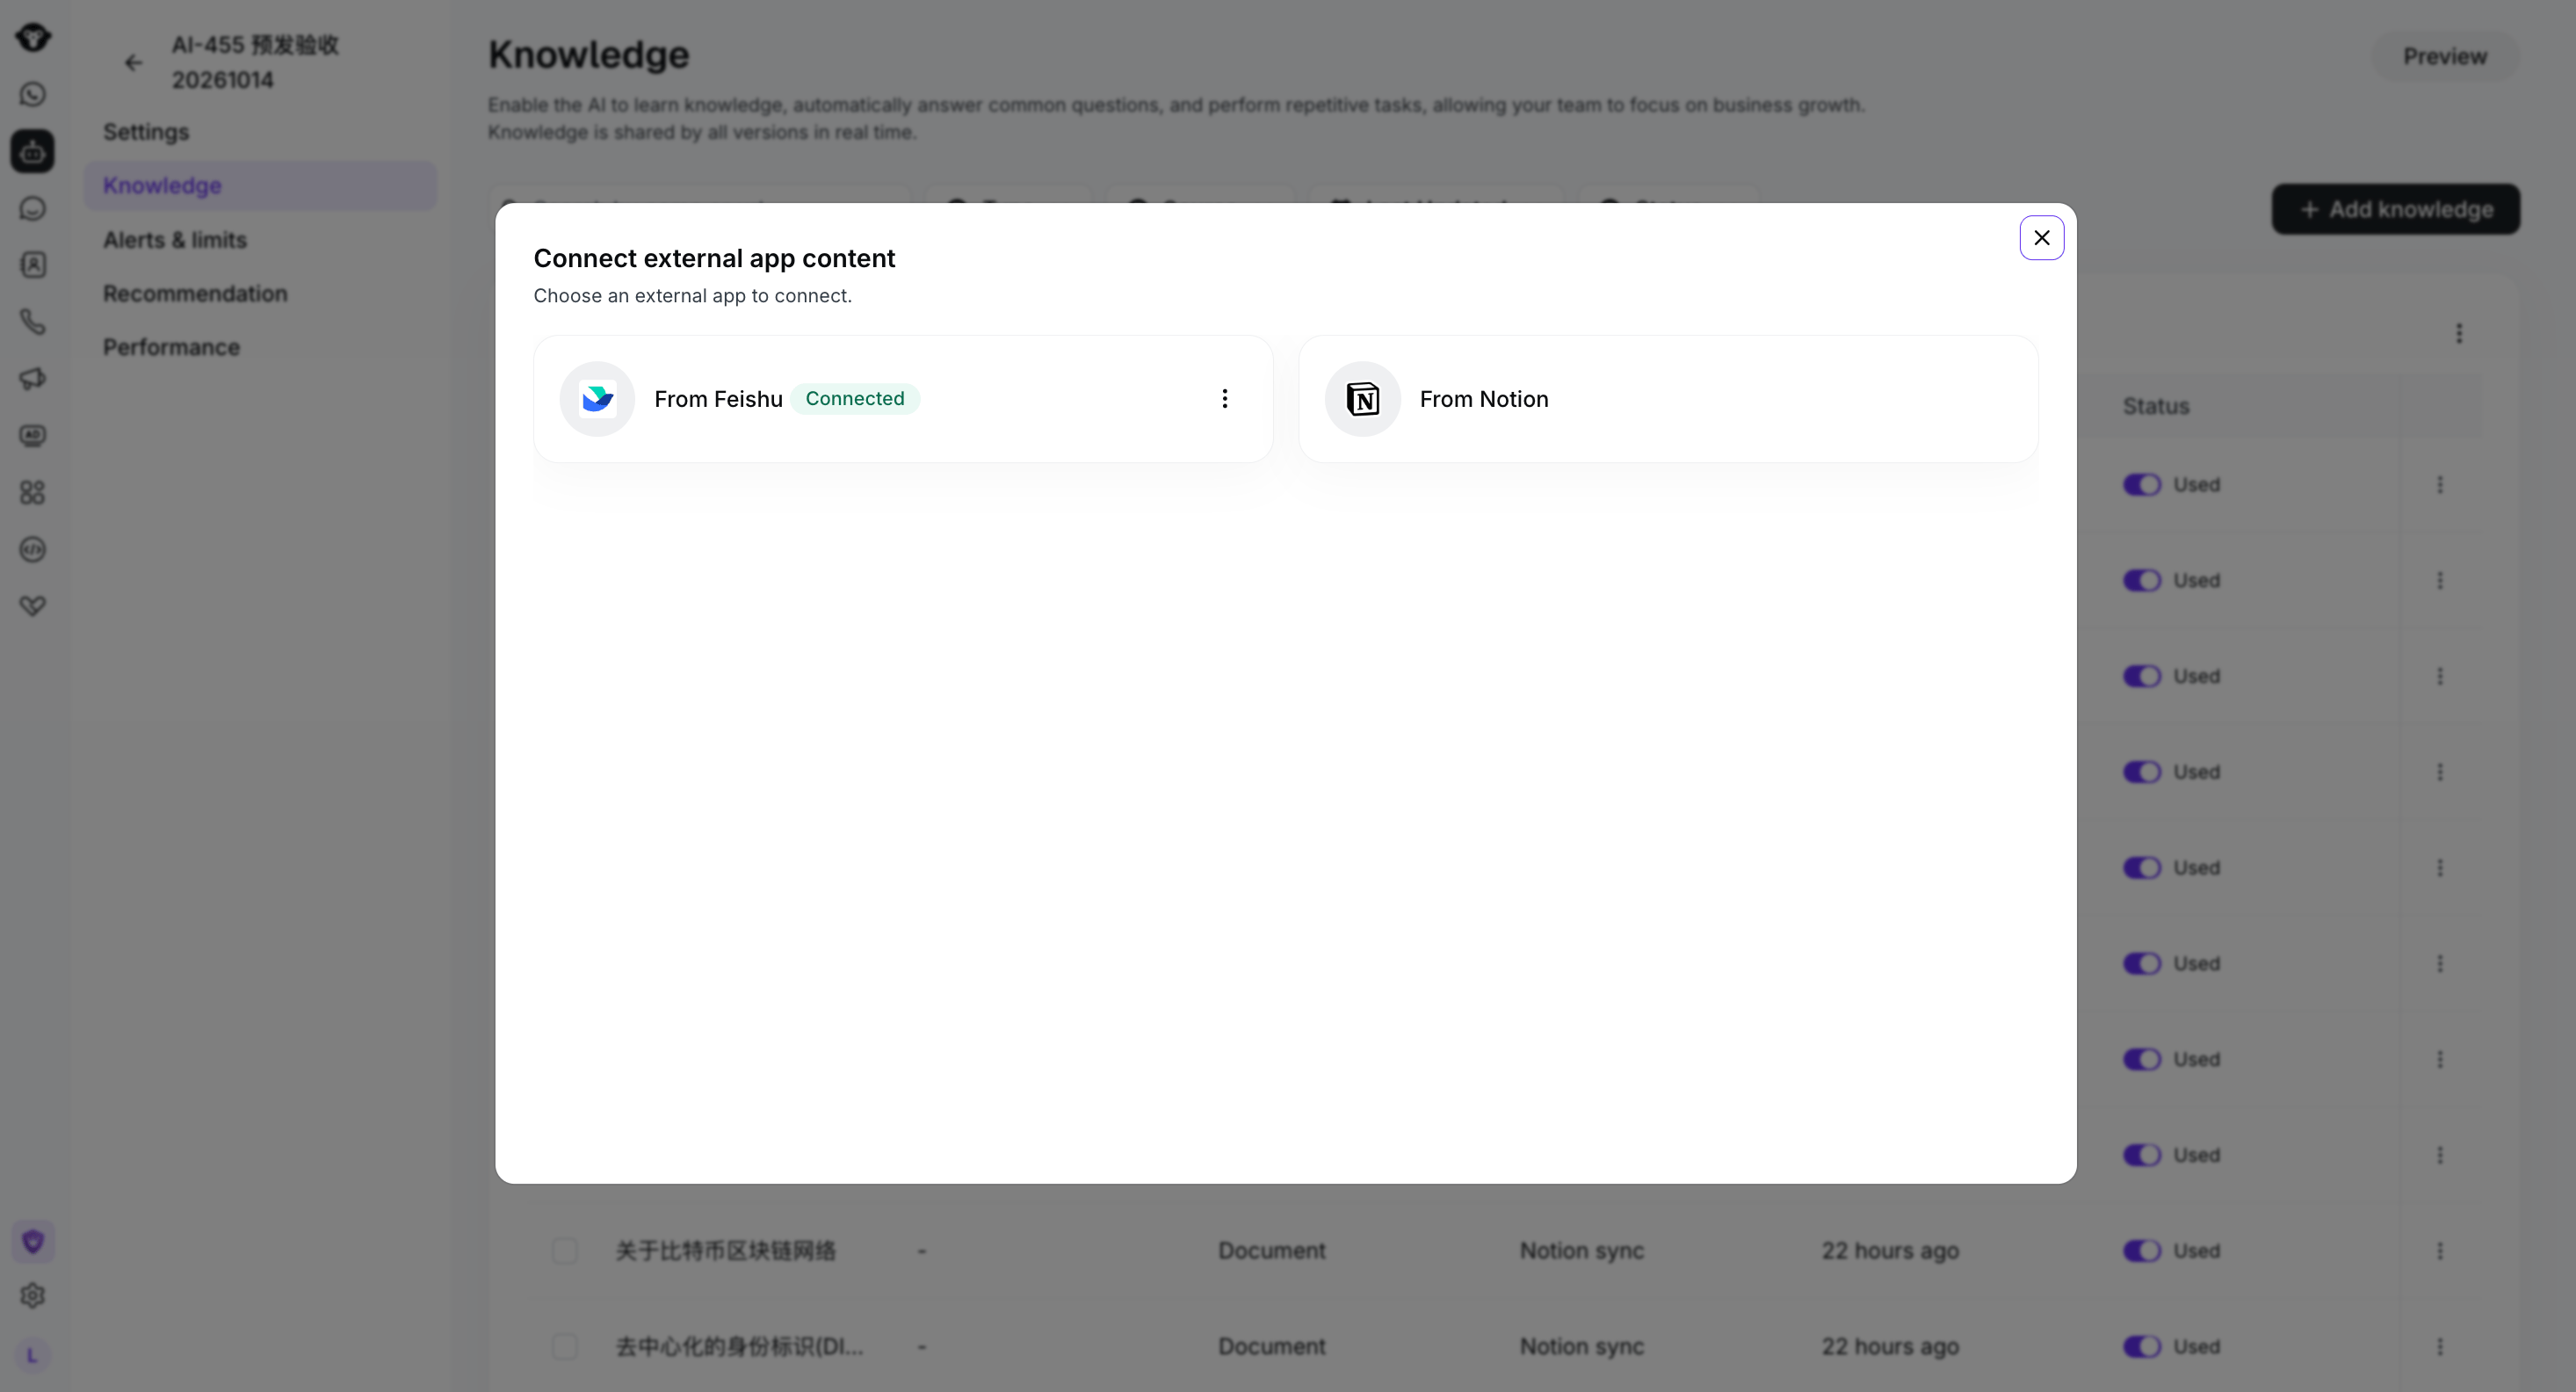
3. Select **Connect external app content**.
4. Choose **From Feishu** or **From Notion**.
 ## Authorize Feishu
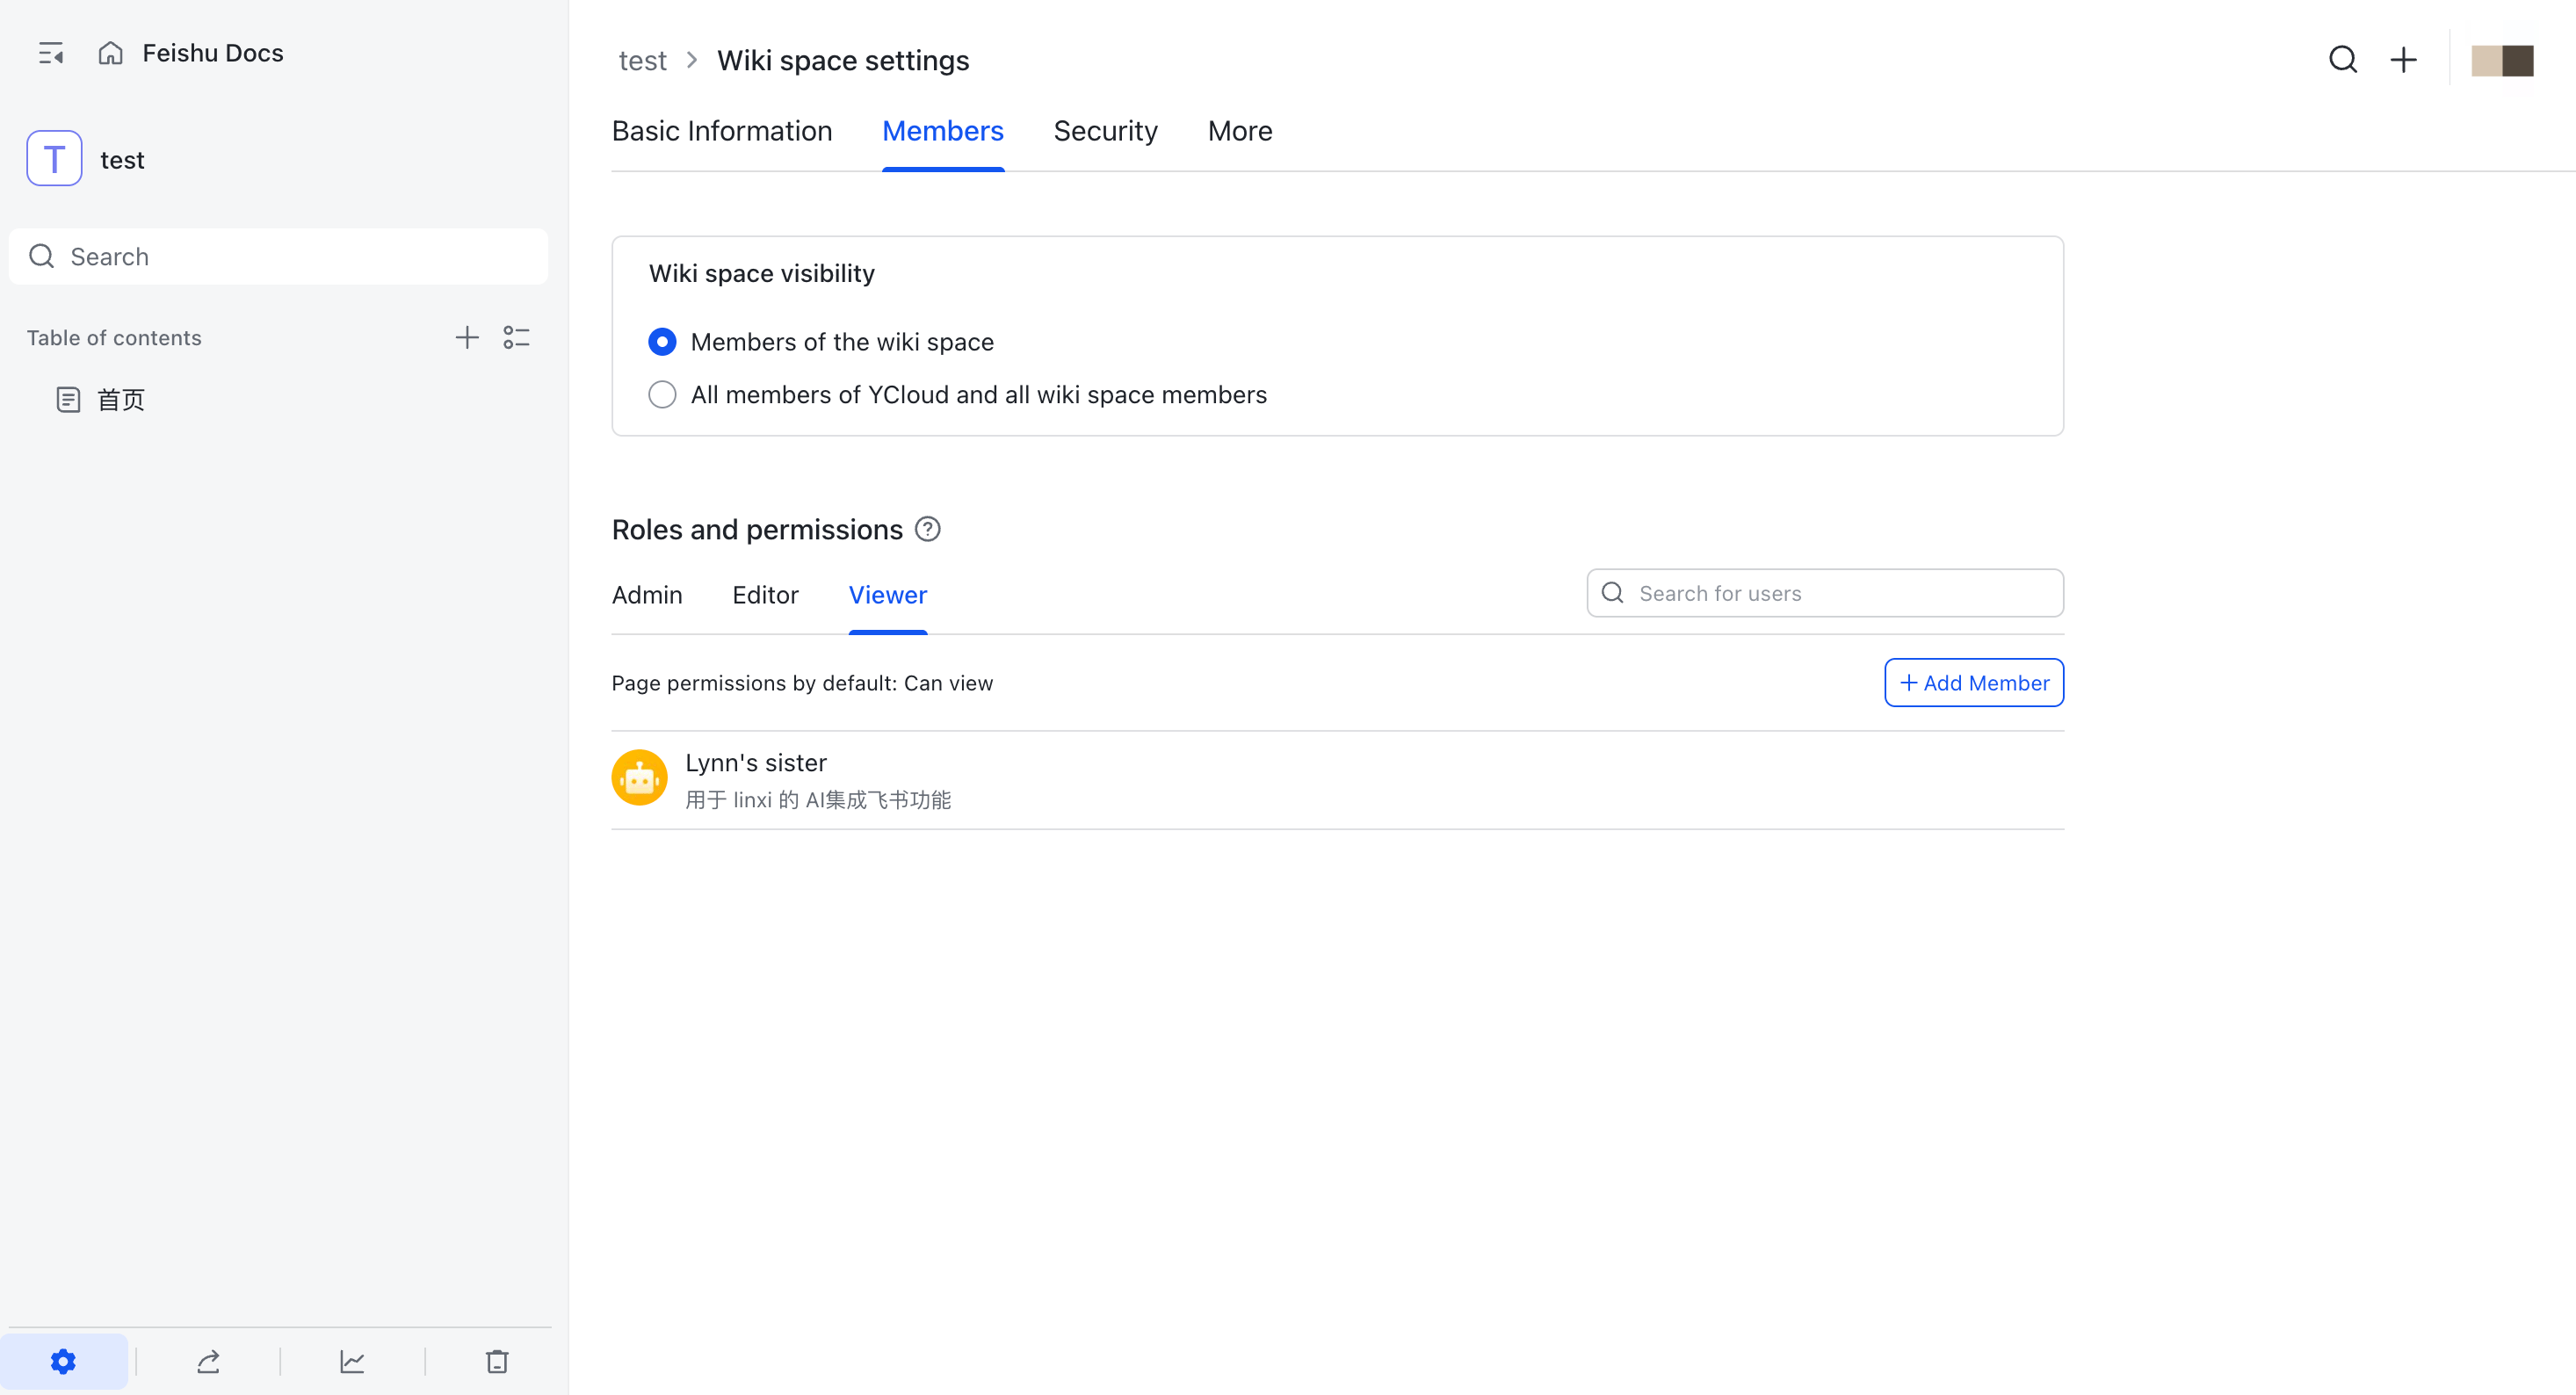
Before you connect Feishu content, grant the Feishu bot Viewer access to each wiki space that you want the AI Agent to use. Make sure the bot has already been created and note its name.
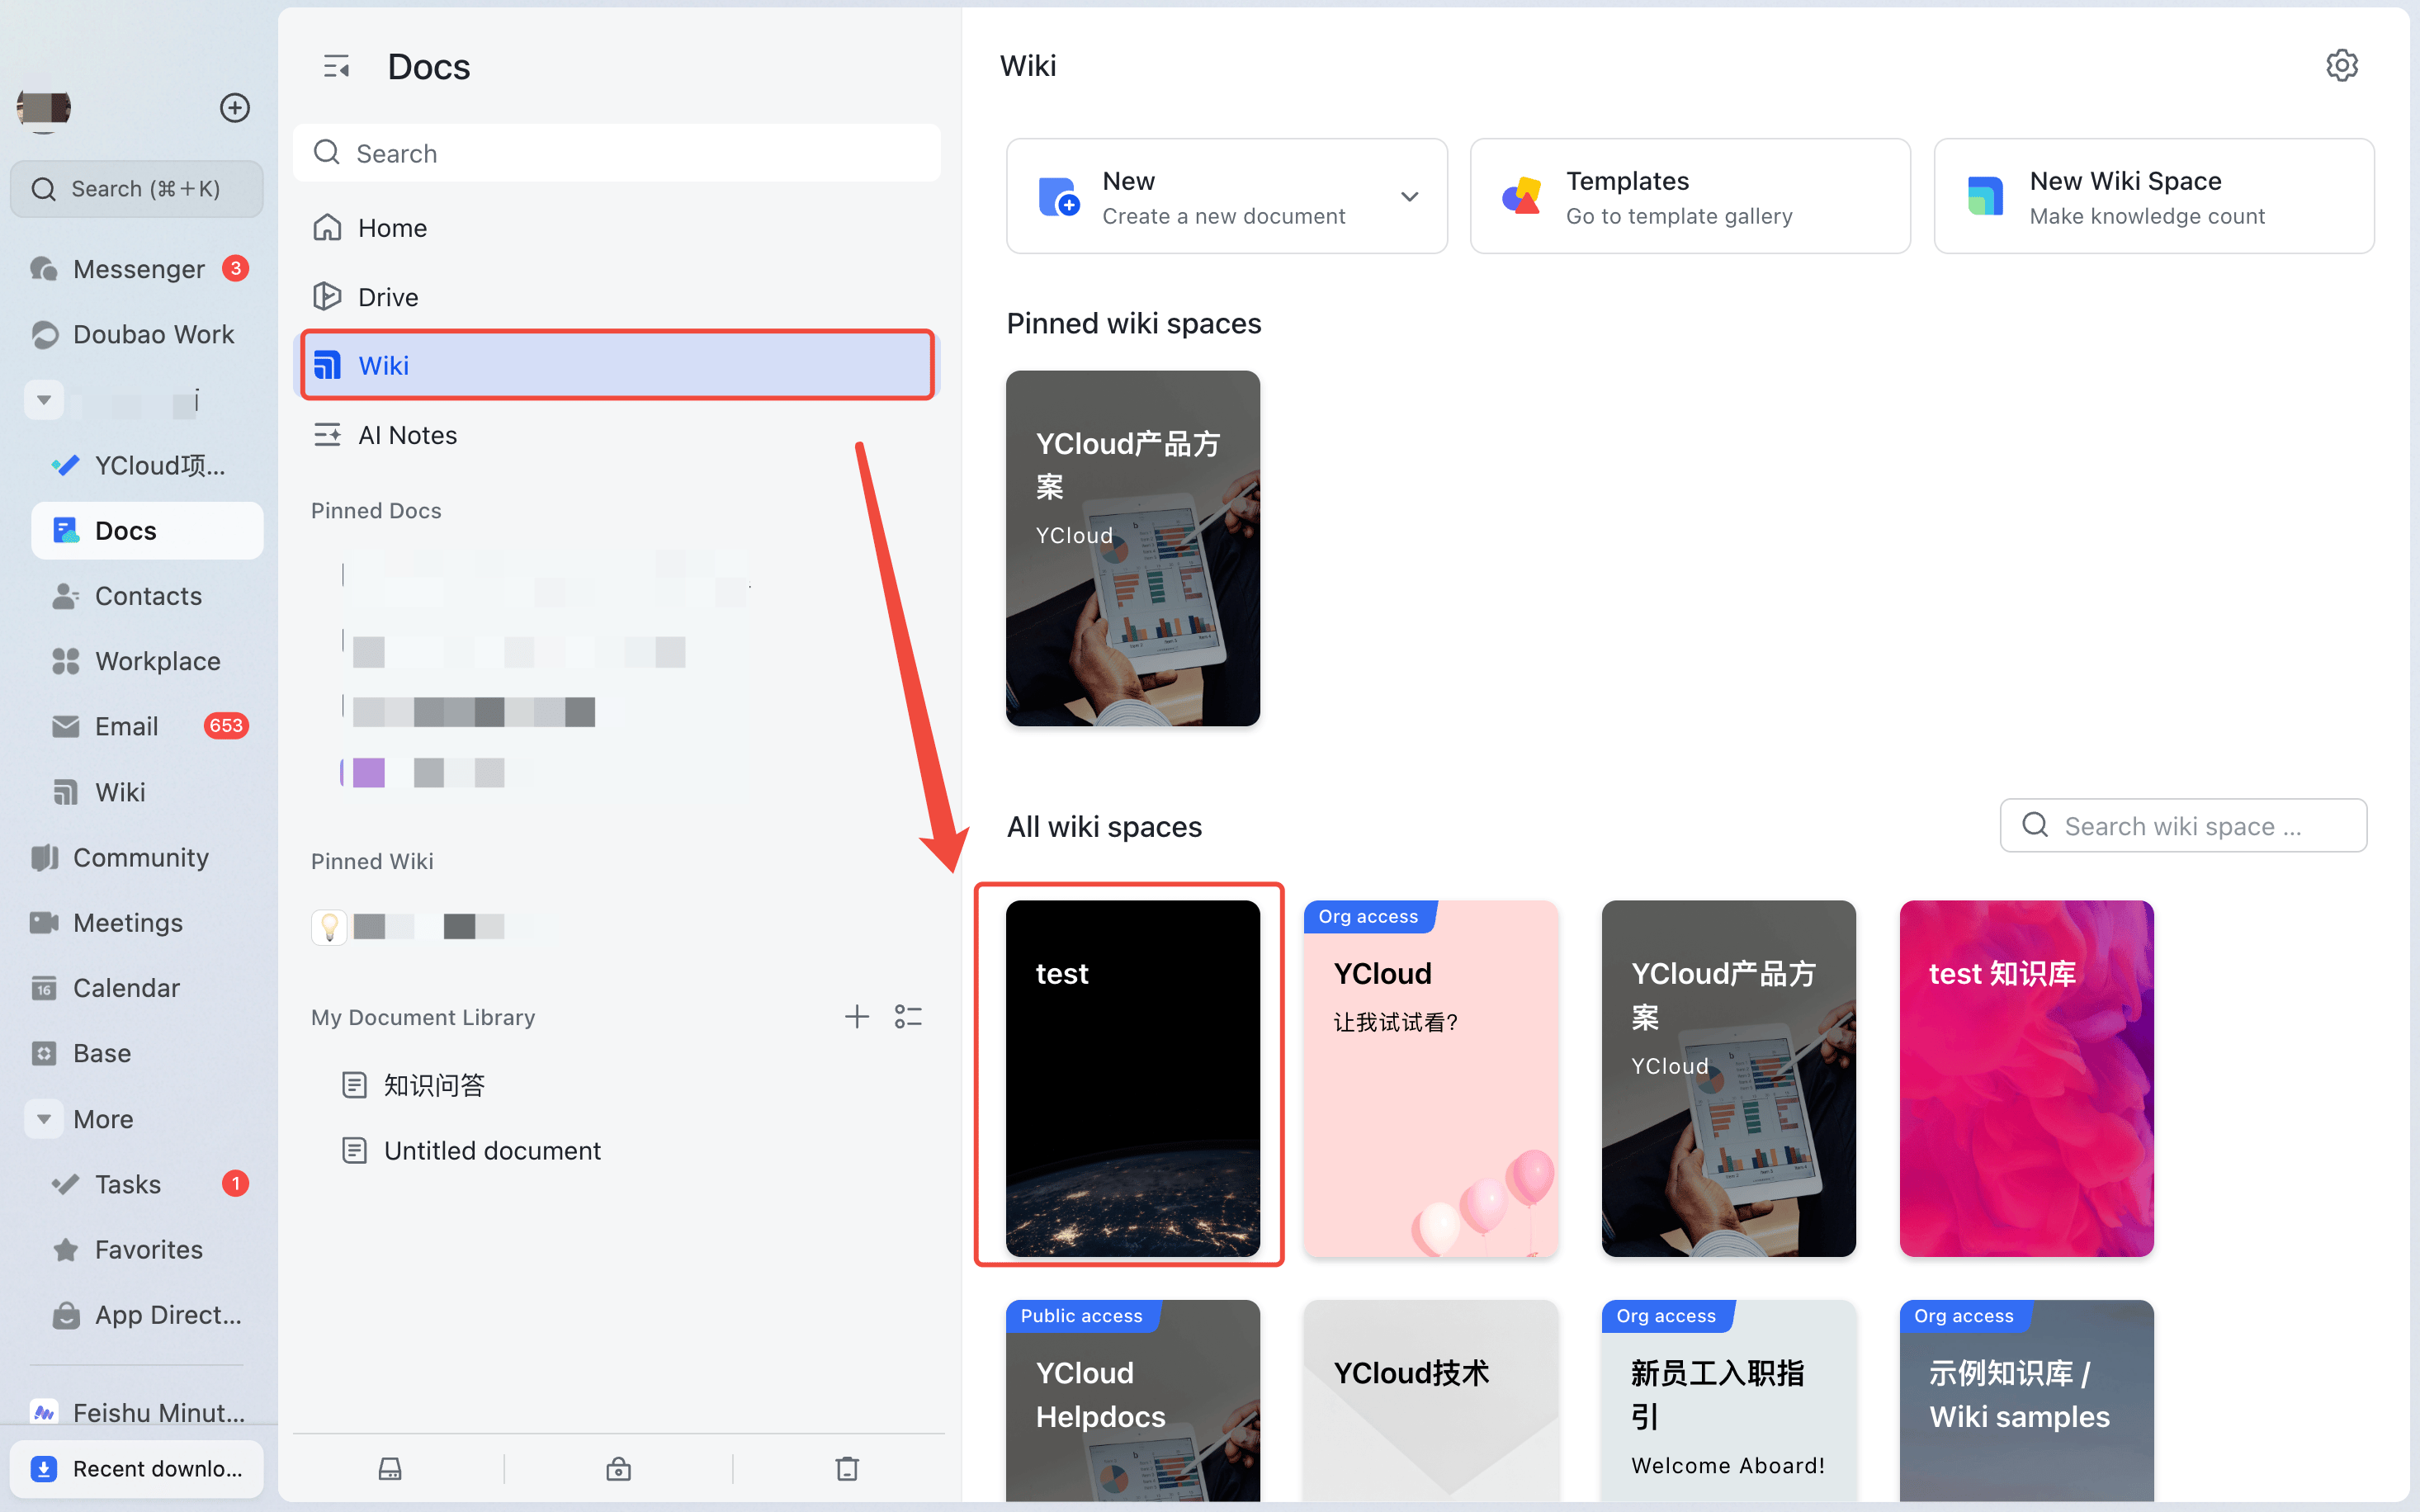
1. In Feishu Docs, open **Wiki**, then open the wiki space that you want to authorize.
## Authorize Feishu
Before you connect Feishu content, grant the Feishu bot Viewer access to each wiki space that you want the AI Agent to use. Make sure the bot has already been created and note its name.
1. In Feishu Docs, open **Wiki**, then open the wiki space that you want to authorize.
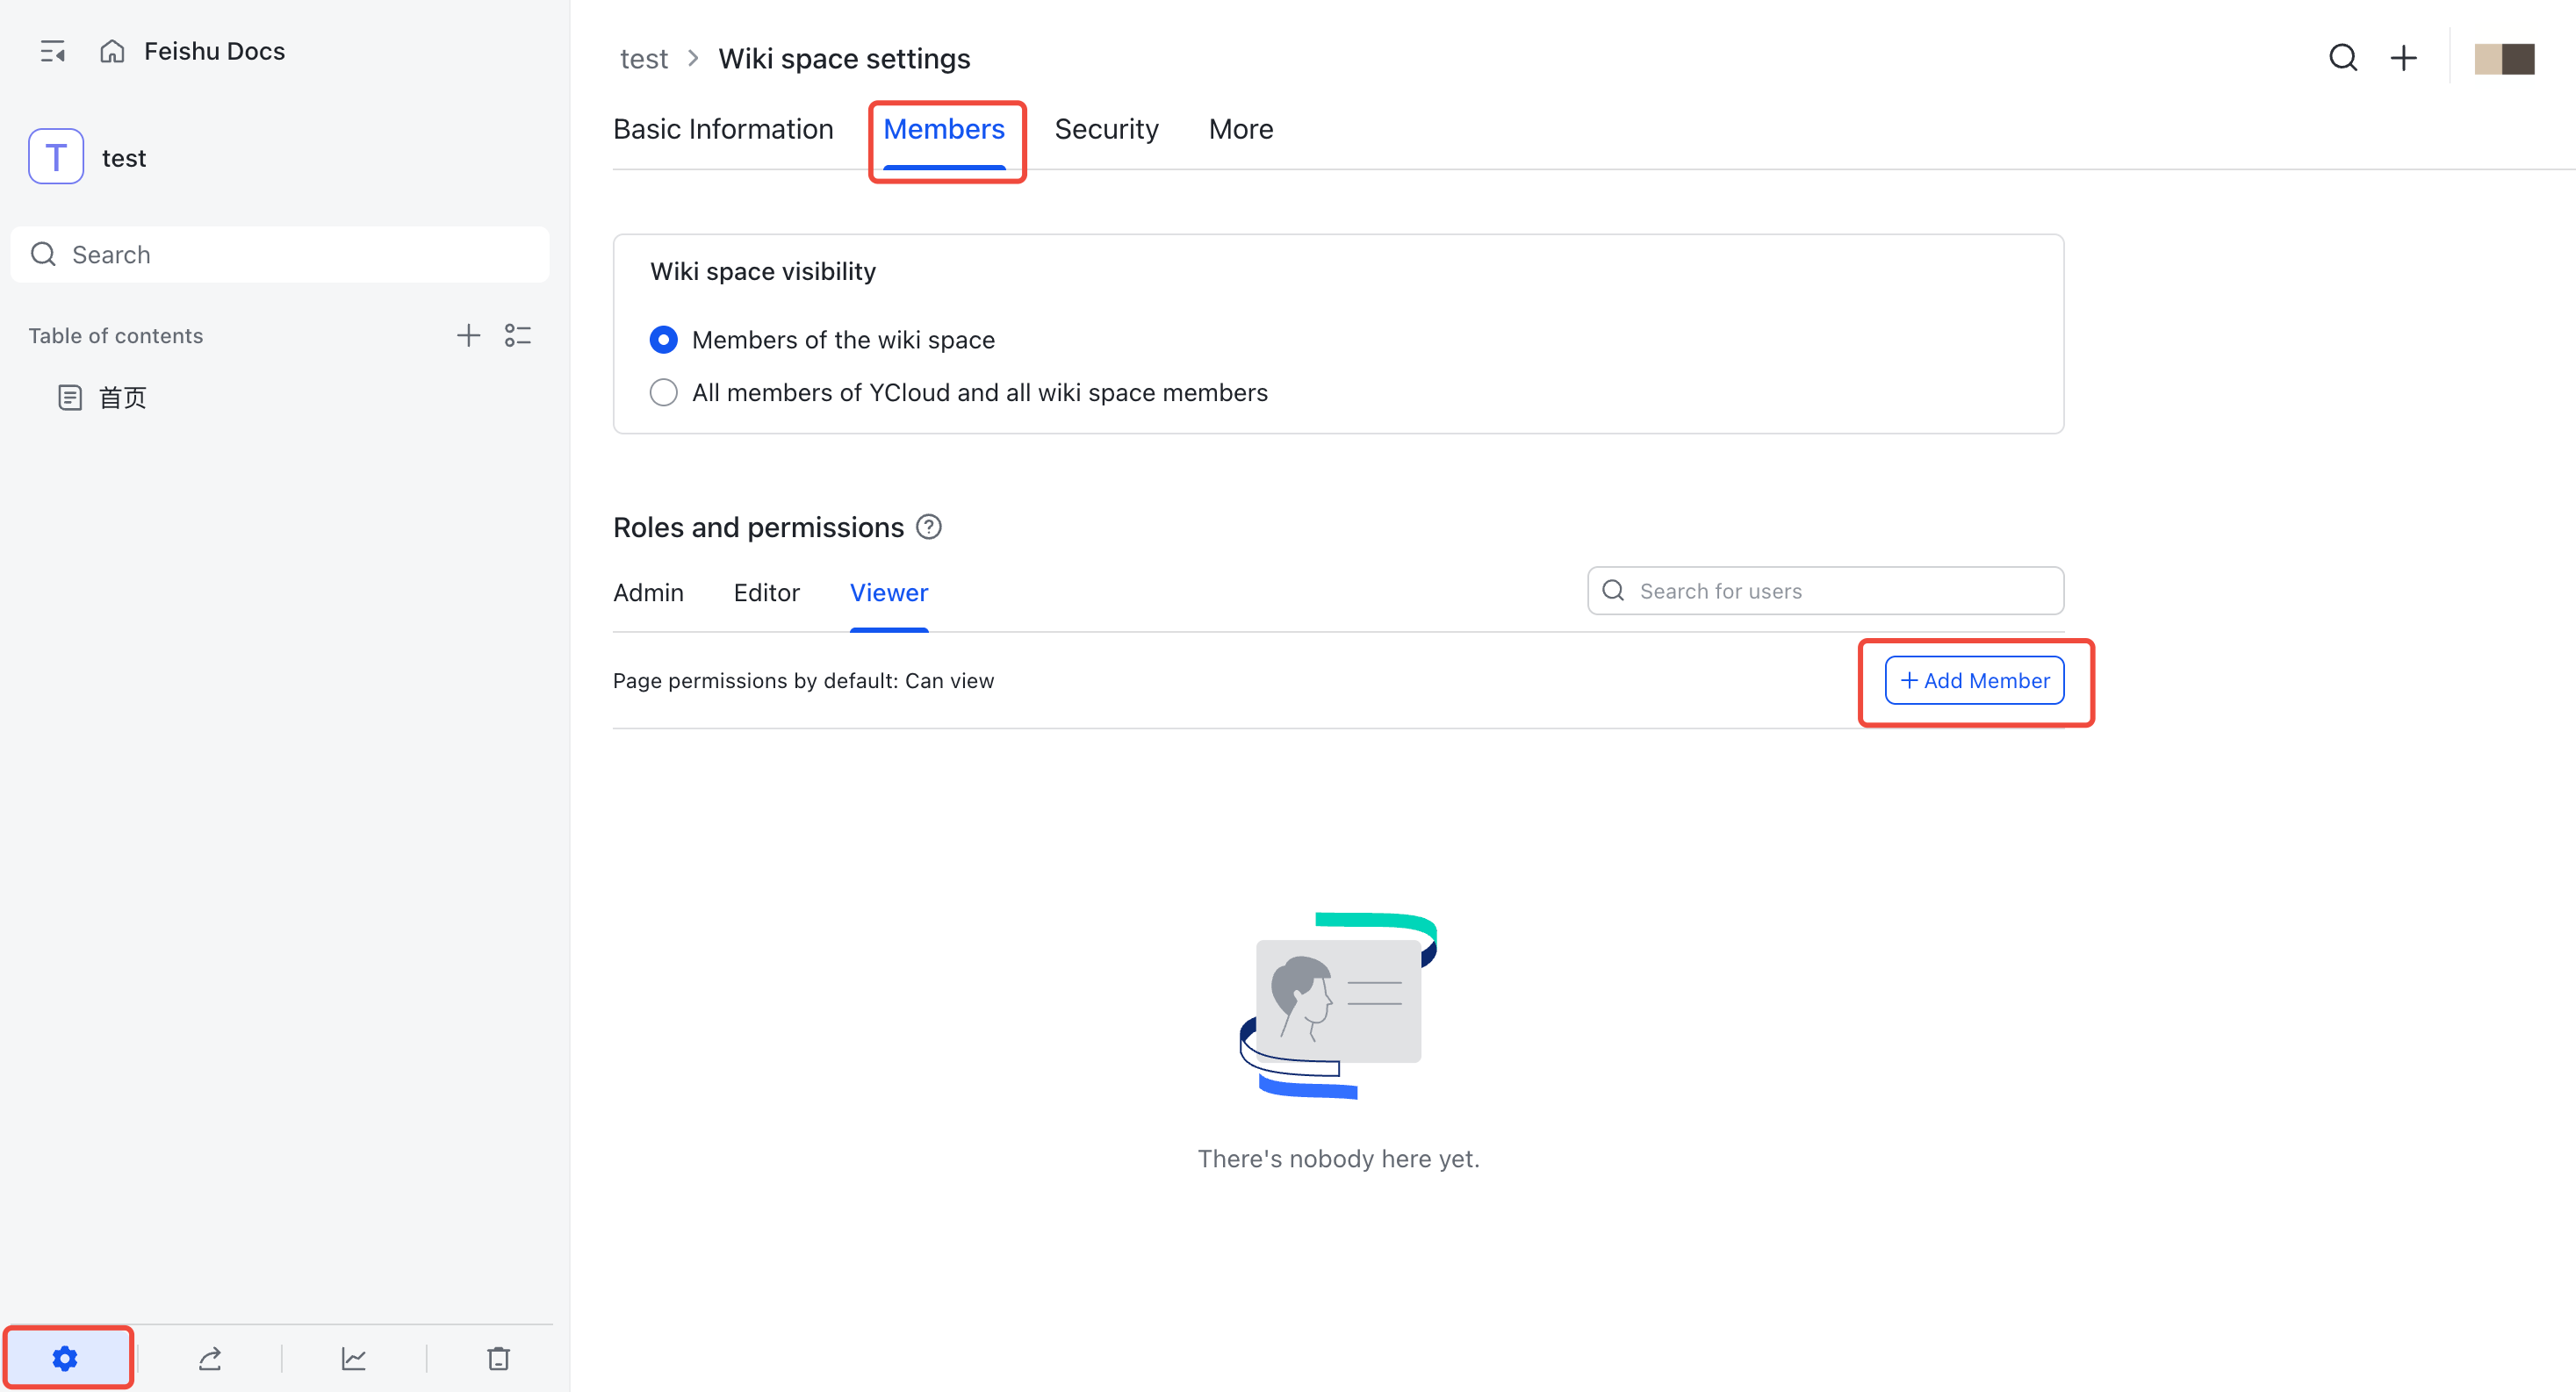
 2. Click **Settings** in the lower-left corner.
3. Open the **Members** tab.
4. Under **Roles and permissions**, select **Viewer**, then click **Add Member**.
2. Click **Settings** in the lower-left corner.
3. Open the **Members** tab.
4. Under **Roles and permissions**, select **Viewer**, then click **Add Member**.
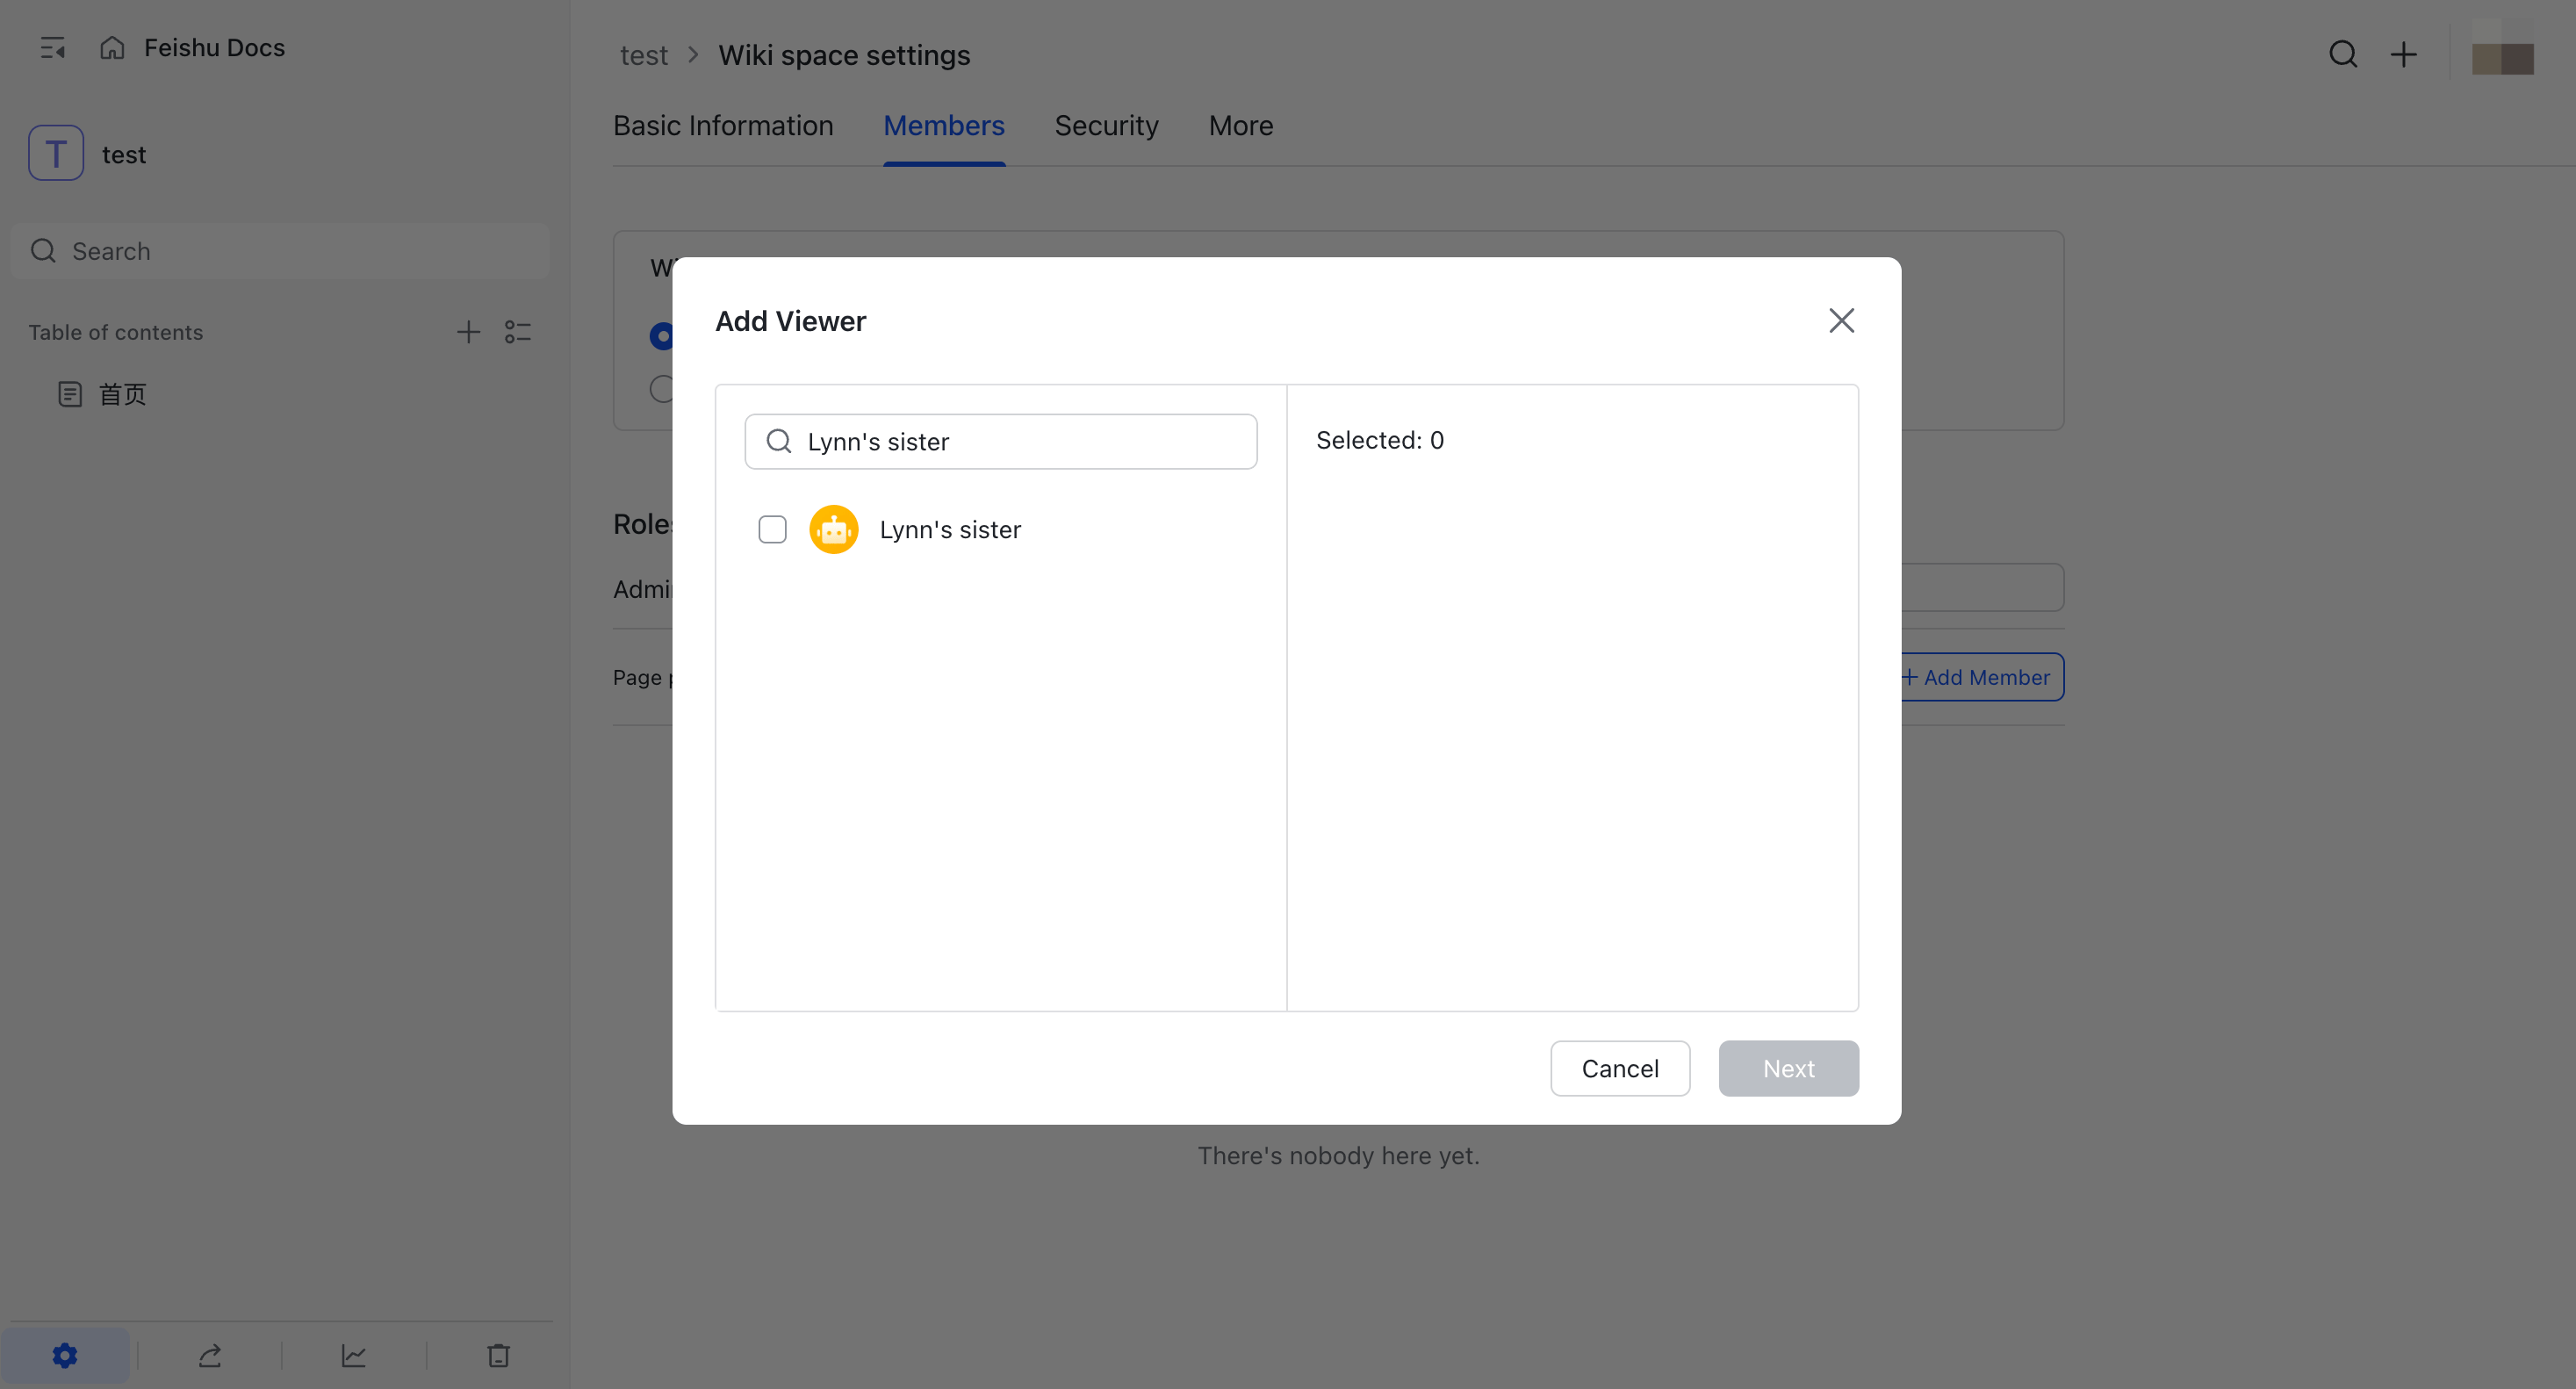
 5. Search for the Feishu bot by name and select it.
 6. Complete the addition and confirm that the bot appears under **Viewer**.
 After the bot has read access, return to YCloud and select **From Feishu** to continue connecting the external content. If a Feishu connection is already available to the AI Agent, the option shows **Connected**.
## Authorize Notion
### Authorize Notion for the first time
1. In YCloud, select **From Notion**.
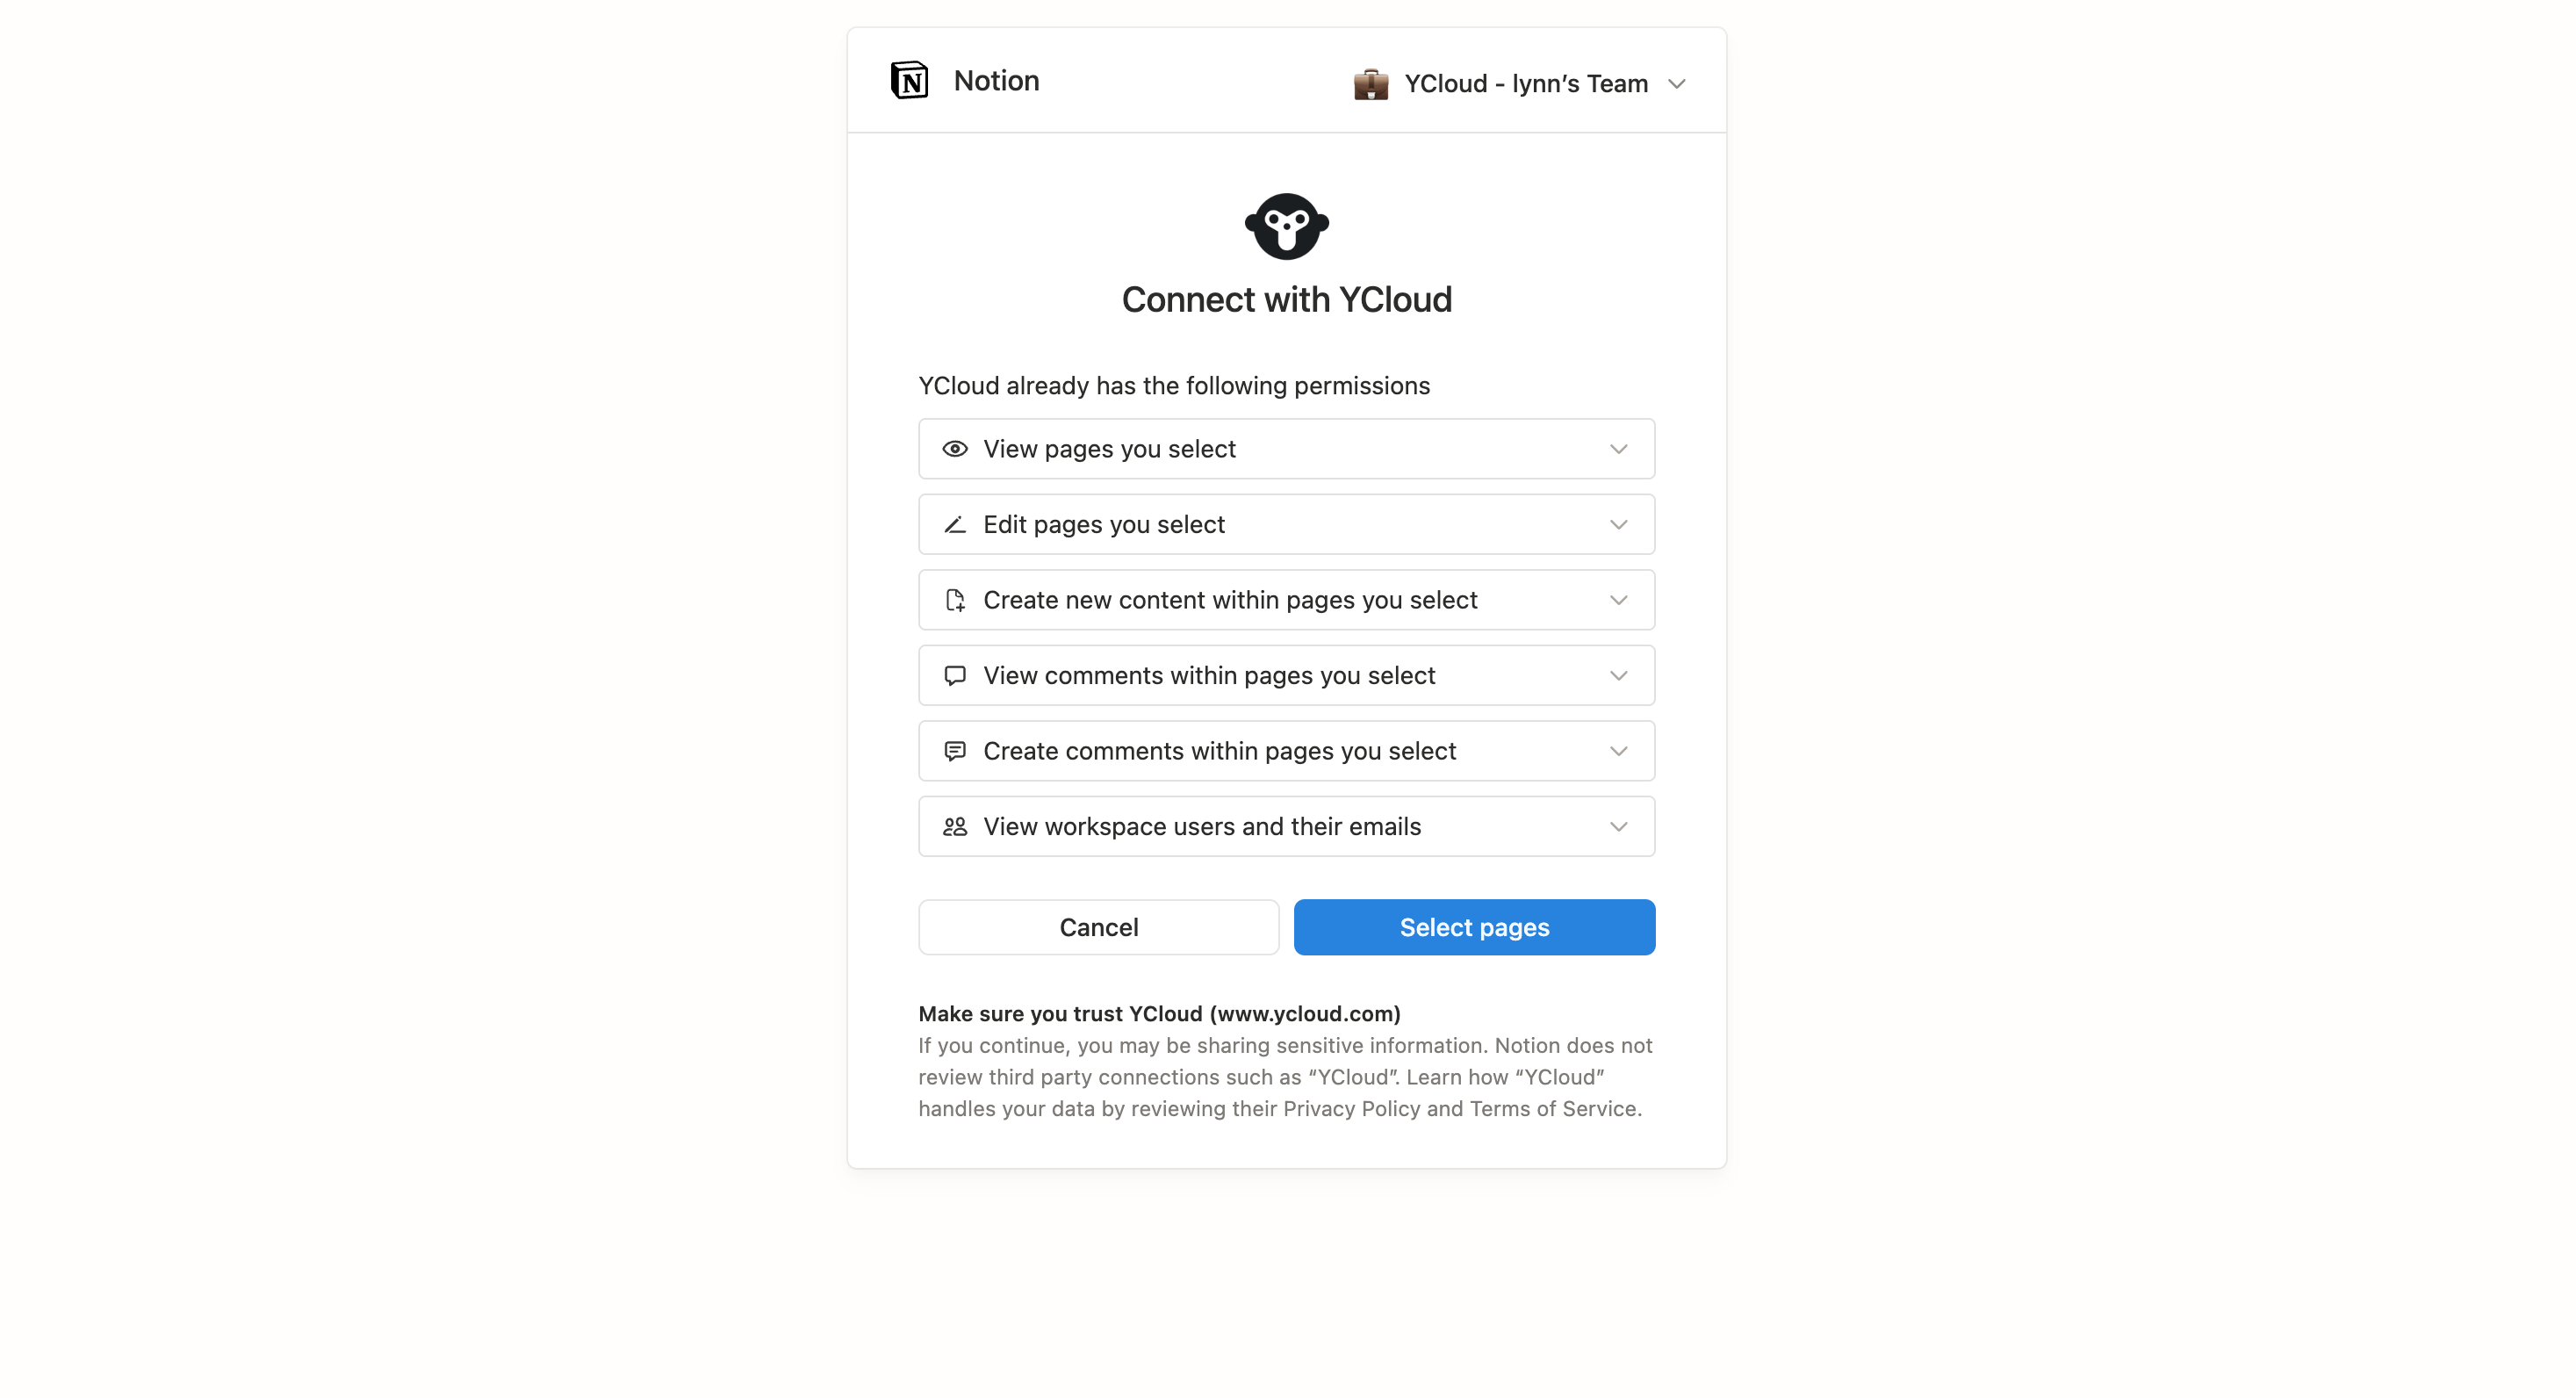
2. On the Notion authorization page, confirm the workspace and review the permissions requested by YCloud.
3. Click **Select pages**, choose the pages that you want to authorize, and complete the authorization.
After the bot has read access, return to YCloud and select **From Feishu** to continue connecting the external content. If a Feishu connection is already available to the AI Agent, the option shows **Connected**.
## Authorize Notion
### Authorize Notion for the first time
1. In YCloud, select **From Notion**.
2. On the Notion authorization page, confirm the workspace and review the permissions requested by YCloud.
3. Click **Select pages**, choose the pages that you want to authorize, and complete the authorization.
 ### Update the authorization later
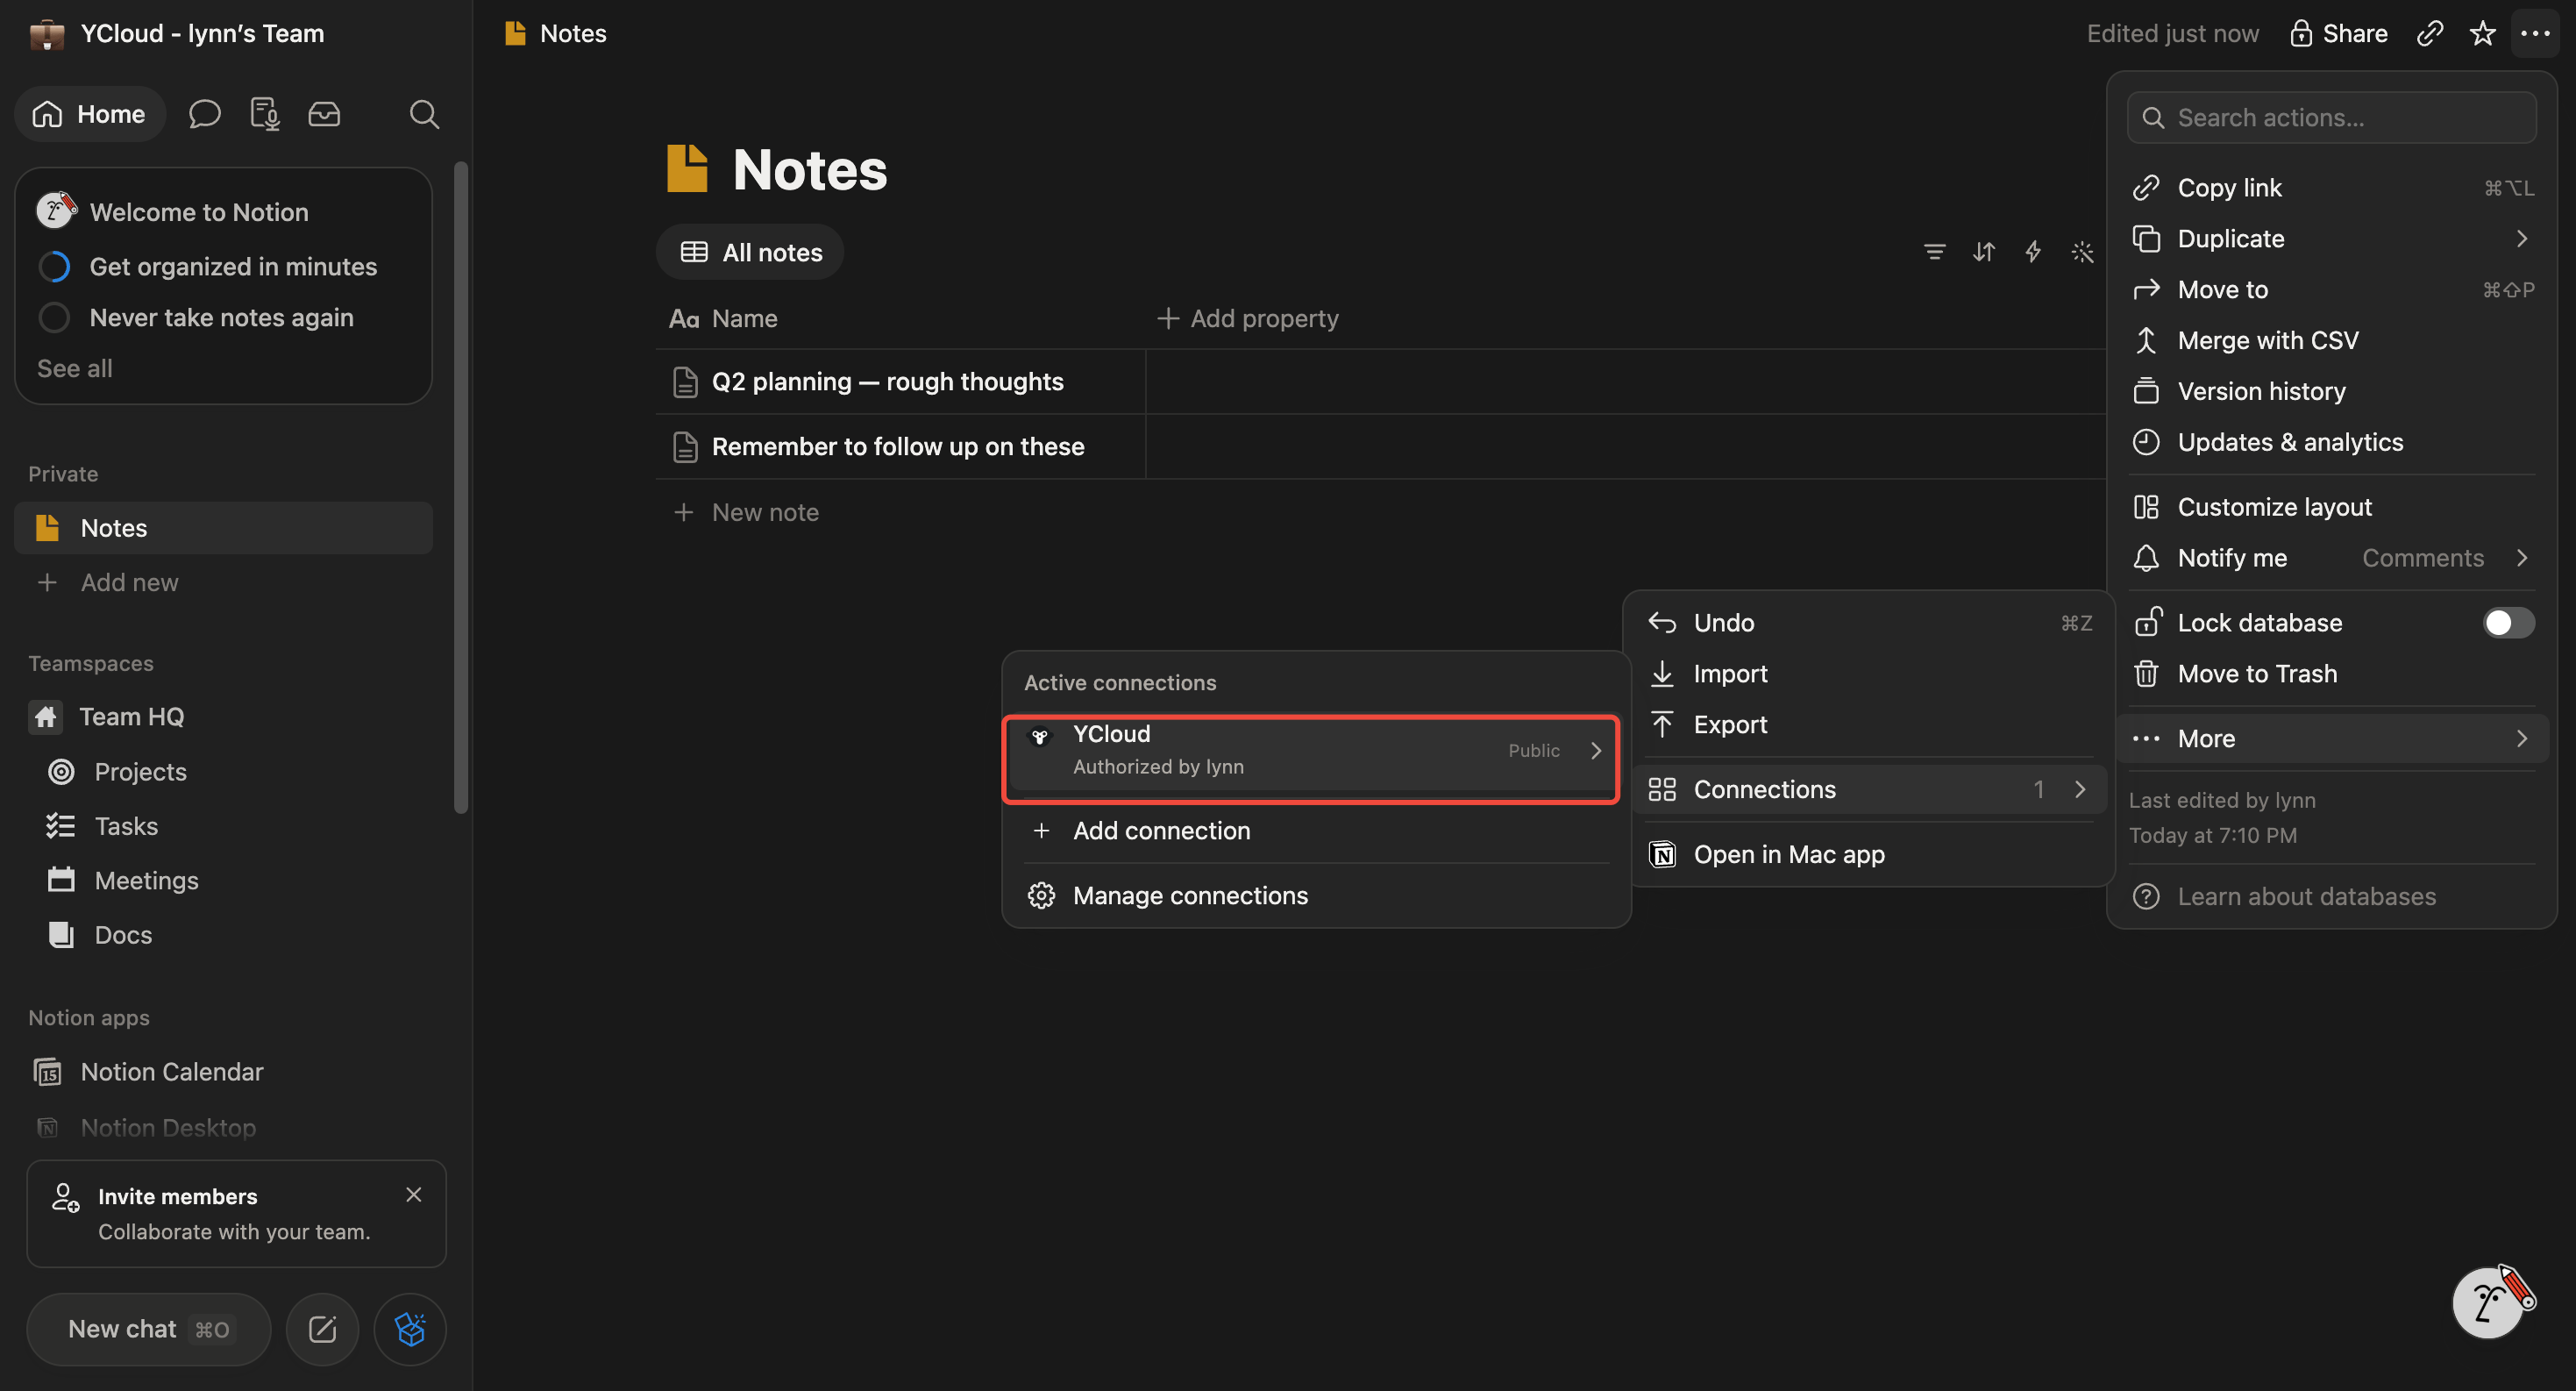
To review or change the YCloud connection for existing Notion content:
1. Open the Notion page or database.
2. Click the three-dot menu in the upper-right corner.
3. Select **More** > **Connections** > **YCloud**.
4. Select **YCloud** and update the authorization as needed.
### Update the authorization later
To review or change the YCloud connection for existing Notion content:
1. Open the Notion page or database.
2. Click the three-dot menu in the upper-right corner.
3. Select **More** > **Connections** > **YCloud**.
4. Select **YCloud** and update the authorization as needed.
 This documentation is built and hosted on [Mintlify](https://mintlify.com), a developer documentation platform.