> ## Documentation Index
> Fetch the complete documentation index at: https://docs.ycloud.com/llms.txt
> Use this file to discover all available pages before exploring further.
# Automatically Add Customers to Unsubscribe List
Use a YCloud Rule-based Agent to confirm unsubscribe requests and add customers to your unsubscribe list.
Example:
When a customer's message to unsubscribe is received, the Rule-based Agent automatically asks the customer if they confirm they want to unsubscribe, and for those who confirm a second time, adds them to the unsubscribe list.
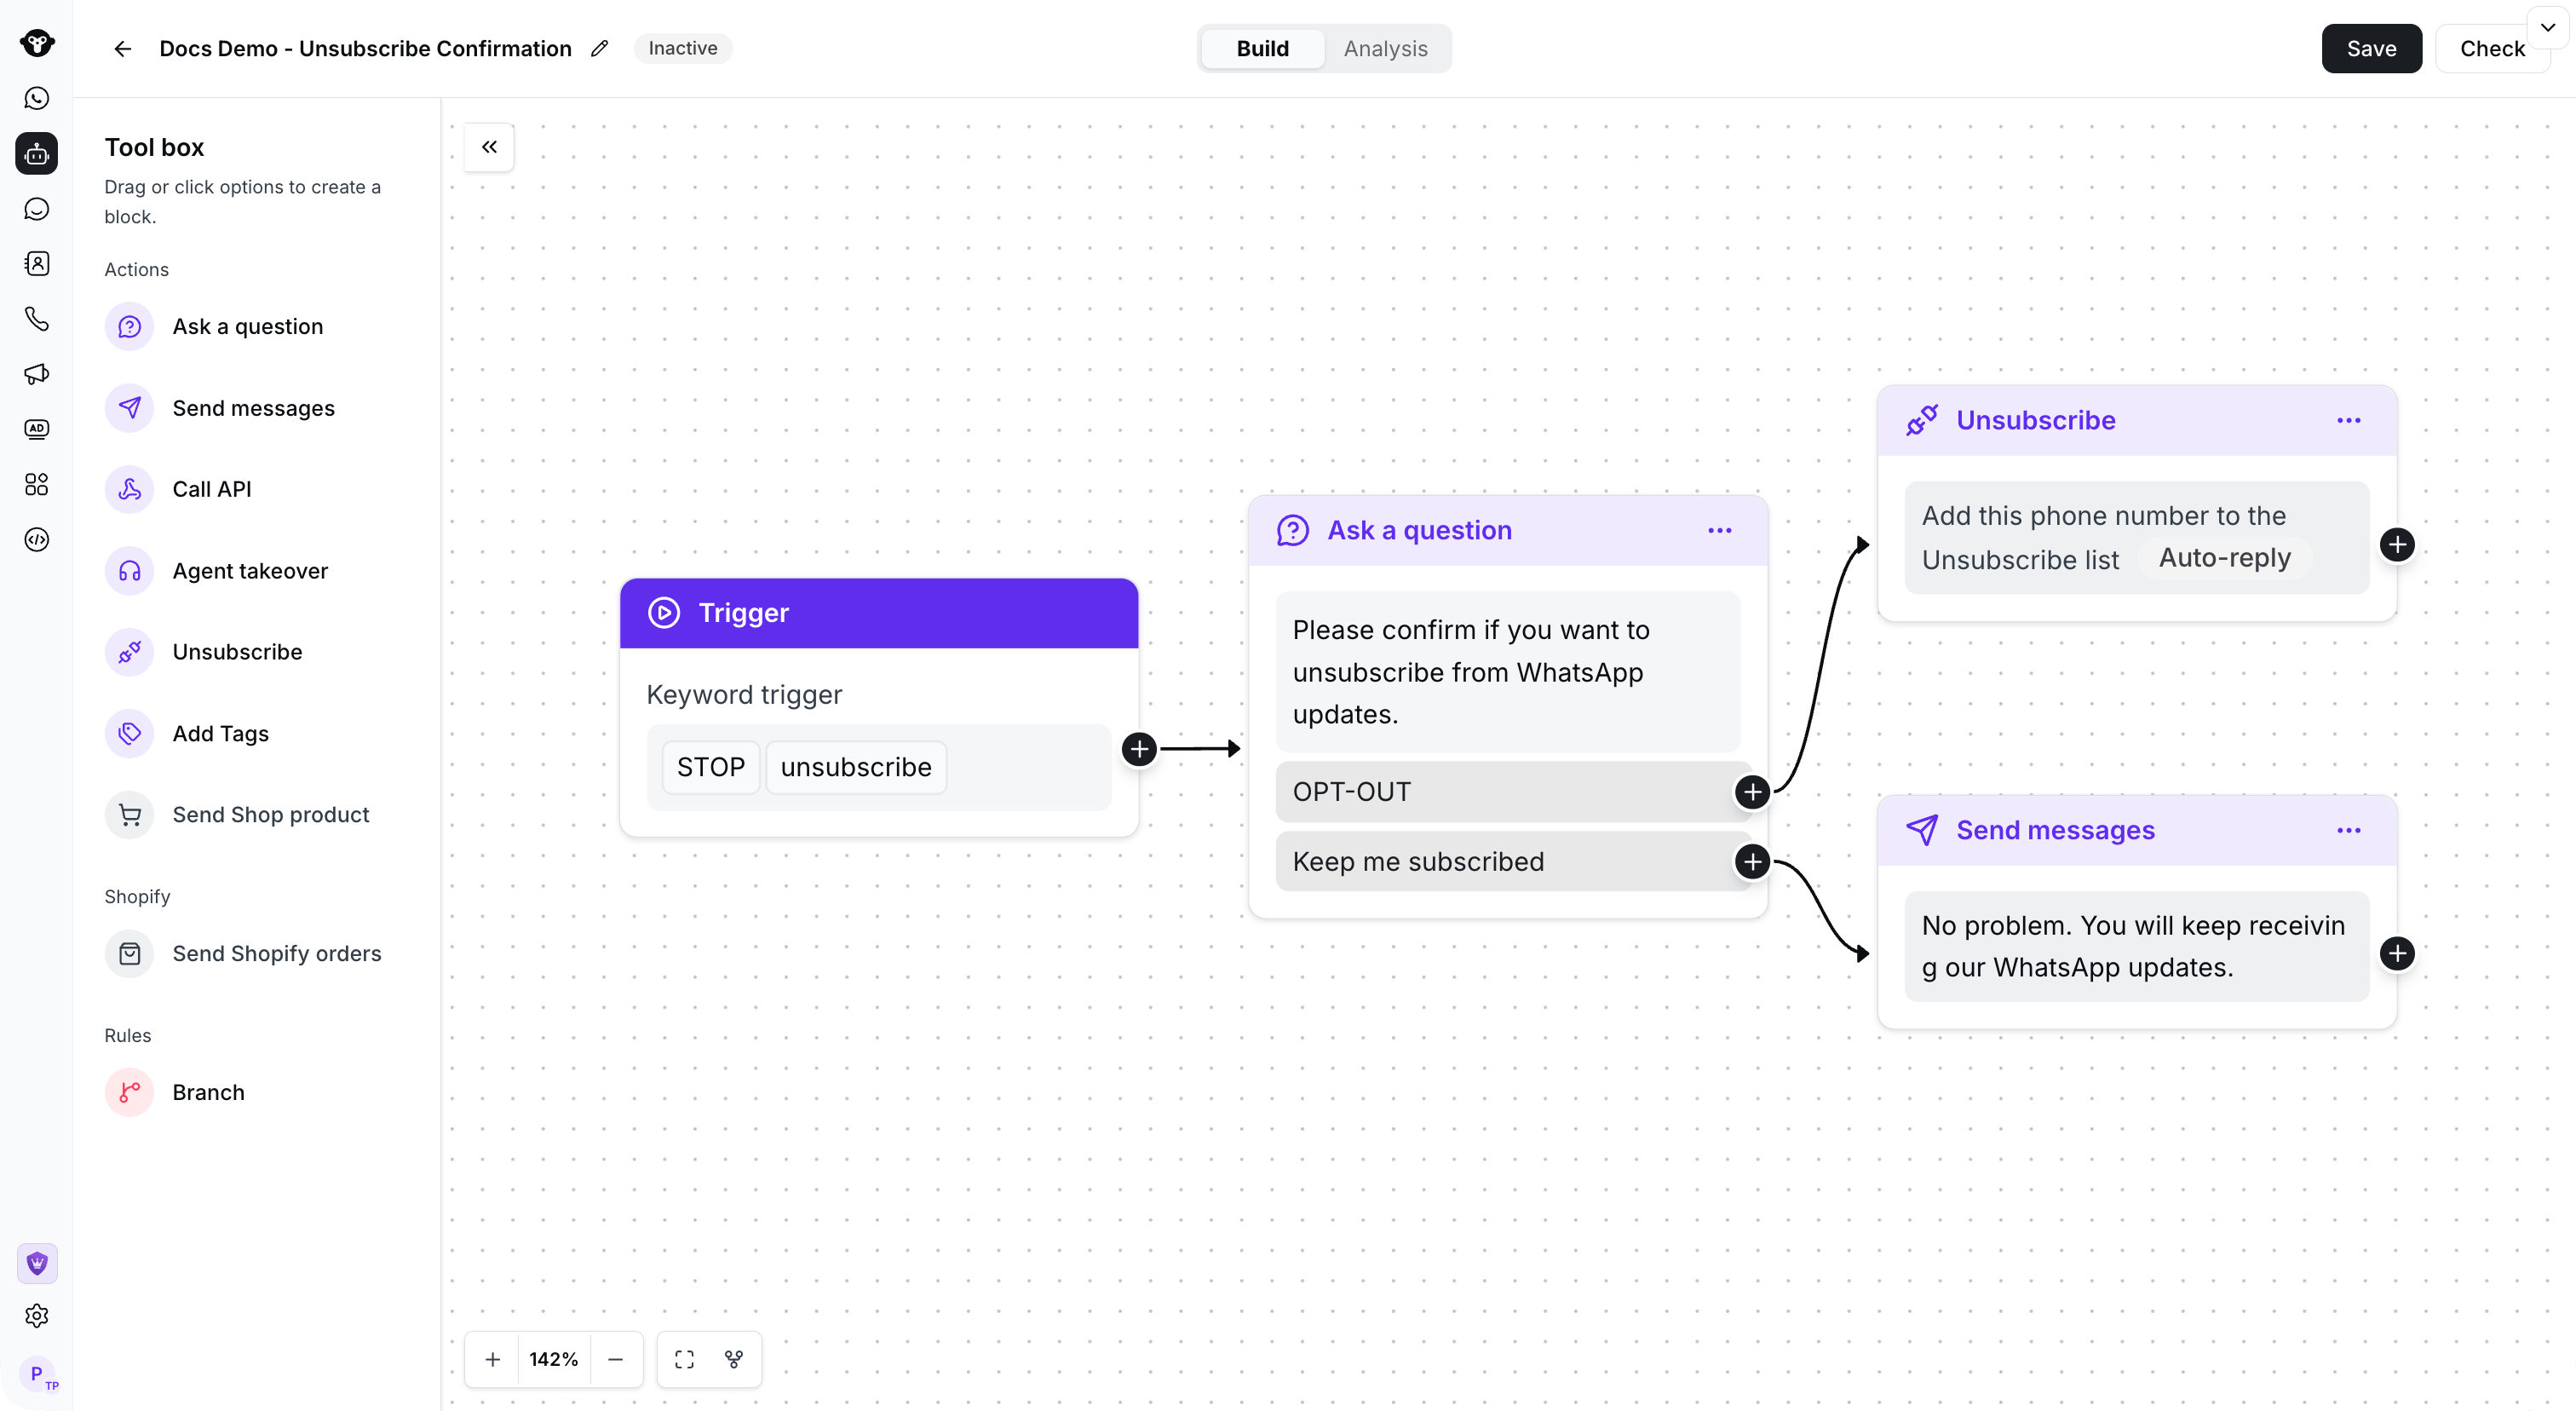 ## Step 1: Create a Rule-based Agent flow
 ## Step 2: Add unsubscribe trigger keywords
Recommendation: Set multiple unsubscribe keywords and choose "Containing" rather than "Exact matching". This way, any keyword in the list will trigger the Rule-based Agent. After setting up, click the save button.
## Step 2: Add unsubscribe trigger keywords
Recommendation: Set multiple unsubscribe keywords and choose "Containing" rather than "Exact matching". This way, any keyword in the list will trigger the Rule-based Agent. After setting up, click the save button.
 ## Step 3: Confirm customer's unsubscribe intention (optional)
Strongly recommend adding this step to avoid customers mistakenly entering the unsubscribe list. You can choose to use the "Ask a question" component to ask the customer: "Please confirm if you want to unsubscribe from messages?"
Detailed steps:
1. Select the "Ask a question" component
2. Choose the Buttons message format
## Step 3: Confirm customer's unsubscribe intention (optional)
Strongly recommend adding this step to avoid customers mistakenly entering the unsubscribe list. You can choose to use the "Ask a question" component to ask the customer: "Please confirm if you want to unsubscribe from messages?"
Detailed steps:
1. Select the "Ask a question" component
2. Choose the Buttons message format
 3. Set the inquiry content: "Please confirm if you want to unsubscribe from WhatsApp?"
* Set two options for the Button
* OPT-OUT
* Keep me subscribed
* After setting up, click Save
3. Set the inquiry content: "Please confirm if you want to unsubscribe from WhatsApp?"
* Set two options for the Button
* OPT-OUT
* Keep me subscribed
* After setting up, click Save
 4. Connect the Keyword trigger to the Ask a question component after setting up
## Step 4: Add to Unsubscribe List
1. Add the Unsubscribe component
2. You can choose whether to automatically reply with a successful unsubscribe message. If needed, click the **Auto-reply** switch and enter the auto-reply content below, then select Save to save.
4. Connect the Keyword trigger to the Ask a question component after setting up
## Step 4: Add to Unsubscribe List
1. Add the Unsubscribe component
2. You can choose whether to automatically reply with a successful unsubscribe message. If needed, click the **Auto-reply** switch and enter the auto-reply content below, then select Save to save.
 3. Connect the "OPT-OUT" button from the Ask a question component to the Unsubscribe component
 ## Step 5: Add a Send messages text (optional)
Add a Send messages text component and connect it to the **Keep me subscribed** button
## Step 5: Add a Send messages text (optional)
Add a Send messages text component and connect it to the **Keep me subscribed** button
 ## Step 6: Save and activate the Rule-based Agent
After editing the flow, select **Save**, choose **Active**, then save again. When a customer completes the unsubscribe flow, YCloud adds the phone number to **Contact > Unsubscribe list**.
## Step 6: Save and activate the Rule-based Agent
After editing the flow, select **Save**, choose **Active**, then save again. When a customer completes the unsubscribe flow, YCloud adds the phone number to **Contact > Unsubscribe list**.
 This documentation is built and hosted on [Mintlify](https://mintlify.com), a developer documentation platform.