> ## Documentation Index
> Fetch the complete documentation index at: https://docs.ycloud.com/llms.txt
> Use this file to discover all available pages before exploring further.
# Unsubscribe List
> Manage contacts who have opted out and control whether they are excluded from message sending.
The **Unsubscribe List** is a centralized list of users who should no longer receive selected business messages. It helps your team manage opt-outs and avoid sending messages to users who have withdrawn consent.
Go to **Contact > Unsubscribe** in the YCloud console to view and manage the list. You can switch between the **Phone** and **BSUID** tabs, search existing records, filter them, and remove records when necessary.
YCloud currently supports adding users to the Unsubscribe List by:
* **Phone number**
* **Business-scoped User ID (BSUID)**
## How unsubscribe filtering works
When sending messages, you can choose whether users on the Unsubscribe List should be excluded.
| Sending method | Default behavior |
| - | - |
| **YCloud platform** | Users on the Unsubscribe List are filtered out by default. You can change this option during sending when the feature provides an unsubscribe filter. |
| **YCloud API** | Users on the Unsubscribe List are **not** filtered out by default. |
To exclude unsubscribed users when sending through the API, set the following request parameter:
```json theme={"theme":{"light":"github-light","dark":"github-dark"}}
{
"filterUnsubscribed": true
}
```
API requests do not filter unsubscribed users unless `filterUnsubscribed` is explicitly set to `true`. Add this parameter when your sending workflow must honor the YCloud Unsubscribe List.
## Add users to the Unsubscribe List
There are three ways to add a user.
### 1. Add users manually
You can add a single user or multiple users directly from the Unsubscribe page.
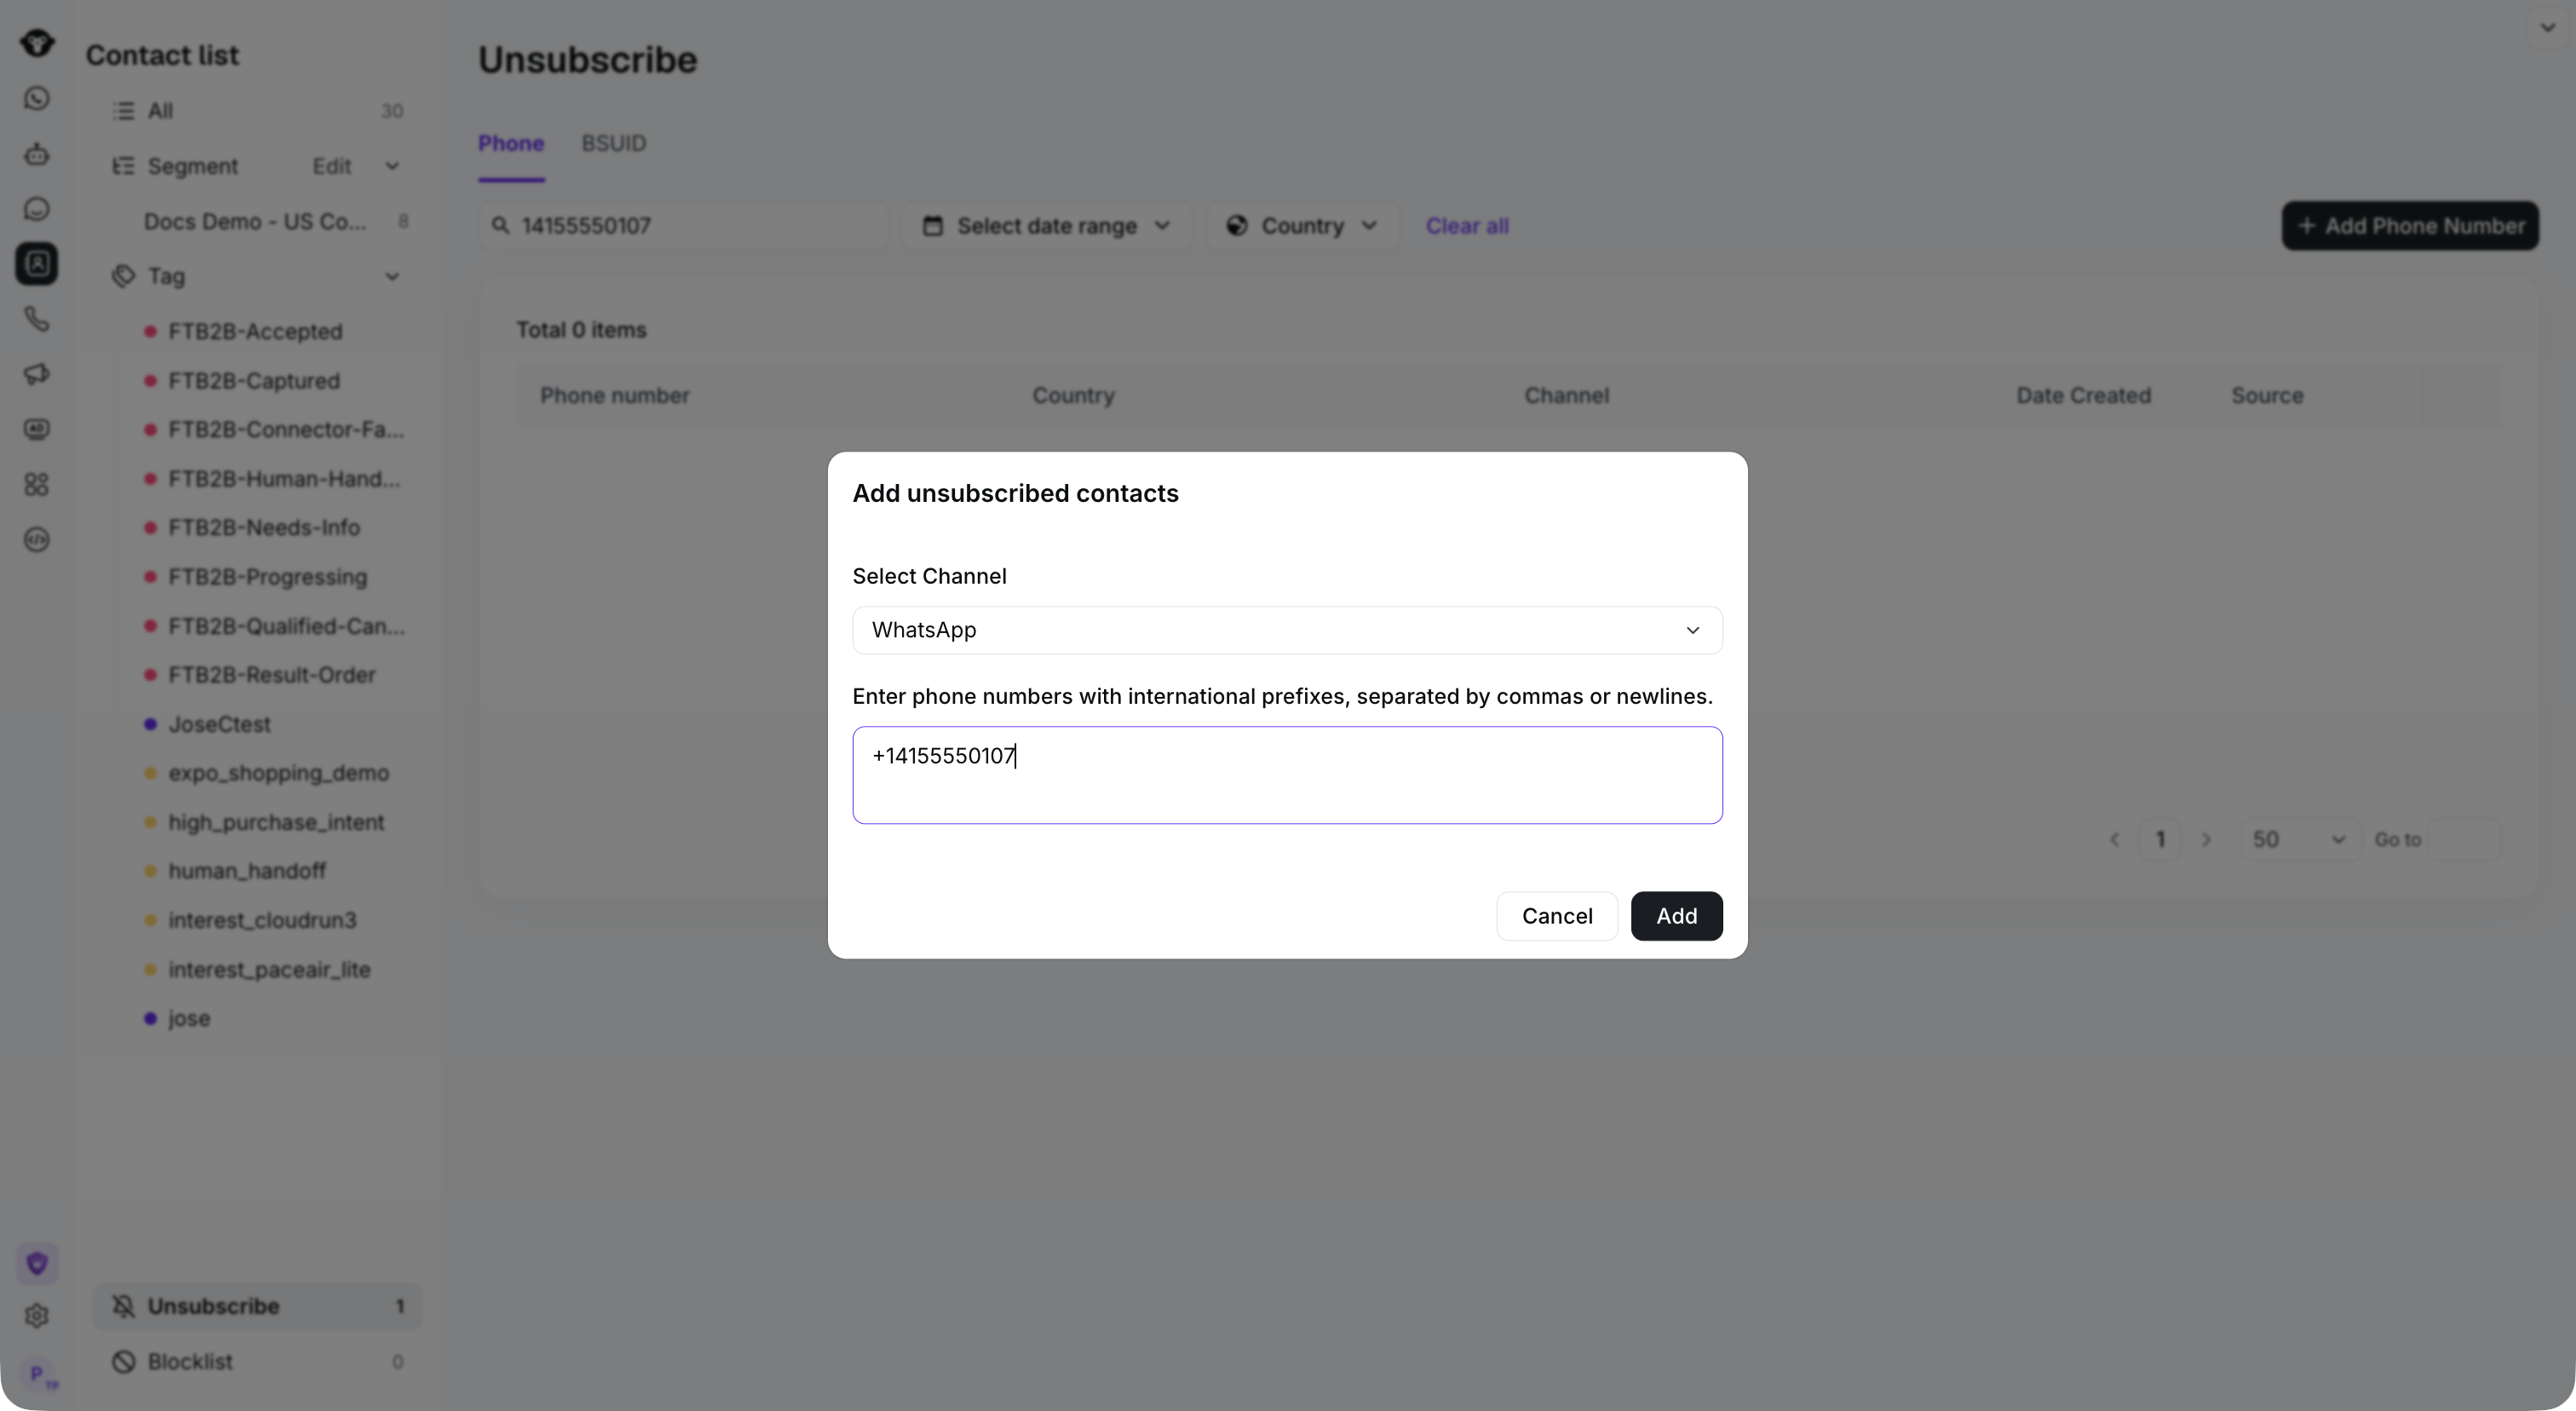
#### Add by phone number
1. Go to **Contact > Unsubscribe**.
2. Select the **Phone** tab.
3. Click **Add Phone Number**.
4. Select the channel.
5. Enter one or more phone numbers with international prefixes. Separate multiple numbers with commas or new lines.
6. Click **Add**.
 #### Add by BSUID
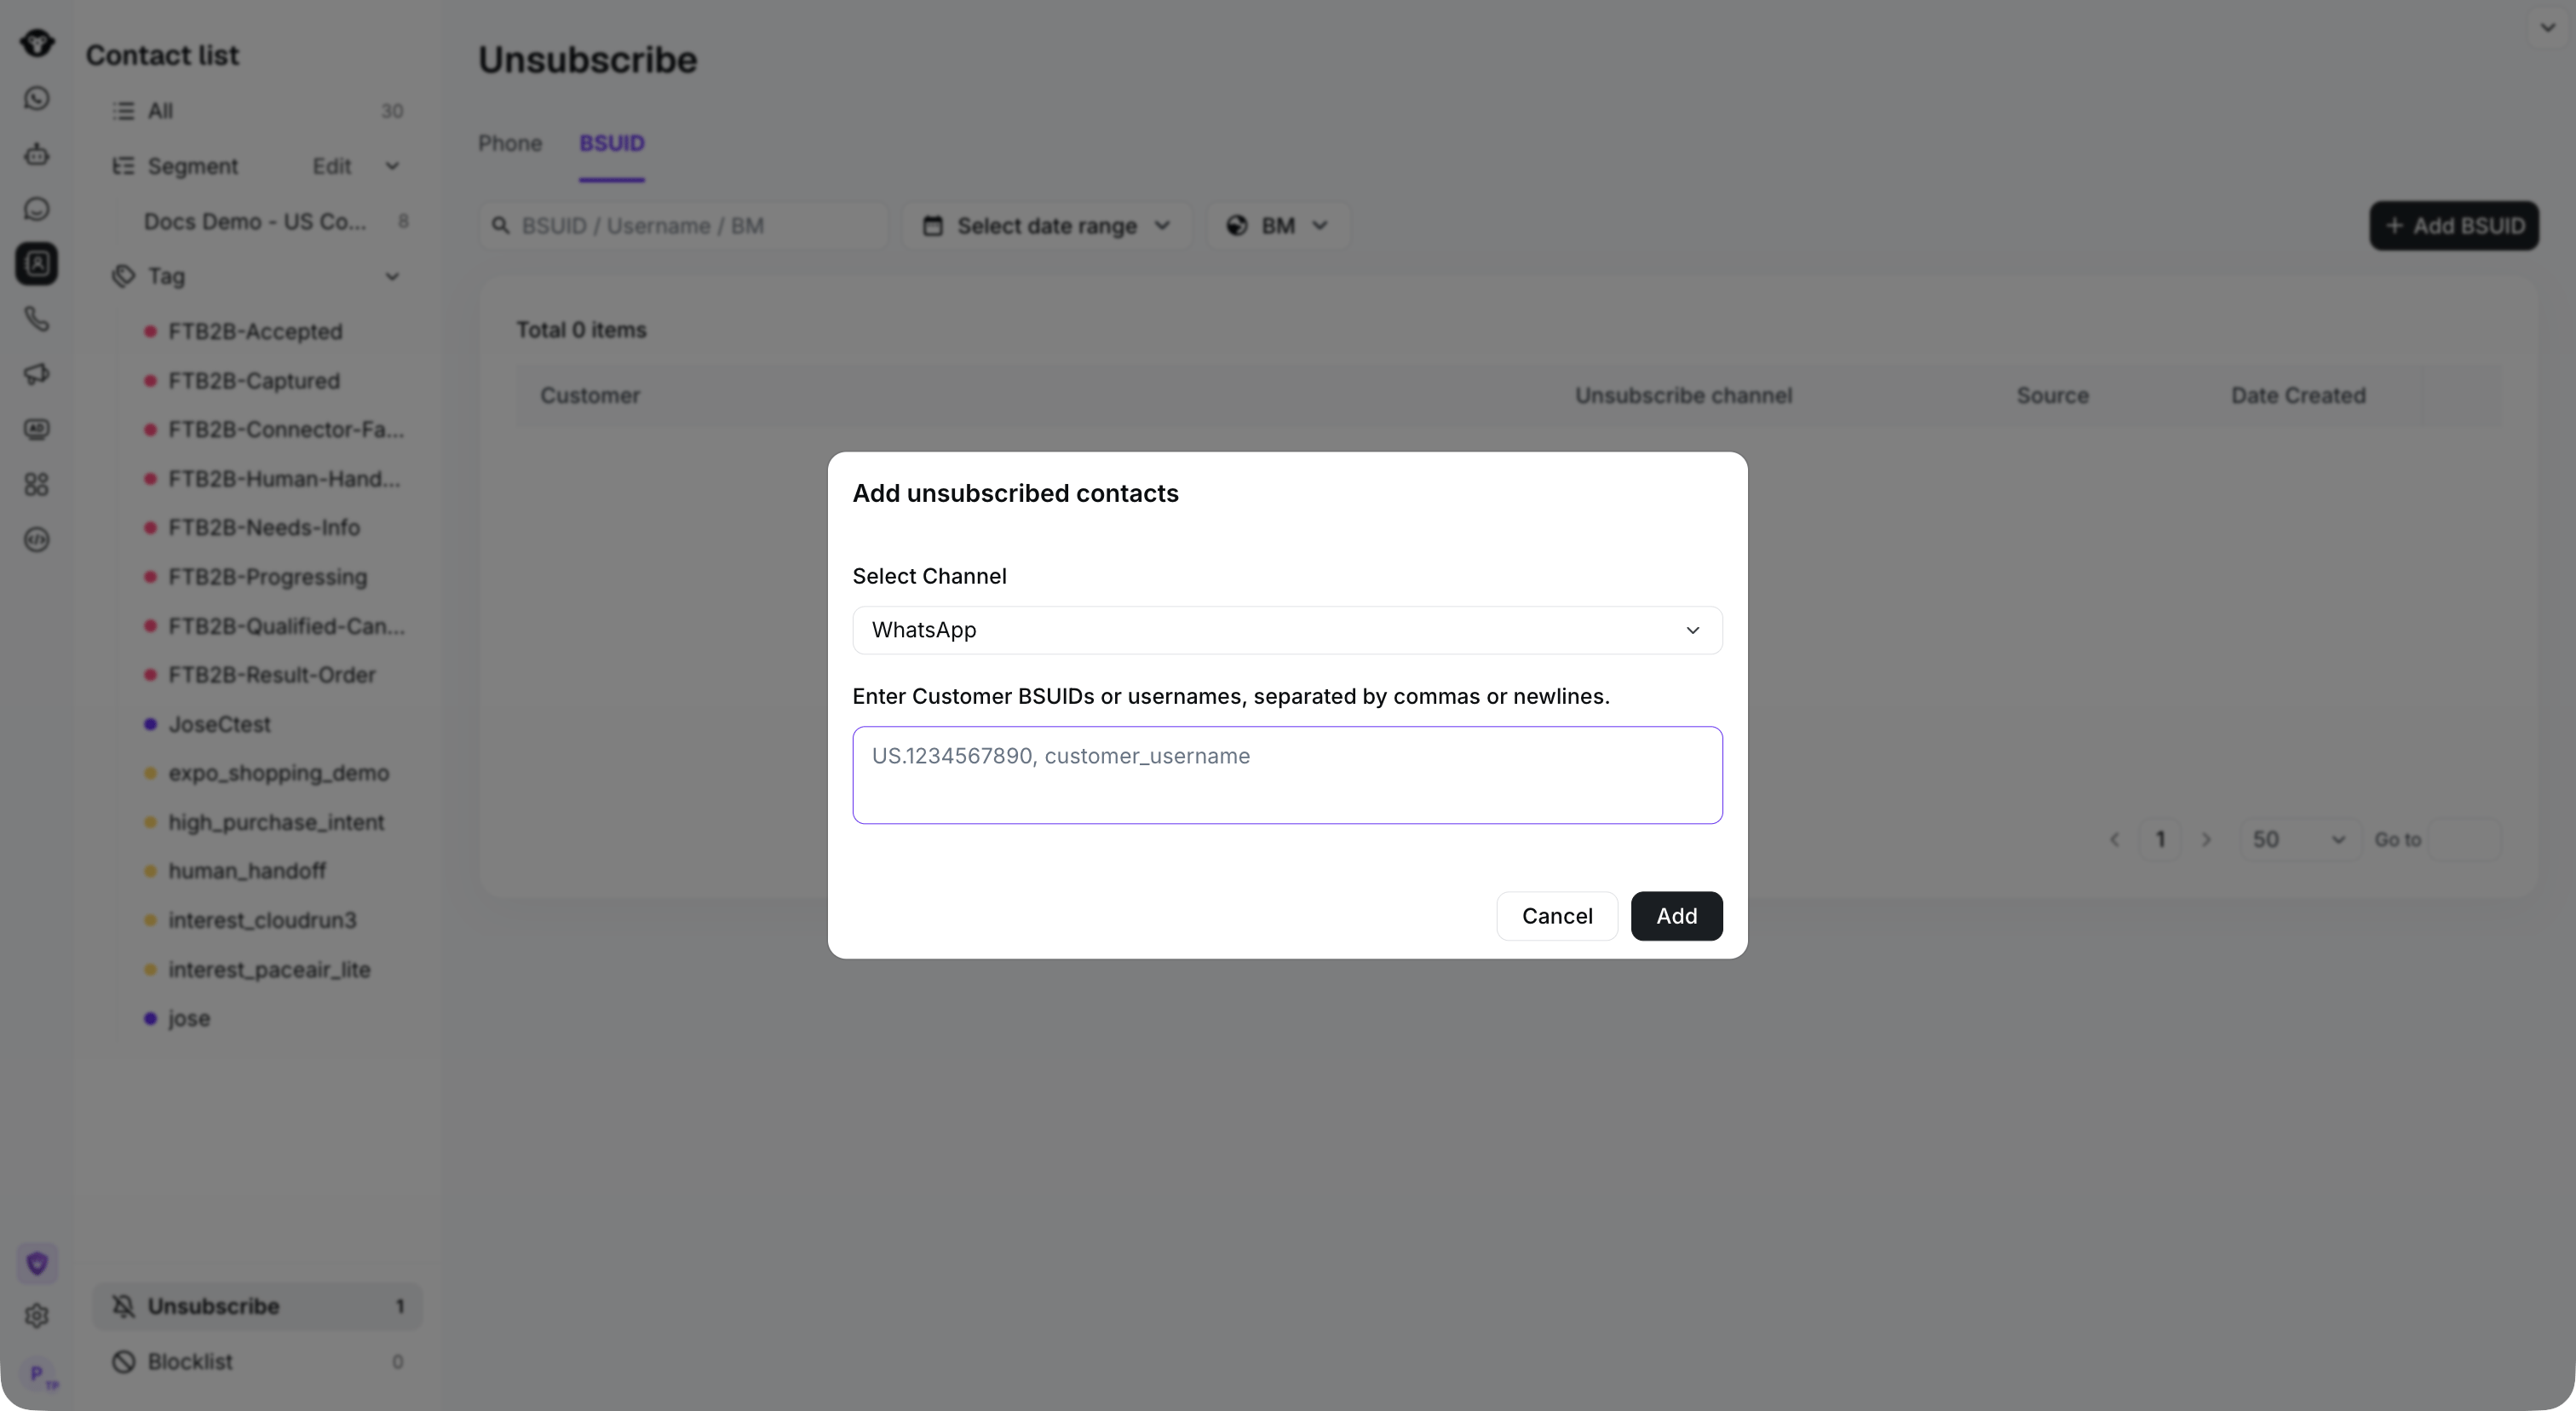
1. Go to **Contact > Unsubscribe**.
2. Select the **BSUID** tab.
3. Click **Add BSUID**.
4. Enter the required BSUID information.
5. Click **Add**.
#### Add by BSUID
1. Go to **Contact > Unsubscribe**.
2. Select the **BSUID** tab.
3. Click **Add BSUID**.
4. Enter the required BSUID information.
5. Click **Add**.
 After the records are added, they appear in the corresponding Phone or BSUID list.
### 2. Add users through the API
Use the YCloud Unsubscriber API to add a phone number or supported user identifier programmatically. This is suitable for synchronizing consent preferences from your website, CRM, or another internal system.
See [Create an unsubscriber](https://docs.ycloud.com/reference/unsubscriber-create) for the request format and supported parameters.
### 3. Add users through an AI Agent
An AI Agent can add a customer to the Unsubscribe List when it identifies and confirms an unsubscribe request during a conversation.
Configure the appropriate unsubscribe behavior under the AI Agent's **Actions**. See [Create and Configure an AI Agent](/en/documentation/agents/ai-agent/how-to-create-and-configure-an-ai-agent#actions) for information about configuring actions.
Before adding a customer automatically, design the Agent to confirm the customer's intent. This helps prevent accidental opt-outs.
## Remove an unsubscribed user
To allow a user to receive messages again, go to **Contact > Unsubscribe**, find the Phone or BSUID record, and select **Delete** from the Action column.
Removing a record only removes it from YCloud's Unsubscribe List. Make sure the change is consistent with the user's consent and your organization's compliance requirements.
## Export the Unsubscribe List
Go to **Contact > Unsubscribe** and click **Export** to download the list for review or synchronization with another system.
This documentation is built and hosted on [Mintlify](https://mintlify.com), a developer documentation platform.
After the records are added, they appear in the corresponding Phone or BSUID list.
### 2. Add users through the API
Use the YCloud Unsubscriber API to add a phone number or supported user identifier programmatically. This is suitable for synchronizing consent preferences from your website, CRM, or another internal system.
See [Create an unsubscriber](https://docs.ycloud.com/reference/unsubscriber-create) for the request format and supported parameters.
### 3. Add users through an AI Agent
An AI Agent can add a customer to the Unsubscribe List when it identifies and confirms an unsubscribe request during a conversation.
Configure the appropriate unsubscribe behavior under the AI Agent's **Actions**. See [Create and Configure an AI Agent](/en/documentation/agents/ai-agent/how-to-create-and-configure-an-ai-agent#actions) for information about configuring actions.
Before adding a customer automatically, design the Agent to confirm the customer's intent. This helps prevent accidental opt-outs.
## Remove an unsubscribed user
To allow a user to receive messages again, go to **Contact > Unsubscribe**, find the Phone or BSUID record, and select **Delete** from the Action column.
Removing a record only removes it from YCloud's Unsubscribe List. Make sure the change is consistent with the user's consent and your organization's compliance requirements.
## Export the Unsubscribe List
Go to **Contact > Unsubscribe** and click **Export** to download the list for review or synchronization with another system.
This documentation is built and hosted on [Mintlify](https://mintlify.com), a developer documentation platform.