 ## Personal account settings
### Personal preferences
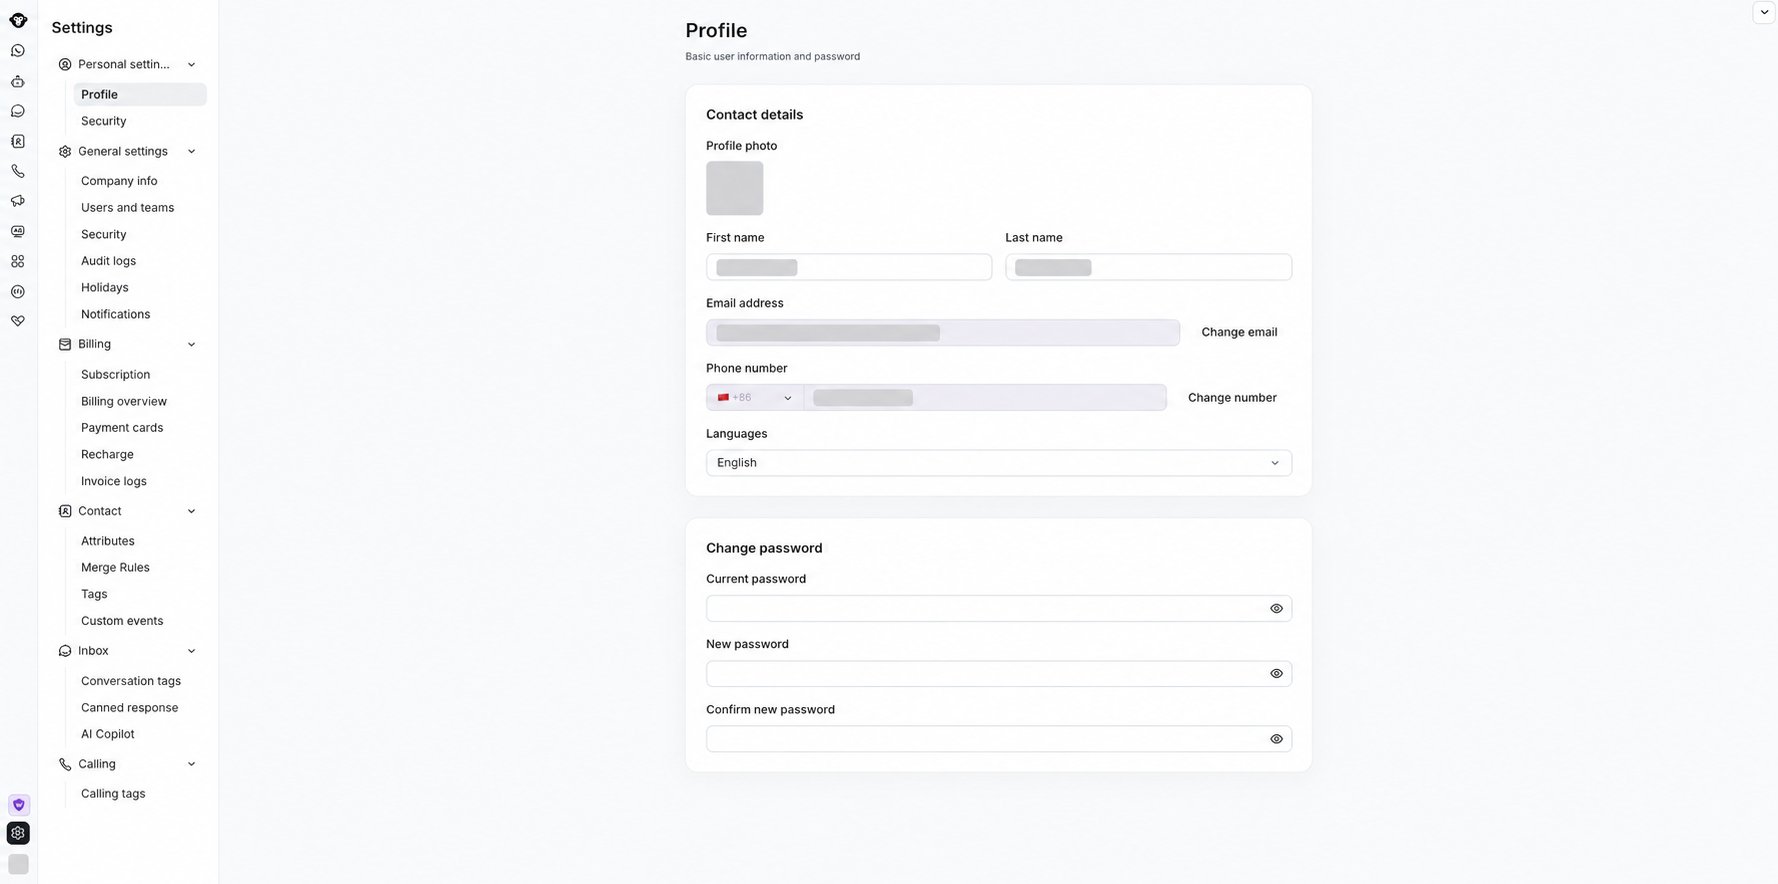
Find Account (the avatar in the lower-left corner) and click **Edit** to go to Account > [Profile](https://www.ycloud.com/console/#/app/userSettings/myProfile)
Upload an avatar. Recommended size: 640×640, under 5 MB, and fill in the basic information.
PS: This information is only used for internal management and identification. Customers can only see the avatar of the corresponding WhatsApp number.
## Personal account settings
### Personal preferences
Find Account (the avatar in the lower-left corner) and click **Edit** to go to Account > [Profile](https://www.ycloud.com/console/#/app/userSettings/myProfile)
Upload an avatar. Recommended size: 640×640, under 5 MB, and fill in the basic information.
PS: This information is only used for internal management and identification. Customers can only see the avatar of the corresponding WhatsApp number.
 ### Notification preferences
Set the scenarios that trigger inbox notifications: Inbox - Settings - Notifications
* Set when sound alerts are triggered
* Set when browser pop-up alerts are triggered (browser notification permission must be enabled)
### Notification preferences
Set the scenarios that trigger inbox notifications: Inbox - Settings - Notifications
* Set when sound alerts are triggered
* Set when browser pop-up alerts are triggered (browser notification permission must be enabled)
 ## Receive customers
### Get familiar with the Inbox chat interface
Please refer to the documentation.
### Start chatting
#### Personal status settings
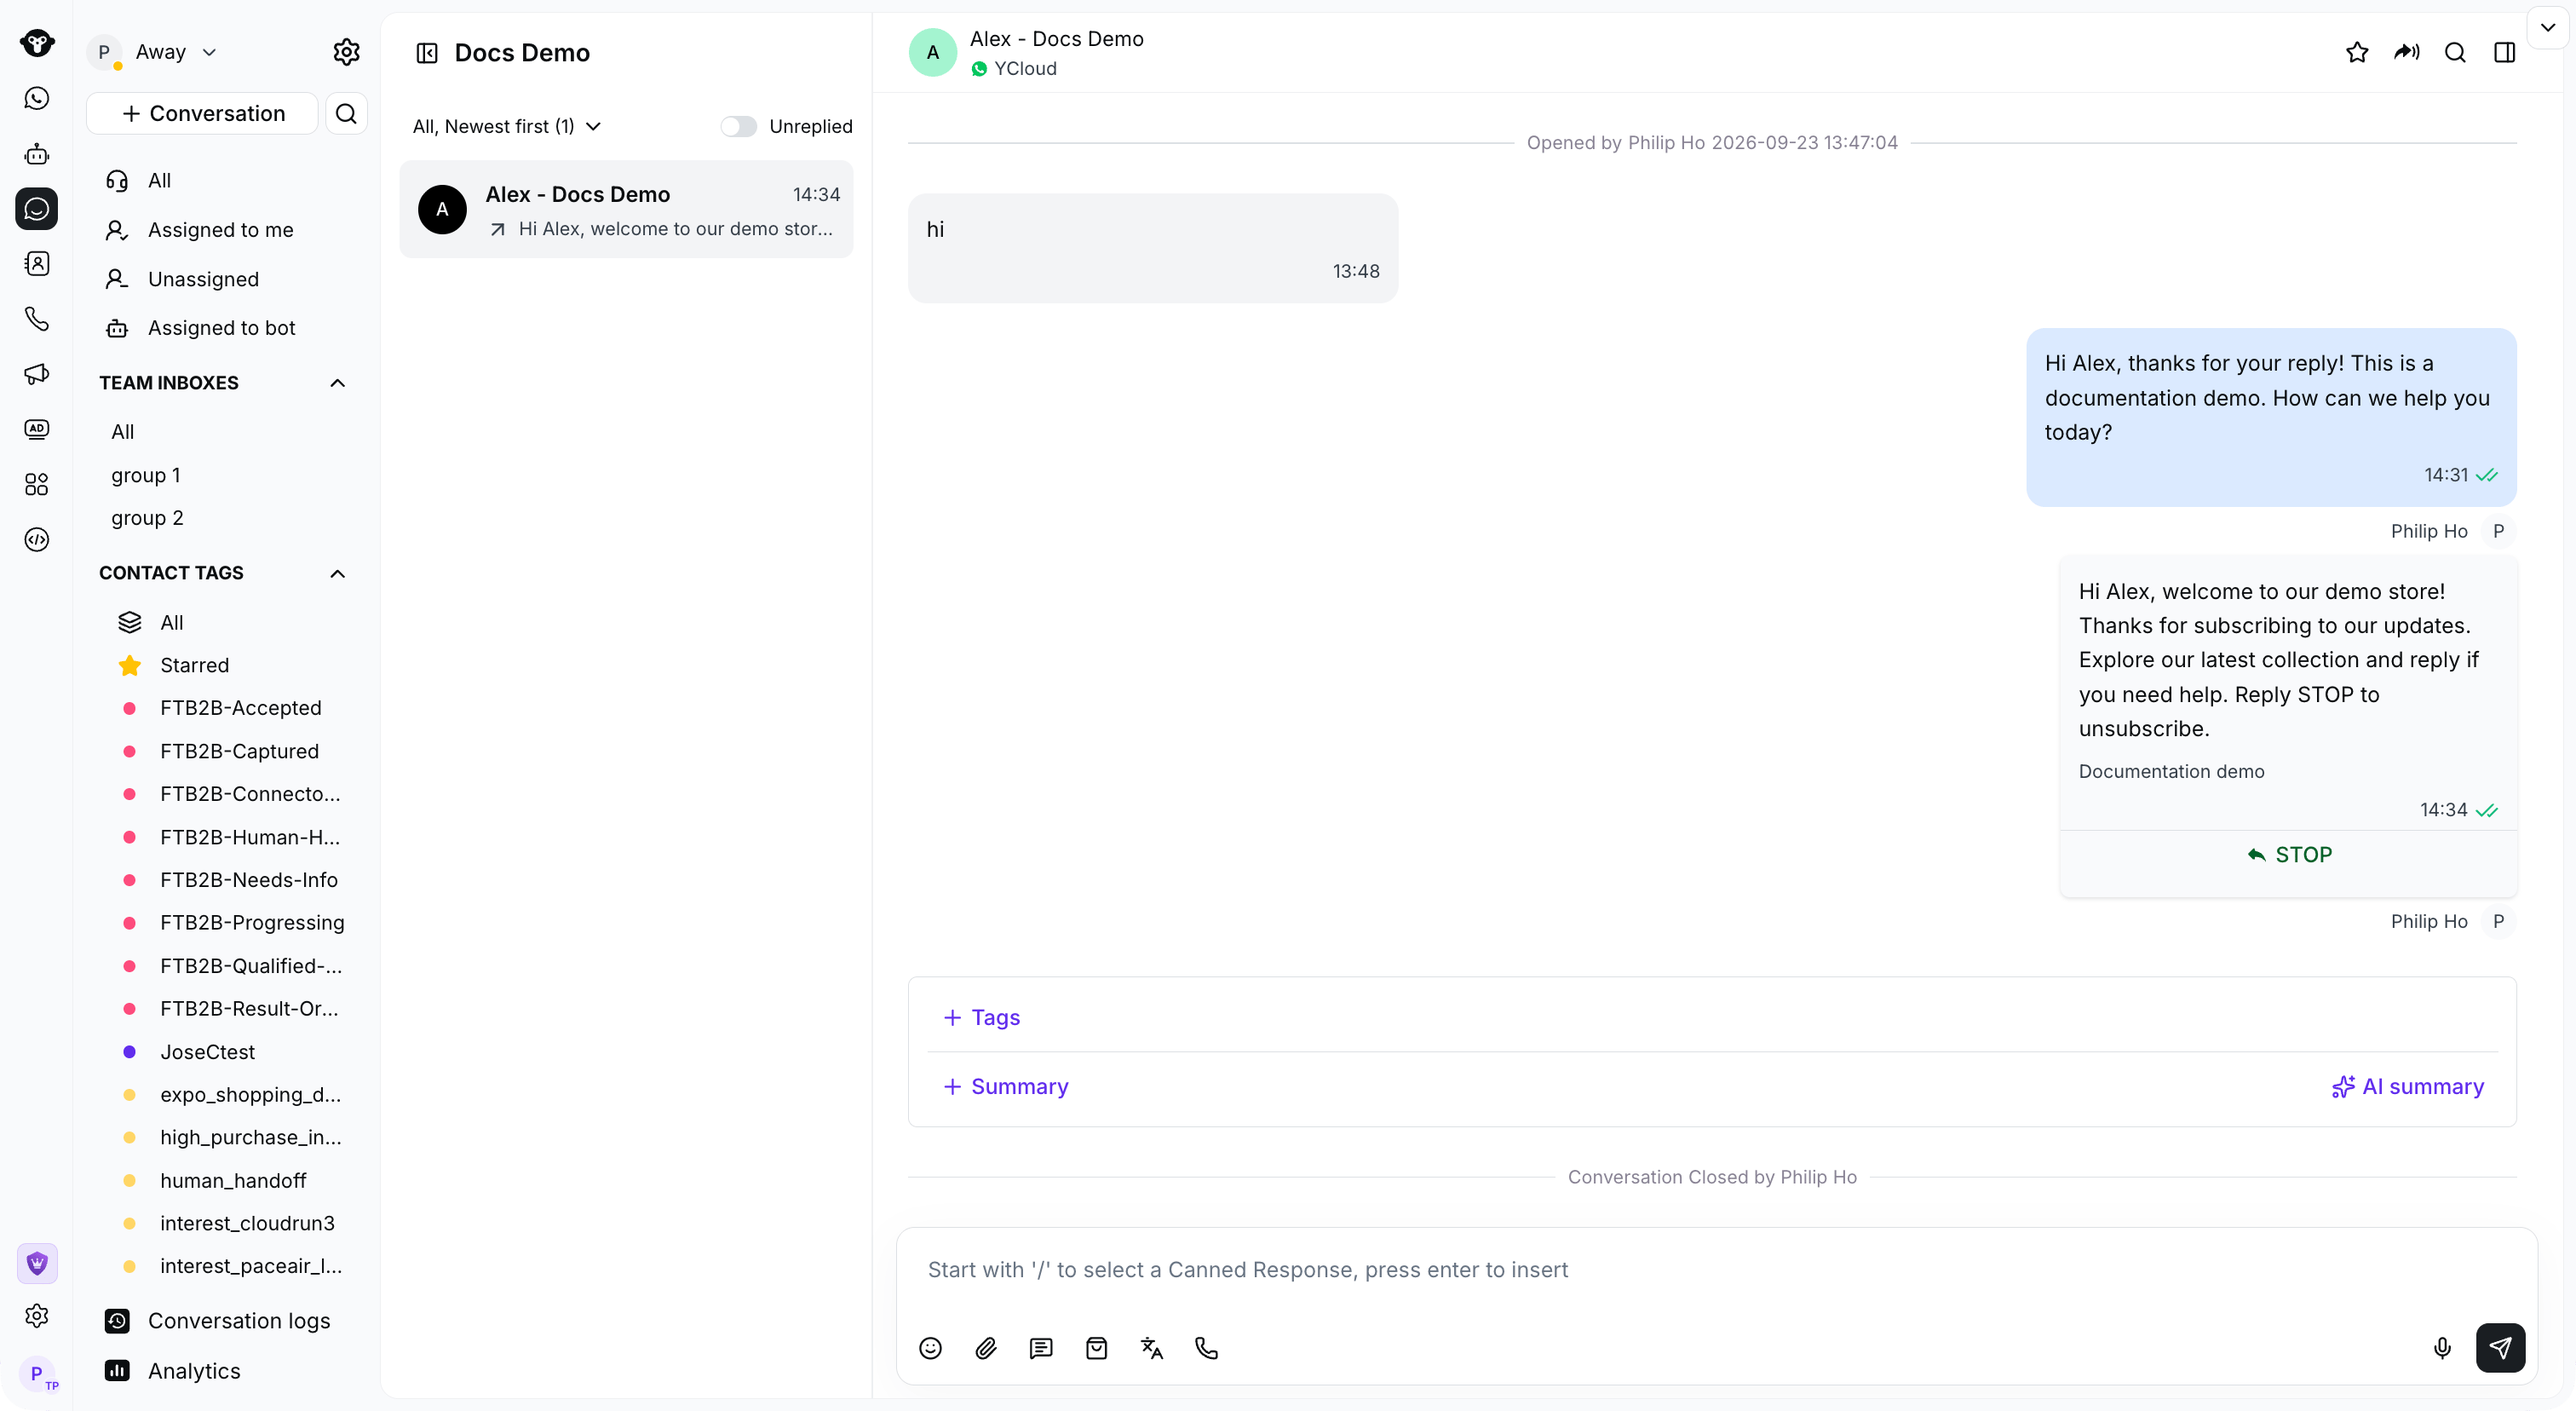
After logging in, the status is **Away**. Change the status to **Available**, and new incoming conversations will be automatically assigned.
Customer service status is the basis the system uses to determine whether conversations are automatically assigned.
## Receive customers
### Get familiar with the Inbox chat interface
Please refer to the documentation.
### Start chatting
#### Personal status settings
After logging in, the status is **Away**. Change the status to **Available**, and new incoming conversations will be automatically assigned.
Customer service status is the basis the system uses to determine whether conversations are automatically assigned.
| Name | Display | Explanation |
|---|---|---|
| Away | Away: when the assignment rule is set to "Only assign to online agents", new conversations will not be automatically assigned to away agents; they can still be manually transferred new conversations | |
| Available | Available: new conversations will be automatically assigned; conversations can be manually transferred | |
| Offline | Not logged in to the system: new conversations are assigned only when the assignment rule is Owner priority. Conversations can be manually transferred |
 #### Start a new chat
Please refer to the documentation: Start a new chat
### In chat
#### Use the chat box
Please refer to the documentation: Inbox chat area
#### Edit customer information
1. When a customer initiates a conversation, the customer-related information will be recorded in Contact. During chat, you can view the user's information. The path is:
* Click the user's name area
* Click the expand button on the right
1. Record useful information, add tags for the customer, and modify attributes.
* Add tags: find the Tags section, then click the **➕** button to select an existing tag
* Modify attributes: click the text after the attribute to change the relevant attribute. Click a blank area with the mouse to save (you can also press Enter on the keyboard to save).
This change will be synchronized to the Contact list.
1. Star important customers
* Add a star: click the star icon to light up the star for the user. The user can then be quickly filtered in the Tags category under **Starred**
* Remove a star: click the star icon again. The star changes from yellow to colorless, which means the star has been removed
### End your chat
#### Close the conversation
Click the **Close** button next to the user's name at the top of the conversation area to end the conversation. The conversation status changes to **Closed**.
> **Tip**
Please note: If you have already set up an automatic reply in AI Agent, you still need to click the transfer button to transfer the conversation to a human agent. Otherwise, even if a human agent replies first, AI Agent's automatic reply will still be triggered.
#### Transfer a conversation
Click the **Transfer** button next to the user's name at the top of the conversation area, then select the person you want to transfer to from the dropdown list. You can enter a name to search quickly.
This documentation is built and hosted on [Mintlify](https://mintlify.com), a developer documentation platform.
#### Start a new chat
Please refer to the documentation: Start a new chat
### In chat
#### Use the chat box
Please refer to the documentation: Inbox chat area
#### Edit customer information
1. When a customer initiates a conversation, the customer-related information will be recorded in Contact. During chat, you can view the user's information. The path is:
* Click the user's name area
* Click the expand button on the right
1. Record useful information, add tags for the customer, and modify attributes.
* Add tags: find the Tags section, then click the **➕** button to select an existing tag
* Modify attributes: click the text after the attribute to change the relevant attribute. Click a blank area with the mouse to save (you can also press Enter on the keyboard to save).
This change will be synchronized to the Contact list.
1. Star important customers
* Add a star: click the star icon to light up the star for the user. The user can then be quickly filtered in the Tags category under **Starred**
* Remove a star: click the star icon again. The star changes from yellow to colorless, which means the star has been removed
### End your chat
#### Close the conversation
Click the **Close** button next to the user's name at the top of the conversation area to end the conversation. The conversation status changes to **Closed**.
> **Tip**
Please note: If you have already set up an automatic reply in AI Agent, you still need to click the transfer button to transfer the conversation to a human agent. Otherwise, even if a human agent replies first, AI Agent's automatic reply will still be triggered.
#### Transfer a conversation
Click the **Transfer** button next to the user's name at the top of the conversation area, then select the person you want to transfer to from the dropdown list. You can enter a name to search quickly.
This documentation is built and hosted on [Mintlify](https://mintlify.com), a developer documentation platform.