> ## Documentation Index
> Fetch the complete documentation index at: https://docs.ycloud.com/llms.txt
> Use this file to discover all available pages before exploring further.
# Trigger
> Define when contacts enter a Journey.
# Trigger
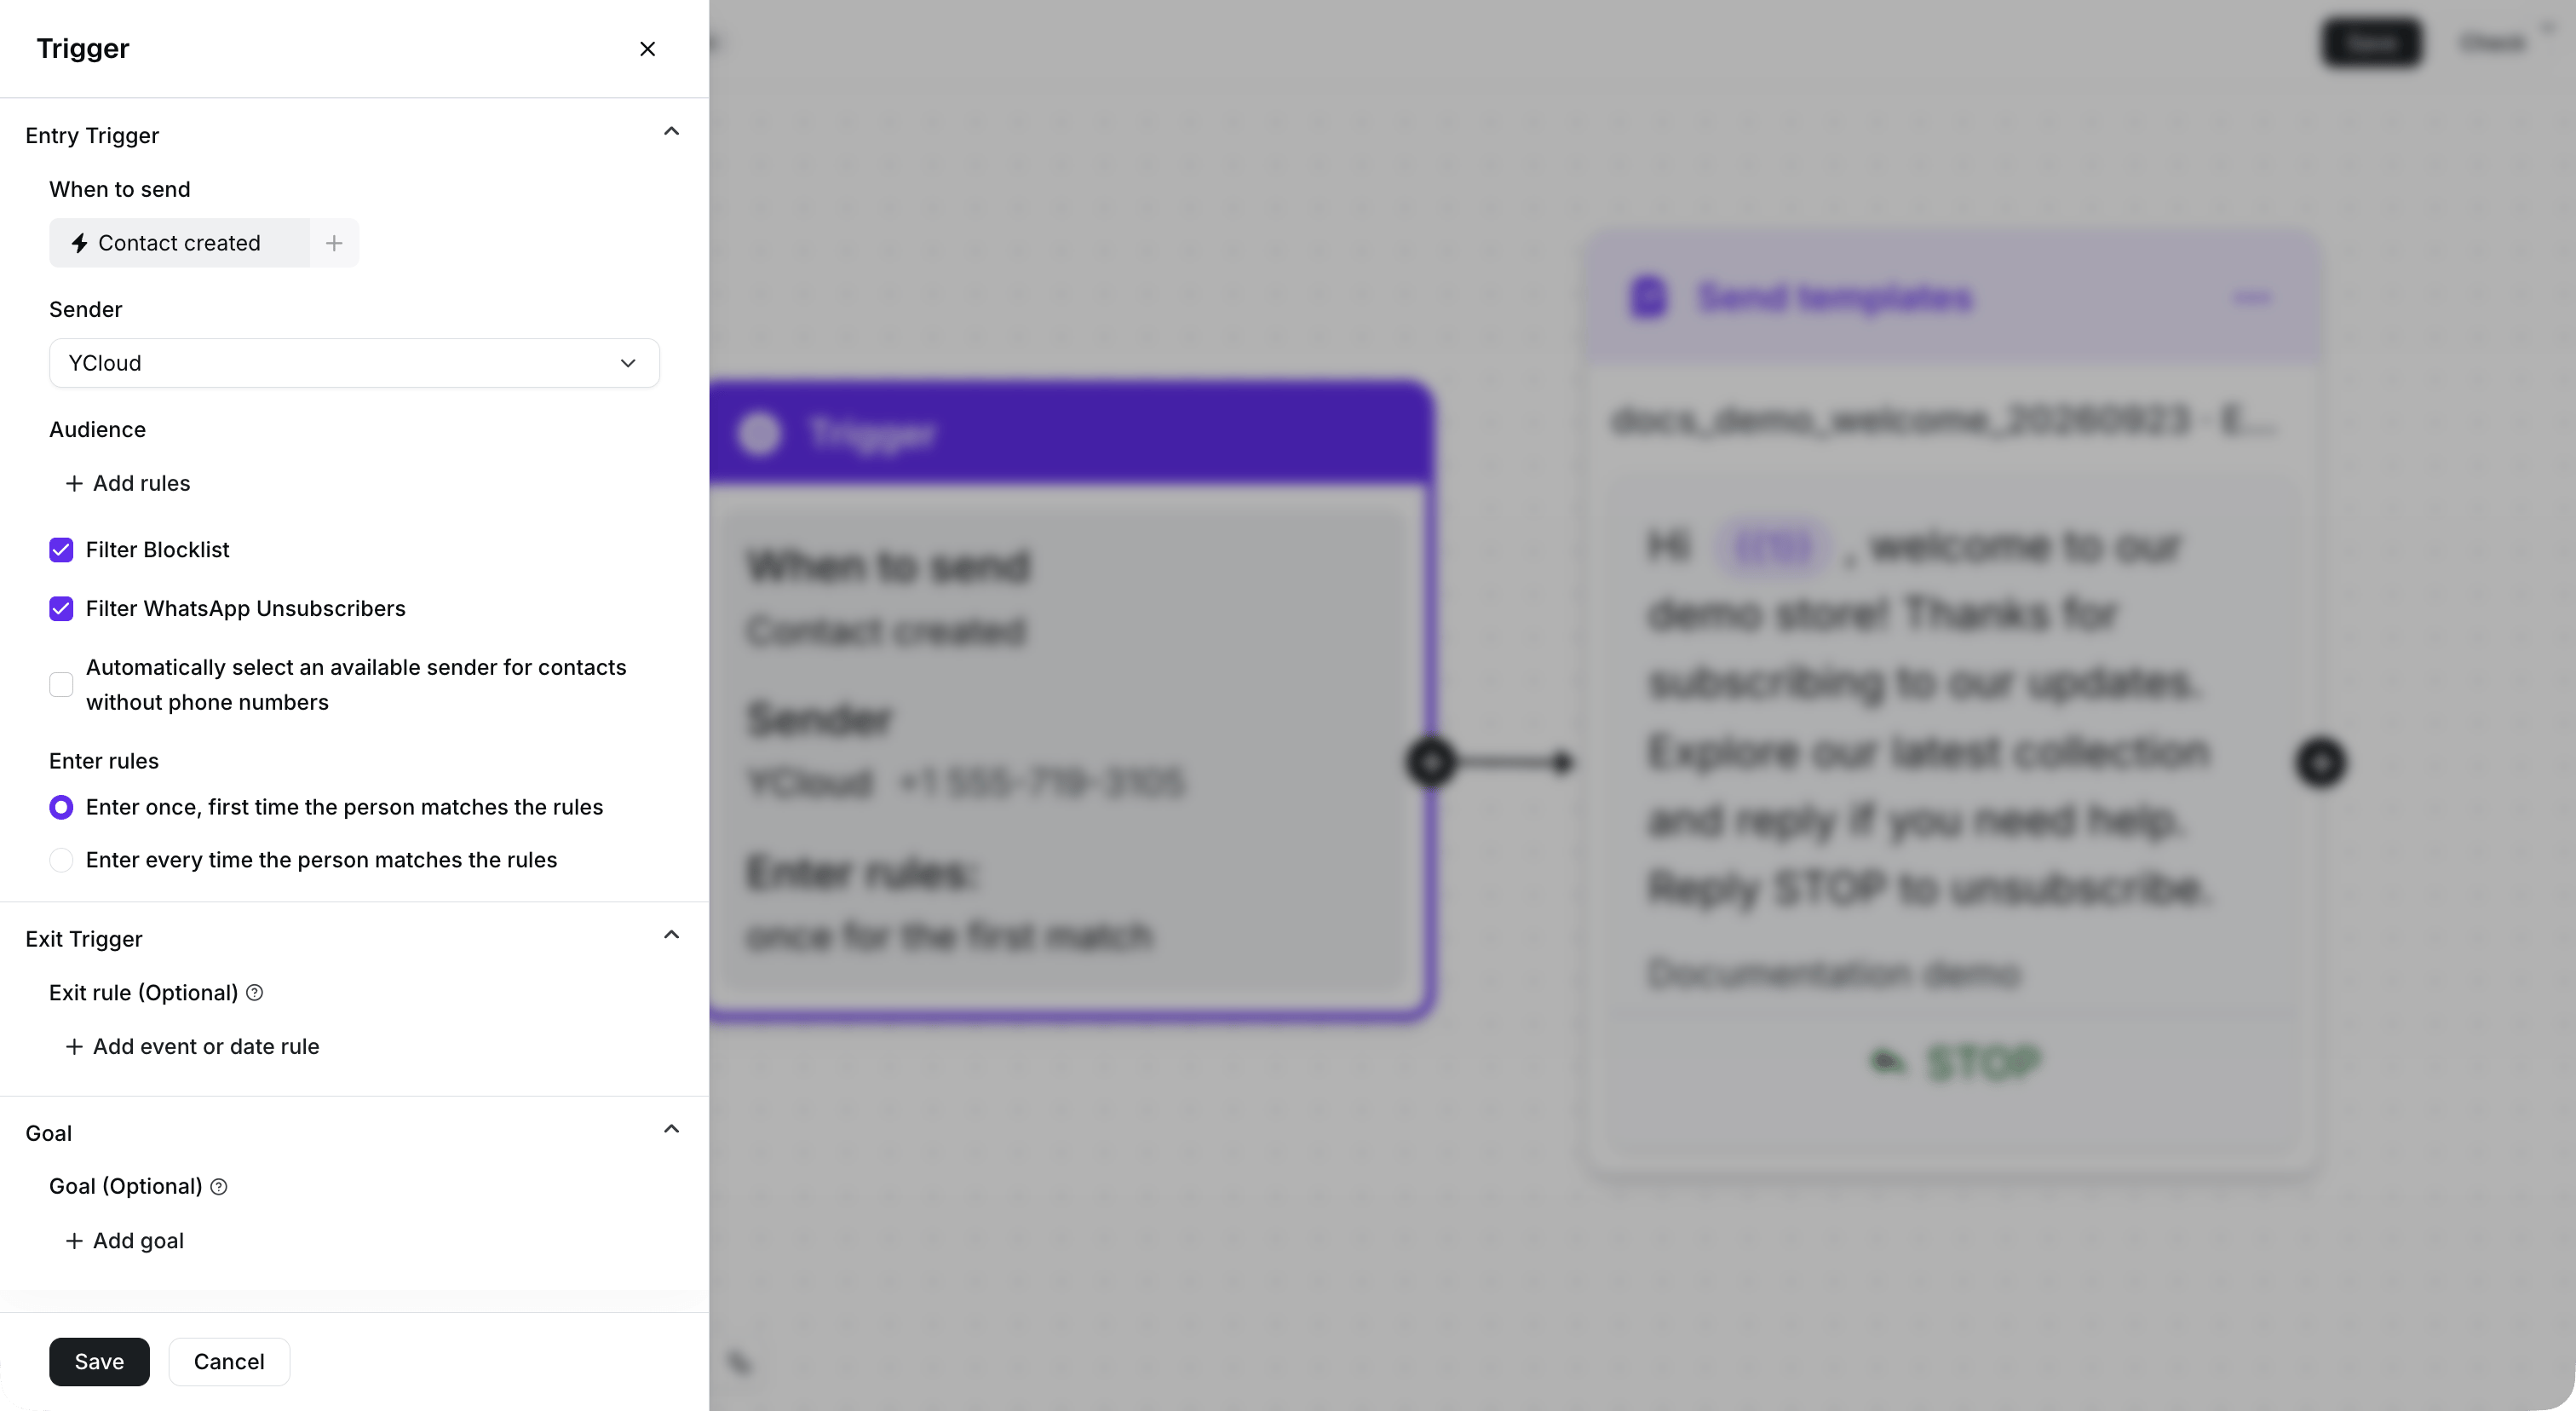
A Trigger defines when a contact enters a Journey. Configure the entry conditions, select the Sender, and choose how often a contact can enter the flow.
## Configure the entry conditions
Under **When to send**, define the conditions that a contact must meet to enter the Journey.
You can optionally add **Audience** conditions to further limit which contacts enter. A contact enters the Journey only when the configured entry conditions and any Audience conditions are met.
## Select a Sender
Select a **Sender** for the Journey. The Sender is required.
The templates you use later in the Journey must be available for the selected Sender's WhatsApp Business Account.
## Configure contact controls
Use the available controls to manage contacts in the Journey:
* **Filter Blocklist** excludes contacts on your blocklist.
* **Filter WhatsApp Unsubscribers** excludes contacts who have unsubscribed from WhatsApp messages.
* **Automatically select an available sender for contacts without phone numbers**: When enabled, YCloud attempts to select an available Sender for eligible contacts without phone numbers.
## Choose an entry rule
Under **Enter rules**, choose how often a contact can enter the Journey:
* **Enter once, first time the person matches the rules**: A contact enters only the first time they meet the conditions.
* **Enter every time the person matches the rules**: A contact can enter again whenever they meet the conditions.
Choose the rule that matches your use case. For example, use the first option for a one-time welcome flow and the second option for a recurring follow-up flow.
 ## Next steps
After you configure the Trigger, add a [Send template](/en/documentation/journey/components-and-features-introduction/send-template) step or another component to continue the flow.
This documentation is built and hosted on [Mintlify](https://mintlify.com), a developer documentation platform.
## Next steps
After you configure the Trigger, add a [Send template](/en/documentation/journey/components-and-features-introduction/send-template) step or another component to continue the flow.
This documentation is built and hosted on [Mintlify](https://mintlify.com), a developer documentation platform.