> ## Documentation Index
> Fetch the complete documentation index at: https://docs.ycloud.com/llms.txt
> Use this file to discover all available pages before exploring further.
# Send order detail & checkout button message
## Create an order detail & checkout template
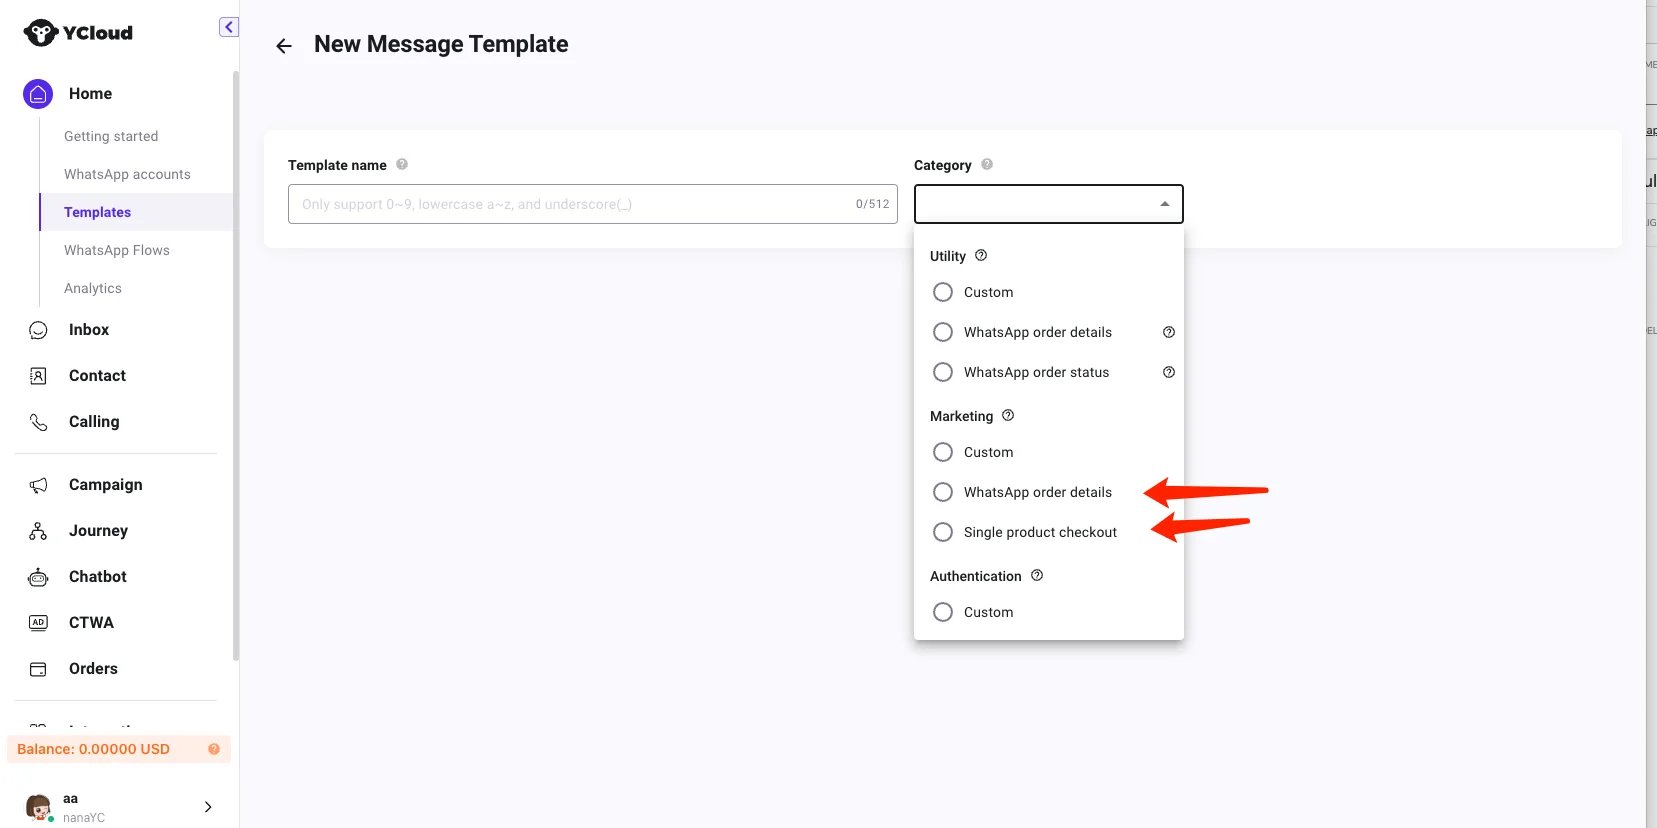
Visit [Templates](https://www.ycloud.com/console/#/app/dashboard/template) page and create a single product checkout template or WhatsApp order details template.
 ##
## Send message
YCloud provides two methods for sending single product and order details messages, as shown below.
### 1. Send via API
Use[ send message api](/api-reference/whatsapp-messages/enqueue-a-message)
Please [click to see the request example](/en/api-reference/guides/whatsapp-platform/send-whatsapp-message)
### 2.Send via Journey
Automatically send the checkout abandon message to your clients.
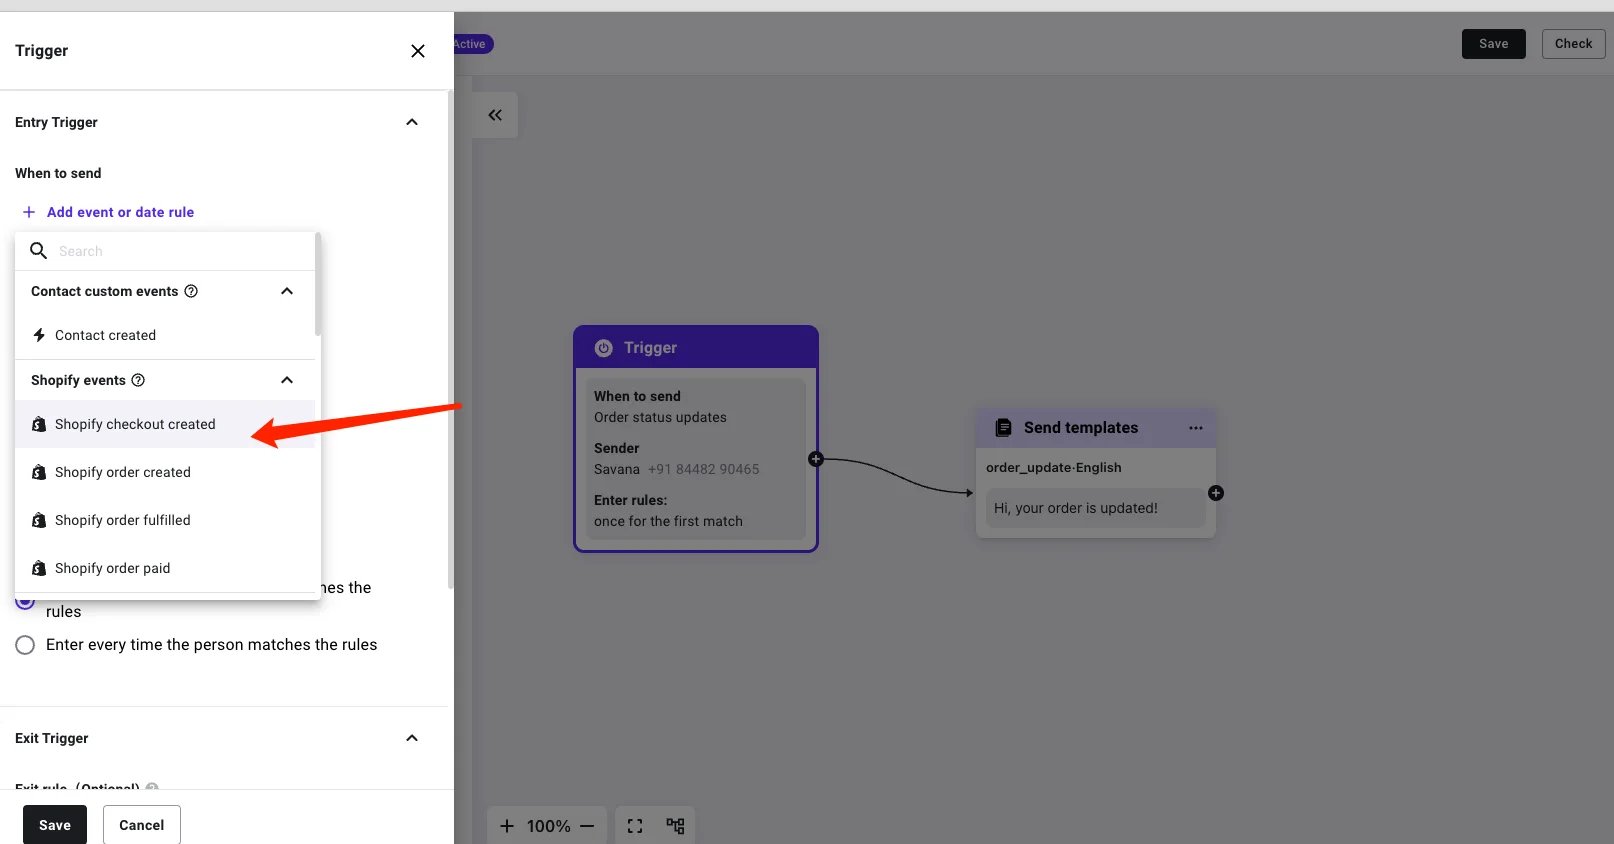
1. Set the trigger when you want to send a detailed message about the order. e.g. when the shopify checkout created.
##
## Send message
YCloud provides two methods for sending single product and order details messages, as shown below.
### 1. Send via API
Use[ send message api](/api-reference/whatsapp-messages/enqueue-a-message)
Please [click to see the request example](/en/api-reference/guides/whatsapp-platform/send-whatsapp-message)
### 2.Send via Journey
Automatically send the checkout abandon message to your clients.
1. Set the trigger when you want to send a detailed message about the order. e.g. when the shopify checkout created.
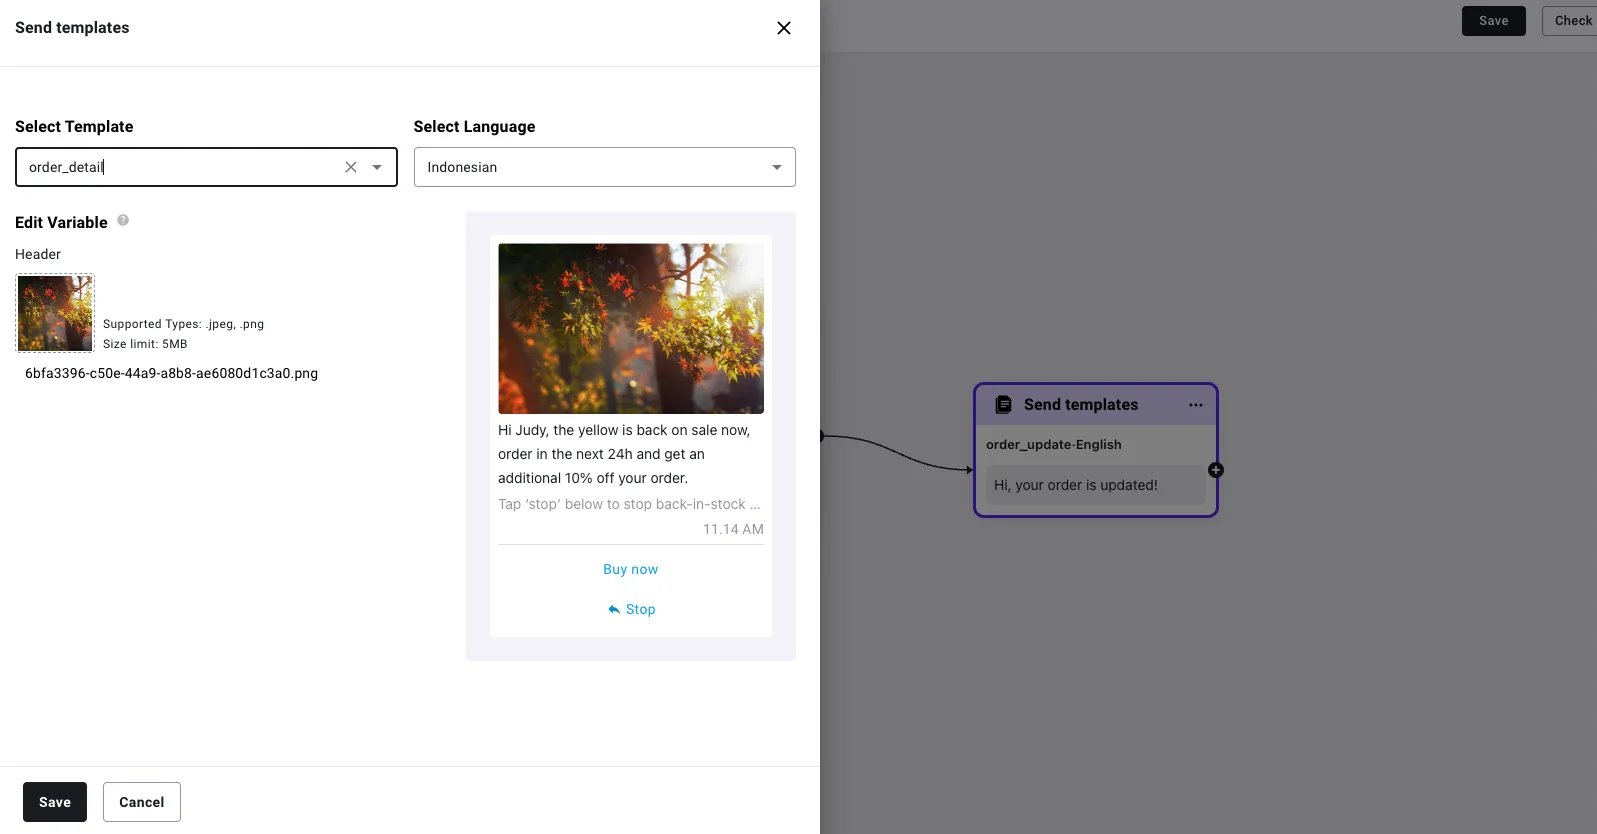
 2. Add a Send templates component and choose the order details template message
 3. Save and activate the Journey
When this event happens, it will automatically trigger this Journey.
## Receive the orders
### 1. Receive the order paid webhook
If you are sending WhatsApp Pay messages via API, you need to use this webhook to listen for user payment events. [Subscribe to this Webhook](/en/api-reference/webhooks/test-webhooks)
You receive updates via webhooks when the status of the user-initiated transaction changes. It occurs when payment status changes to `captured` (when the payment is successfully completed), or `pending` (when the user attempted but yet to receive success transactions signal).
Sample:
```
{
"id": "evt_eEkn26qar3nOB8md",
"type": "whatsapp.payment.updated",
"apiVersion": "v2",
"createTime": "2024-10-10T07:08:00.000Z",
"whatsappPayment": {
"wabaId": "WABA-ID",
"referenceId": "",
"status": "captured | pending",
"transactions": [
{
"id": "",
"type": "billdesk | payu | razorpay | zaakpay",
"status": "pending | success | failed",
"createdTimestamp": 1728544066000,
"updatedTimestamp": 1728544066000,
"amount": {
"value": 21000,
"offset": 100
},
"currency": "INR",
"methodType": "upi | card | wallet | netbanking",
"error": {
"code": "error-code",
"reason": "error-reason"
}
}
]
}
}
```
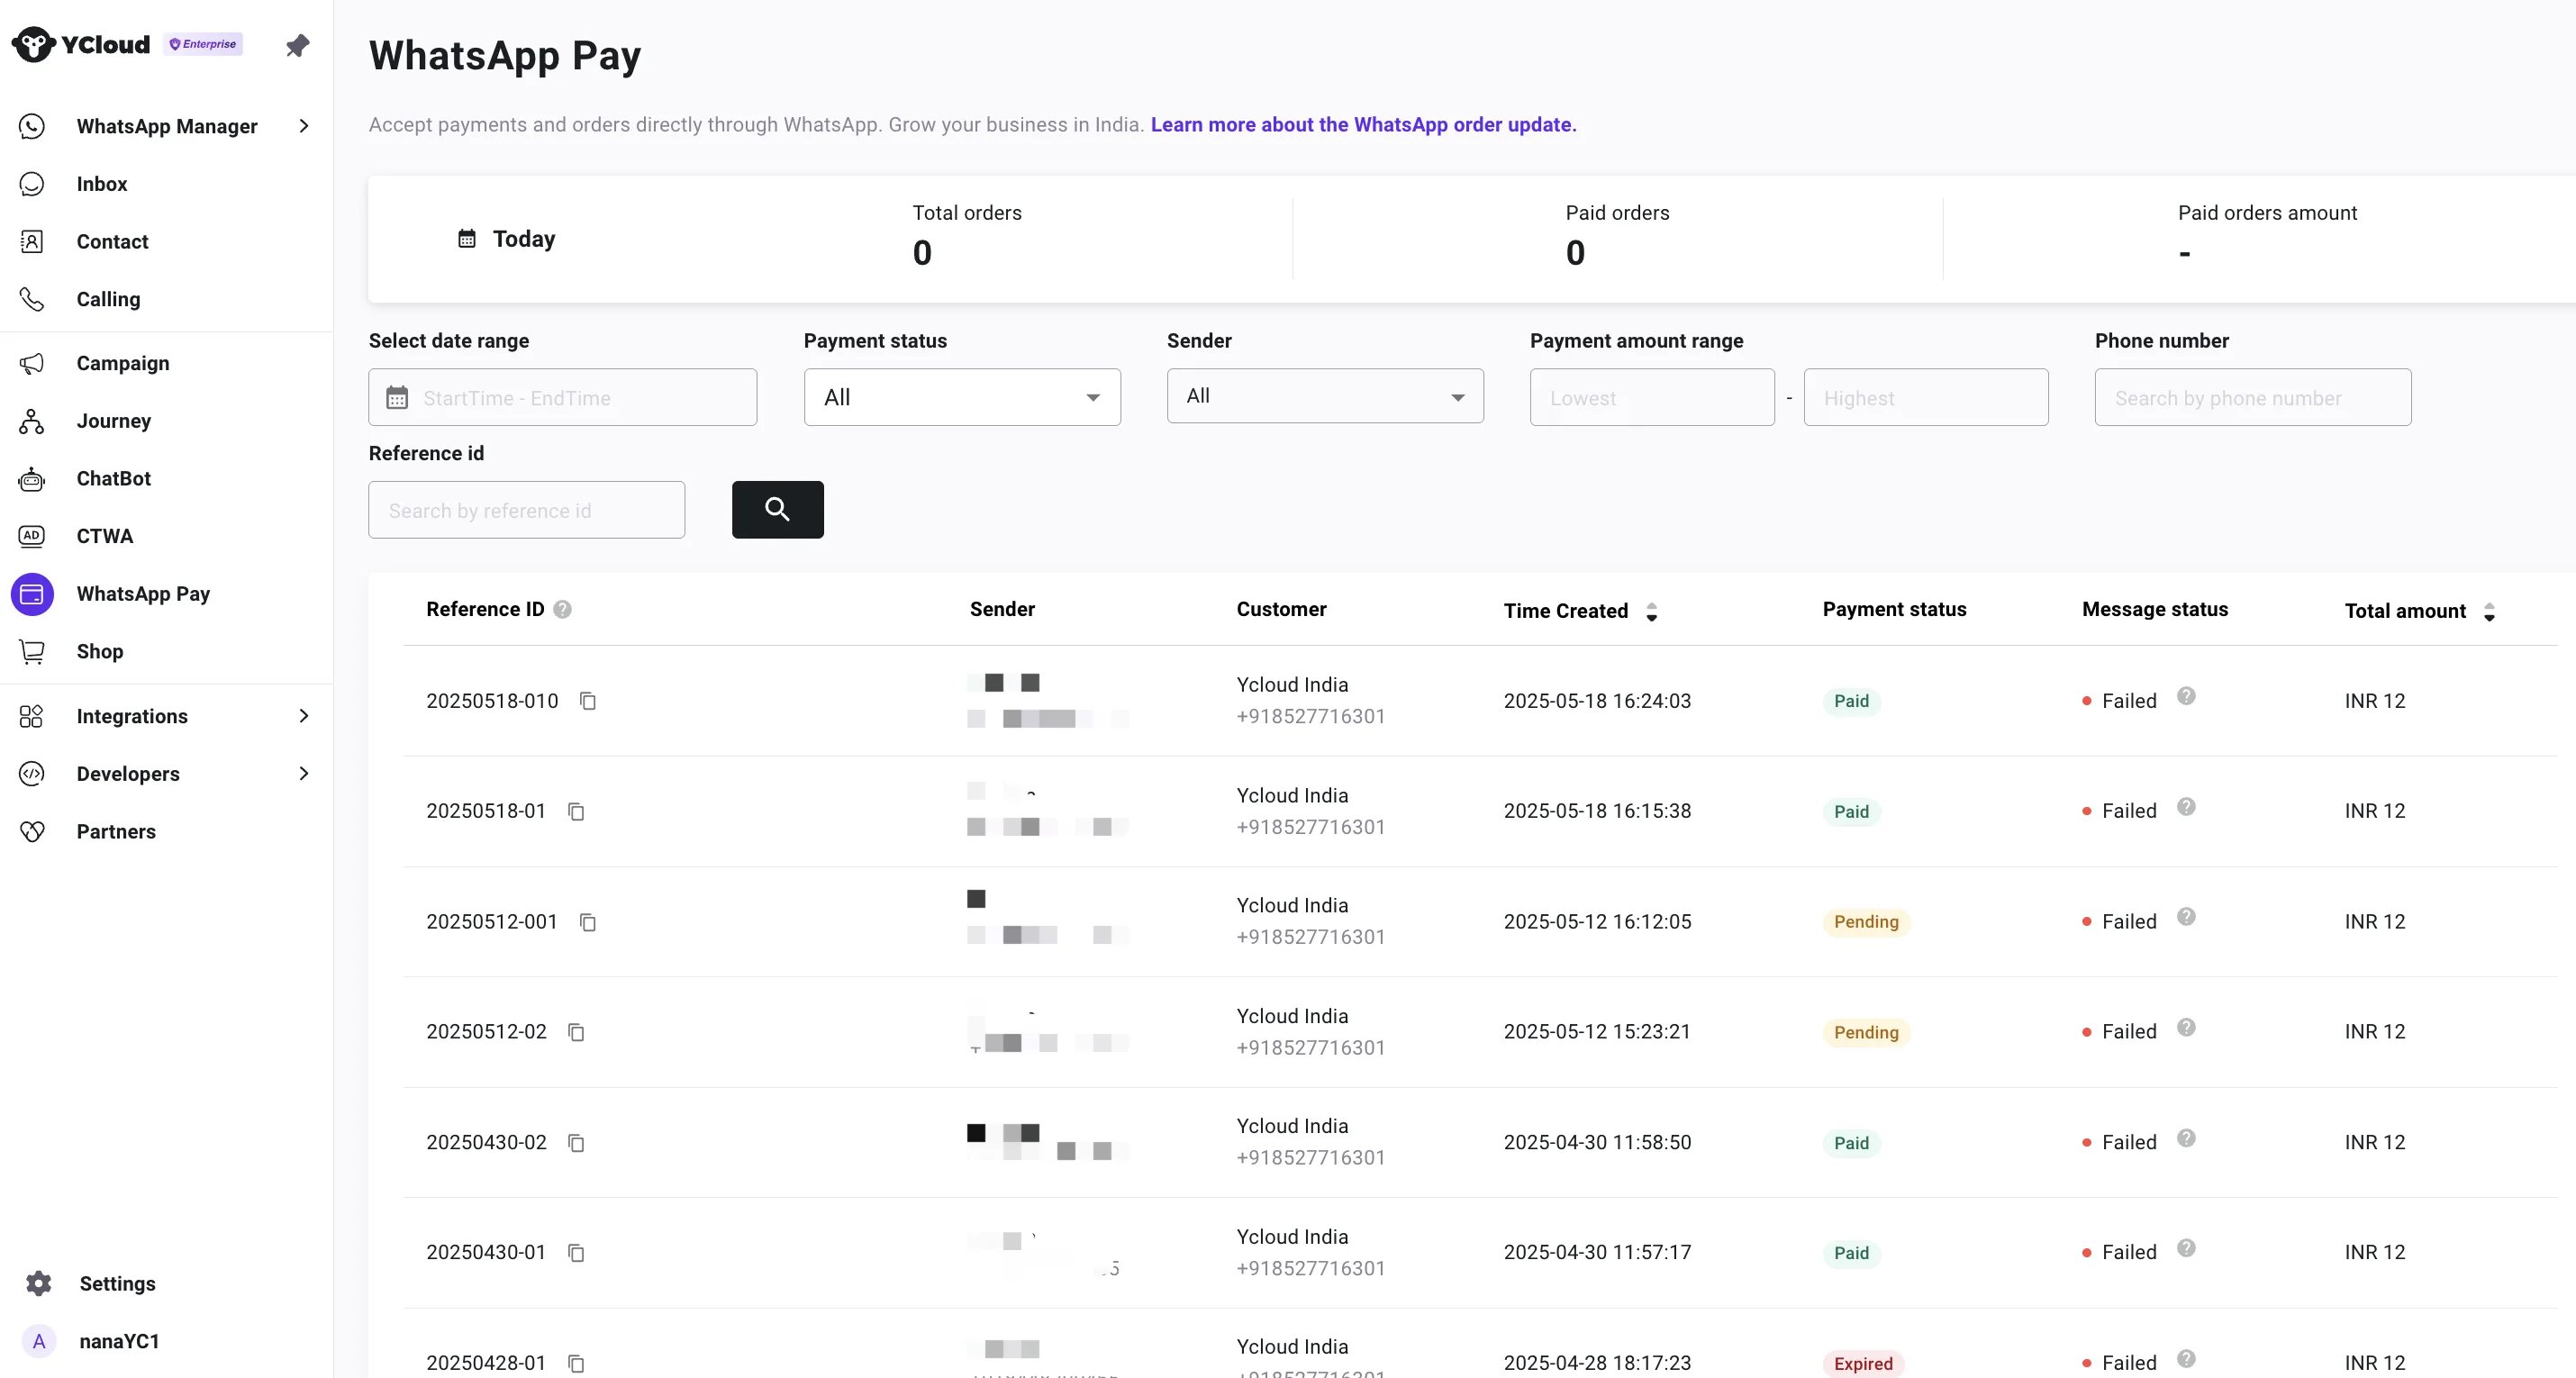
### 2. Check the payment status here on WhatsApp Pay
3. Save and activate the Journey
When this event happens, it will automatically trigger this Journey.
## Receive the orders
### 1. Receive the order paid webhook
If you are sending WhatsApp Pay messages via API, you need to use this webhook to listen for user payment events. [Subscribe to this Webhook](/en/api-reference/webhooks/test-webhooks)
You receive updates via webhooks when the status of the user-initiated transaction changes. It occurs when payment status changes to `captured` (when the payment is successfully completed), or `pending` (when the user attempted but yet to receive success transactions signal).
Sample:
```
{
"id": "evt_eEkn26qar3nOB8md",
"type": "whatsapp.payment.updated",
"apiVersion": "v2",
"createTime": "2024-10-10T07:08:00.000Z",
"whatsappPayment": {
"wabaId": "WABA-ID",
"referenceId": "",
"status": "captured | pending",
"transactions": [
{
"id": "",
"type": "billdesk | payu | razorpay | zaakpay",
"status": "pending | success | failed",
"createdTimestamp": 1728544066000,
"updatedTimestamp": 1728544066000,
"amount": {
"value": 21000,
"offset": 100
},
"currency": "INR",
"methodType": "upi | card | wallet | netbanking",
"error": {
"code": "error-code",
"reason": "error-reason"
}
}
]
}
}
```
### 2. Check the payment status here on WhatsApp Pay
 This documentation is built and hosted on [Mintlify](https://mintlify.com), a developer documentation platform.