> ## Documentation Index
> Fetch the complete documentation index at: https://docs.ycloud.com/llms.txt
> Use this file to discover all available pages before exploring further.
# 创建 WhatsApp 营销活动
> 通过活动向选定受众发送已审核通过的 WhatsApp 模板。
使用活动同时向多个收件人发送已审核通过的 WhatsApp 模板。在开始之前,请在 **Templates** 中创建并提交您的模板。有关说明,请参阅 [Create Template](/zh/documentation/channels/whatsapp-accounts-management/template-management/create-template/index)。
## 1. 设置活动
1. 在 YCloud 中,前往 **Outbound** > **Bulk Campaigns** > **Add Campaign** > **WhatsApp**。
2. 输入活动名称。
3. 选择可用的 WhatsApp 发送方。
4. 选择一个已审核通过的模板,以及所选发送方和活动支持的语言。
5. 选择立即发送活动或安排在稍后发送。
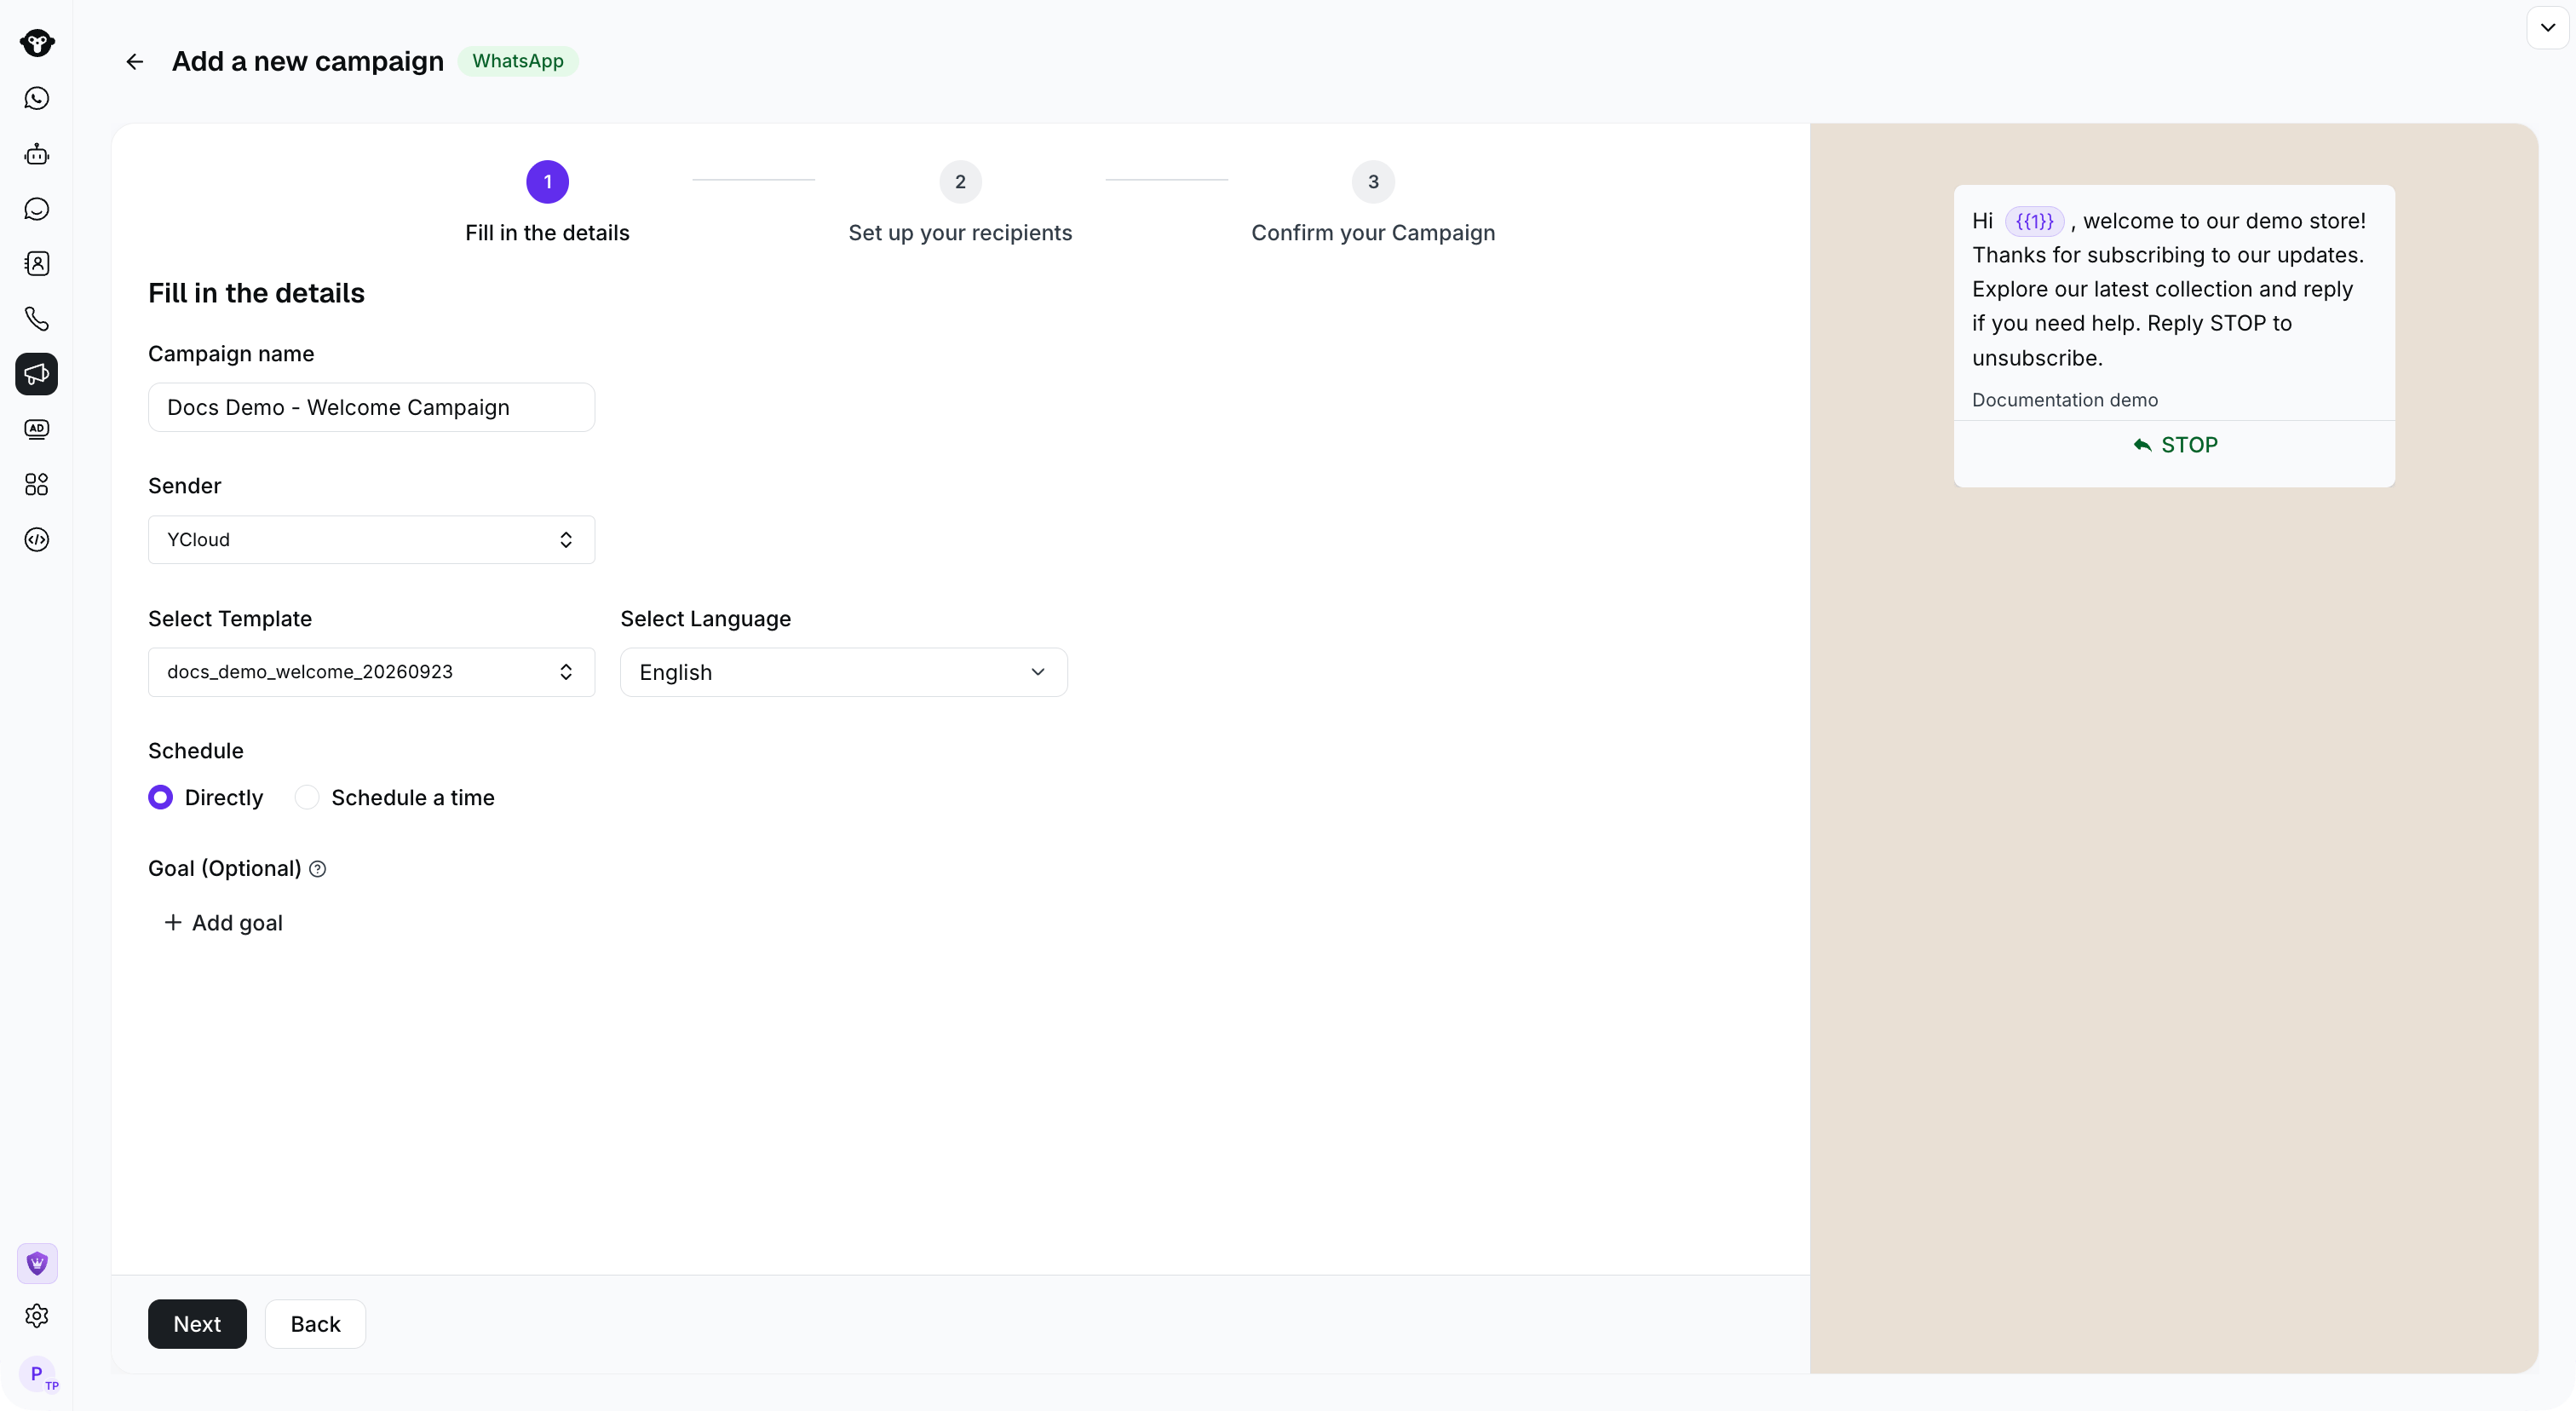 选择 **Next** 以设置收件人。
## 2. 选择收件人
选择以下方法之一。
### 手动输入电话号码
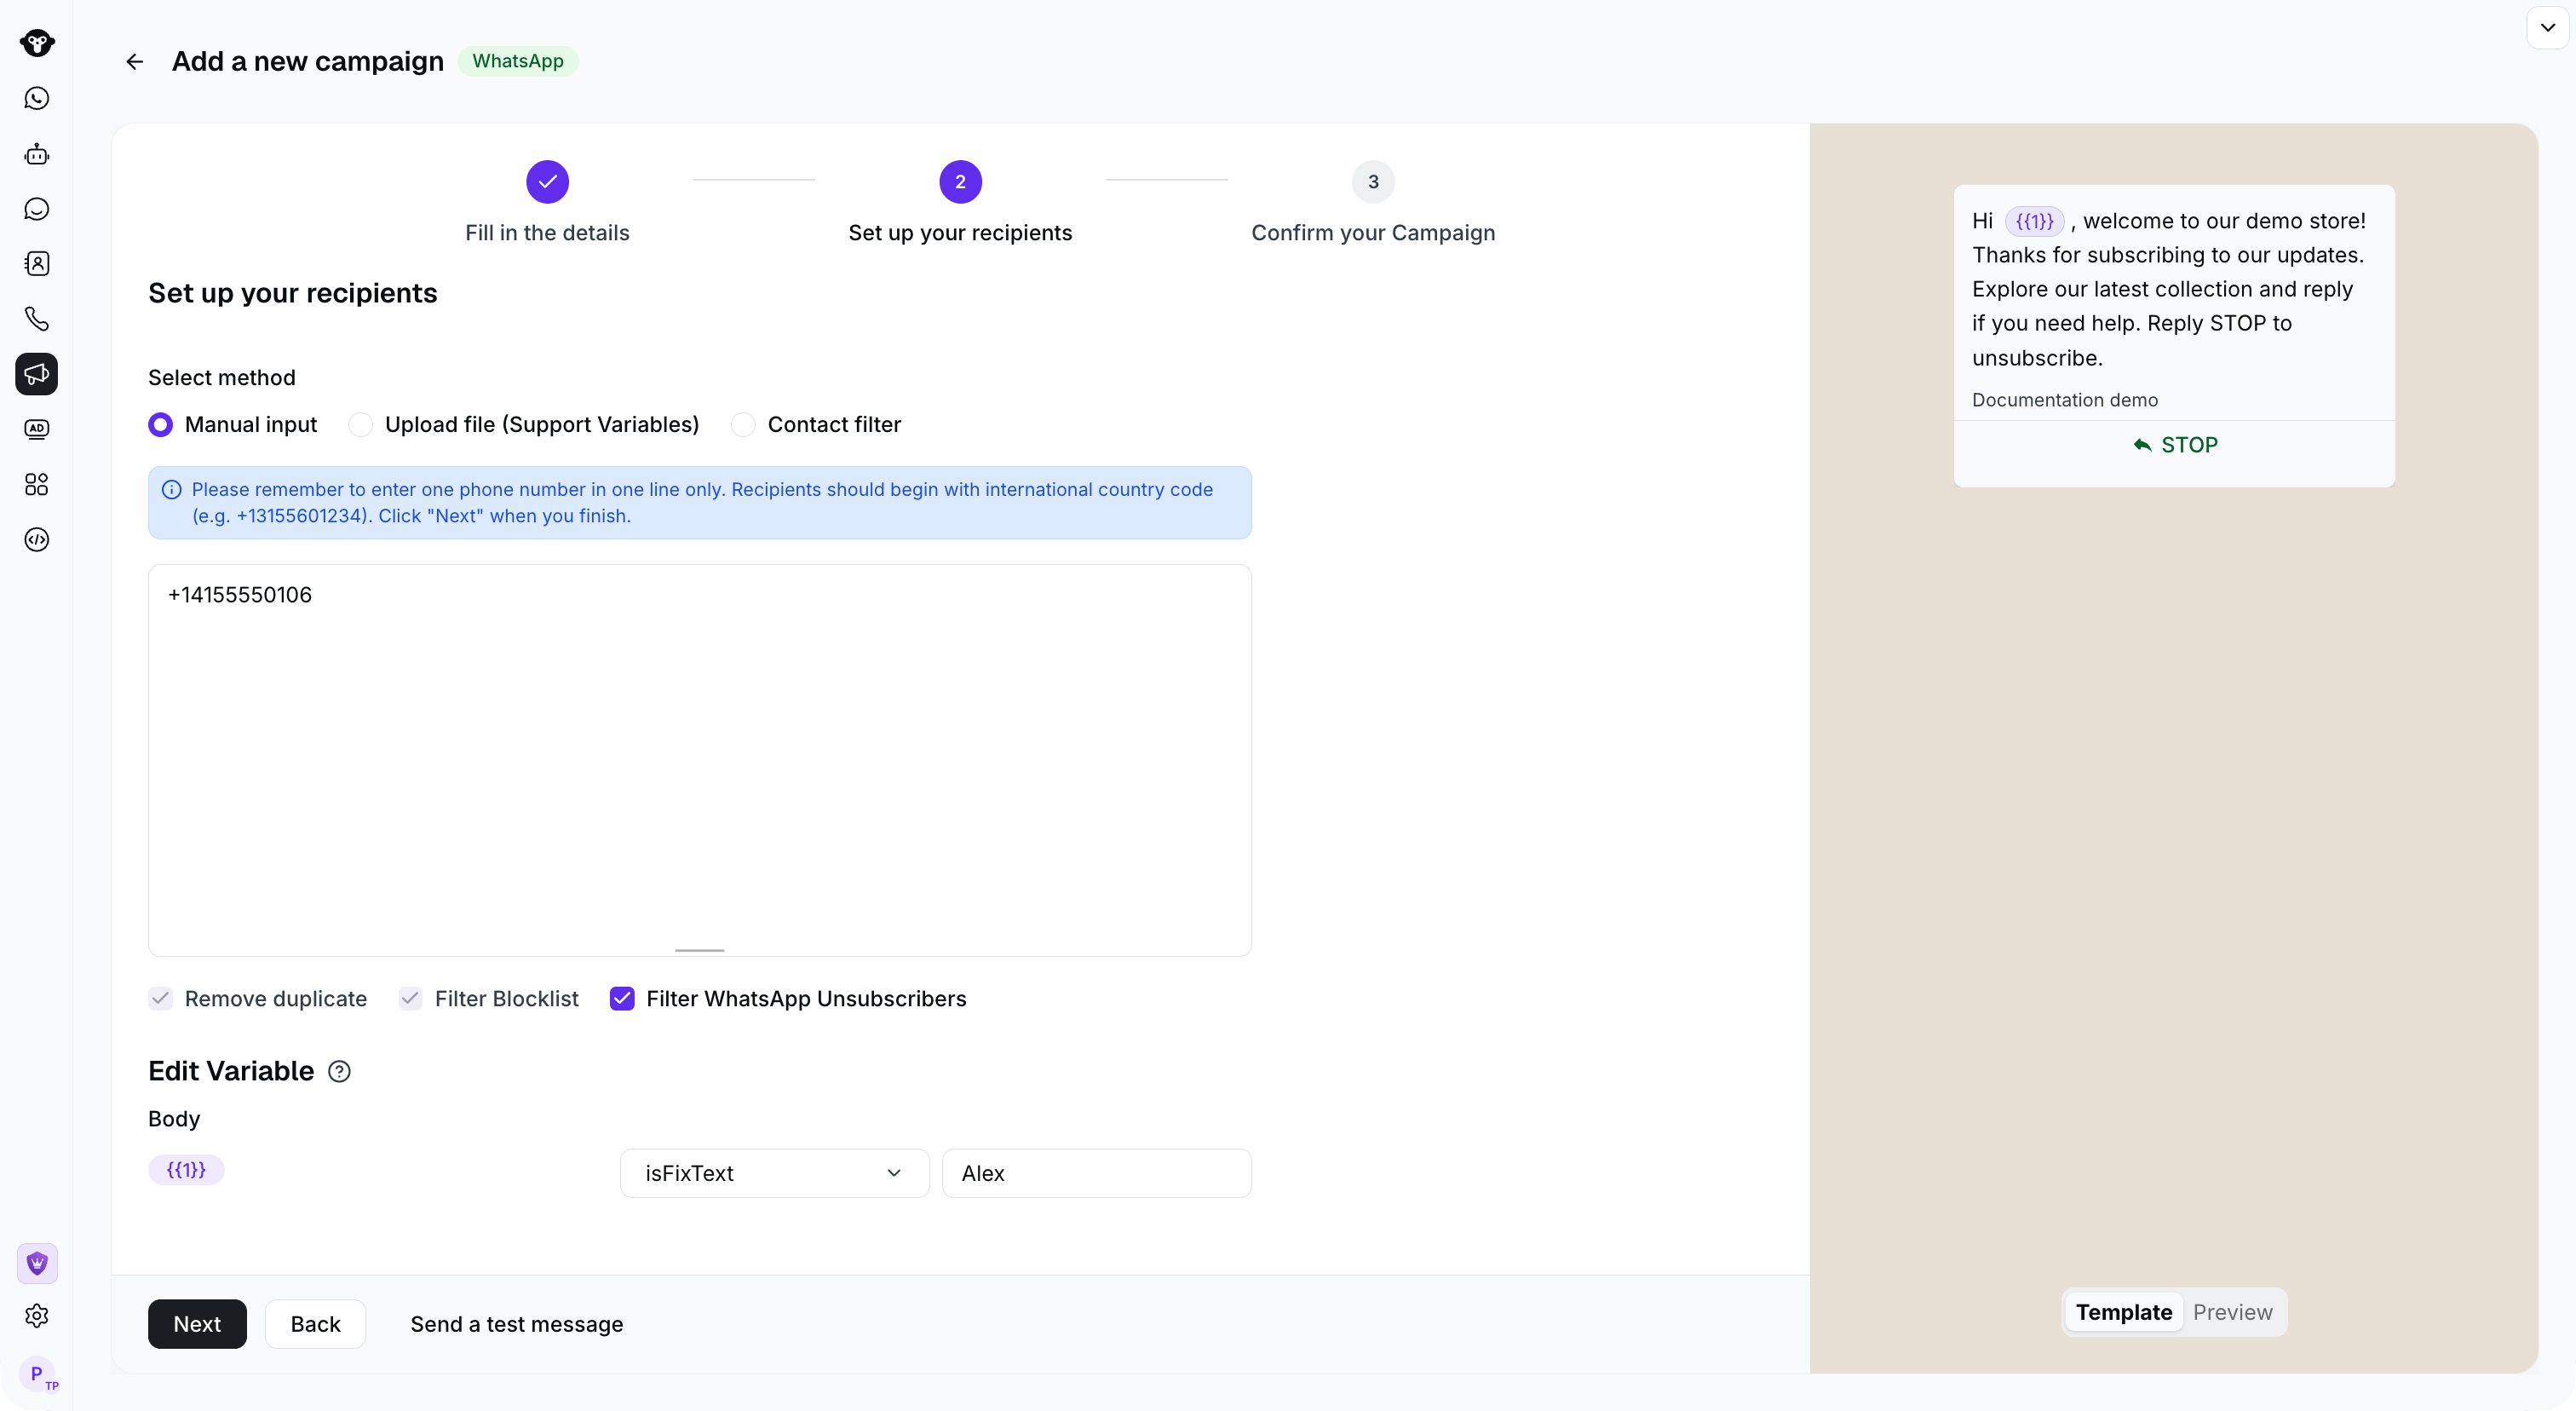
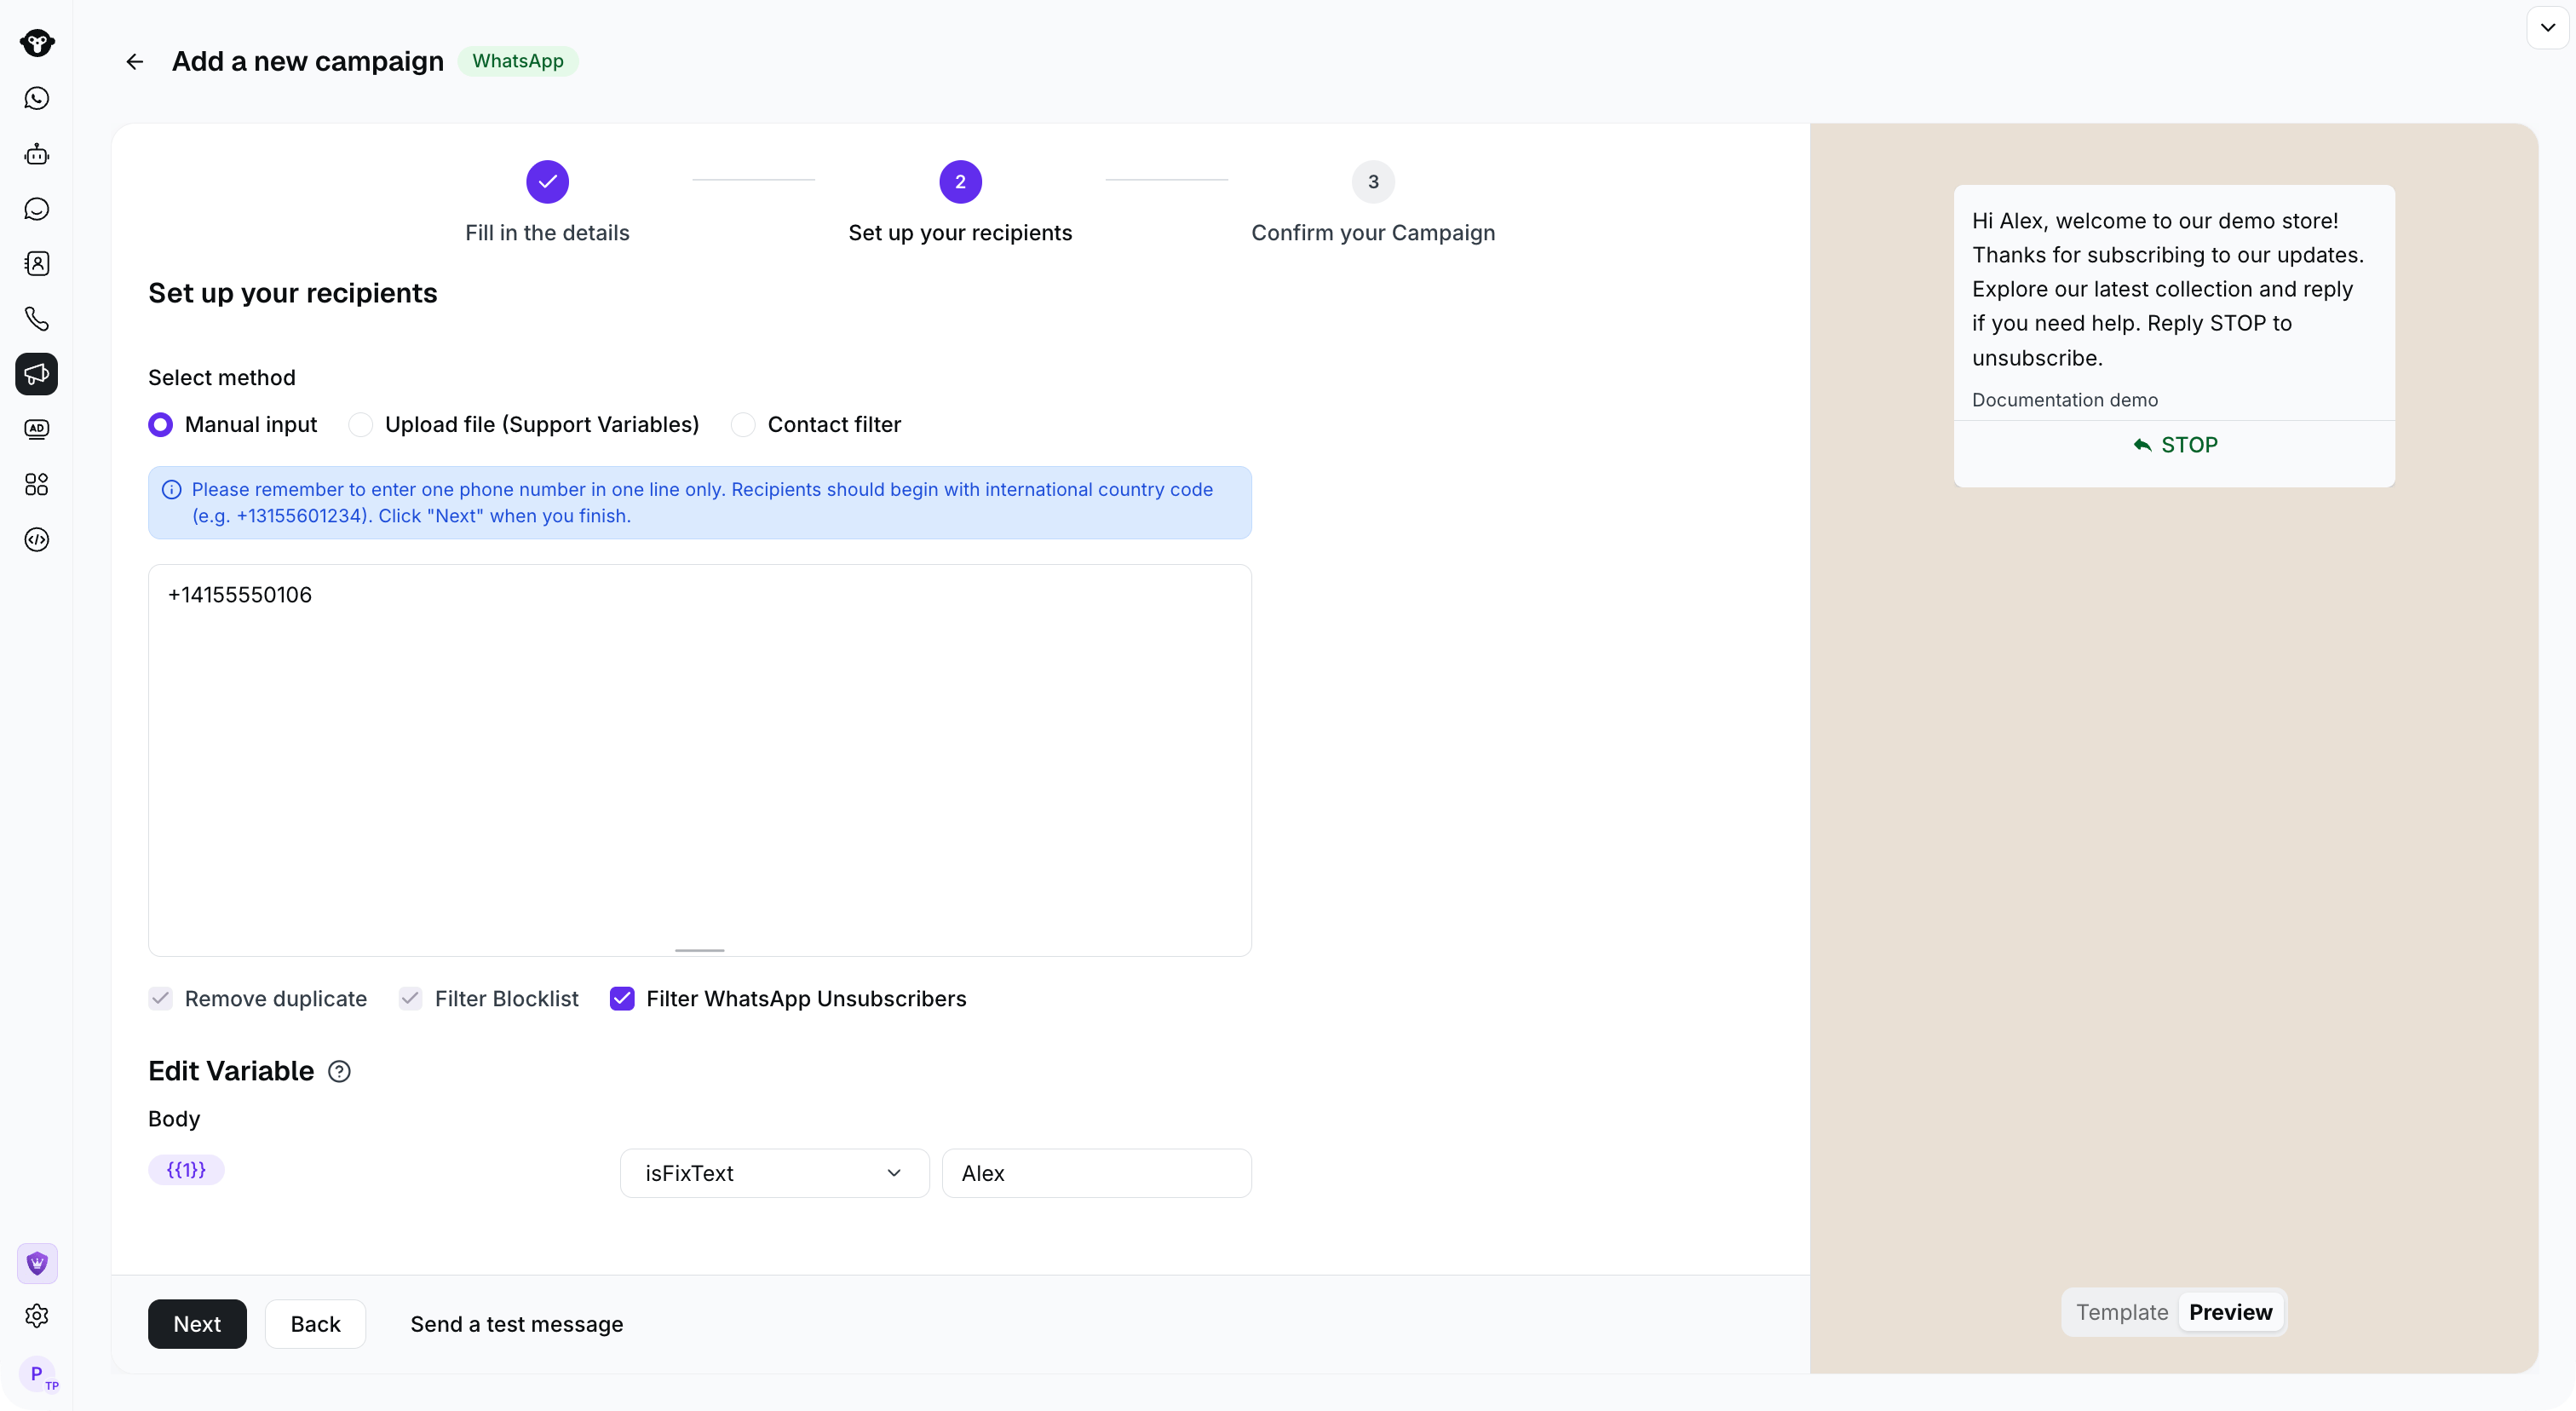
按国际格式每行输入一个电话号码,需包含国家/地区代码。例如,使用 `+14155550106` 作为虚构的美国号码。
当每位收件人都应接收相同的模板变量值时,请使用此方法。您可以在同一页面的 **Edit Variable** 下将这些值设置为固定文本。
选择 **Next** 以设置收件人。
## 2. 选择收件人
选择以下方法之一。
### 手动输入电话号码
按国际格式每行输入一个电话号码,需包含国家/地区代码。例如,使用 `+14155550106` 作为虚构的美国号码。
当每位收件人都应接收相同的模板变量值时,请使用此方法。您可以在同一页面的 **Edit Variable** 下将这些值设置为固定文本。
 ### 上传 XLSX 文件
当您需要向不同收件人发送不同的变量值时,请使用 `.xlsx` 文件。
* 将第一列命名为 `phone`,并将每位收件人的电话号码填入该列。
* 在 `phone` 列之后,为每个模板变量添加一列。
* 在同一页面的 **Edit Variable** 下,将每个模板变量映射到文件列或设置固定值。
例如,如果模板的正文包含 `{{1}}`,您可以在文件中添加 `name` 列,并在 **Edit Variable** 下将该列映射到 **Body** `{{1}}`。
| 电话 | 姓名 |
| - | - |
| +14155550106 | Alex |
| +14155550105 | Sofia |
这些是虚构的示例号码。在上传之前,请将这些列保存为 `.xlsx` 文件。上传后,请在收件人步骤中检查显示的有效、无效和重复计数。
### 使用联系人筛选条件
使用联系人筛选条件,通过 **Contact segment** 或 **Contact attributes** 选择现有联系人。
* **Contact segment**:选择一个或多个已保存的分群。您最多可以选择 10 个分群。
* **Contact attributes**:选择 **Add Filter**,然后定义收件人必须匹配的联系人属性。
### 上传 XLSX 文件
当您需要向不同收件人发送不同的变量值时,请使用 `.xlsx` 文件。
* 将第一列命名为 `phone`,并将每位收件人的电话号码填入该列。
* 在 `phone` 列之后,为每个模板变量添加一列。
* 在同一页面的 **Edit Variable** 下,将每个模板变量映射到文件列或设置固定值。
例如,如果模板的正文包含 `{{1}}`,您可以在文件中添加 `name` 列,并在 **Edit Variable** 下将该列映射到 **Body** `{{1}}`。
| 电话 | 姓名 |
| - | - |
| +14155550106 | Alex |
| +14155550105 | Sofia |
这些是虚构的示例号码。在上传之前,请将这些列保存为 `.xlsx` 文件。上传后,请在收件人步骤中检查显示的有效、无效和重复计数。
### 使用联系人筛选条件
使用联系人筛选条件,通过 **Contact segment** 或 **Contact attributes** 选择现有联系人。
* **Contact segment**:选择一个或多个已保存的分群。您最多可以选择 10 个分群。
* **Contact attributes**:选择 **Add Filter**,然后定义收件人必须匹配的联系人属性。
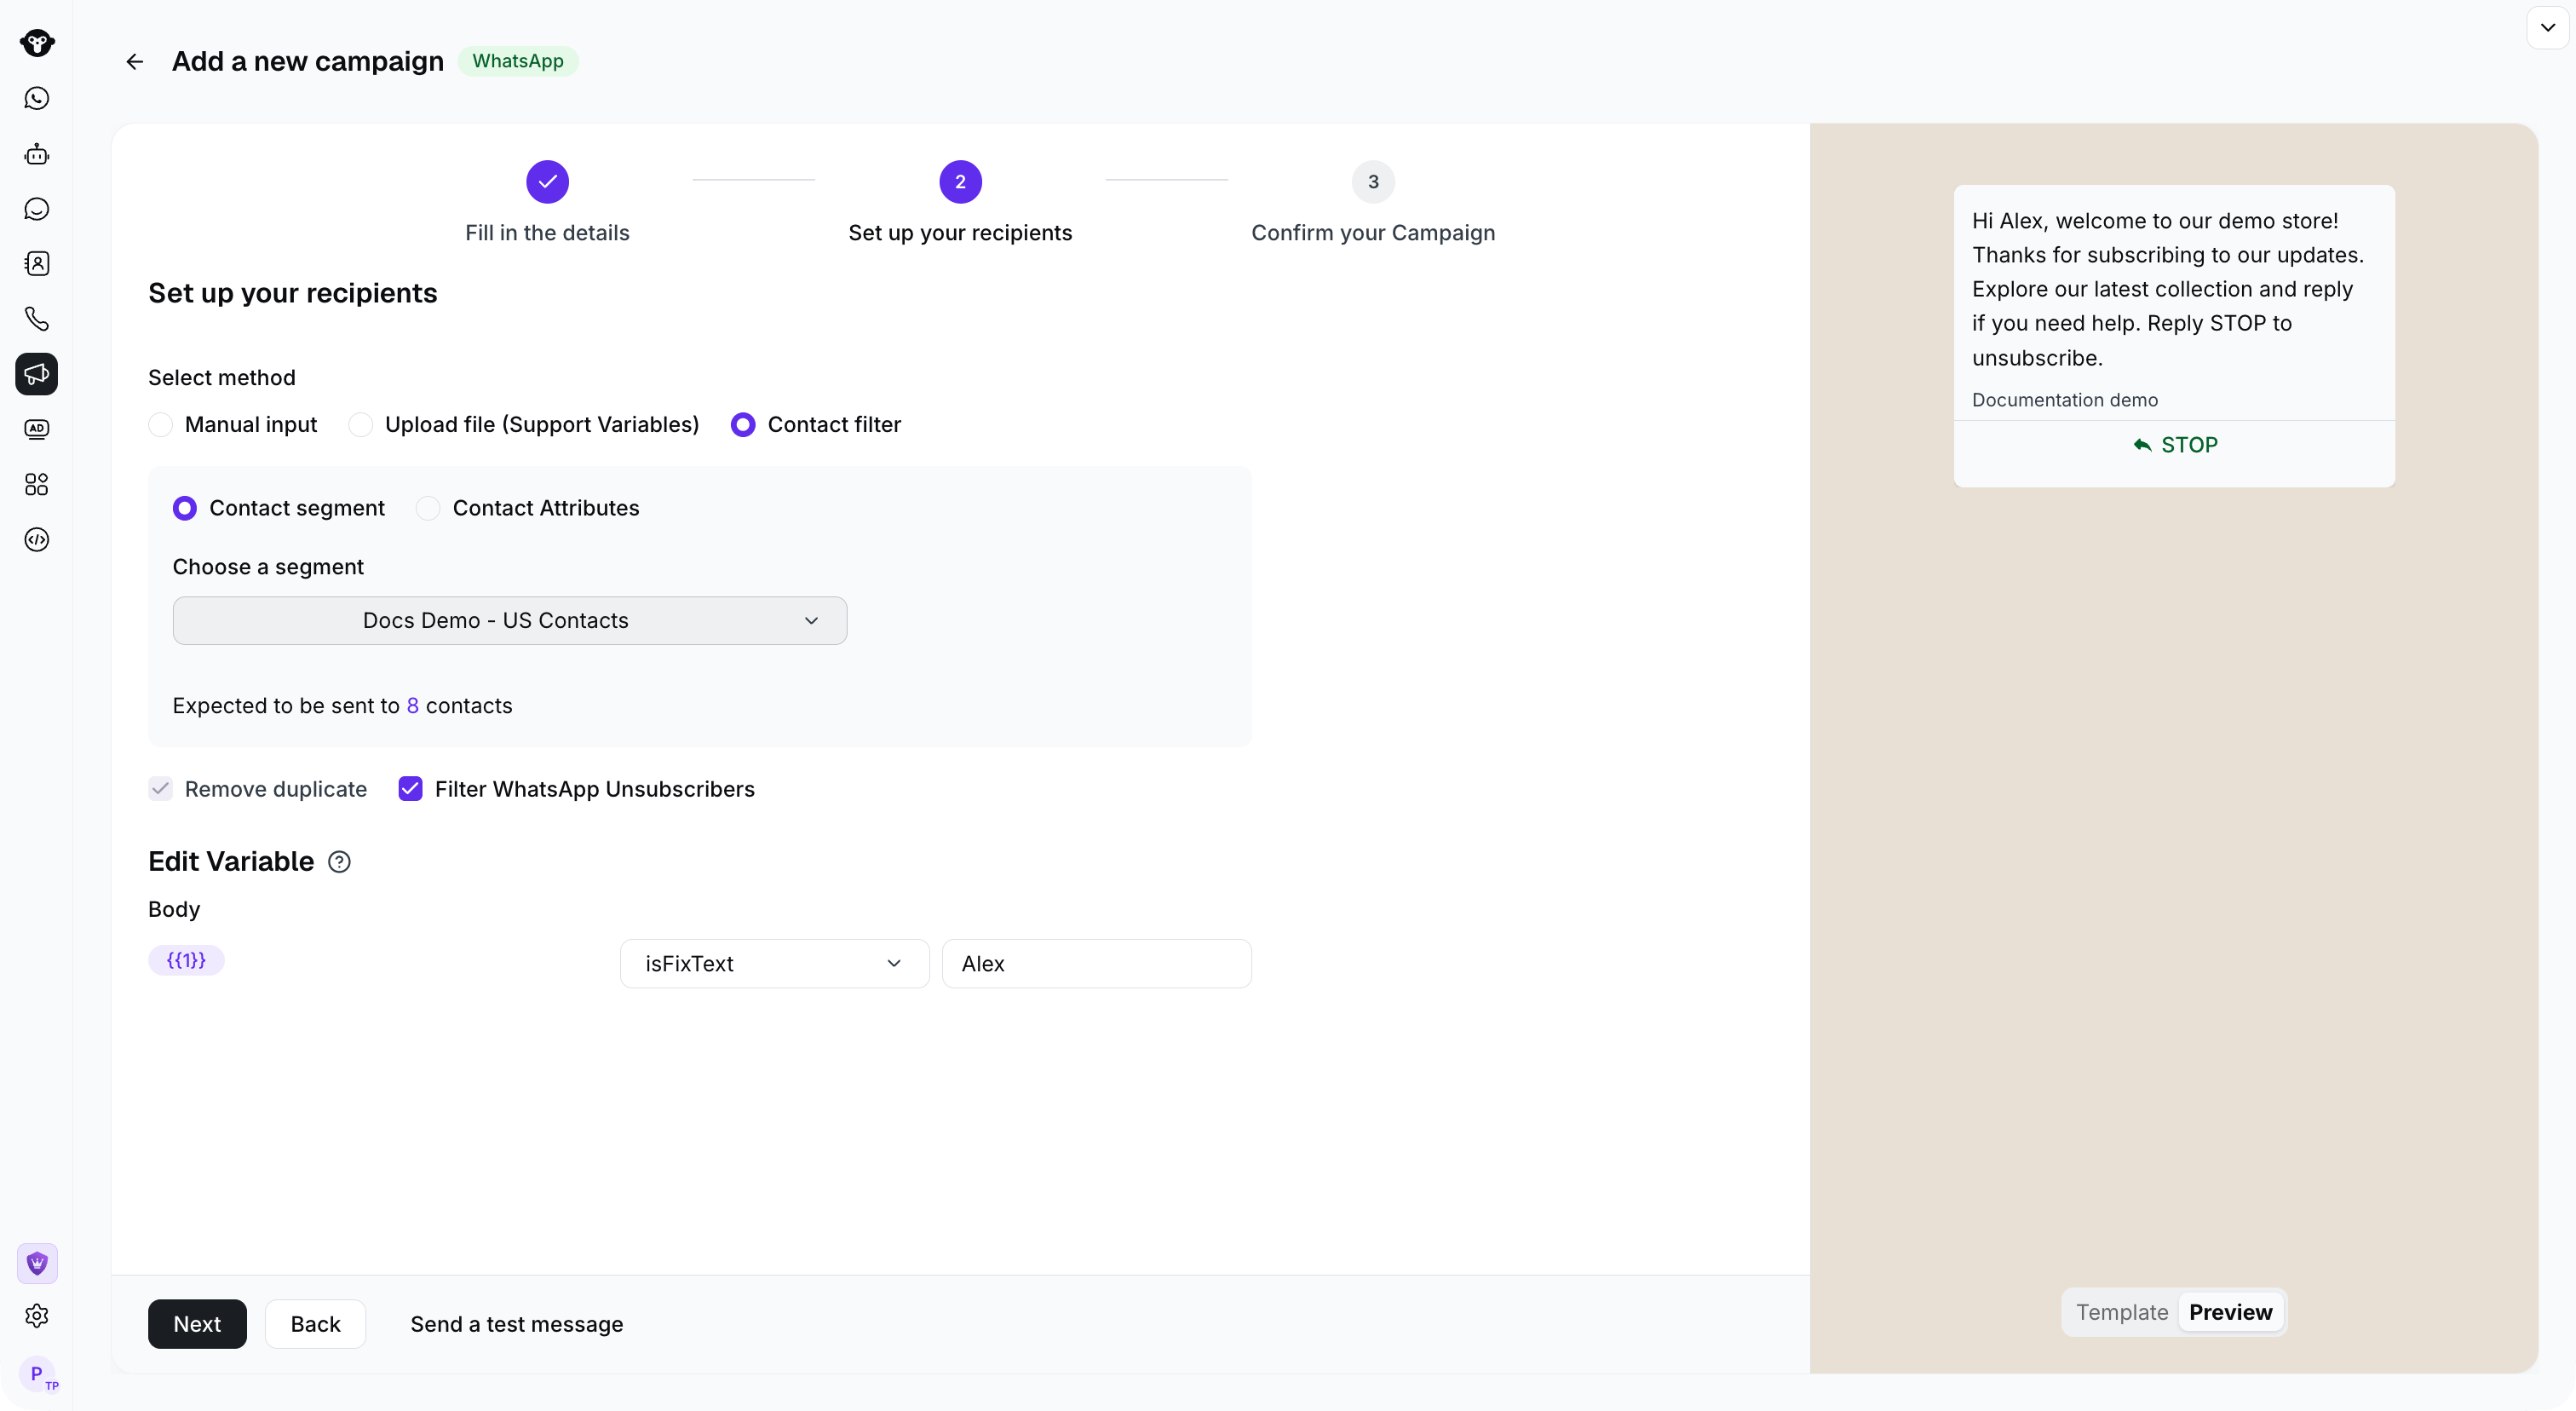
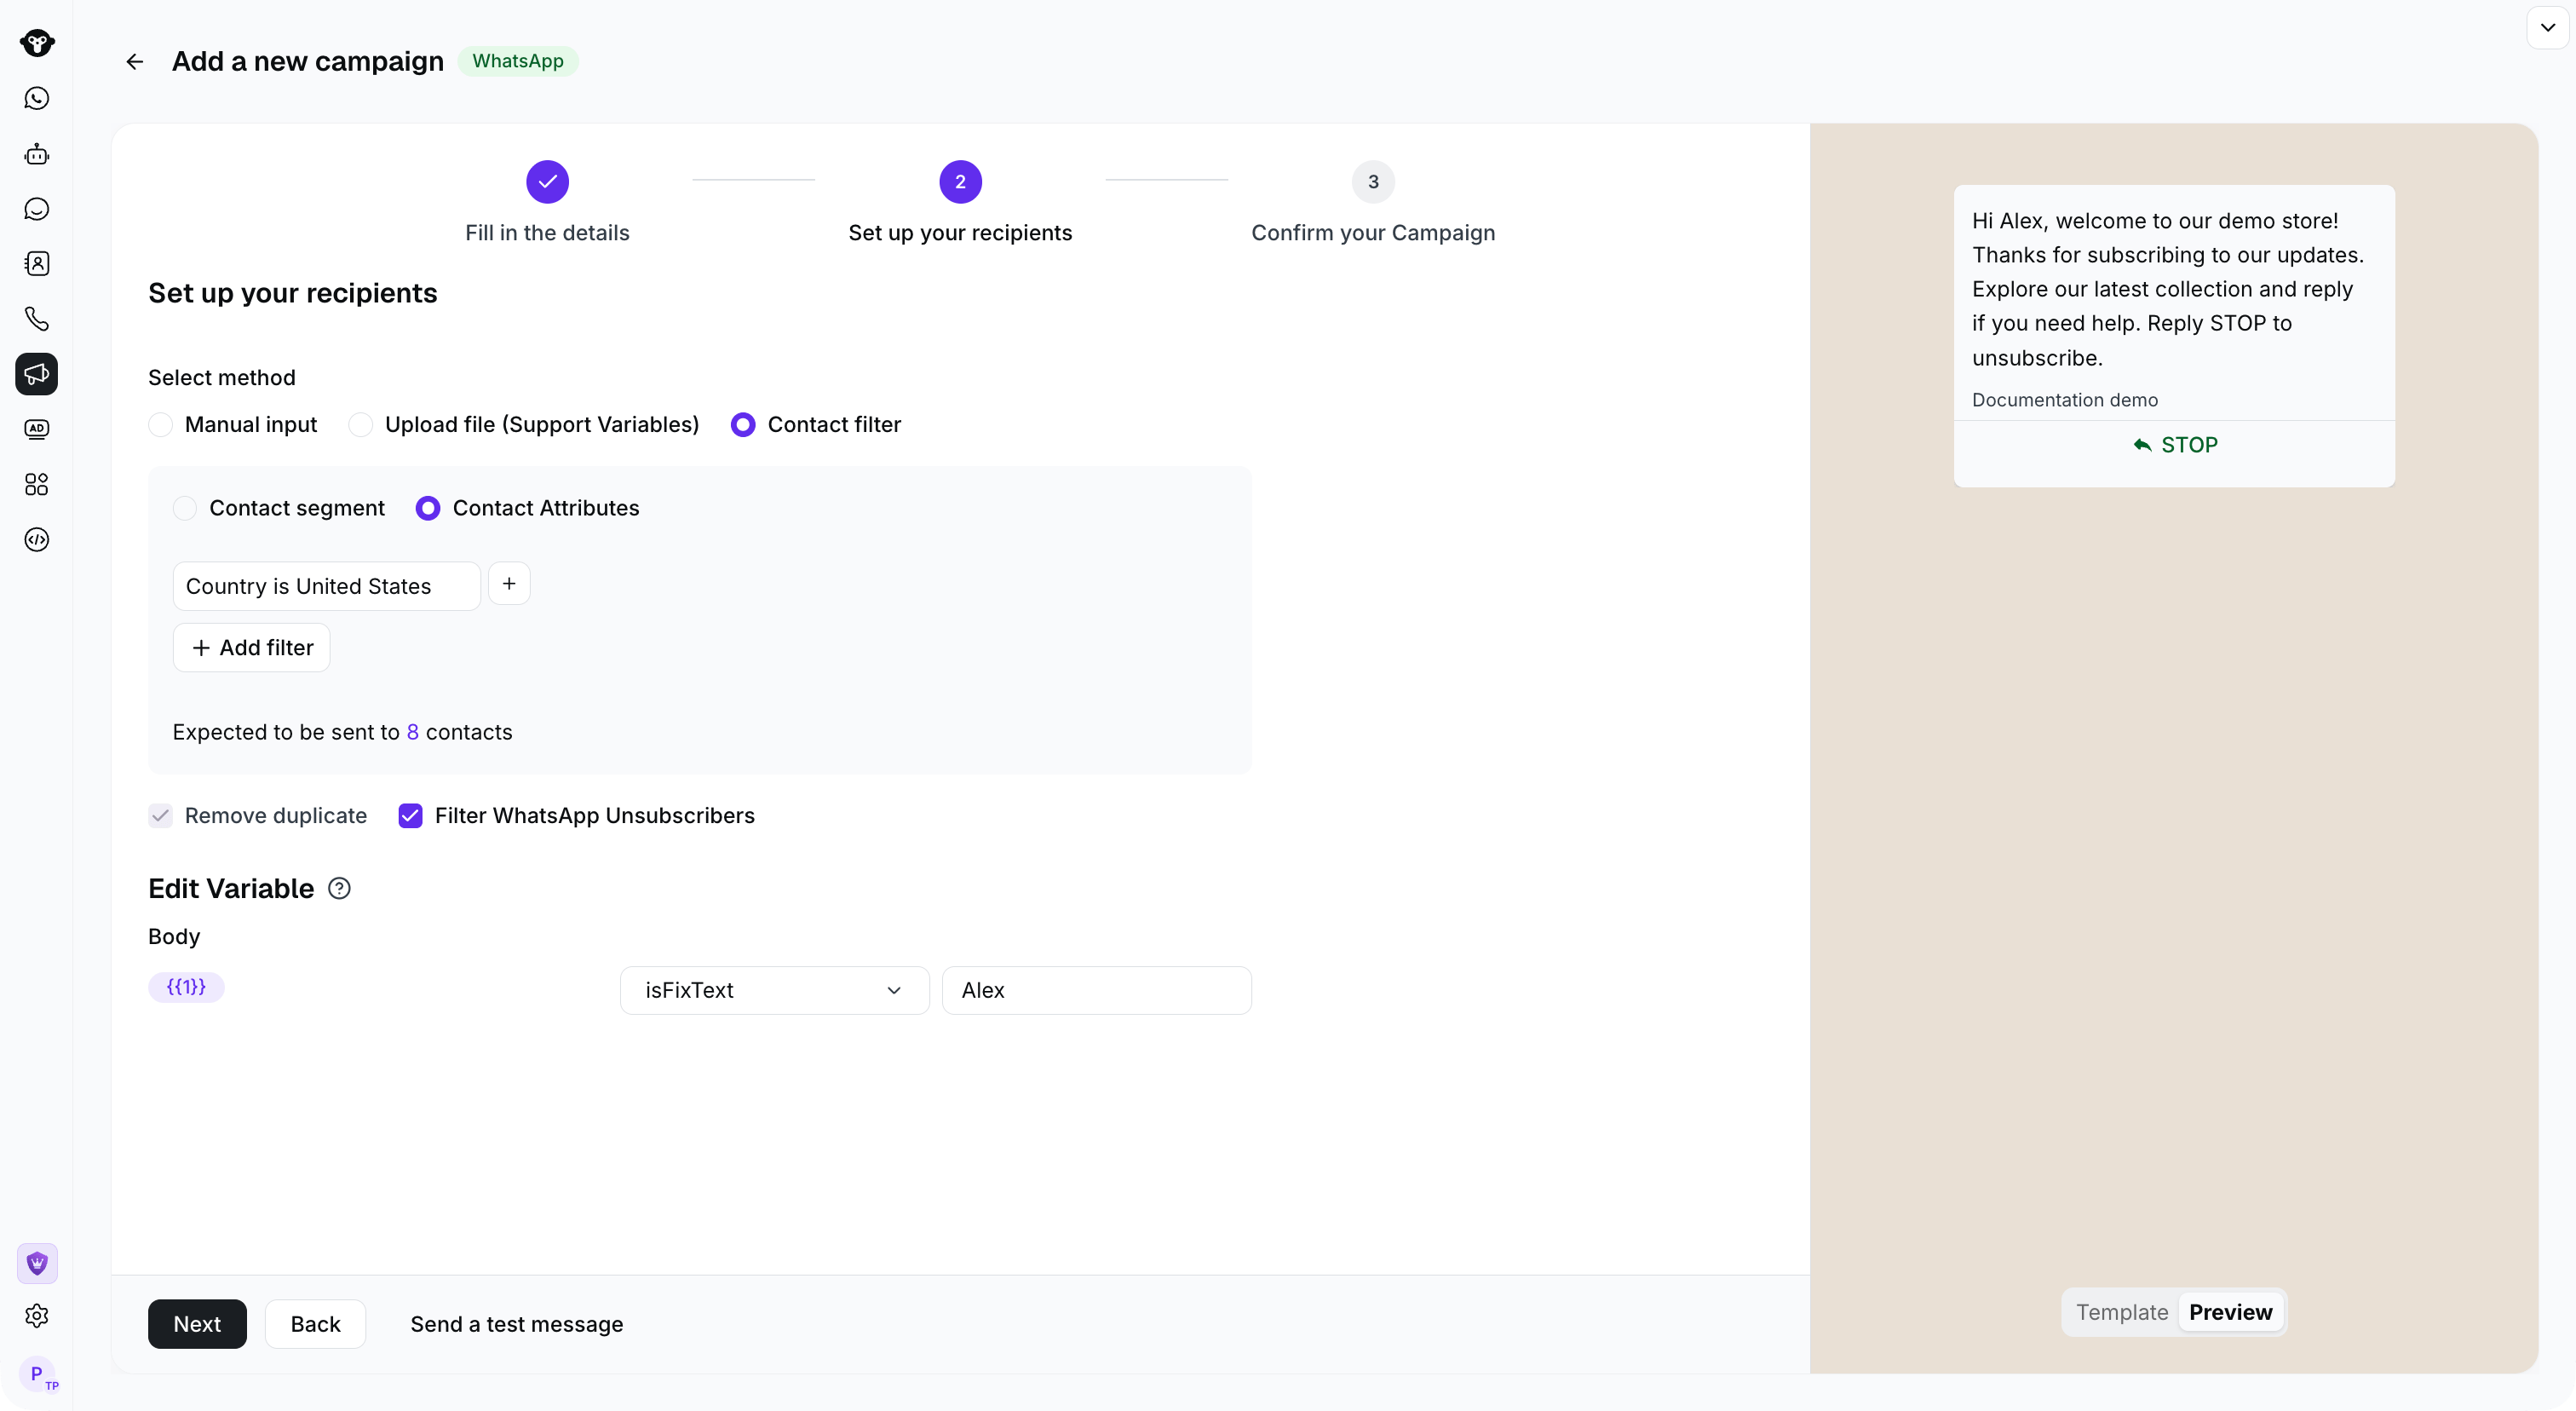 选择收件人后,请在下方配置任何模板变量或媒体,然后再选择 **Next**。
## 3. 配置模板内容
在 **Set up your recipients** 上,当所选模板包含变量或媒体标头时,请配置相关内容。
### 设置变量值
对于每个变量,请选择一个可用来源:
* 将其映射到上传的文件列。
* 使用联系人筛选条件时,将其映射到系统或自定义联系人属性。
* 为每位收件人设置固定的文本值。
对于上面的示例文件,在 **Edit Variable** 下为 **Body** `{{1}}` 选择上传的 `name` 列。收件人步骤会一并显示文件验证计数和选定的列。在继续之前,请选择 **Preview** 以检查生成的消息。
选择收件人后,请在下方配置任何模板变量或媒体,然后再选择 **Next**。
## 3. 配置模板内容
在 **Set up your recipients** 上,当所选模板包含变量或媒体标头时,请配置相关内容。
### 设置变量值
对于每个变量,请选择一个可用来源:
* 将其映射到上传的文件列。
* 使用联系人筛选条件时,将其映射到系统或自定义联系人属性。
* 为每位收件人设置固定的文本值。
对于上面的示例文件,在 **Edit Variable** 下为 **Body** `{{1}}` 选择上传的 `name` 列。收件人步骤会一并显示文件验证计数和选定的列。在继续之前,请选择 **Preview** 以检查生成的消息。
 ### 设置标头媒体
对于带有图片、视频、文档或 GIF 标头的模板,请检查预填充的媒体并上传要随此活动发送的文件。如果现有的媒体链接已过期,请重新上传文件。
选择 **Next** 以审核活动。
## 4. 审核并提交
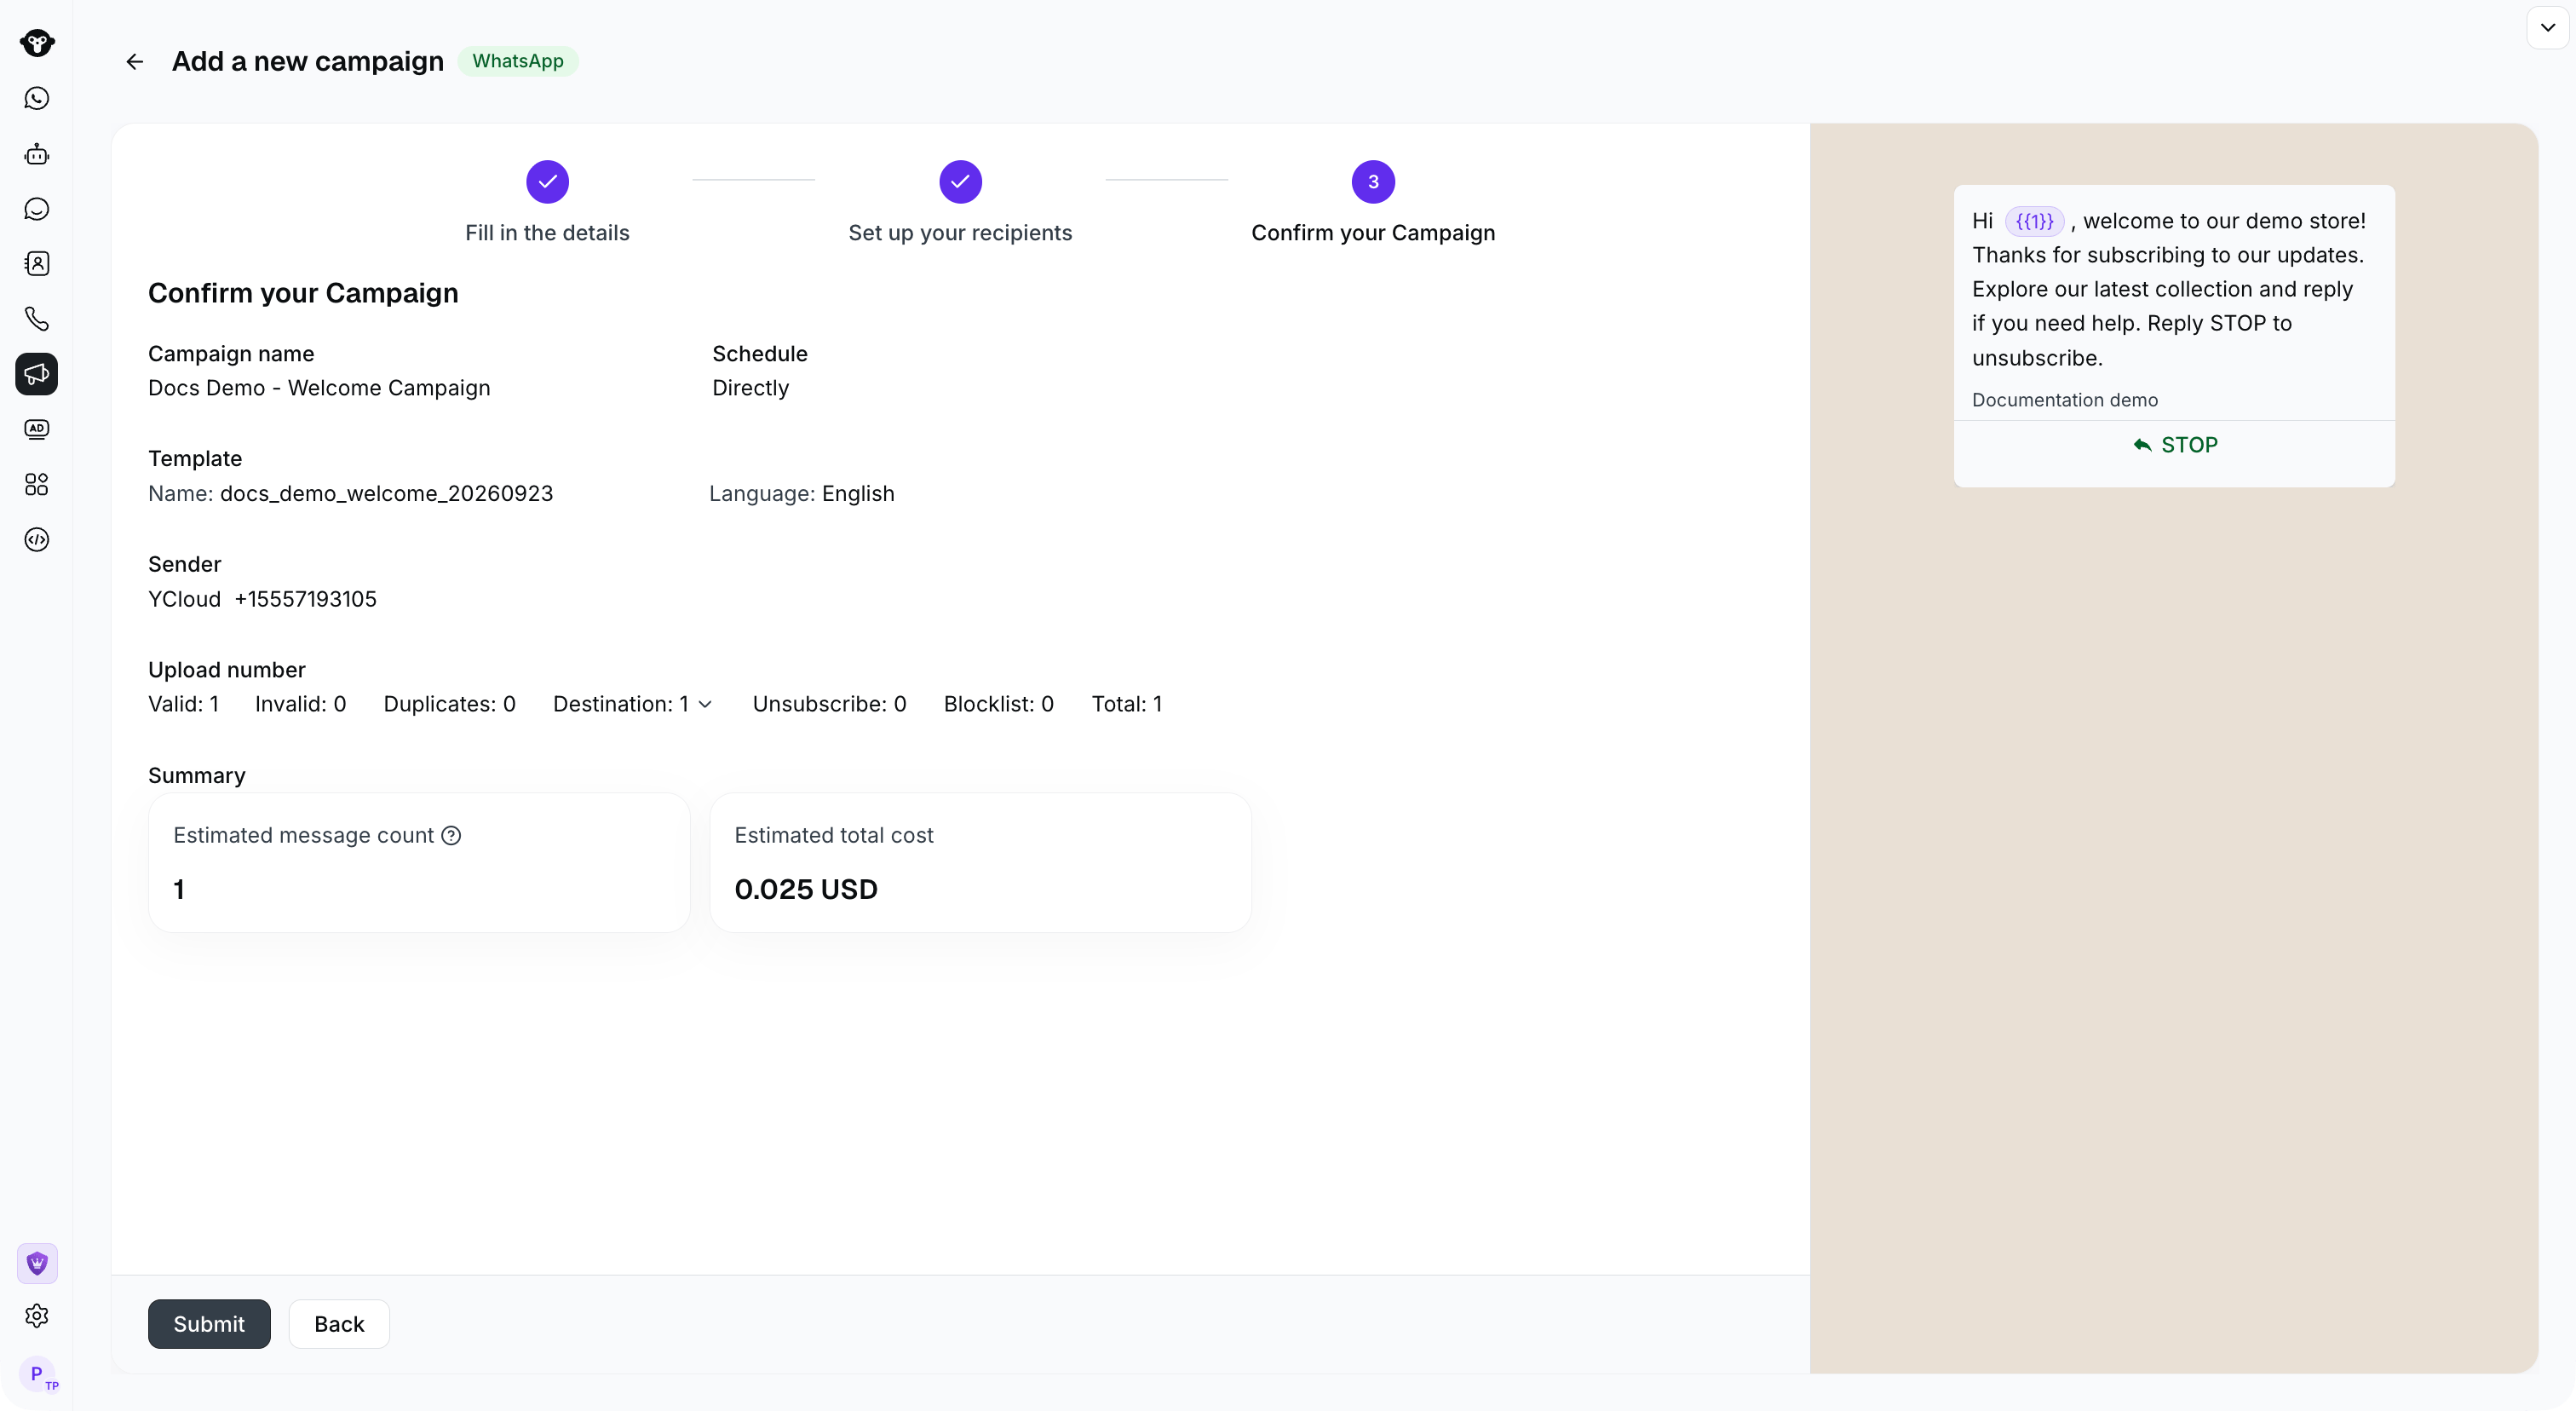
检查活动详情。确认发送方、收件人、变量值、媒体和发送计划均正确无误,然后选择 **Submit**。
### 设置标头媒体
对于带有图片、视频、文档或 GIF 标头的模板,请检查预填充的媒体并上传要随此活动发送的文件。如果现有的媒体链接已过期,请重新上传文件。
选择 **Next** 以审核活动。
## 4. 审核并提交
检查活动详情。确认发送方、收件人、变量值、媒体和发送计划均正确无误,然后选择 **Submit**。
 This documentation is built and hosted on [Mintlify](https://mintlify.com), a developer documentation platform.