> ## Documentation Index
> Fetch the complete documentation index at: https://docs.ycloud.com/llms.txt
> Use this file to discover all available pages before exploring further.
# 联系人分群
## 步骤 1 — 找到创建新分群的入口
您可以通过以下路径找到创建新分群的入口:
登录您的 [YCloud 账户](https://www.ycloud.com/console/#/entry/login) > 前往 Contact(联系人)> 点击“Add filter”(添加筛选条件)。
 ## 步骤 2 — 设置筛选条件
根据您的分群需求添加合适的筛选条件。
## 步骤 2 — 设置筛选条件
根据您的分群需求添加合适的筛选条件。
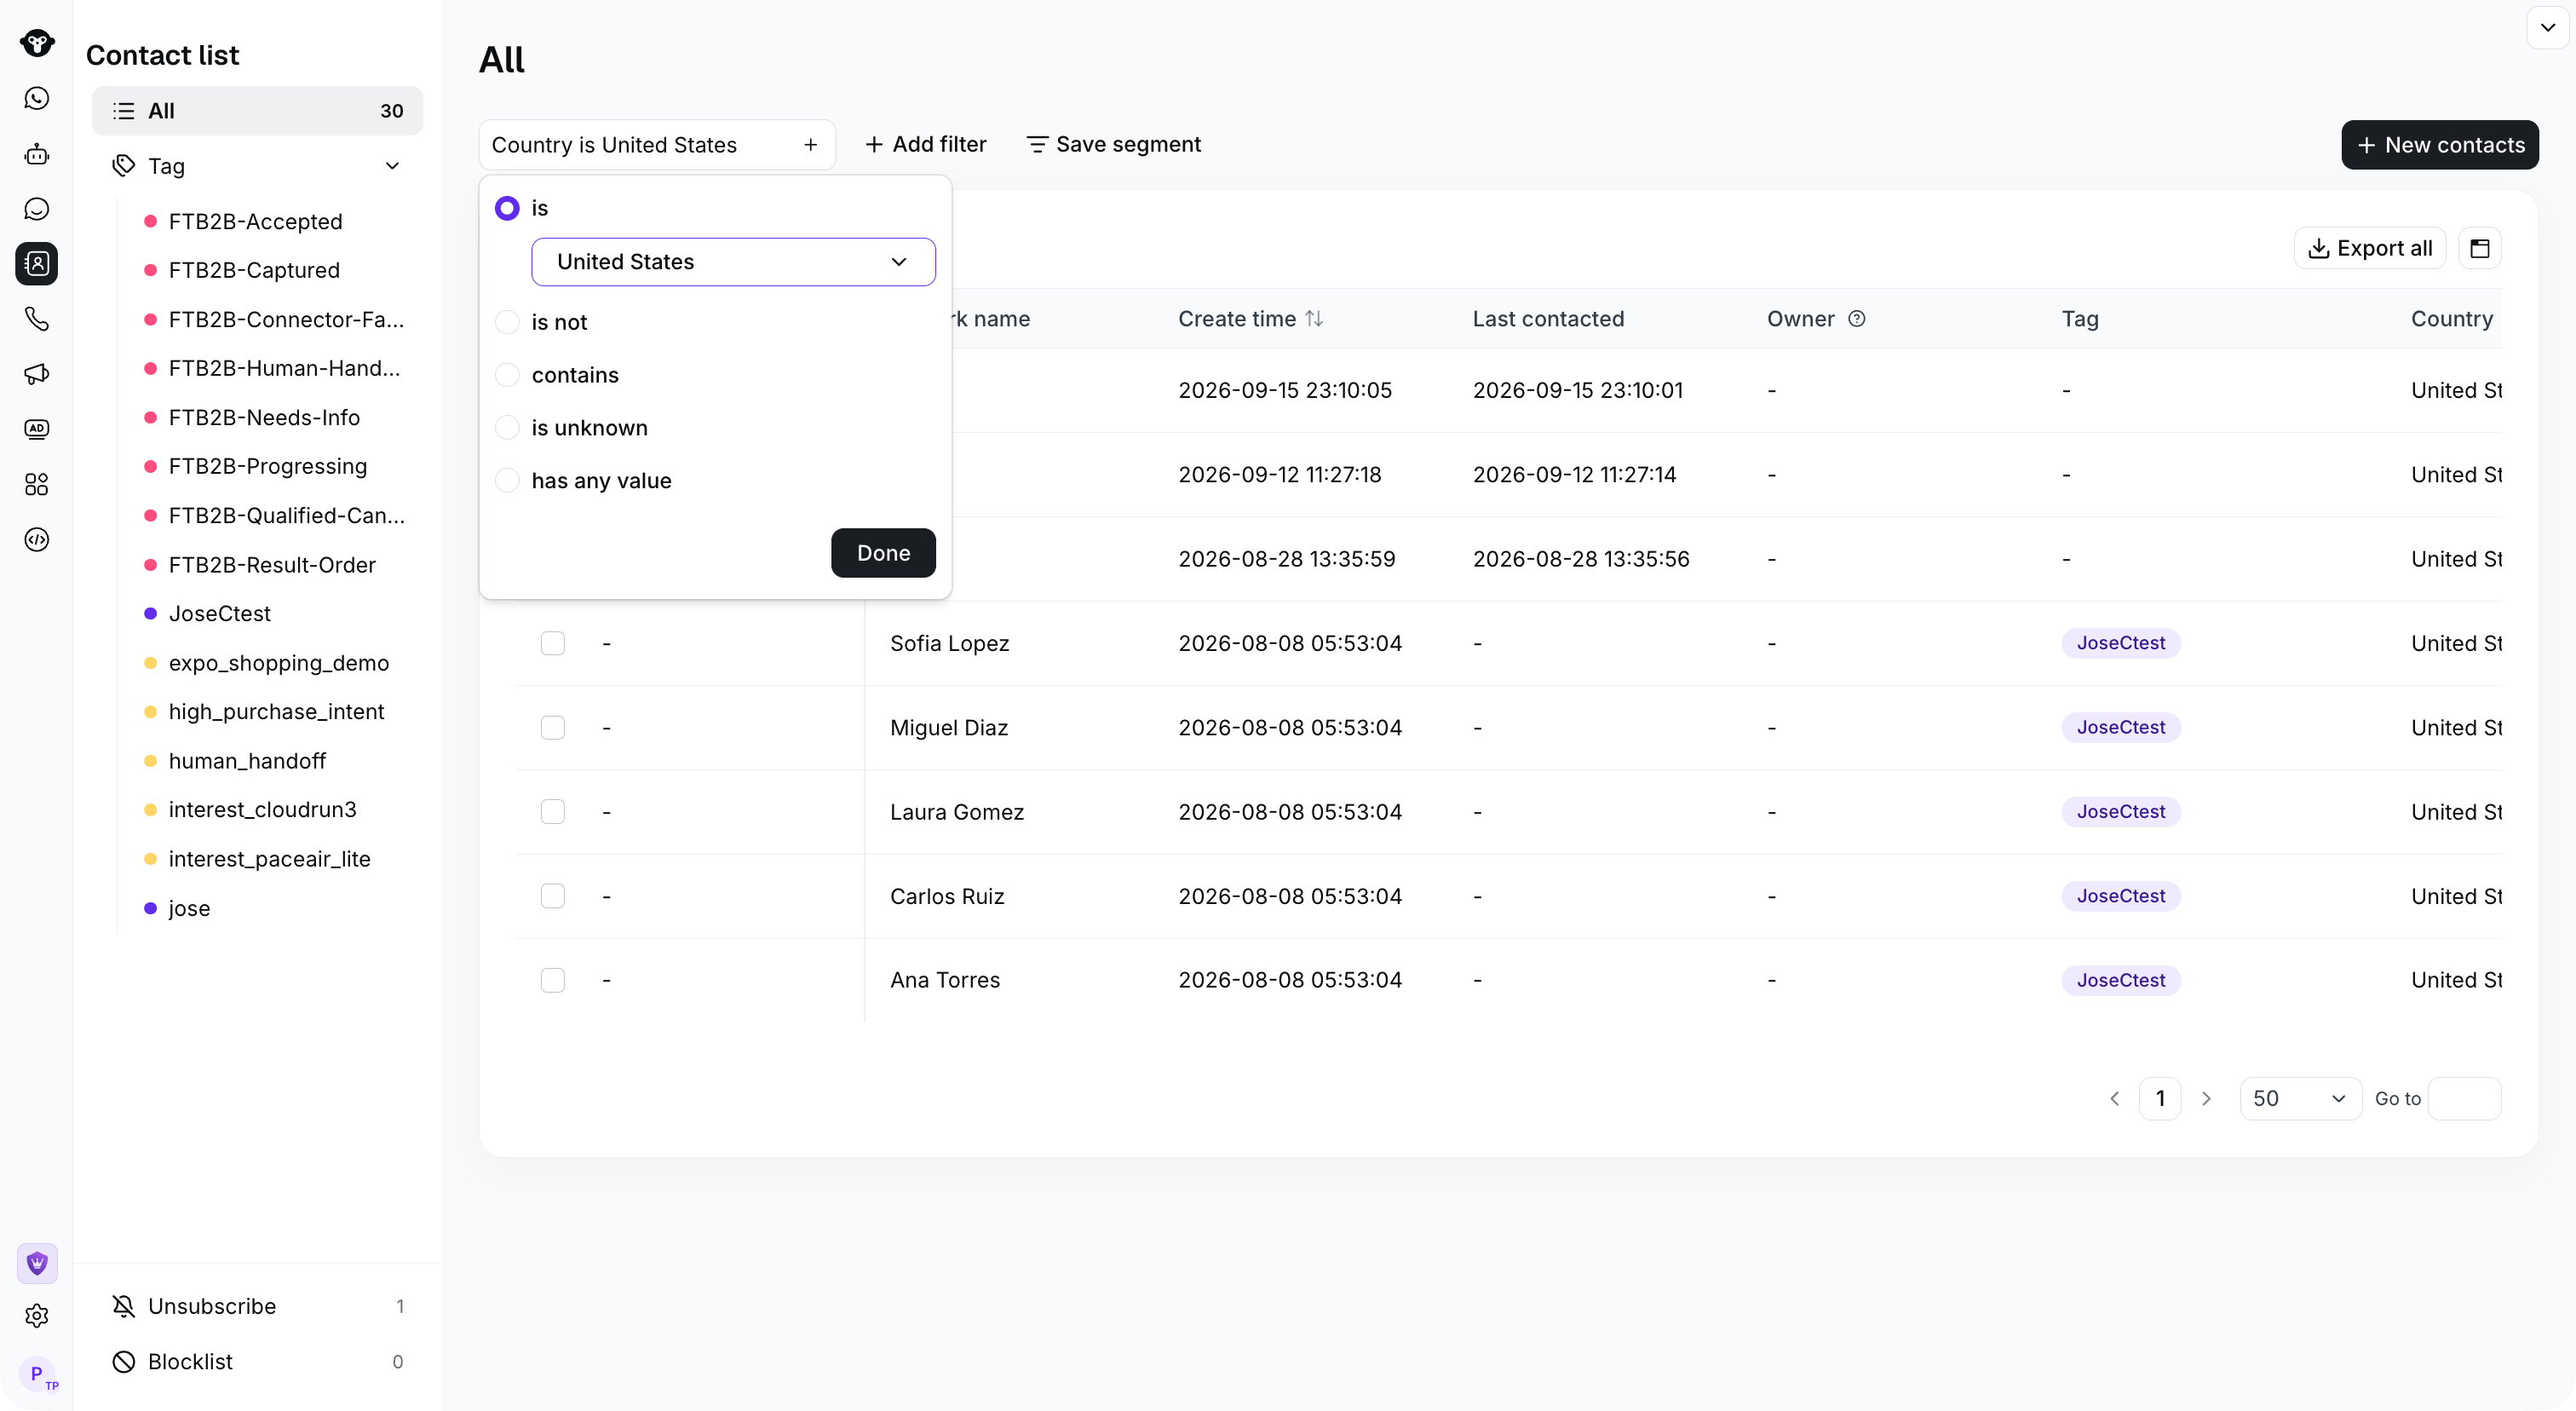
例如,要将国家/地区为美国的联系人进行分群,您需要按照以下步骤操作。
#### 1. 选择筛选类型
选择 **Country**。
 #### 2. 编辑筛选条件
选择 **United States**。
#### 2. 编辑筛选条件
选择 **United States**。
 #### 3. 保存分群
选择 **Done** 以展示符合条件的联系人。
#### 3. 保存分群
选择 **Done** 以展示符合条件的联系人。
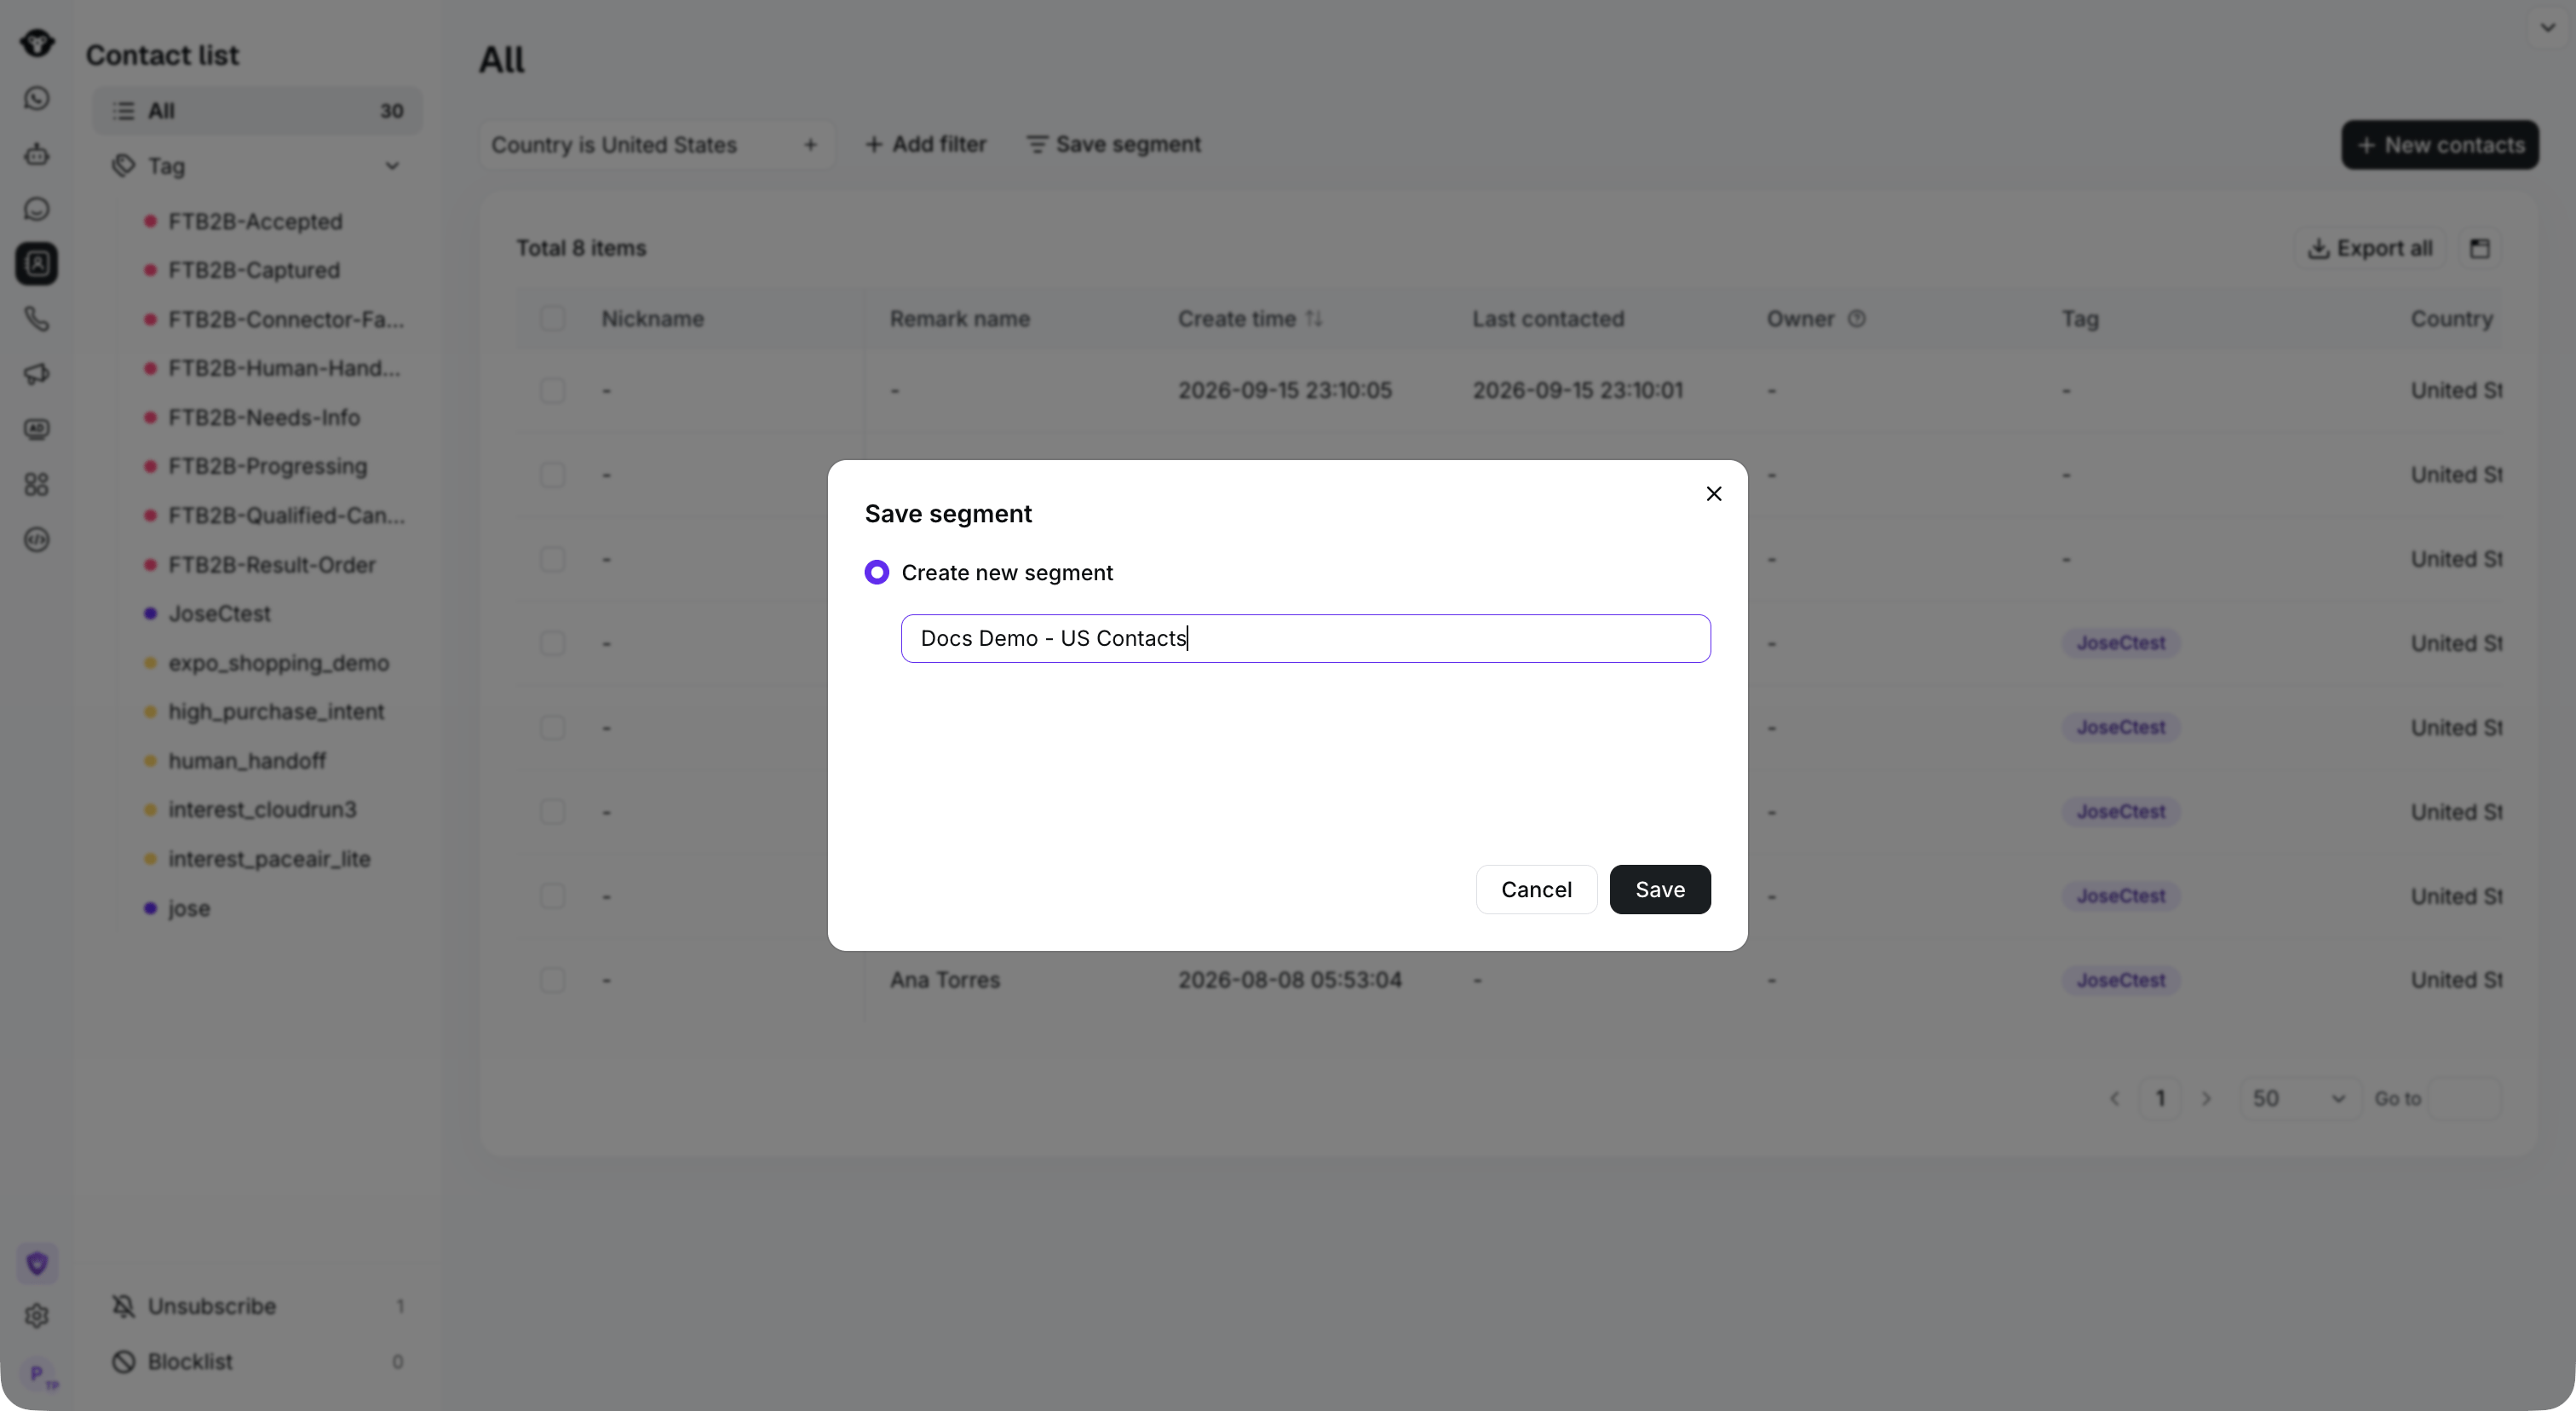
 选择 **Save segment**,输入名称,然后选择 **Save**。保存的分群将显示在左侧的联系人列表中。
 ## 进阶用法
### 使用 AND 和 OR 组合筛选条件
一个分群可以包含多个筛选条件。使用两个条件之间的关系选择器可在 **AND** 和 **OR** 之间切换:
* **AND:** 联系人必须符合所有关联条件才会被纳入。
* **OR:** 联系人只要符合至少一个关联条件就会被纳入。
例如:
* `Country is India AND Create time is more than 3 days ago` 仅包含同时满足这两个条件的联系人。
* `Country is India OR Tag is VIP` 包含满足任一条件的联系人。
配置逻辑关系:
1. 添加两个或更多筛选条件。
2. 点击筛选条件之间显示的 **and** 或 **or** 连接符。
3. 选择您想要使用的关系。
4. 根据需要继续添加筛选条件并设置其逻辑关系。
5. 检查筛选生成的联系人列表,然后点击 **Save Segment**。
当您需要更精细、更准确的目标受众时,选择 **AND** 。当联系人可以通过不同条件符合要求时,选择 **OR** 。
### 在 Campaign 中使用分群
保存分群后,您可以在配置 Campaign 受众时引用它。这样您可以向符合分群筛选条件的联系人发送营销活动,而无需逐个选择收件人。
创建或编辑营销活动时:
1. 前往 **Campaign** 并配置活动内容。
2. 在受众或收件人设置中,选择 **Contact segment**。
3. 选择您想要使用的已保存分群。
4. 在发送或定时发送活动之前检查受众。
为分群设置能清晰描述其条件的名称,尤其是在您的账户包含多个活动受众时。
This documentation is built and hosted on [Mintlify](https://mintlify.com), a developer documentation platform.
## 进阶用法
### 使用 AND 和 OR 组合筛选条件
一个分群可以包含多个筛选条件。使用两个条件之间的关系选择器可在 **AND** 和 **OR** 之间切换:
* **AND:** 联系人必须符合所有关联条件才会被纳入。
* **OR:** 联系人只要符合至少一个关联条件就会被纳入。
例如:
* `Country is India AND Create time is more than 3 days ago` 仅包含同时满足这两个条件的联系人。
* `Country is India OR Tag is VIP` 包含满足任一条件的联系人。
配置逻辑关系:
1. 添加两个或更多筛选条件。
2. 点击筛选条件之间显示的 **and** 或 **or** 连接符。
3. 选择您想要使用的关系。
4. 根据需要继续添加筛选条件并设置其逻辑关系。
5. 检查筛选生成的联系人列表,然后点击 **Save Segment**。
当您需要更精细、更准确的目标受众时,选择 **AND** 。当联系人可以通过不同条件符合要求时,选择 **OR** 。
### 在 Campaign 中使用分群
保存分群后,您可以在配置 Campaign 受众时引用它。这样您可以向符合分群筛选条件的联系人发送营销活动,而无需逐个选择收件人。
创建或编辑营销活动时:
1. 前往 **Campaign** 并配置活动内容。
2. 在受众或收件人设置中,选择 **Contact segment**。
3. 选择您想要使用的已保存分群。
4. 在发送或定时发送活动之前检查受众。
为分群设置能清晰描述其条件的名称,尤其是在您的账户包含多个活动受众时。
This documentation is built and hosted on [Mintlify](https://mintlify.com), a developer documentation platform.