> ## Documentation Index
> Fetch the complete documentation index at: https://docs.ycloud.com/llms.txt
> Use this file to discover all available pages before exploring further.
# 示例 1:AI 自动回复
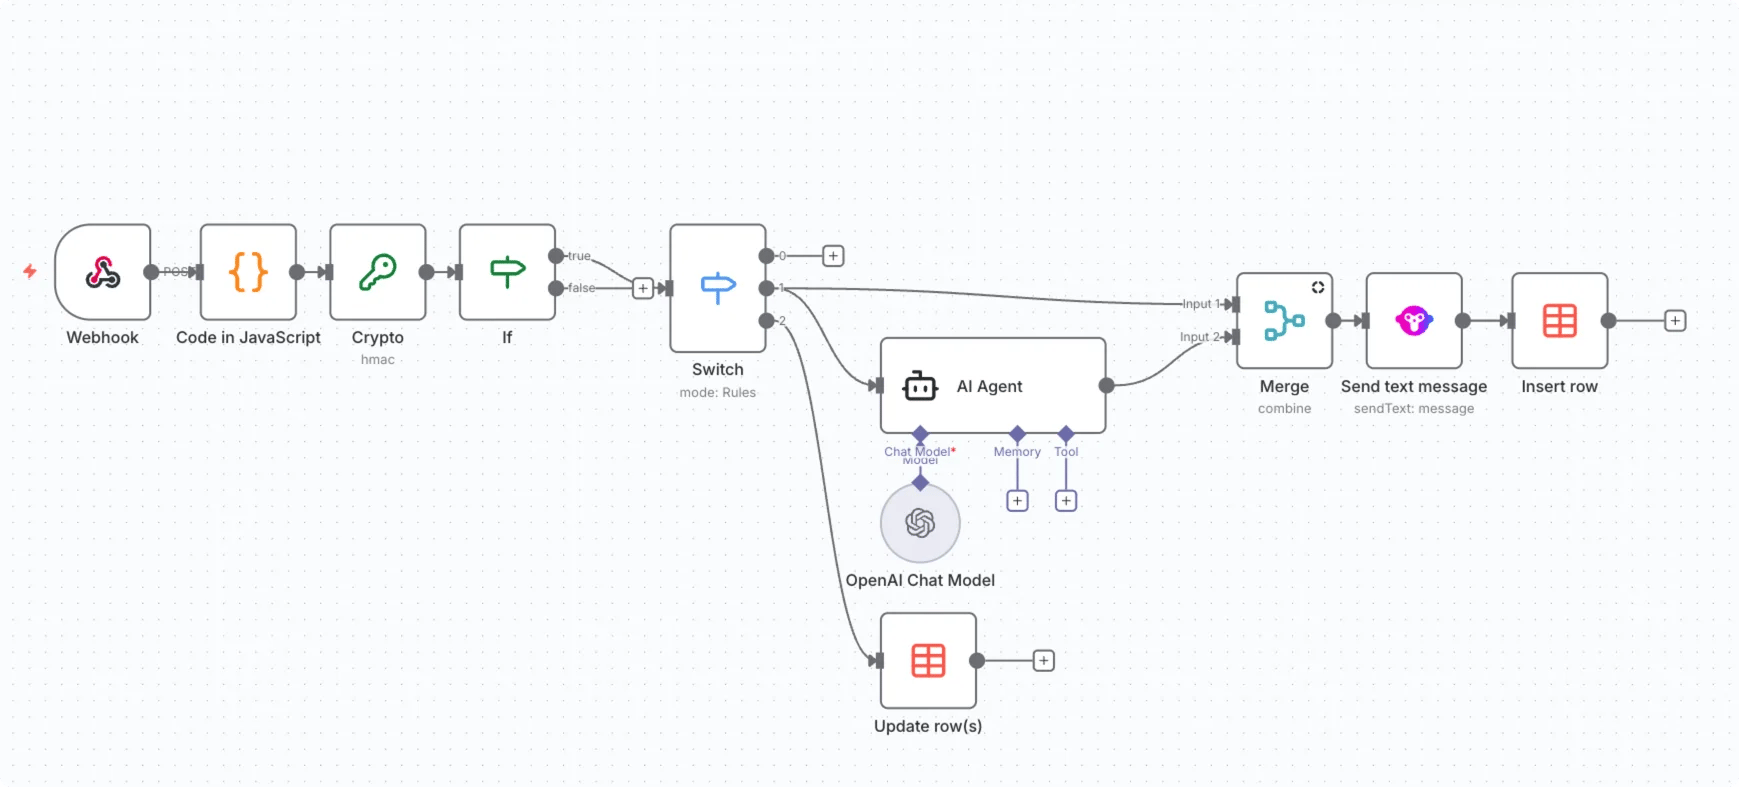
本示例演示了如何使用 n8n、大语言模型和 YCloud 节点实现基本的自动回复工作流:
当 YCloud 平台收到入站消息时,会通过 Webhook 触发 n8n 工作流。工作流调用大语言模型生成回复,然后通过 YCloud 节点将消息发送回用户。
> YCloud AI Agent 为您构建了全面的 AI 工作流,提供端到端、通俗易懂的 AI 知识库、语料库和自动化流程。点击此处查看更多详情。
### 整体流程
 ### Webhook 事件
1. 创建 Webhook 端点
1. 使用 n8n Webhook 节点创建新的监听器
2. 选择 POST 作为 HTTP 方法
3. 在 Options 中,将 Response Code 设置为 200,并确保选中“Immediately”
### Webhook 事件
1. 创建 Webhook 端点
1. 使用 n8n Webhook 节点创建新的监听器
2. 选择 POST 作为 HTTP 方法
3. 在 Options 中,将 Response Code 设置为 200,并确保选中“Immediately”
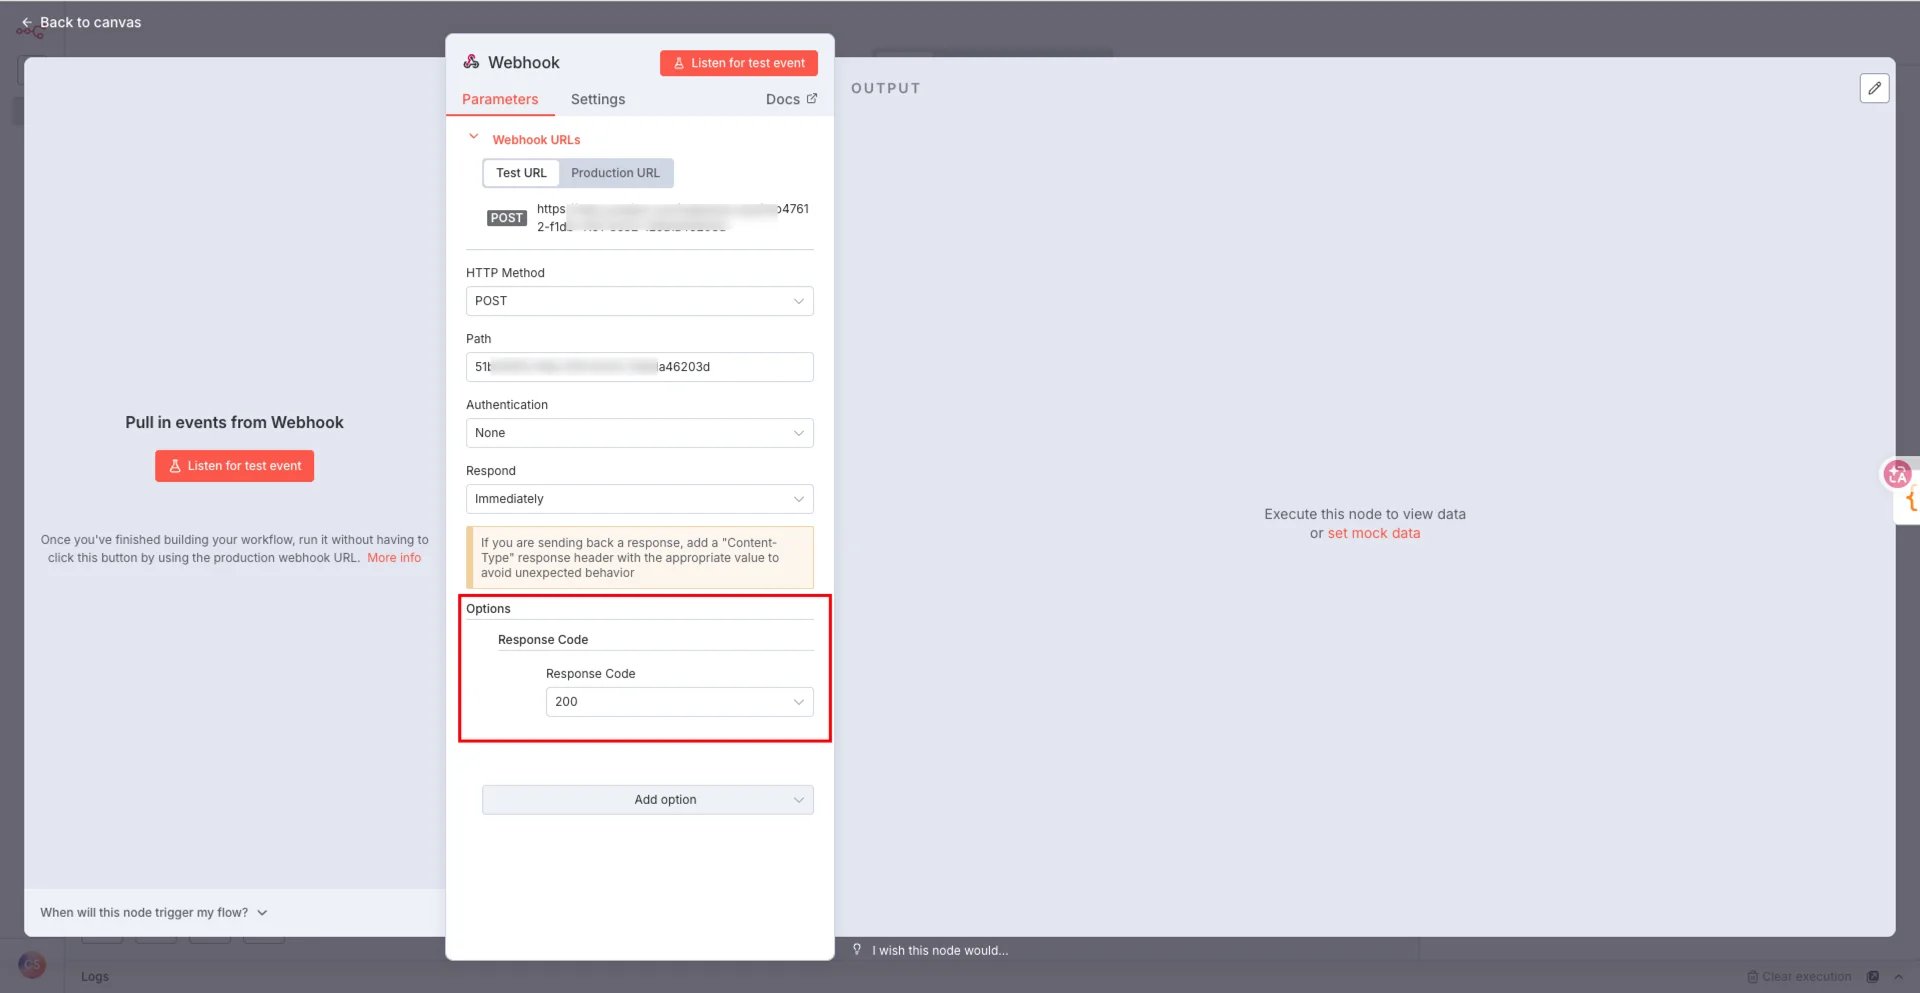 将端点详细信息添加到 YCloud 平台,并选择要监听的 Webhook 事件
 ### 解析返回值并验证签名
#### 解析返回值
使用 n8n 内置的“code”节点解析 Webhook 响应中的请求头
### 解析返回值并验证签名
#### 解析返回值
使用 n8n 内置的“code”节点解析 Webhook 响应中的请求头
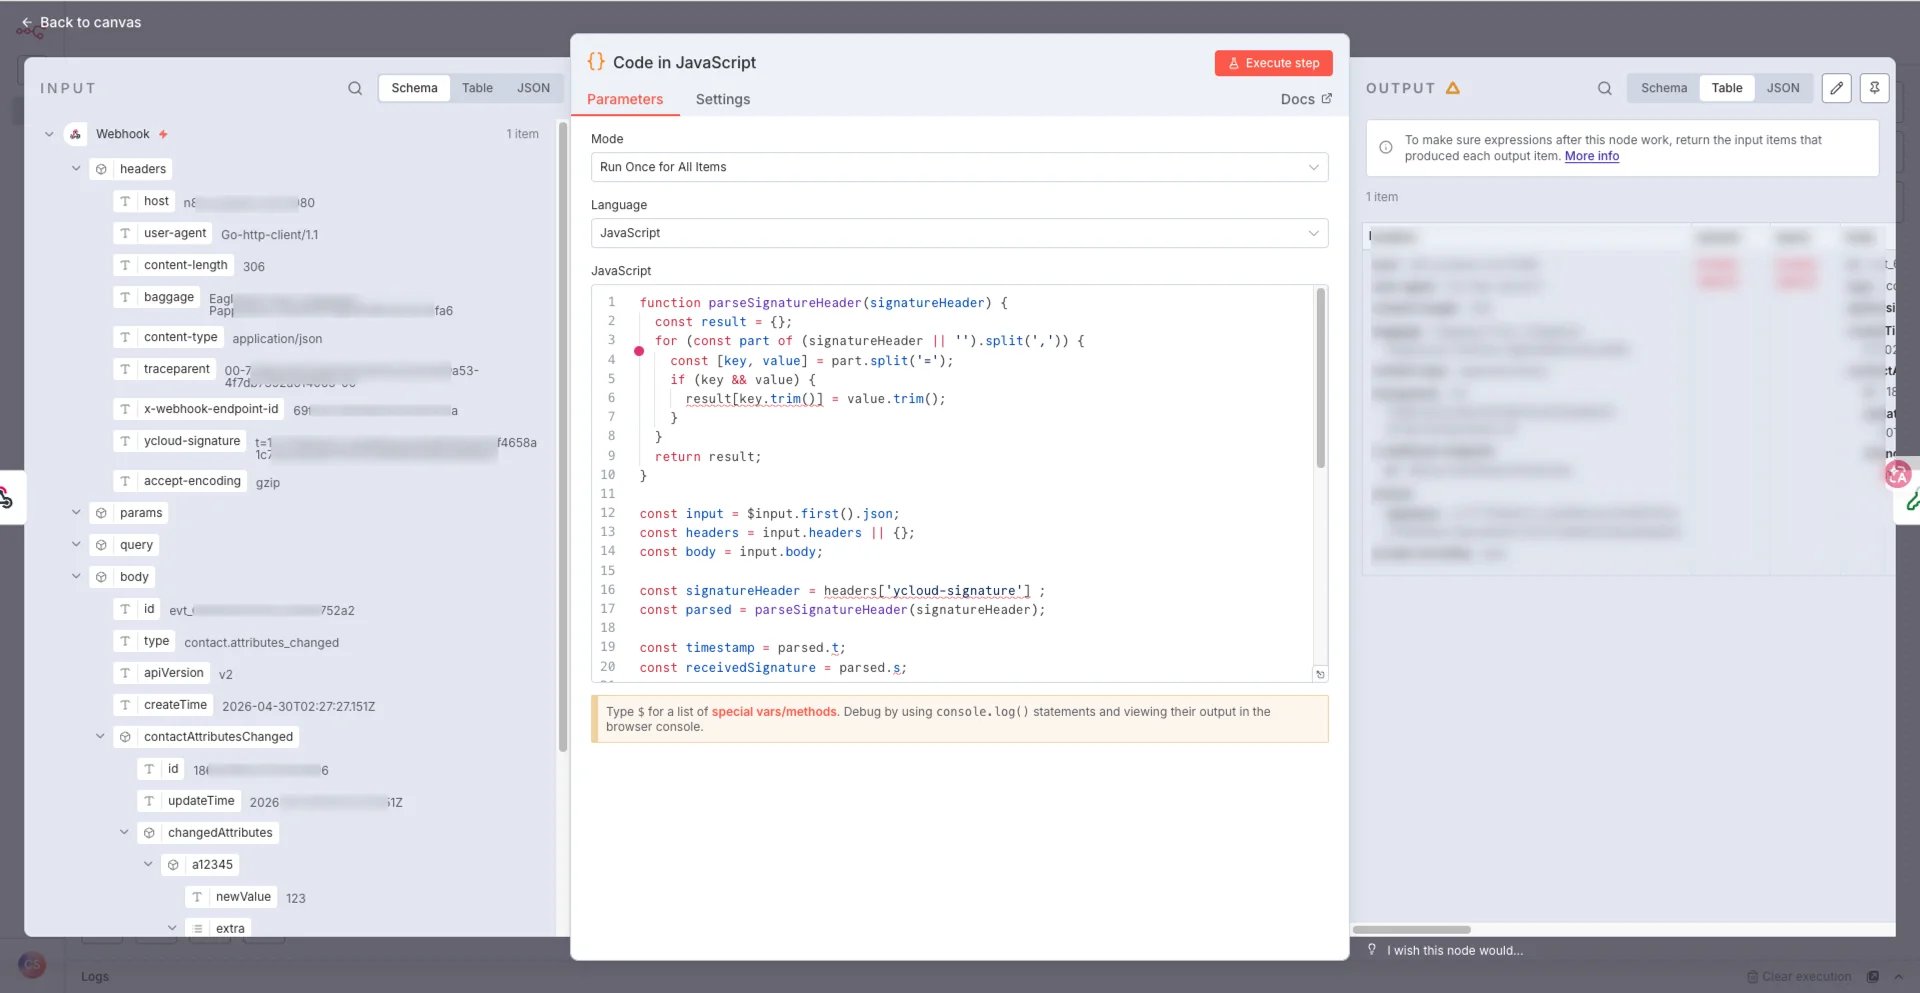 选择 JavaScript 进行解析
```javascript theme={"theme":{"light":"github-light","dark":"github-dark"}}
function parseSignatureHeader(signatureHeader) {
const result = {};
for (const part of (signatureHeader || '').split(',')) {
const [key, value] = part.split('=');
if (key && value) {
result[key.trim()] = value.trim();
}
}
return result;
}
const input = $input.first().json;
const headers = input.headers || {};
const body = input.body;
const signatureHeader = headers['ycloud-signature'] ;
const parsed = parseSignatureHeader(signatureHeader);
const timestamp = parsed.t;
const receivedSignature = parsed.s;
const payload =
body === undefined || body === null
? ''
: typeof body === 'string'
? body
: JSON.stringify(body);
const signedPayload = `${timestamp}.${payload}`;
return [
{
json: {
...input,
timestamp,
receivedSignature,
payload,
signedPayload,
signatureHeader,
}
}
];
```
该节点的返回值包括:
* 原始值,
* 时间戳,
* 接收到的签名、有效负载 (payload)、已签名负载 (signed payload) 以及请求头中的签名信息
#### 加密数据
在上一步中,数据已被完全拆分。在此节点中,我们将使用 SignedPayload 和 Secret。我们将使用 Crypto 节点对数据进行加密。
选择 JavaScript 进行解析
```javascript theme={"theme":{"light":"github-light","dark":"github-dark"}}
function parseSignatureHeader(signatureHeader) {
const result = {};
for (const part of (signatureHeader || '').split(',')) {
const [key, value] = part.split('=');
if (key && value) {
result[key.trim()] = value.trim();
}
}
return result;
}
const input = $input.first().json;
const headers = input.headers || {};
const body = input.body;
const signatureHeader = headers['ycloud-signature'] ;
const parsed = parseSignatureHeader(signatureHeader);
const timestamp = parsed.t;
const receivedSignature = parsed.s;
const payload =
body === undefined || body === null
? ''
: typeof body === 'string'
? body
: JSON.stringify(body);
const signedPayload = `${timestamp}.${payload}`;
return [
{
json: {
...input,
timestamp,
receivedSignature,
payload,
signedPayload,
signatureHeader,
}
}
];
```
该节点的返回值包括:
* 原始值,
* 时间戳,
* 接收到的签名、有效负载 (payload)、已签名负载 (signed payload) 以及请求头中的签名信息
#### 加密数据
在上一步中,数据已被完全拆分。在此节点中,我们将使用 SignedPayload 和 Secret。我们将使用 Crypto 节点对数据进行加密。
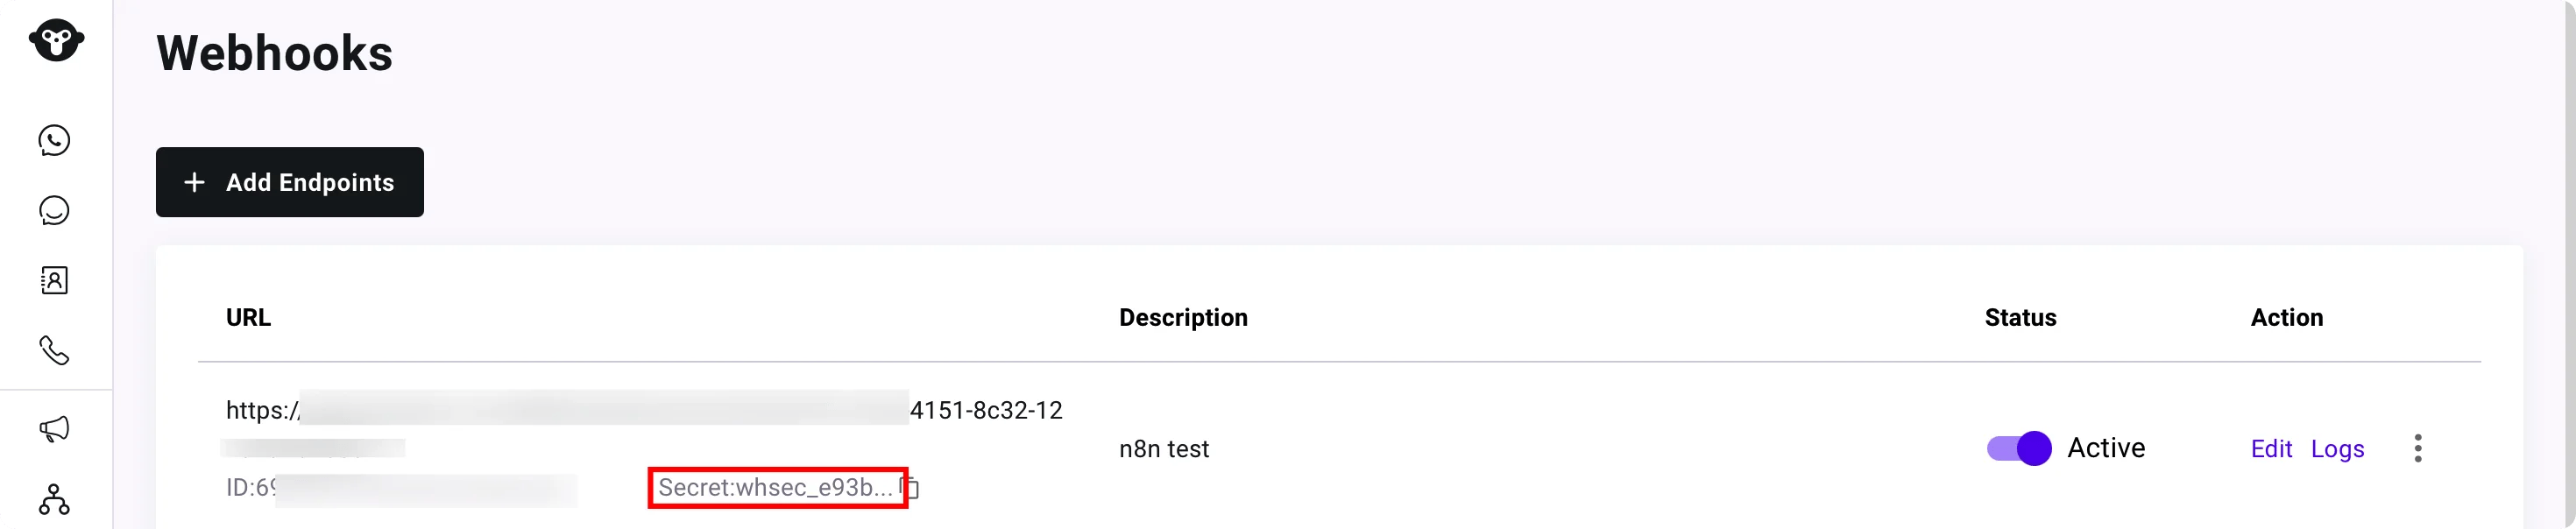
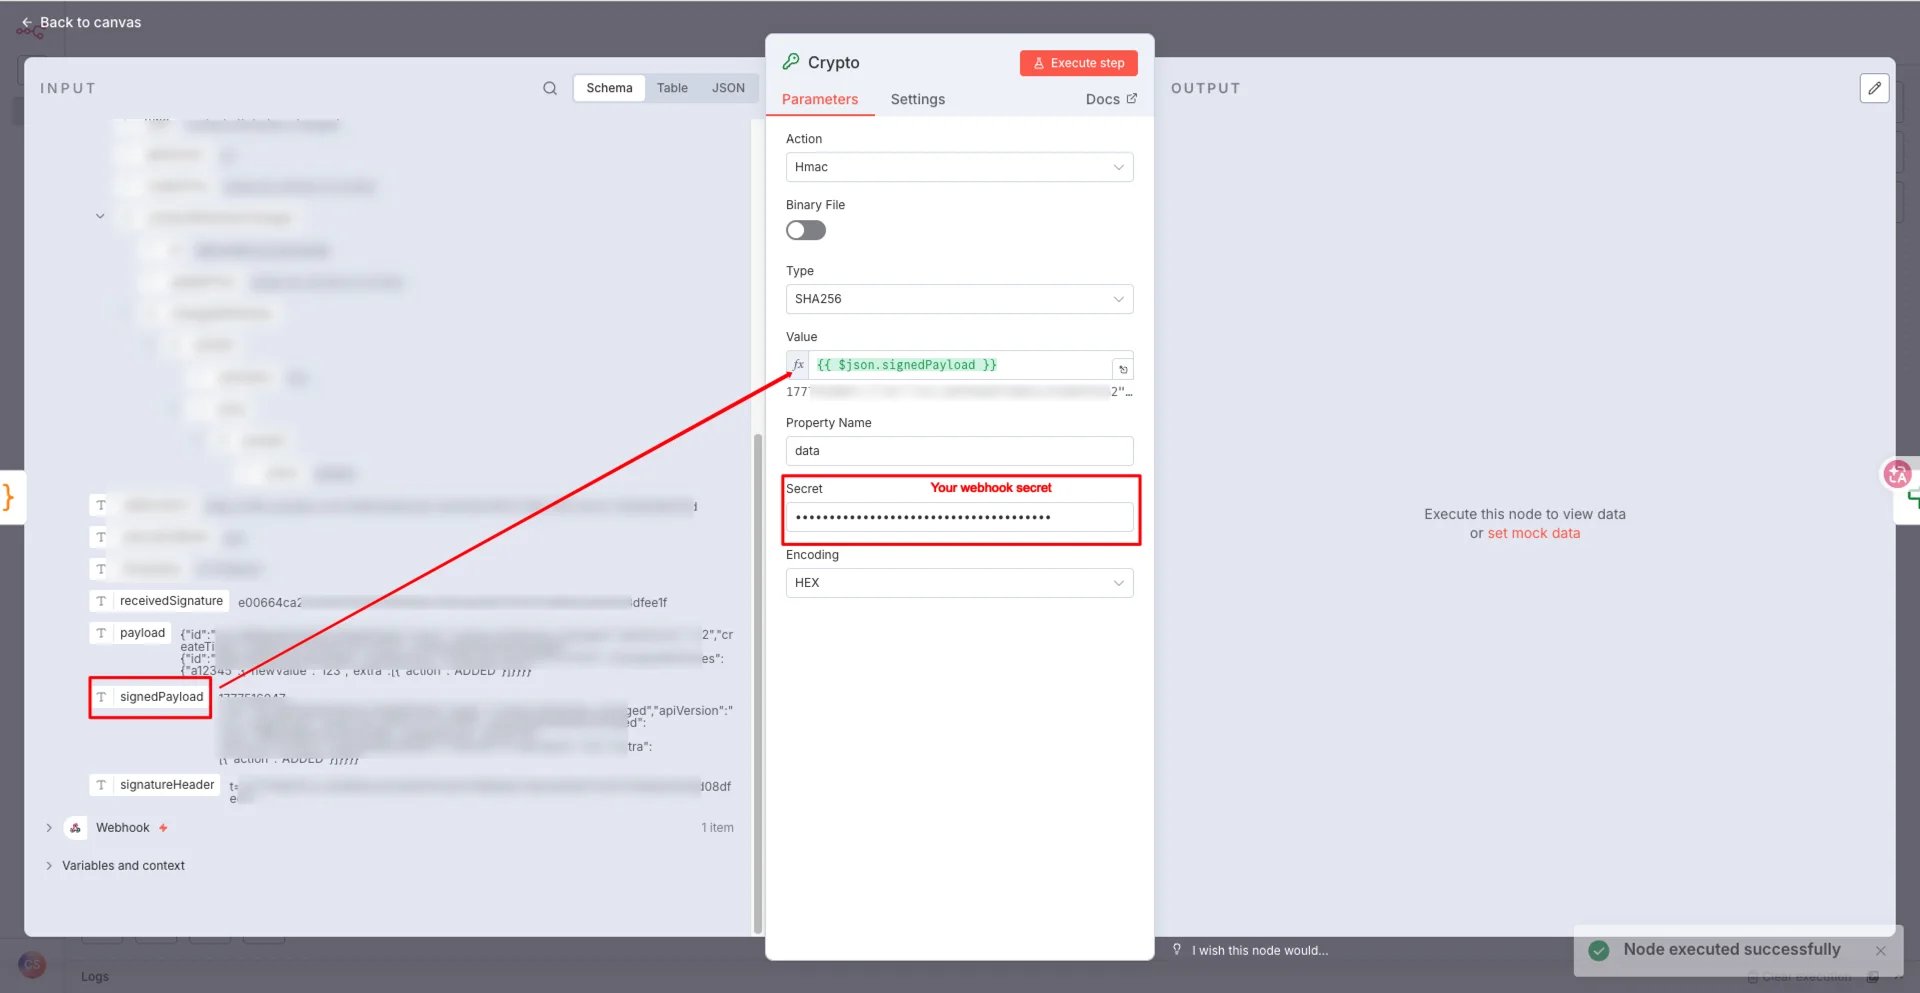 从 YCloud 平台获取 Secret。
 #### 对比签名
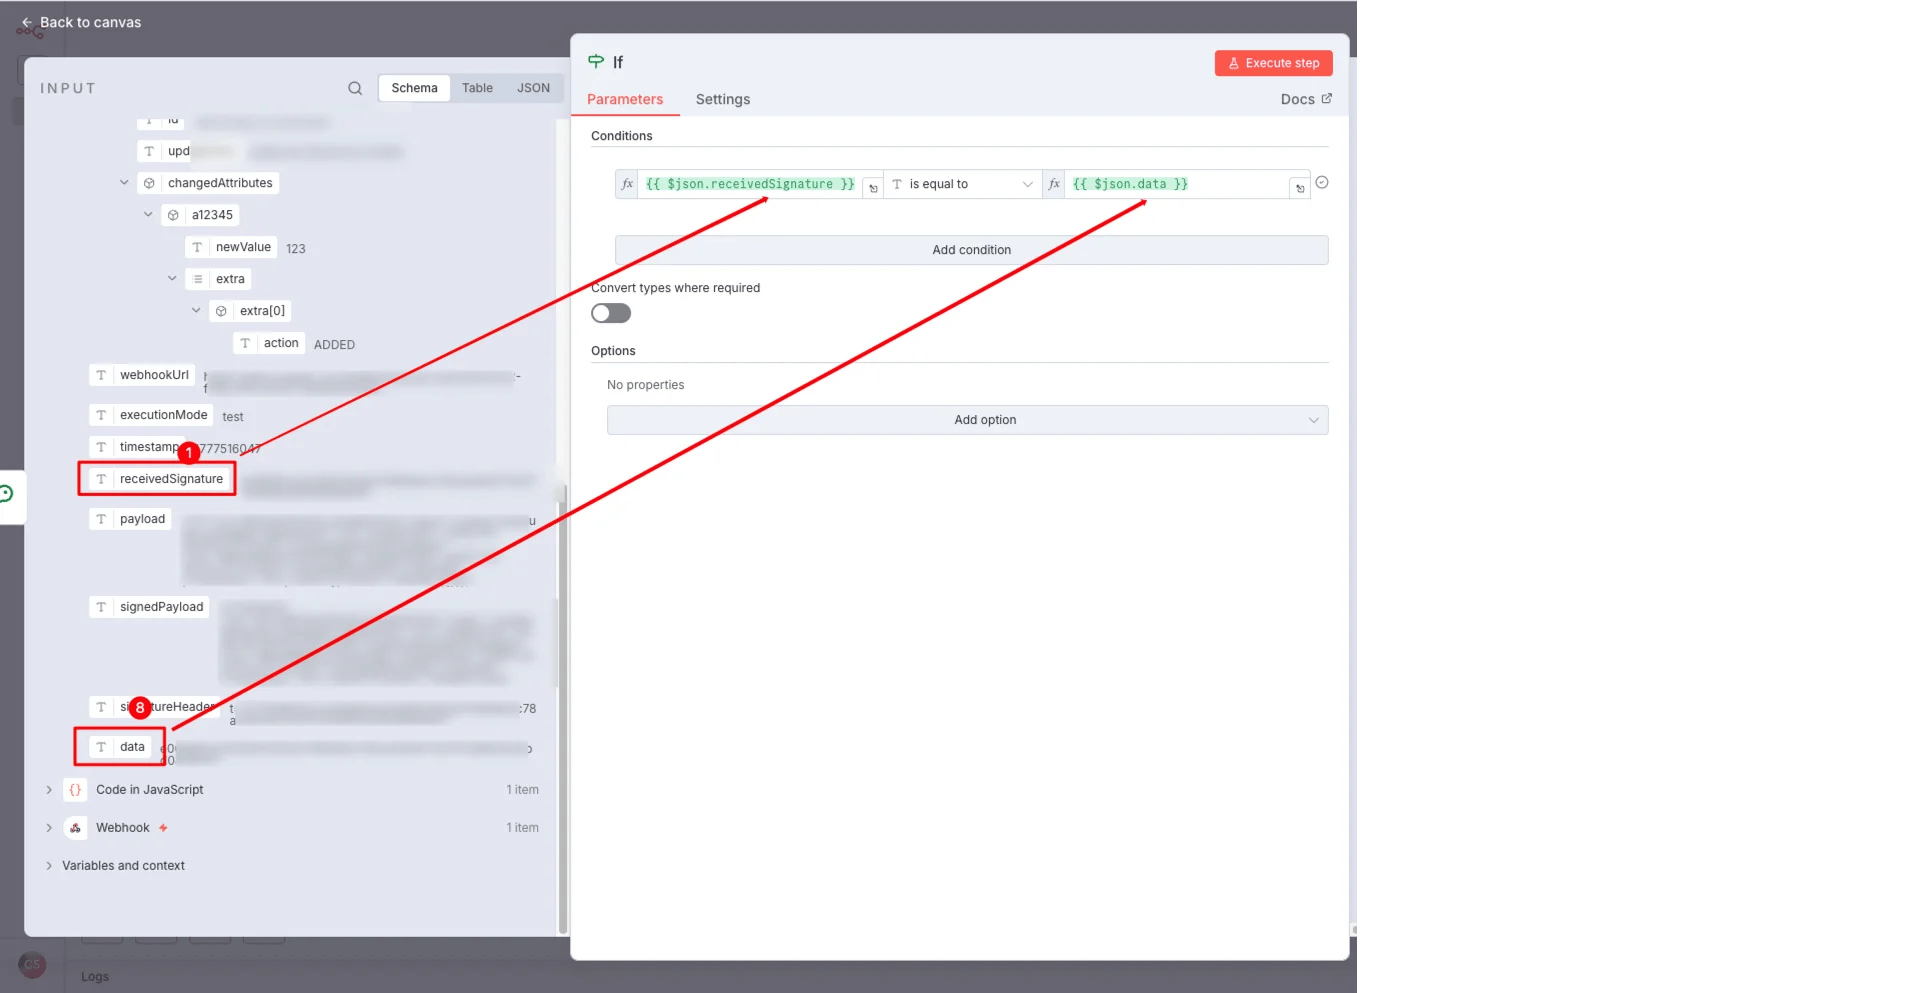
使用 if 语句验证签名信息;如果匹配,则视为验证成功。
#### 对比签名
使用 if 语句验证签名信息;如果匹配,则视为验证成功。
 #### 使用 AI 回复消息
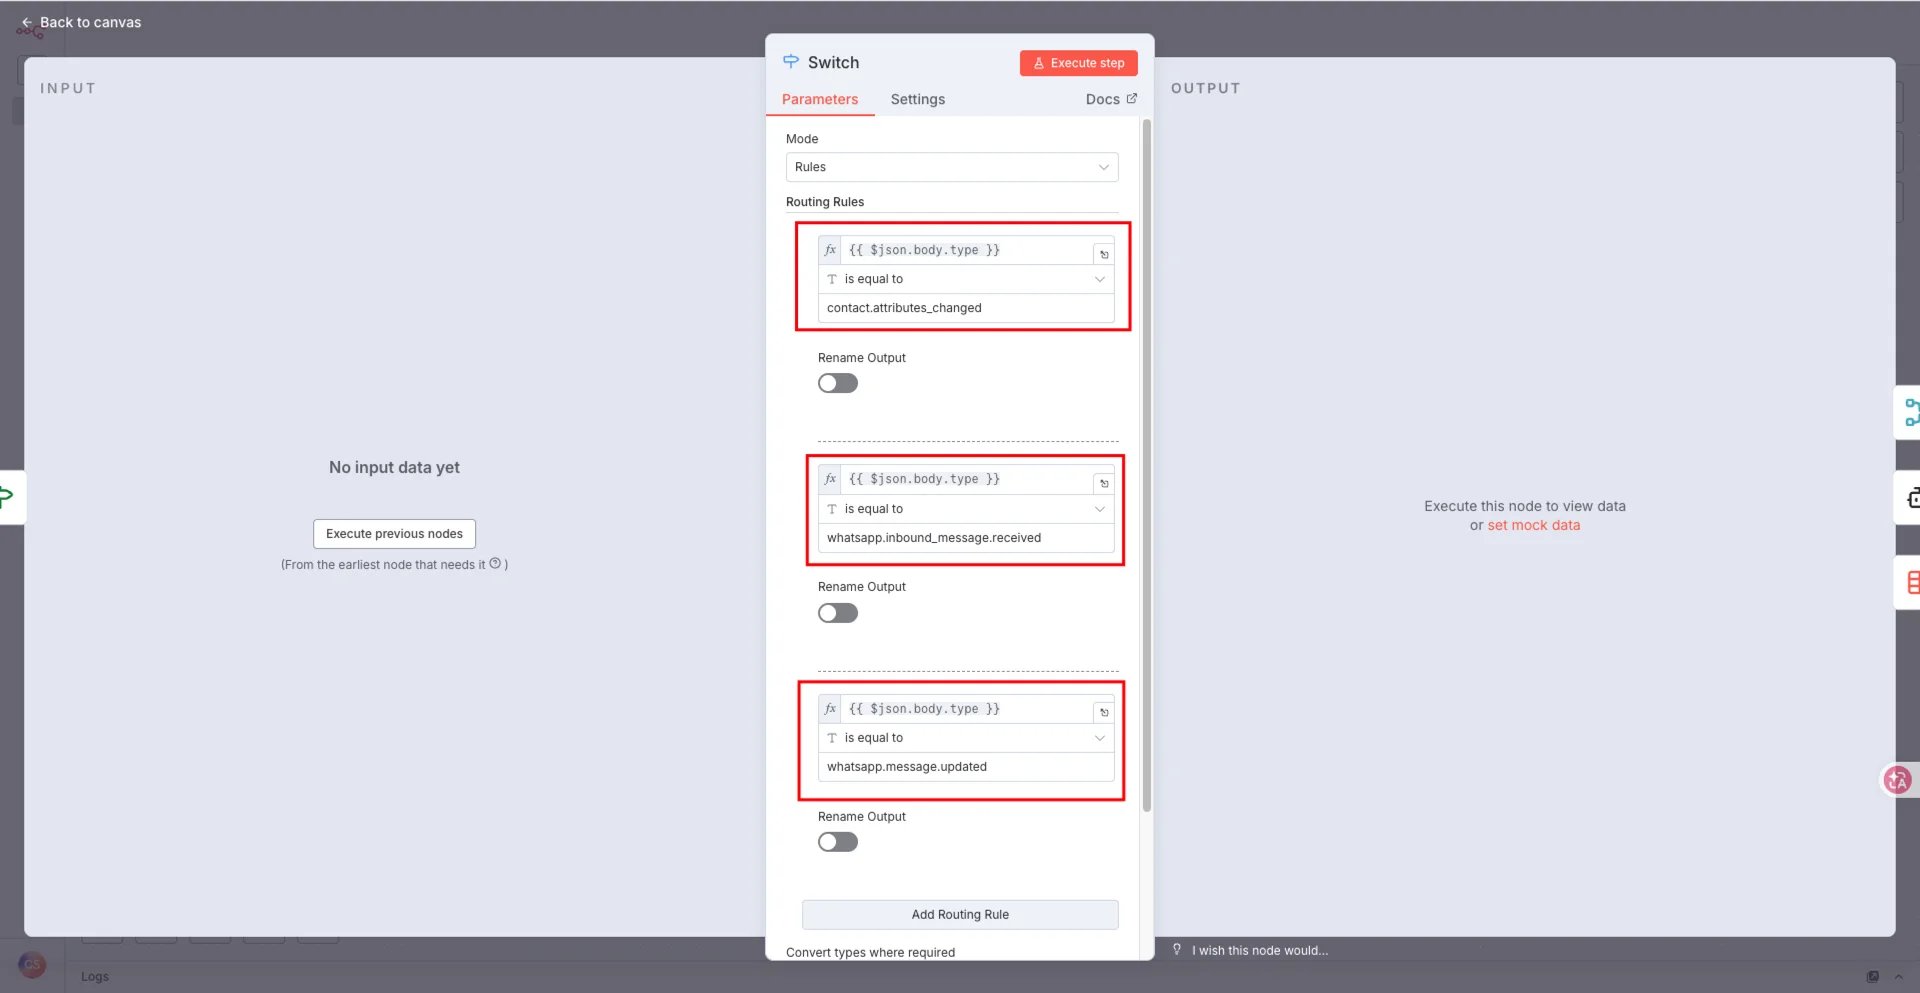
订阅 `whatsapp.inbound_message.received` 和 `whatsapp.message.updated` 事件后,您将在收到消息时收到推送通知,或在发送消息后收到后续状态更新。
1. 使用 `switch` 节点配置多种 Webhook 通知类型。
#### 使用 AI 回复消息
订阅 `whatsapp.inbound_message.received` 和 `whatsapp.message.updated` 事件后,您将在收到消息时收到推送通知,或在发送消息后收到后续状态更新。
1. 使用 `switch` 节点配置多种 Webhook 通知类型。
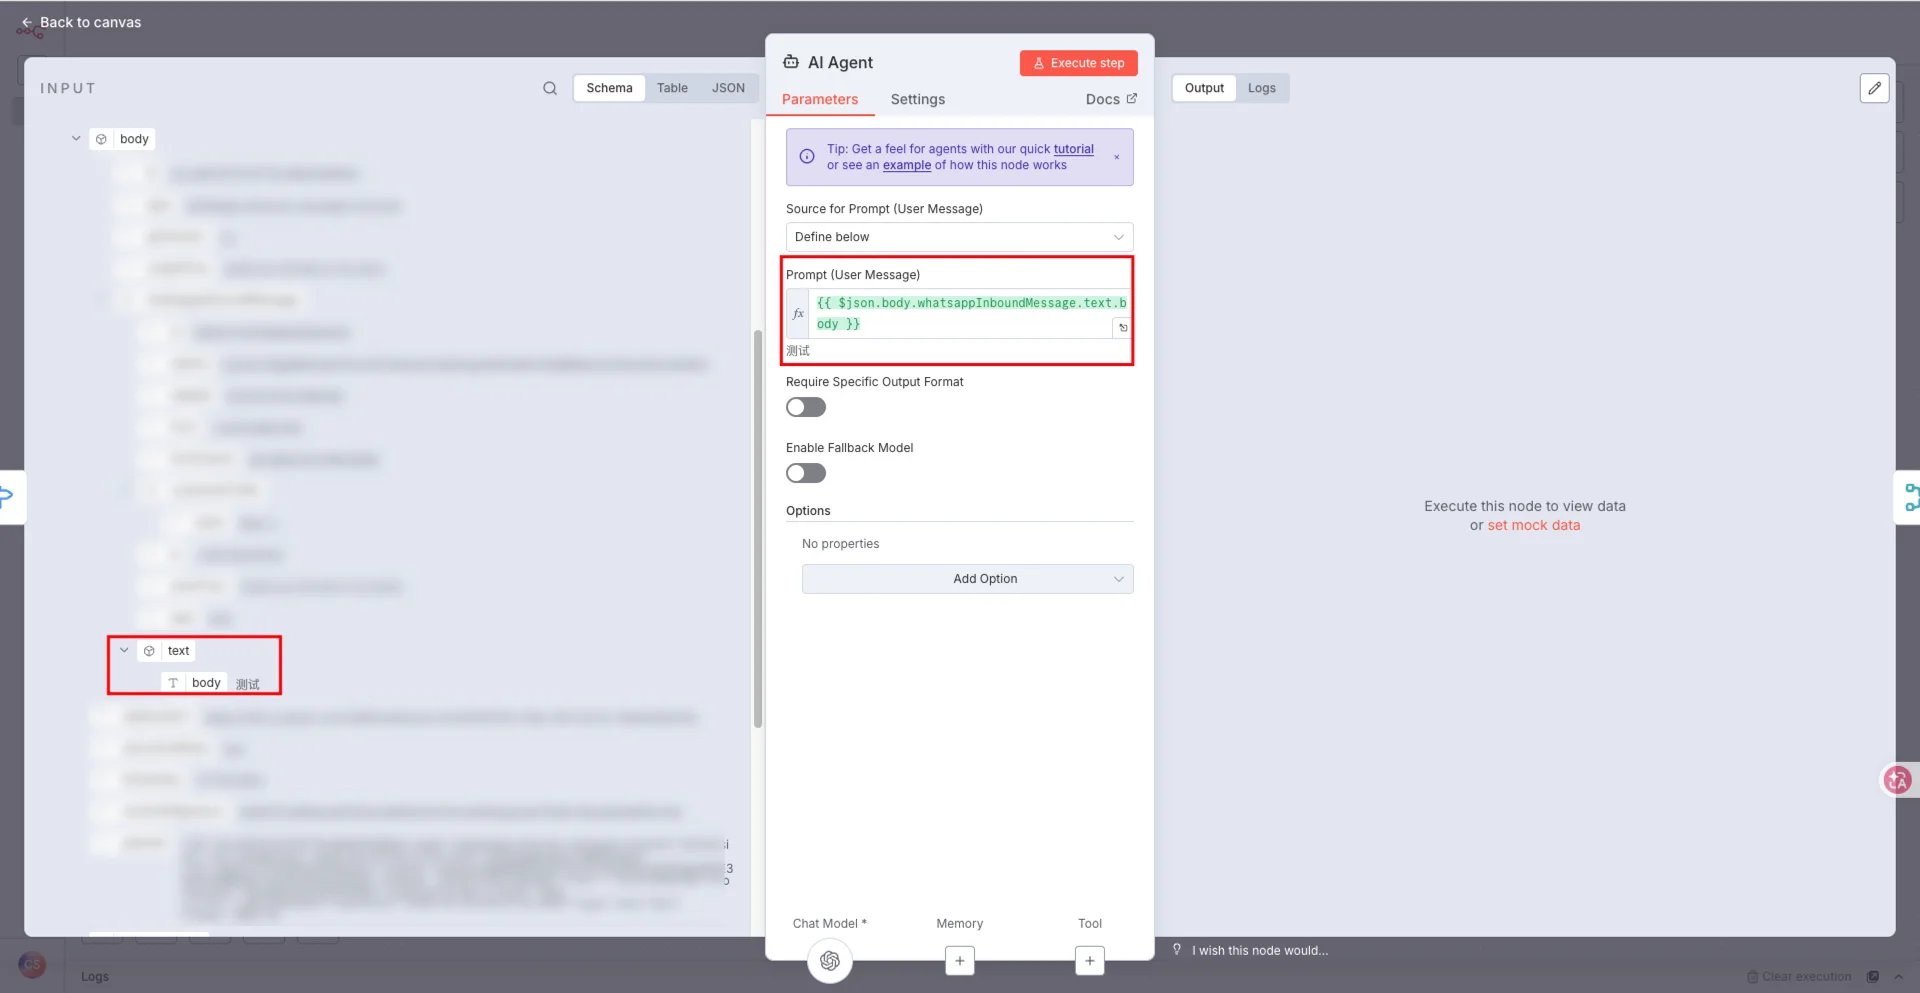
 2. 当收到 `inbound_message_received` 事件时,可以通过调用 AI API 生成回复
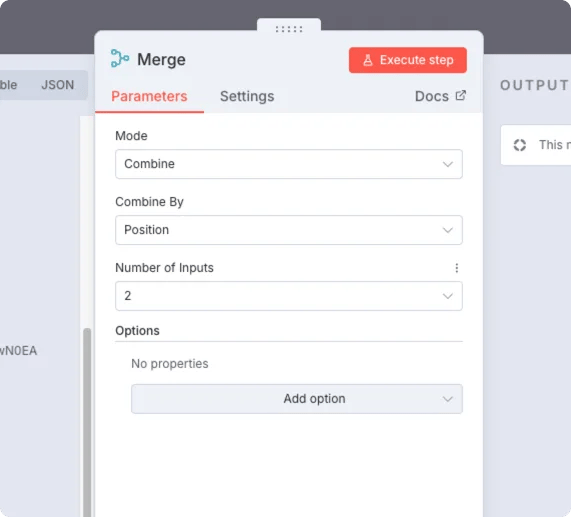
 3. 使用 merge 节点保留上一部分中的 Webhook 推送数据集合
 4. 使用 YCloud 节点发送消息
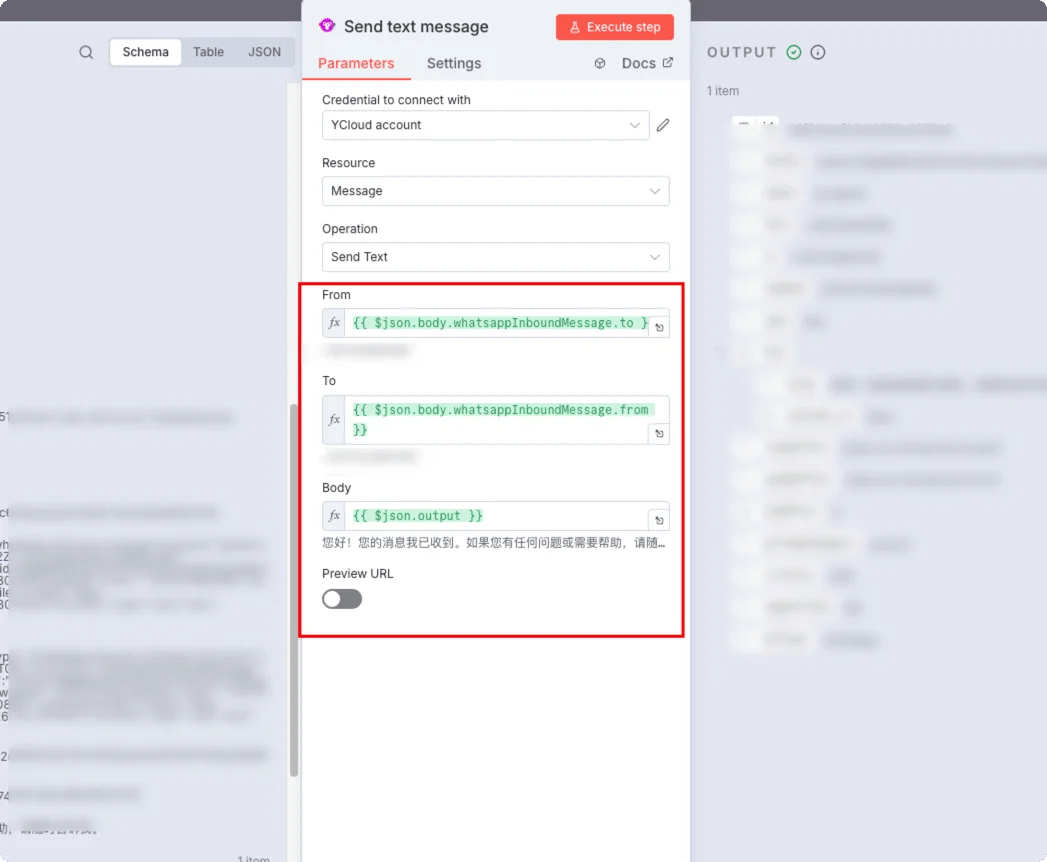 填写相关详情,将 AI 生成的文本放入 Body 字段中并发送。
请注意,这里的发送者和接收者是 **相反的** ;这是一条回复消息。
至此,完整的 n8n 工作流(Webhook → 大语言模型 → 自动回复)现已配置完成。
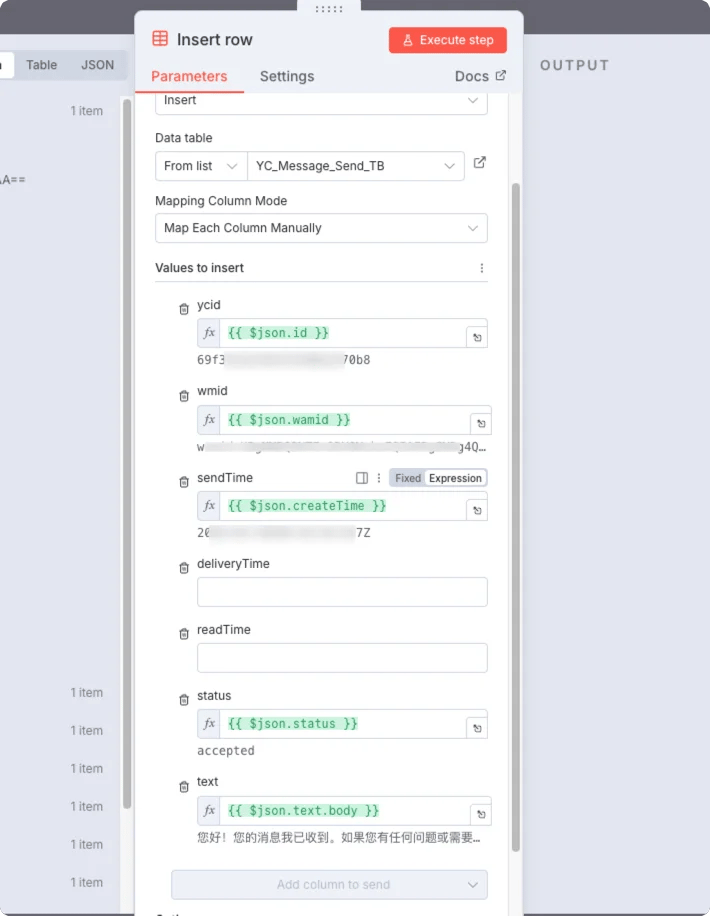
### 保存到数据表(可选)
填写相关详情,将 AI 生成的文本放入 Body 字段中并发送。
请注意,这里的发送者和接收者是 **相反的** ;这是一条回复消息。
至此,完整的 n8n 工作流(Webhook → 大语言模型 → 自动回复)现已配置完成。
### 保存到数据表(可选)
 ### 监听已发送消息的后续更新(可选)
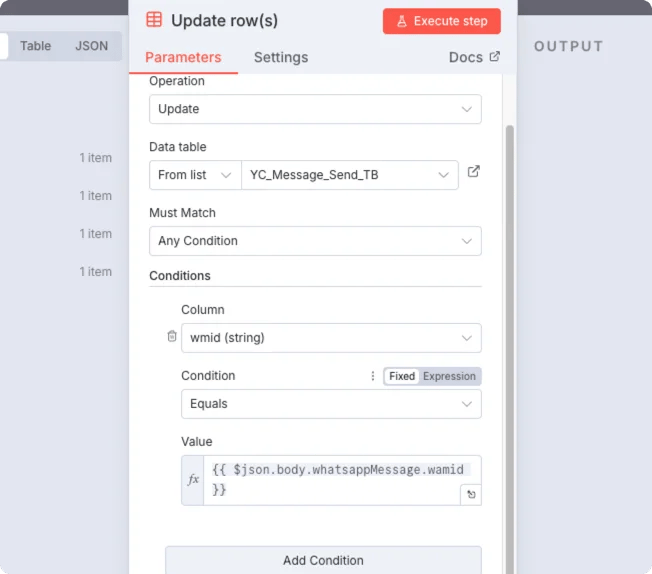
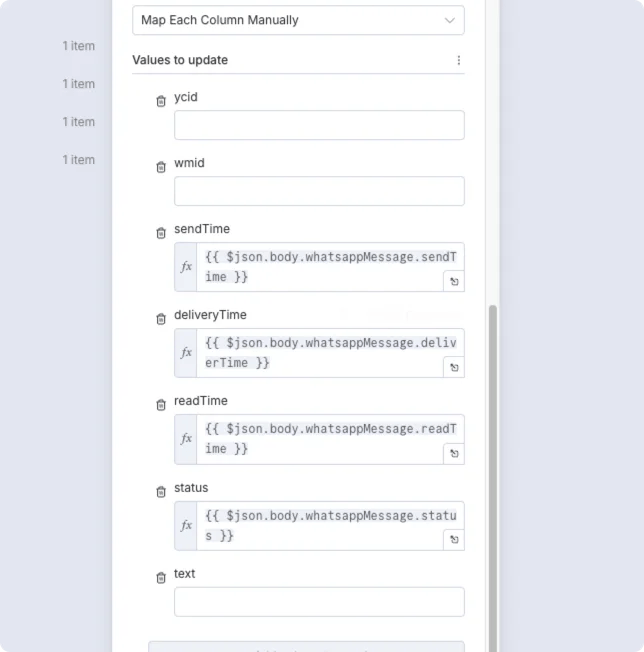
完成步骤 5 后,数据将通过 `whatsapp.message.update` 事件推送。
收到此推送后,您可以使用 `datatable - update rows` 节点更新数据表,从而跟踪整个消息发送过程。
### 监听已发送消息的后续更新(可选)
完成步骤 5 后,数据将通过 `whatsapp.message.update` 事件推送。
收到此推送后,您可以使用 `datatable - update rows` 节点更新数据表,从而跟踪整个消息发送过程。
 This documentation is built and hosted on [Mintlify](https://mintlify.com), a developer documentation platform.