 ## 个人账户设置
### 个人偏好设置
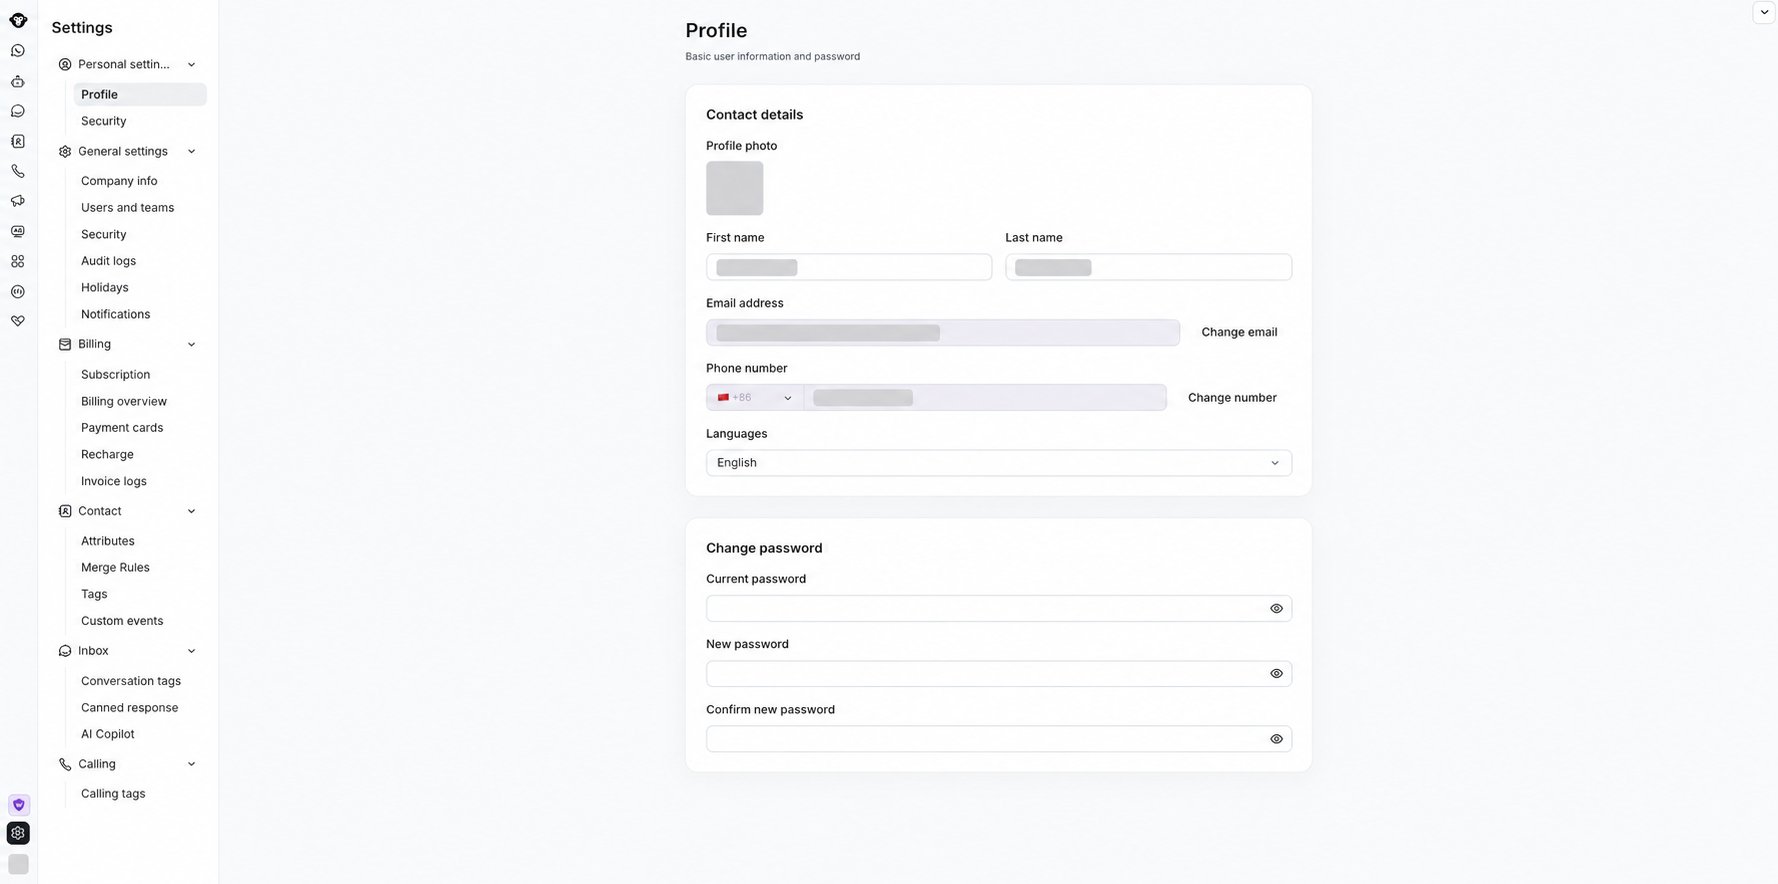
找到账户(左下角的头像),点击 **Edit** 前往 Account > [Profile](https://www.ycloud.com/console/#/app/userSettings/myProfile)
上传头像。推荐尺寸:640×640,小于 5 MB,并填写基本信息。
注:此信息仅用于内部管理和识别。客户只能看到对应 WhatsApp 号码的头像。
## 个人账户设置
### 个人偏好设置
找到账户(左下角的头像),点击 **Edit** 前往 Account > [Profile](https://www.ycloud.com/console/#/app/userSettings/myProfile)
上传头像。推荐尺寸:640×640,小于 5 MB,并填写基本信息。
注:此信息仅用于内部管理和识别。客户只能看到对应 WhatsApp 号码的头像。
 ### 通知偏好设置
设置触发收件箱通知的场景:Inbox - Settings - Notifications
* 设置何时触发声音提醒
* 设置何时触发浏览器弹窗提醒(必须开启浏览器通知权限)
### 通知偏好设置
设置触发收件箱通知的场景:Inbox - Settings - Notifications
* 设置何时触发声音提醒
* 设置何时触发浏览器弹窗提醒(必须开启浏览器通知权限)
 ## 接待客户
### 熟悉 Inbox 聊天界面
请参阅相关文档。
### 开始聊天
#### 个人状态设置
登录后,状态为 **Away**。将状态更改为 **Available**,新进会话将自动分配。
客服状态是系统判断是否自动分配会话的依据。
## 接待客户
### 熟悉 Inbox 聊天界面
请参阅相关文档。
### 开始聊天
#### 个人状态设置
登录后,状态为 **Away**。将状态更改为 **Available**,新进会话将自动分配。
客服状态是系统判断是否自动分配会话的依据。
| 名称 | 显示 | 说明 |
|---|---|---|
| 离开 | 离开:当分配规则设置为“仅分配给在线客服”时,新会话不会自动分配给离开状态的客服;仍可手动转接新会话给他们 | |
| 空闲 | 空闲:新会话将自动分配;可以手动转接会话 | |
| 离线 | 未登录系统:仅当分配规则为“负责人优先”时才会分配新会话。可以手动转接会话 |
 #### 发起新聊天
请参阅文档:发起新聊天
### 聊天中
#### 使用聊天框
请参阅文档:Inbox 聊天区域
#### 编辑客户信息
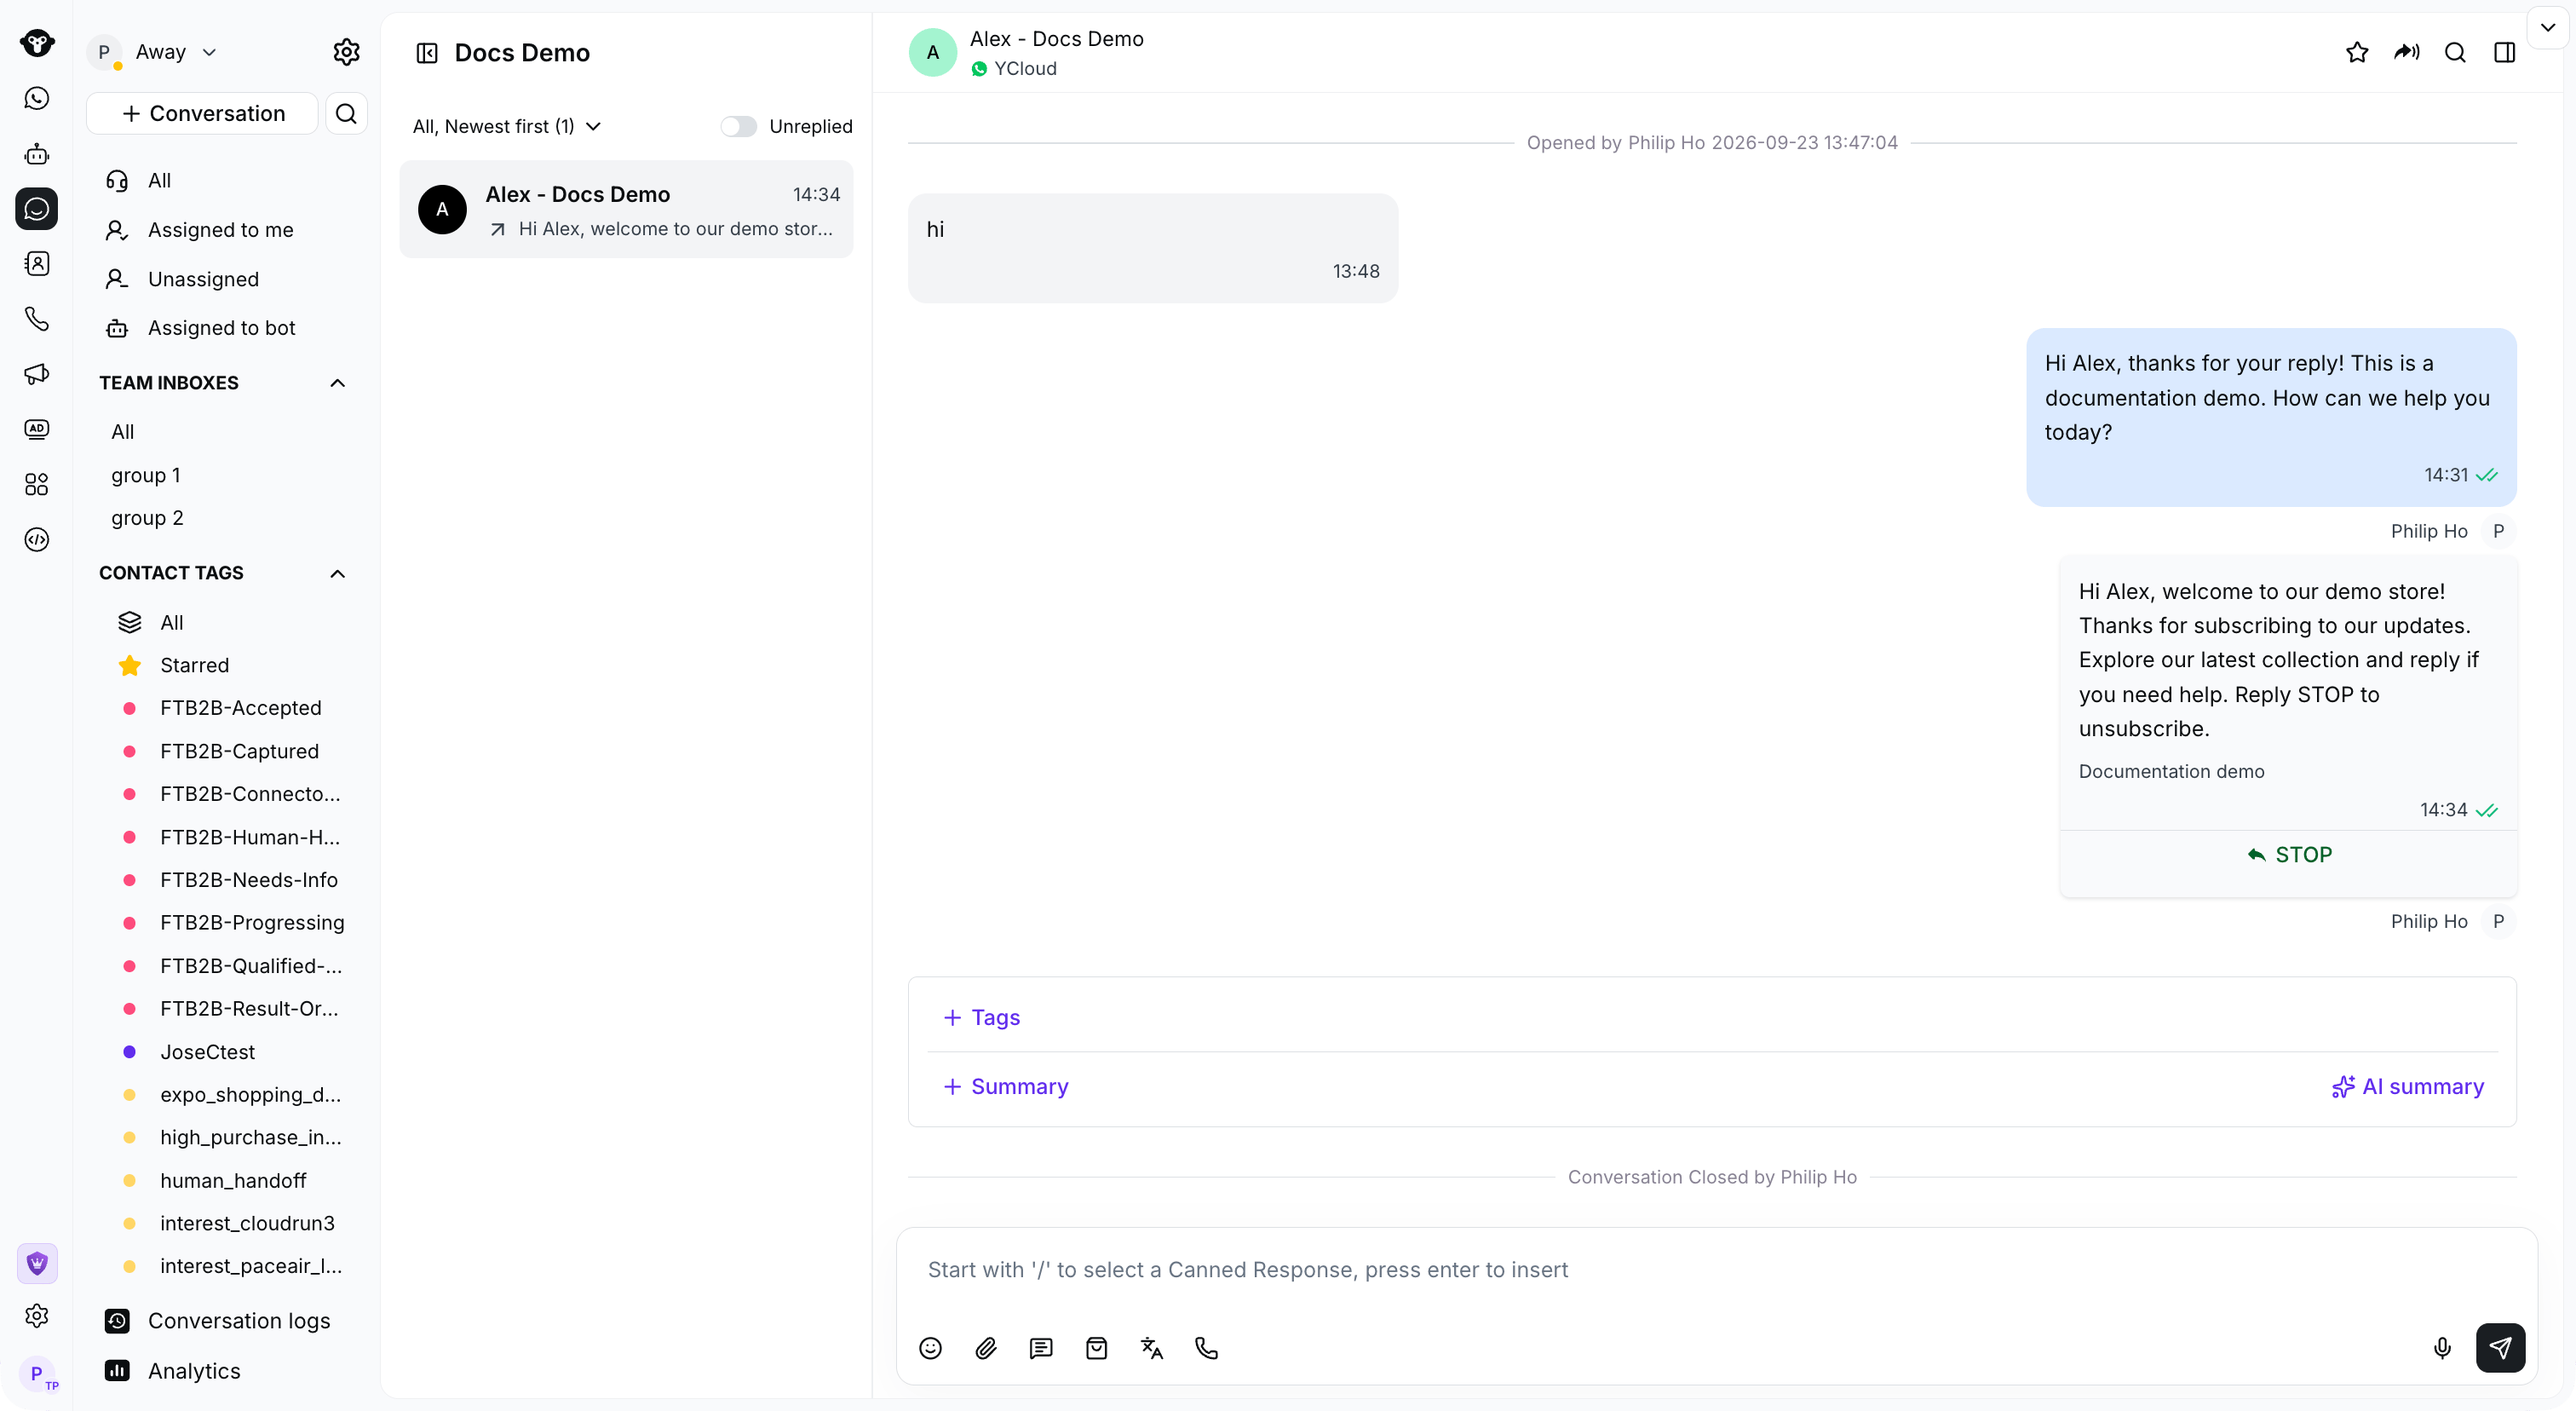
1. 当客户发起会话时,客户相关信息将记录在 Contact 中。聊天期间,您可以查看该用户的信息。路径为:
* 点击用户姓名区域
* 点击右侧的展开按钮
1. 记录有用信息,为客户添加标签,并修改属性。
* 添加标签:找到 Tags 部分,然后点击 **➕** 按钮选择已有标签
* 修改属性:点击属性后面的文本以更改相关属性。用鼠标点击空白区域即可保存(也可以按键盘上的 Enter 键保存)。
此更改将同步到 Contact 列表。
1. 为重要客户加星标
* 添加星标:点击星标图标为该用户点亮星标。随后即可在 **Starred** 下的 Tags 分类中快速筛选该用户
* 取消星标:再次点击星标图标。星标由黄色变为无色,表示已取消星标
### 结束聊天
#### 关闭会话
点击会话区域顶部用户姓名旁边的 **Close** 按钮以结束会话。会话状态变为 **Closed**。
> **提示**
请注意:如果您已经在 AI Agent 中设置了自动回复,仍需点击转接按钮将对话转接给人工客服。否则,即使人工客服先回复,也仍然会触发 AI Agent 的自动回复。
#### 转接会话
点击会话区域顶部用户姓名旁边的 **Transfer** 按钮,然后从下拉列表中选择要转接的对象。您可以输入姓名进行快速搜索。
This documentation is built and hosted on [Mintlify](https://mintlify.com), a developer documentation platform.
#### 发起新聊天
请参阅文档:发起新聊天
### 聊天中
#### 使用聊天框
请参阅文档:Inbox 聊天区域
#### 编辑客户信息
1. 当客户发起会话时,客户相关信息将记录在 Contact 中。聊天期间,您可以查看该用户的信息。路径为:
* 点击用户姓名区域
* 点击右侧的展开按钮
1. 记录有用信息,为客户添加标签,并修改属性。
* 添加标签:找到 Tags 部分,然后点击 **➕** 按钮选择已有标签
* 修改属性:点击属性后面的文本以更改相关属性。用鼠标点击空白区域即可保存(也可以按键盘上的 Enter 键保存)。
此更改将同步到 Contact 列表。
1. 为重要客户加星标
* 添加星标:点击星标图标为该用户点亮星标。随后即可在 **Starred** 下的 Tags 分类中快速筛选该用户
* 取消星标:再次点击星标图标。星标由黄色变为无色,表示已取消星标
### 结束聊天
#### 关闭会话
点击会话区域顶部用户姓名旁边的 **Close** 按钮以结束会话。会话状态变为 **Closed**。
> **提示**
请注意:如果您已经在 AI Agent 中设置了自动回复,仍需点击转接按钮将对话转接给人工客服。否则,即使人工客服先回复,也仍然会触发 AI Agent 的自动回复。
#### 转接会话
点击会话区域顶部用户姓名旁边的 **Transfer** 按钮,然后从下拉列表中选择要转接的对象。您可以输入姓名进行快速搜索。
This documentation is built and hosted on [Mintlify](https://mintlify.com), a developer documentation platform.