> ## Documentation Index
> Fetch the complete documentation index at: https://docs.ycloud.com/llms.txt
> Use this file to discover all available pages before exploring further.
# 域名配置
要使用此服务,您必须在 YCloud 平台上配置自己的发信域名并获取用于验证的 DNS 记录。获取 DNS 记录后,您需要将其应用到您的托管服务商以验证您的域名。这是确保电子邮件安全性和真实性的重要步骤。
## 步骤 1:添加域名
前往 [域名配置页面](https://www.ycloud.com/console/#/app/integrations/email/domains) 并点击添加按钮。
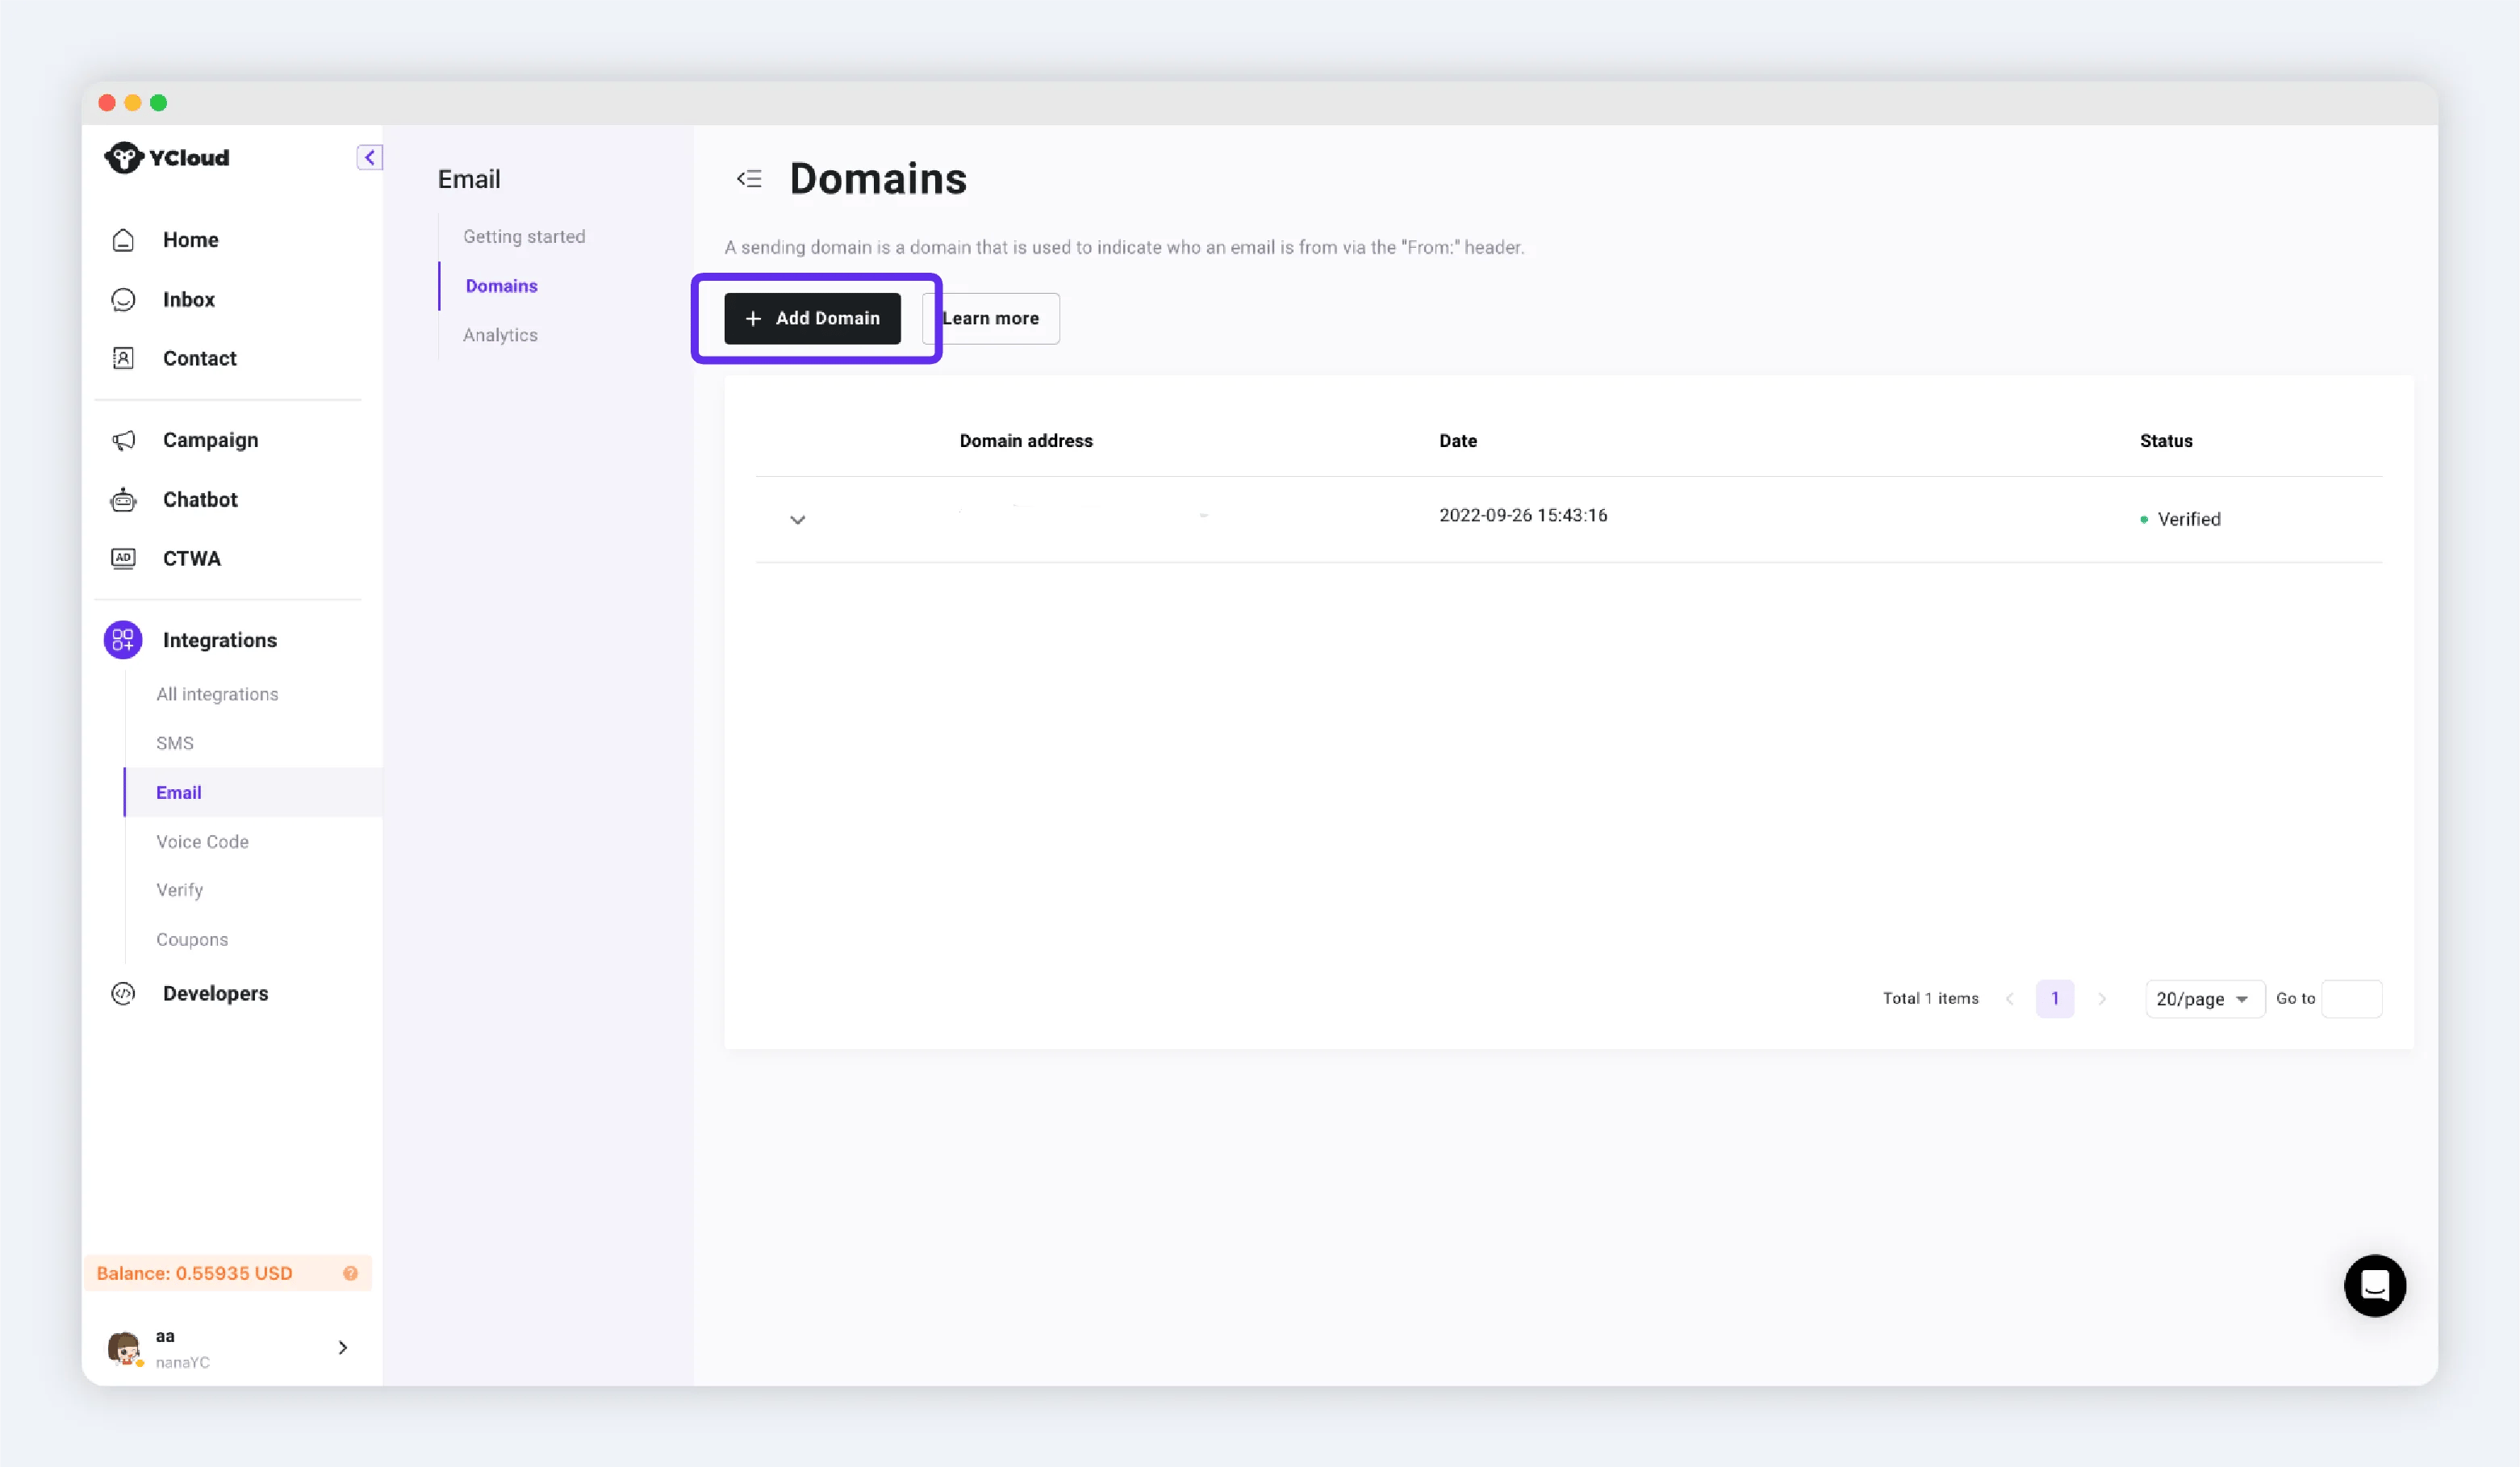 输入您的域名,例如:ycloud.com。输入后点击提交。
 ## 步骤 2:配置 DNS
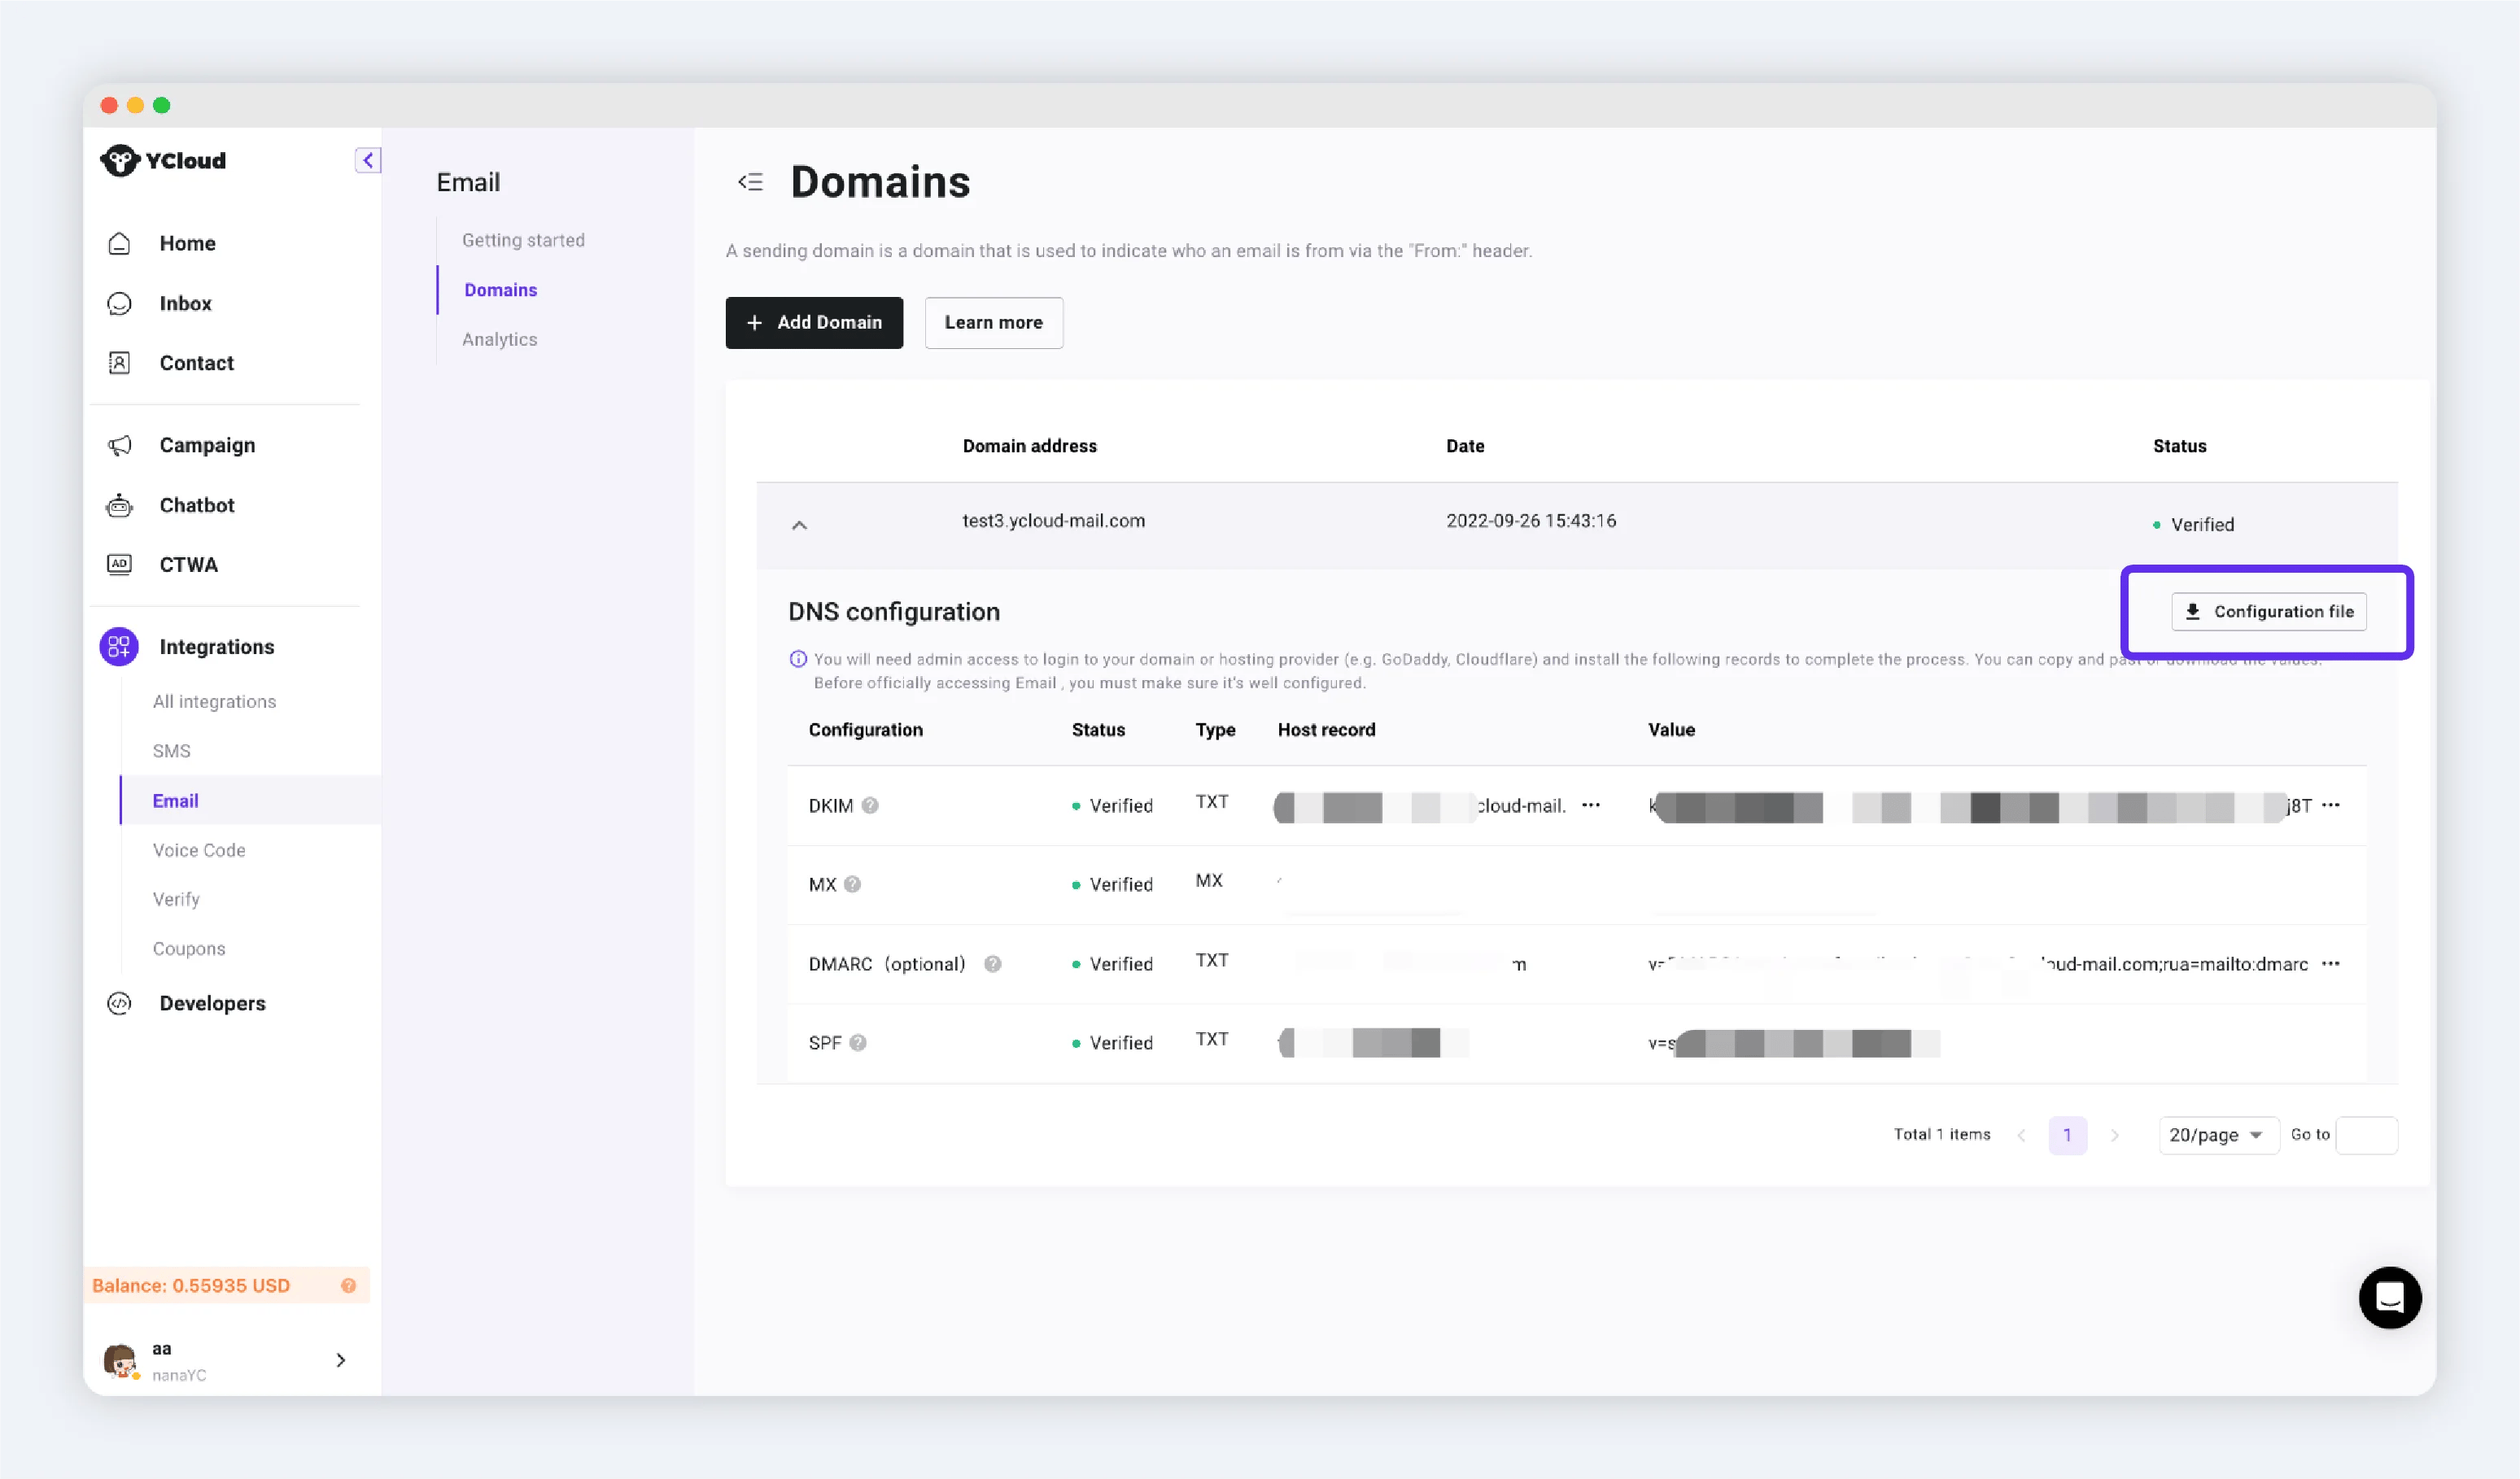
您需要将所有 TXT 记录添加到您的 DNS 主机。如果您没有权限修改公司的 DNS 记录,可以点击“Download Data”(下载数据)按钮并将文件发送给您的同事。
## 步骤 2:配置 DNS
您需要将所有 TXT 记录添加到您的 DNS 主机。如果您没有权限修改公司的 DNS 记录,可以点击“Download Data”(下载数据)按钮并将文件发送给您的同事。
 ## 步骤 3:验证域名
完成配置后,点击验证按钮进行验证。当域名状态变为“Active”时,您就可以使用该域名发送电子邮件了。
This documentation is built and hosted on [Mintlify](https://mintlify.com), a developer documentation platform.
## 步骤 3:验证域名
完成配置后,点击验证按钮进行验证。当域名状态变为“Active”时,您就可以使用该域名发送电子邮件了。
This documentation is built and hosted on [Mintlify](https://mintlify.com), a developer documentation platform.