> ## Documentation Index
> Fetch the complete documentation index at: https://docs.ycloud.com/llms.txt
> Use this file to discover all available pages before exploring further.
# Trigger
> 定义联系人何时进入 Journey。
# Trigger
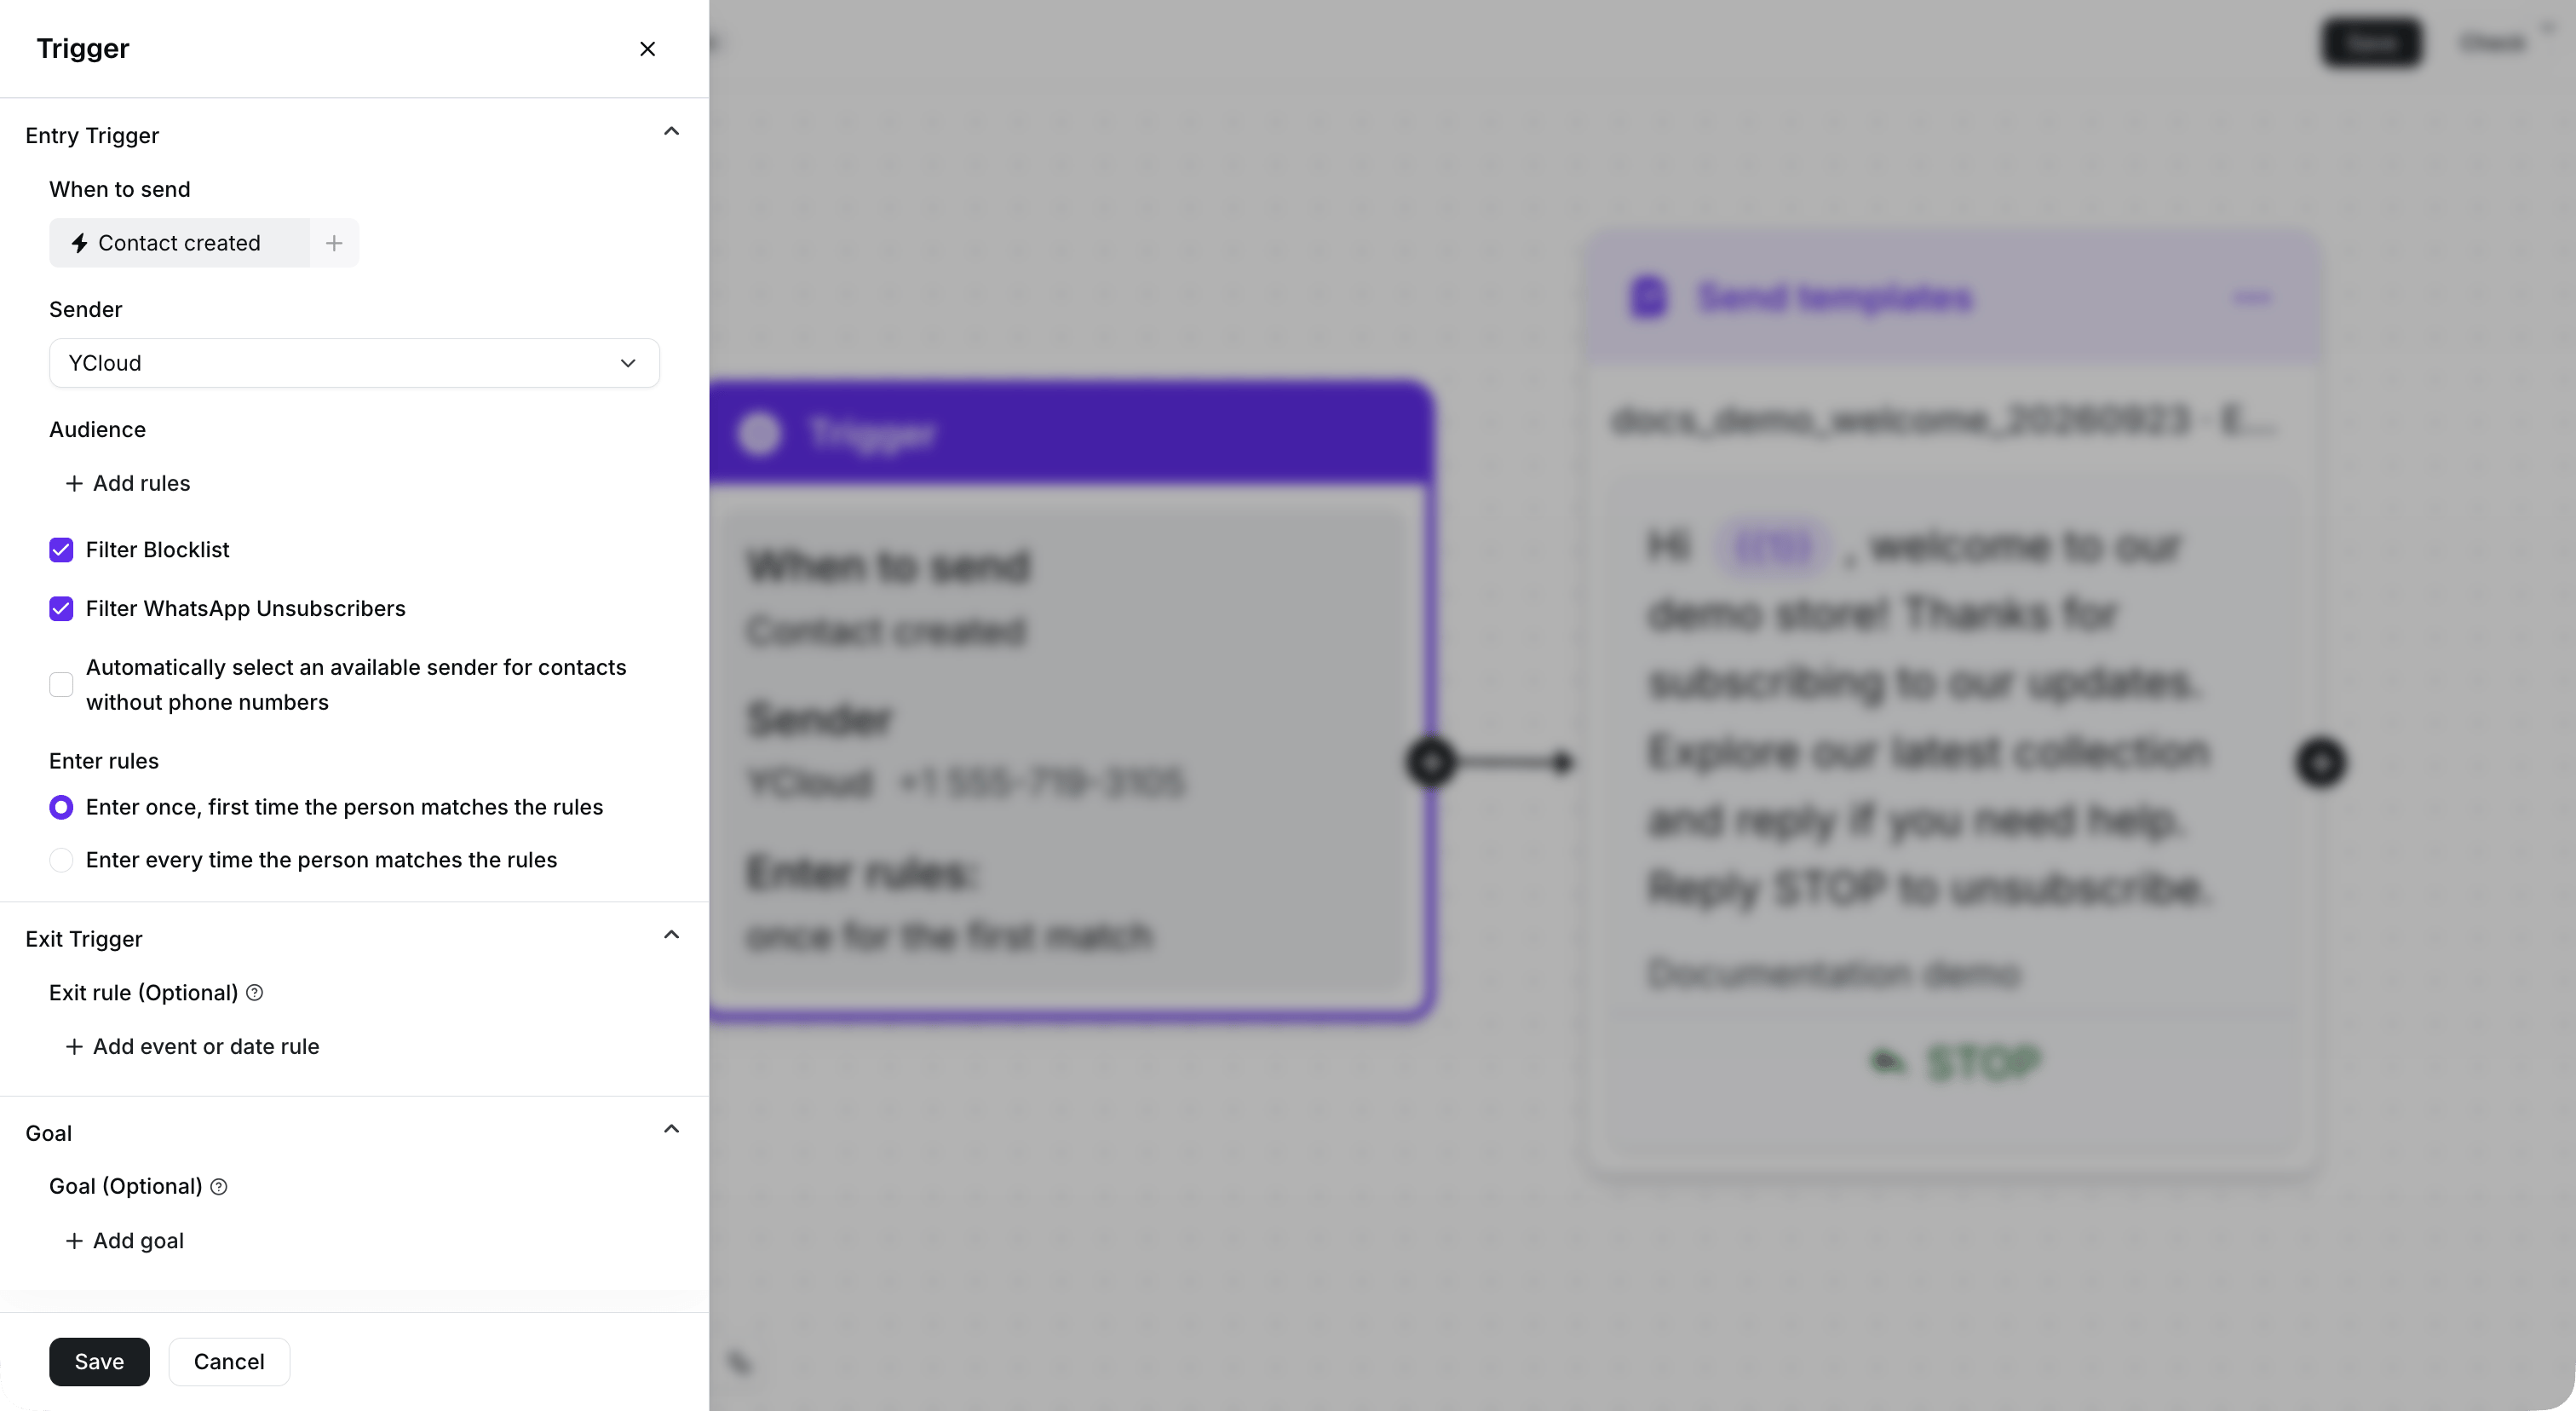
Trigger 用于定义联系人何时进入 Journey。您可以配置进入条件、选择发送者,并设置联系人进入该流程的频率。
## 配置进入条件
在 **When to send** 下,定义联系人进入 Journey 必须满足的条件。
您还可以选择添加 **Audience** 条件,以进一步限制哪些联系人可以进入。仅当同时满足配置的进入条件和所有受众条件时,联系人才能进入 Journey。
## 选择发送者
为 Journey 选择一个 **Sender** 。发送者为必填项。
您稍后在 Journey 中使用的模板必须适用于所选发送者的 WhatsApp 商业账户。
## 配置联系人控制项
使用以下可用控制项管理 Journey 中的联系人:
* **Filter Blocklist** 排除黑名单中的联系人。
* **Filter WhatsApp Unsubscribers** 排除已退订 WhatsApp 消息的联系人。
* **Automatically select an available sender for contacts without phone numbers**:启用后,YCloud 会尝试为没有电话号码的符合条件联系人选择可用的发送者。
## 选择进入规则
在 **Enter rules** 下,选择联系人进入 Journey 的频率:
* **Enter once, first time the person matches the rules**:联系人仅在首次满足条件时进入。
* **Enter every time the person matches the rules**:只要满足条件,联系人即可再次进入。
选择符合您业务场景的规则。例如,一次性欢迎流程使用第一个选项,而周期性跟进流程使用第二个选项。
 ## 后续步骤
配置完 Trigger 后,添加 [Send template](/zh/documentation/journey/components-and-features-introduction/send-template) 步骤或其他组件以继续构建流程。
This documentation is built and hosted on [Mintlify](https://mintlify.com), a developer documentation platform.
## 后续步骤
配置完 Trigger 后,添加 [Send template](/zh/documentation/journey/components-and-features-introduction/send-template) 步骤或其他组件以继续构建流程。
This documentation is built and hosted on [Mintlify](https://mintlify.com), a developer documentation platform.