> ## Documentation Index
> Fetch the complete documentation index at: https://docs.ycloud.com/llms.txt
> Use this file to discover all available pages before exploring further.
# 订单
> 本文介绍如何在 Shop 中管理订单。
# 订单
## **售前准备**
**必要设置**
请确保您的店铺已完成完整配置:
* [**安装店铺**](/zh/documentation/shop/install-shop)
* [**添加商品**](/zh/documentation/shop/product)
* [**设置物流配送**](/zh/documentation/shop/shipping-settings)
* [**配置支付方式**](/zh/documentation/shop/payment-settings)
## **订单创建**
在 **Inbox** 中与客户沟通时,如果客户表现出购买意向,您可以直接分享商品链接:
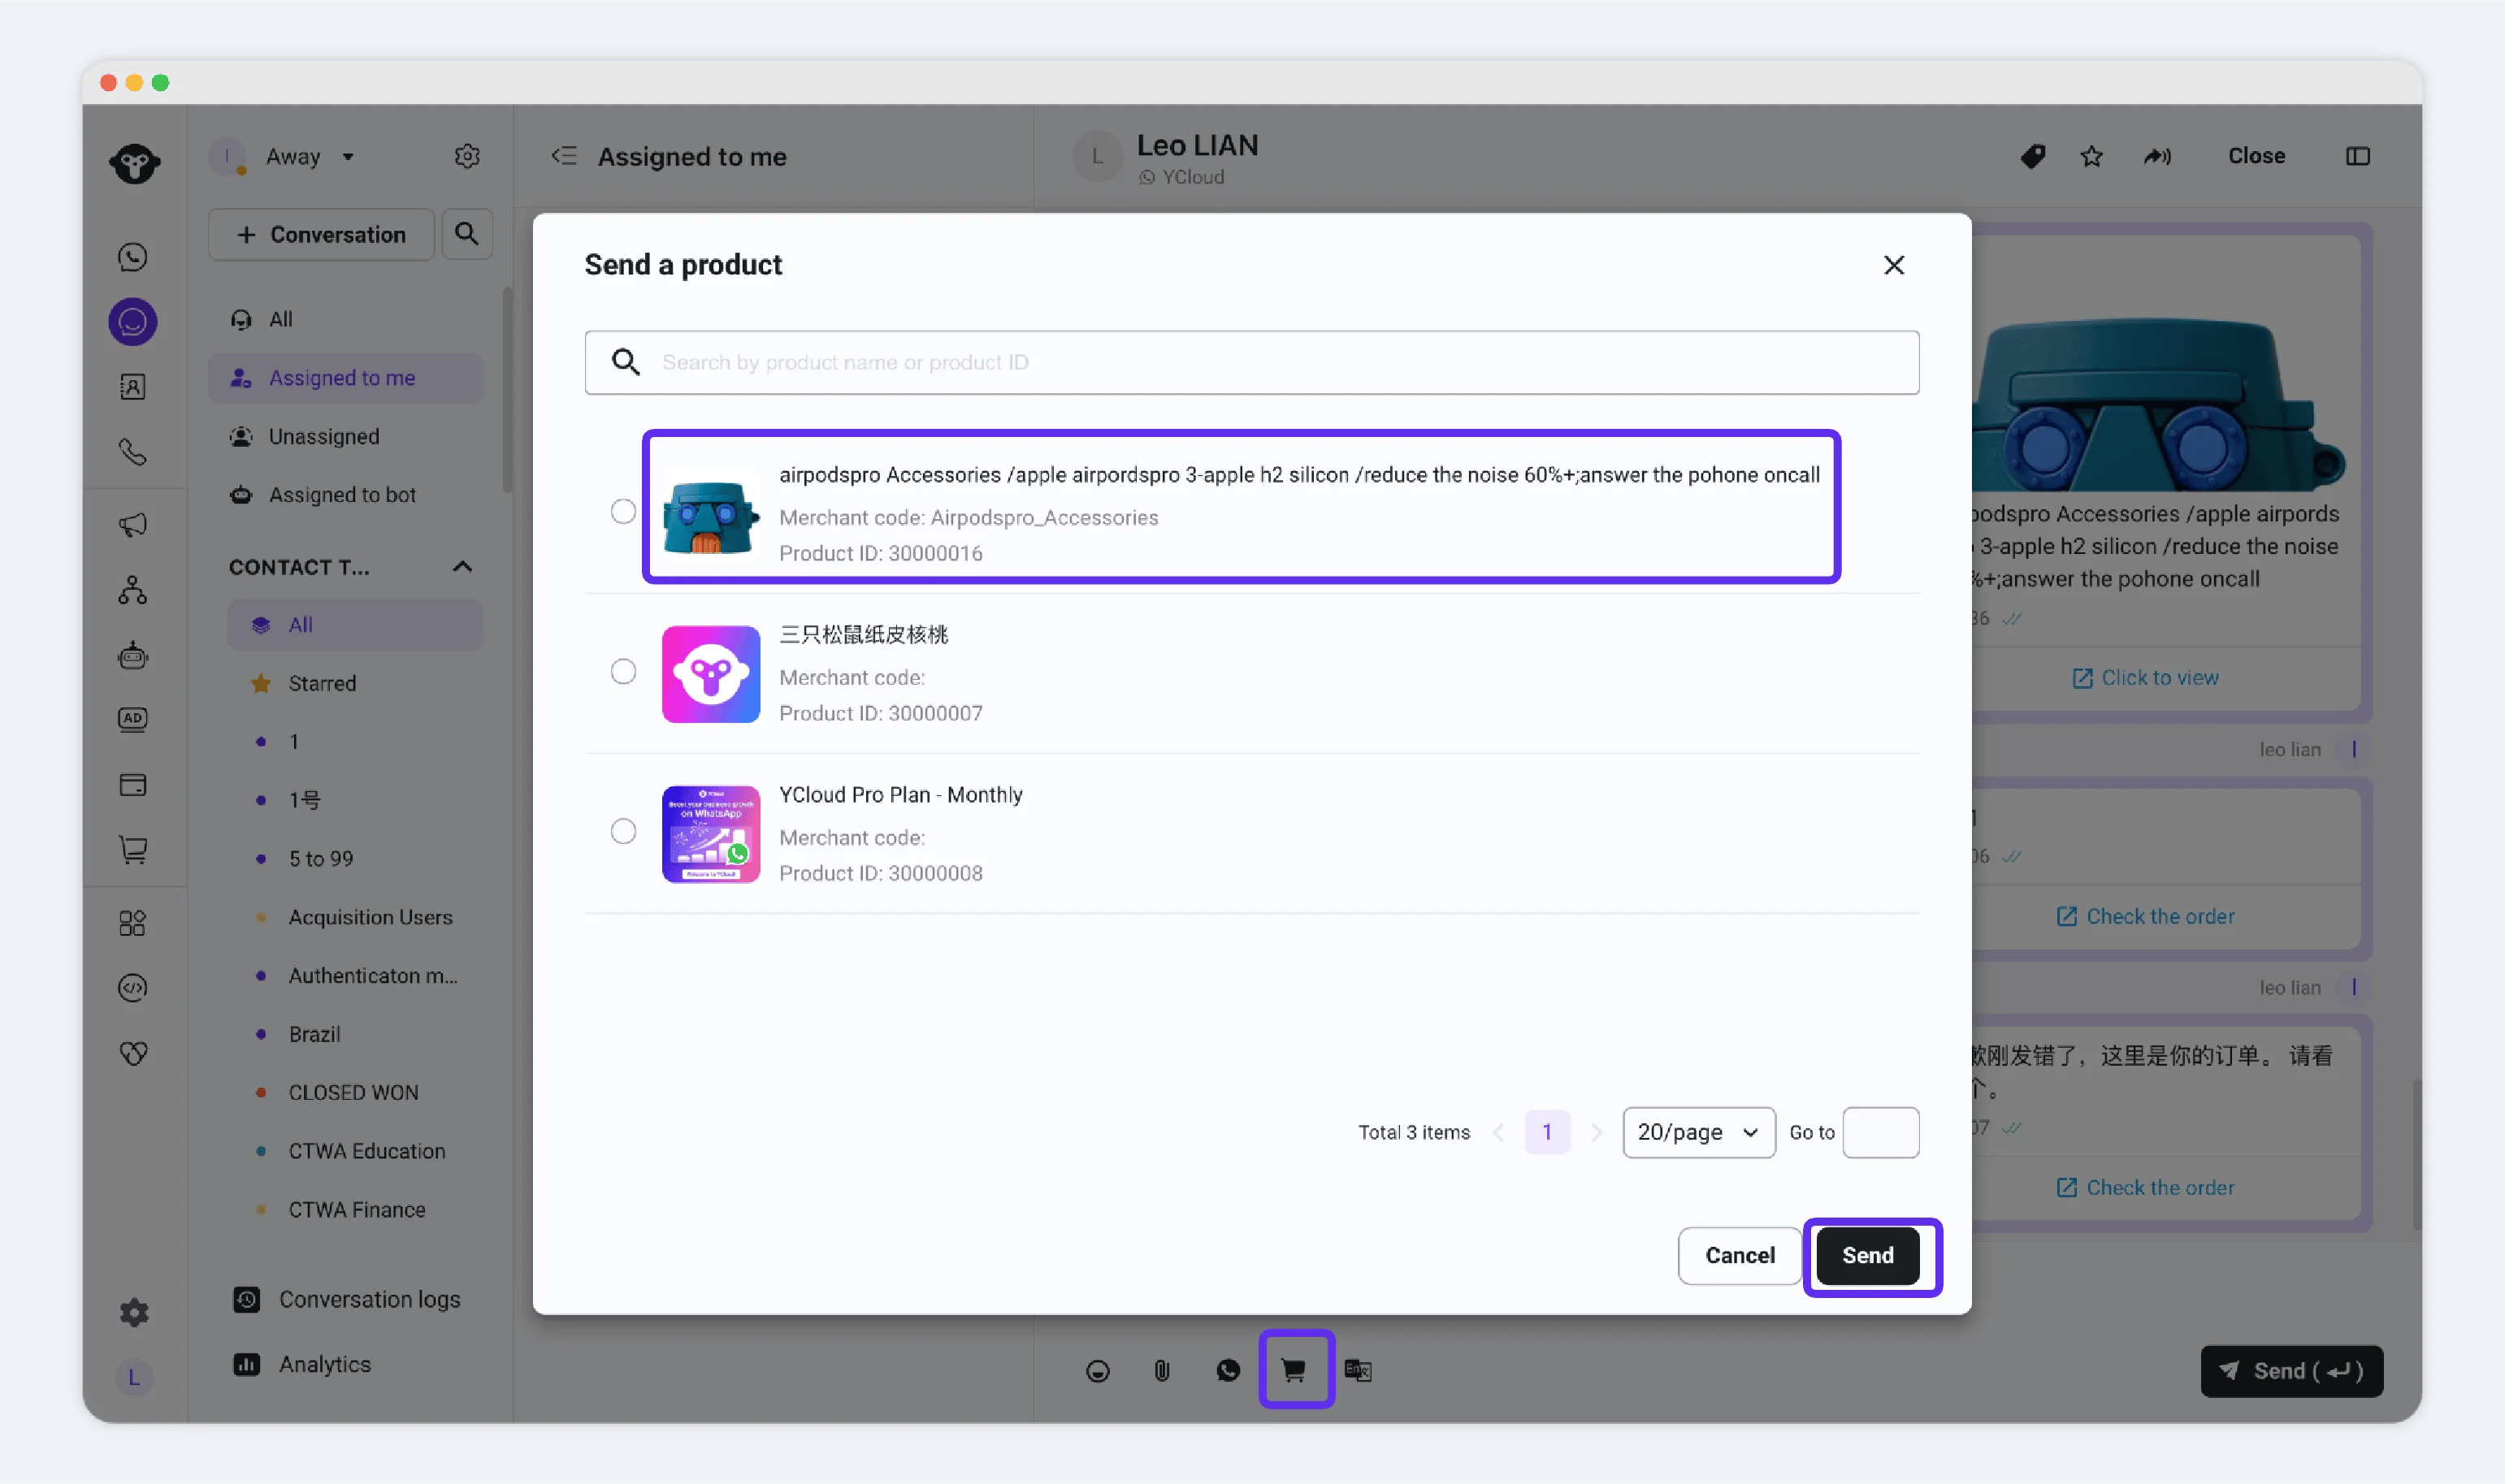 1. 打开与客户的聊天界面。
2. 点击 **菜单** → 选择 **"Send a Product"** → 选择商品并发送。
**客户购买流程:**
* 点击商品链接 → 选择规格 (SKU) → **"Buy Now"** → 输入收货地址 → 提交订单。
**当前支持的支付方式:**
* **COD(货到付款)**
* **PayPal 钱包**
[了解更多支付方式相关信息](/zh/documentation/shop/payment-settings)
## **订单操作**
收到订单后,请关注以下关键操作:
* [订单履约(发货)](./#id-1.-order-fulfillment-shipping)
* [标记订单为已付款](./#id-2.-marking-orders-as-paid-cod-orders)
* [订单取消](./#id-3.-order-cancellation)
* [退款与退货](./#id-4.-refunds-and-returns)
### **1. 订单履约(发货)**
商品分为 **两大类**: **实物商品** 和 **虚拟商品**。
#### **实物商品**
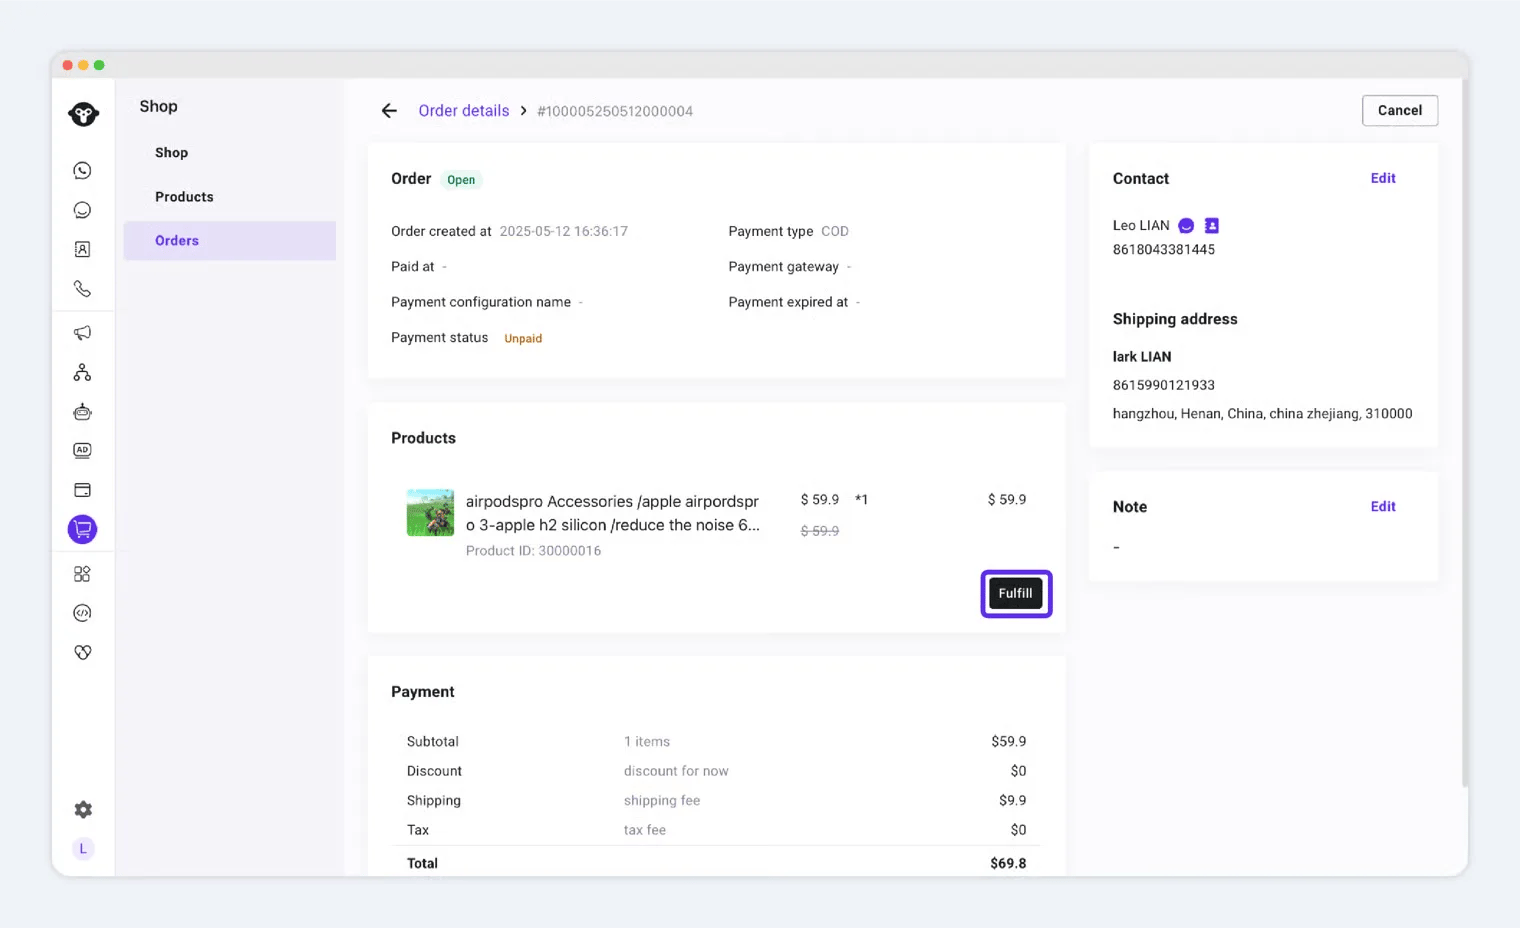
发货操作步骤:
1. 找到对应订单。
2. 点击 **"Ship"** → 填写 **发货详情**。
1. 打开与客户的聊天界面。
2. 点击 **菜单** → 选择 **"Send a Product"** → 选择商品并发送。
**客户购买流程:**
* 点击商品链接 → 选择规格 (SKU) → **"Buy Now"** → 输入收货地址 → 提交订单。
**当前支持的支付方式:**
* **COD(货到付款)**
* **PayPal 钱包**
[了解更多支付方式相关信息](/zh/documentation/shop/payment-settings)
## **订单操作**
收到订单后,请关注以下关键操作:
* [订单履约(发货)](./#id-1.-order-fulfillment-shipping)
* [标记订单为已付款](./#id-2.-marking-orders-as-paid-cod-orders)
* [订单取消](./#id-3.-order-cancellation)
* [退款与退货](./#id-4.-refunds-and-returns)
### **1. 订单履约(发货)**
商品分为 **两大类**: **实物商品** 和 **虚拟商品**。
#### **实物商品**
发货操作步骤:
1. 找到对应订单。
2. 点击 **"Ship"** → 填写 **发货详情**。
 #### **虚拟商品**
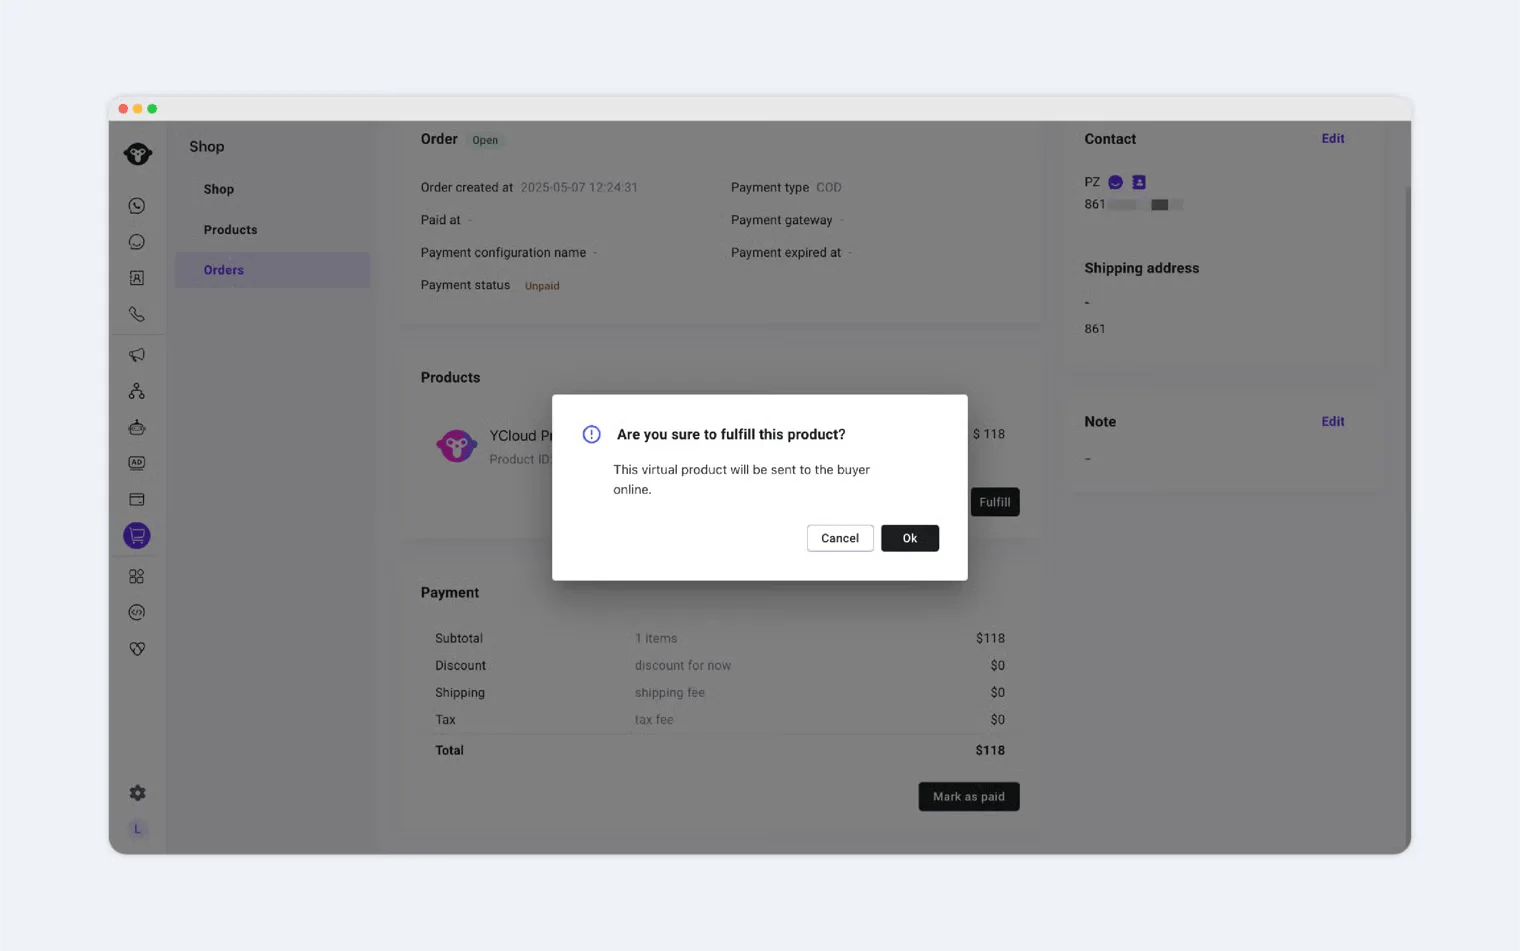 虚拟商品履约 **无法撤销**,请谨慎操作。
* 客户购买虚拟商品后,点击 **"OK"** 确认发货/交付。
* 系统将自动将其标记为 **"Shipped"**。
### **2. 标记订单为已付款**
对于 **货到付款 (COD)**,款项在线下收取。
虚拟商品履约 **无法撤销**,请谨慎操作。
* 客户购买虚拟商品后,点击 **"OK"** 确认发货/交付。
* 系统将自动将其标记为 **"Shipped"**。
### **2. 标记订单为已付款**
对于 **货到付款 (COD)**,款项在线下收取。
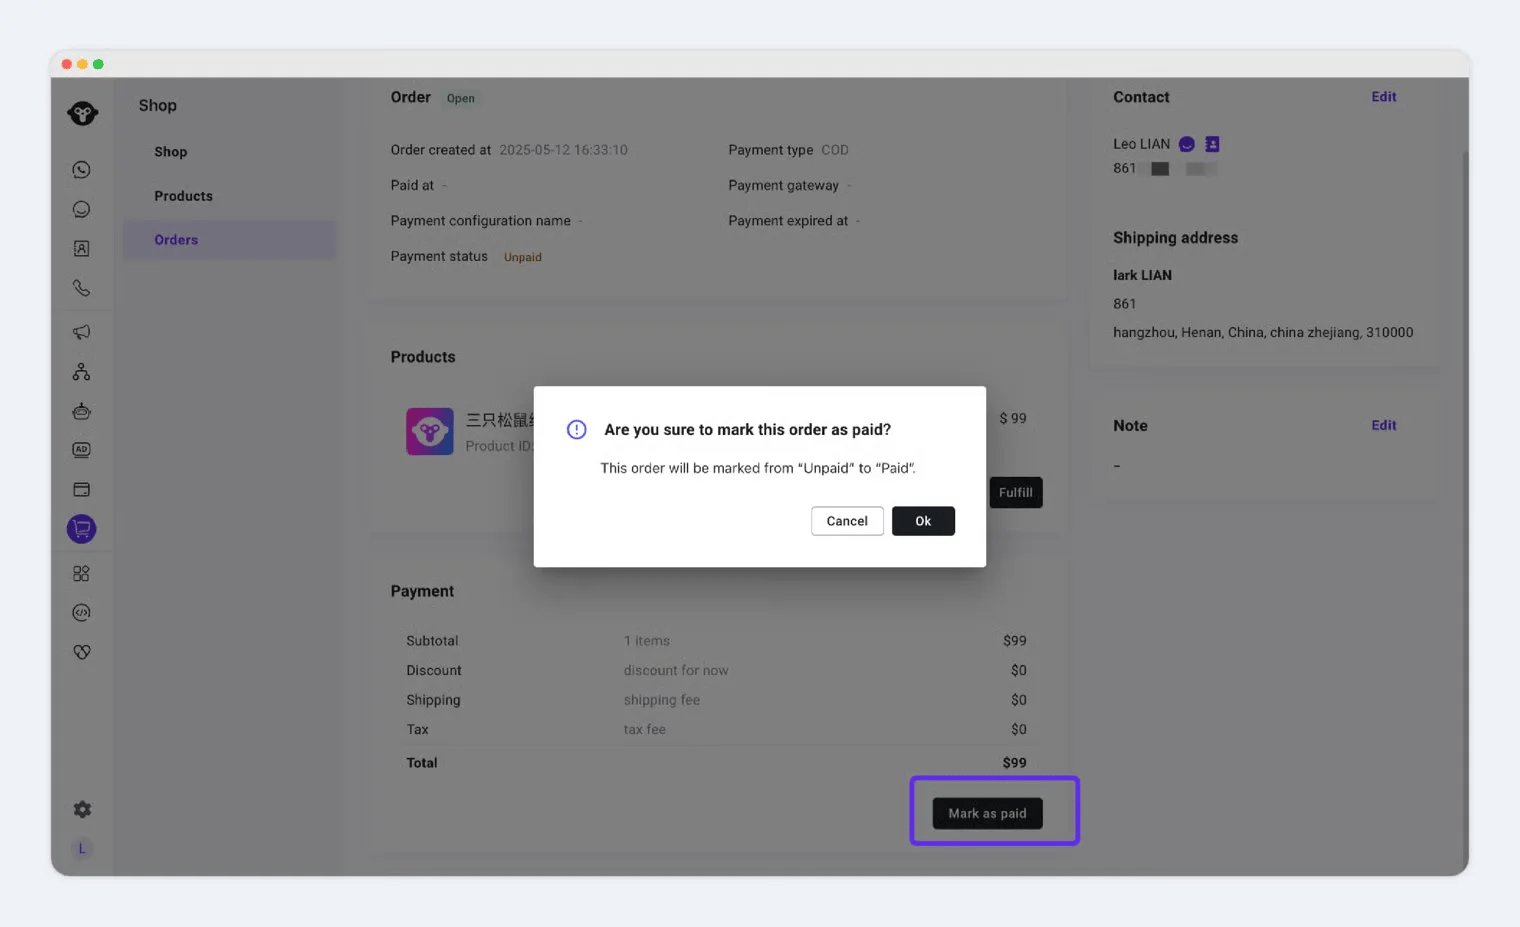 * 确认收到款项后,手动将订单标记为 **"Paid"**。
* 点击 **"OK"**,状态将从 **"Pending"** 更新为 **"Paid"**。
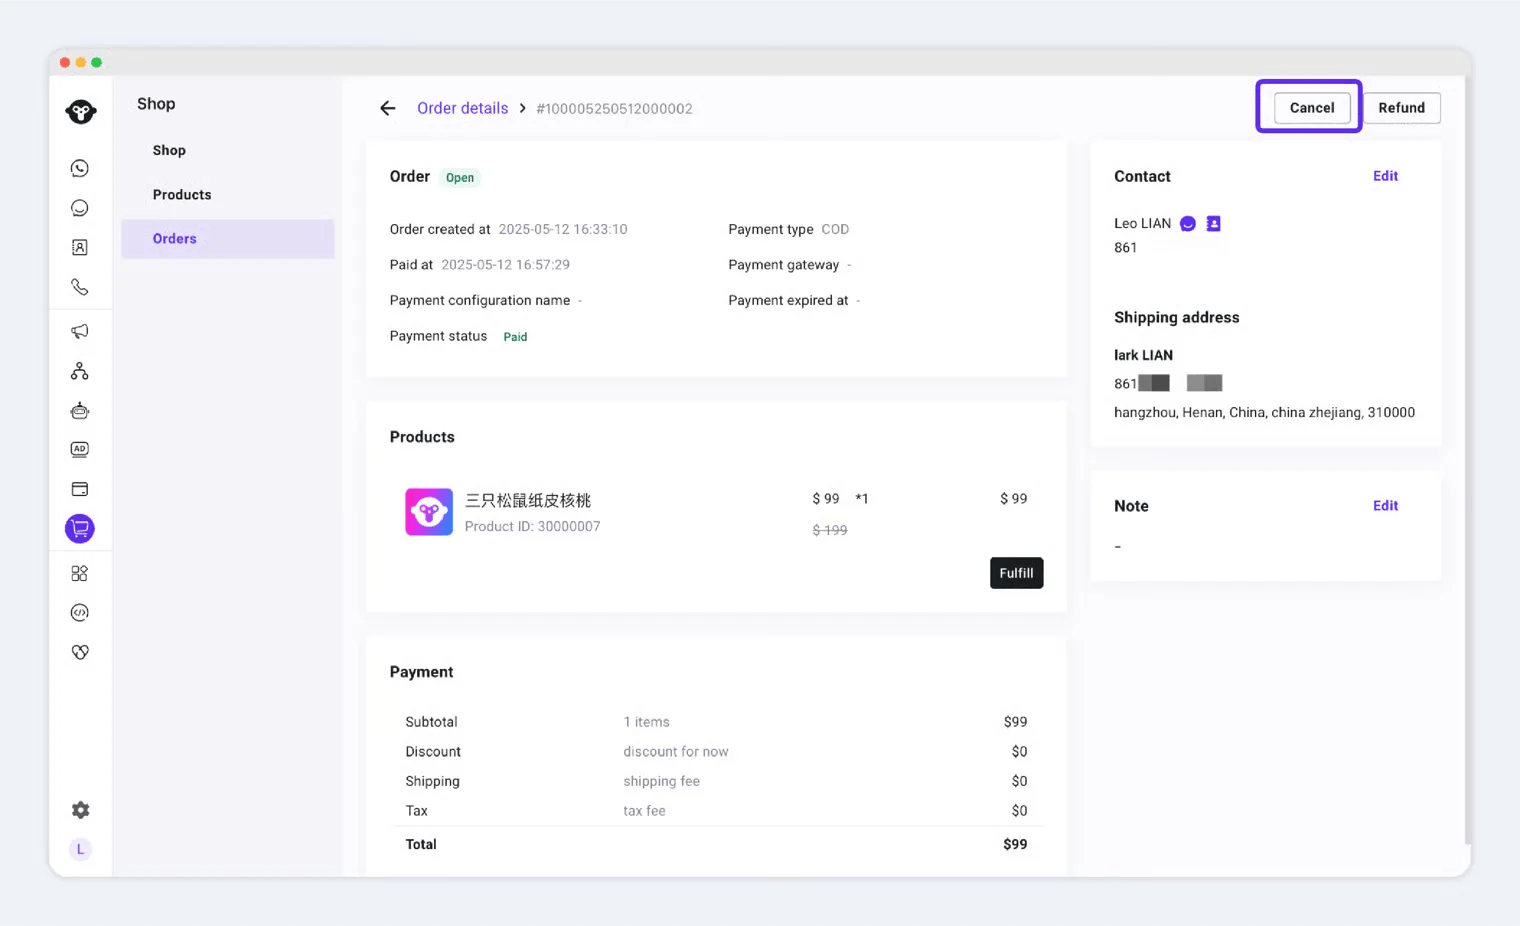
### **3. 订单取消**
如果订单不再需要履约,您可以 **取消该订单**。
* 确认收到款项后,手动将订单标记为 **"Paid"**。
* 点击 **"OK"**,状态将从 **"Pending"** 更新为 **"Paid"**。
### **3. 订单取消**
如果订单不再需要履约,您可以 **取消该订单**。
 ### **4. 退款与退货**
处理退款或退货步骤:
1. 点击 **"Refund"** 或 **"Return"**。
2. 填写:
* **退款金额**
* **原因**
* **备注(可选,仅对您自己可见)**
提示
* **退款金额** 和 **原因** 将对客户可见。
* **"Note"** 字段为 **私密内容** (客户不可见)。
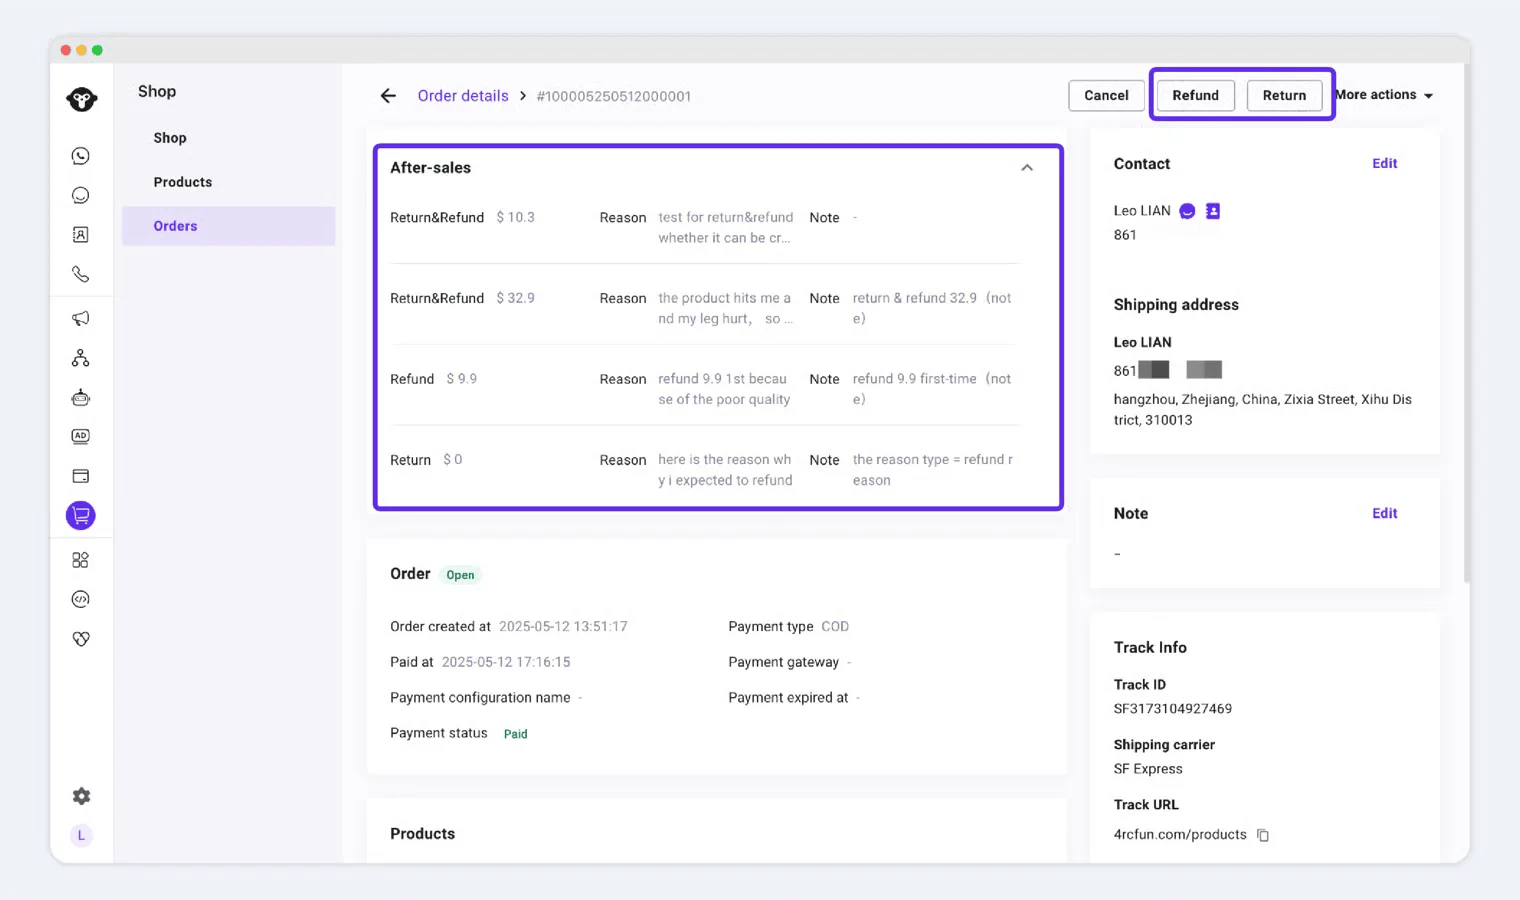
保存后,退款/退货详情将显示在 **订单概览** 中(参见下文示例)。
### **4. 退款与退货**
处理退款或退货步骤:
1. 点击 **"Refund"** 或 **"Return"**。
2. 填写:
* **退款金额**
* **原因**
* **备注(可选,仅对您自己可见)**
提示
* **退款金额** 和 **原因** 将对客户可见。
* **"Note"** 字段为 **私密内容** (客户不可见)。
保存后,退款/退货详情将显示在 **订单概览** 中(参见下文示例)。
 This documentation is built and hosted on [Mintlify](https://mintlify.com), a developer documentation platform.