

创建客户旅程
创建客户旅程(Journey),为满足设定条件的联系人自动执行后续操作。您可以从现有模板开始,也可以从头构建流程。准备工作
准备好您要使用的准入条件、发送方(Sender)、模板消息及后续操作。如果您计划添加标签或使用消息状态检查,请在开始前确定它们应如何配合流程运作。打开 Journey
在 YCloud 中打开 Journey 工作区,查看现有的 Journey 或创建新的客户旅程。
Open Outbound > Journey to view existing Journeys or select Create Journey.
从模板开始或从头构建
选择 Create Journey,然后选择以下选项之一:- Start from a template :从现有流程开始,并根据您的使用场景进行调整。
- Build from scratch :自行配置流程的每个部分。

Choose Build from scratch or an available template. Shopify templates require a connected store.
配置触发器
Journey 需要一个 Trigger(触发器)。配置准入条件,选择 Sender,并为您的流程选择准入规则。准入规则决定联系人是仅在首次匹配条件时进入,还是在每次匹配条件时都会进入。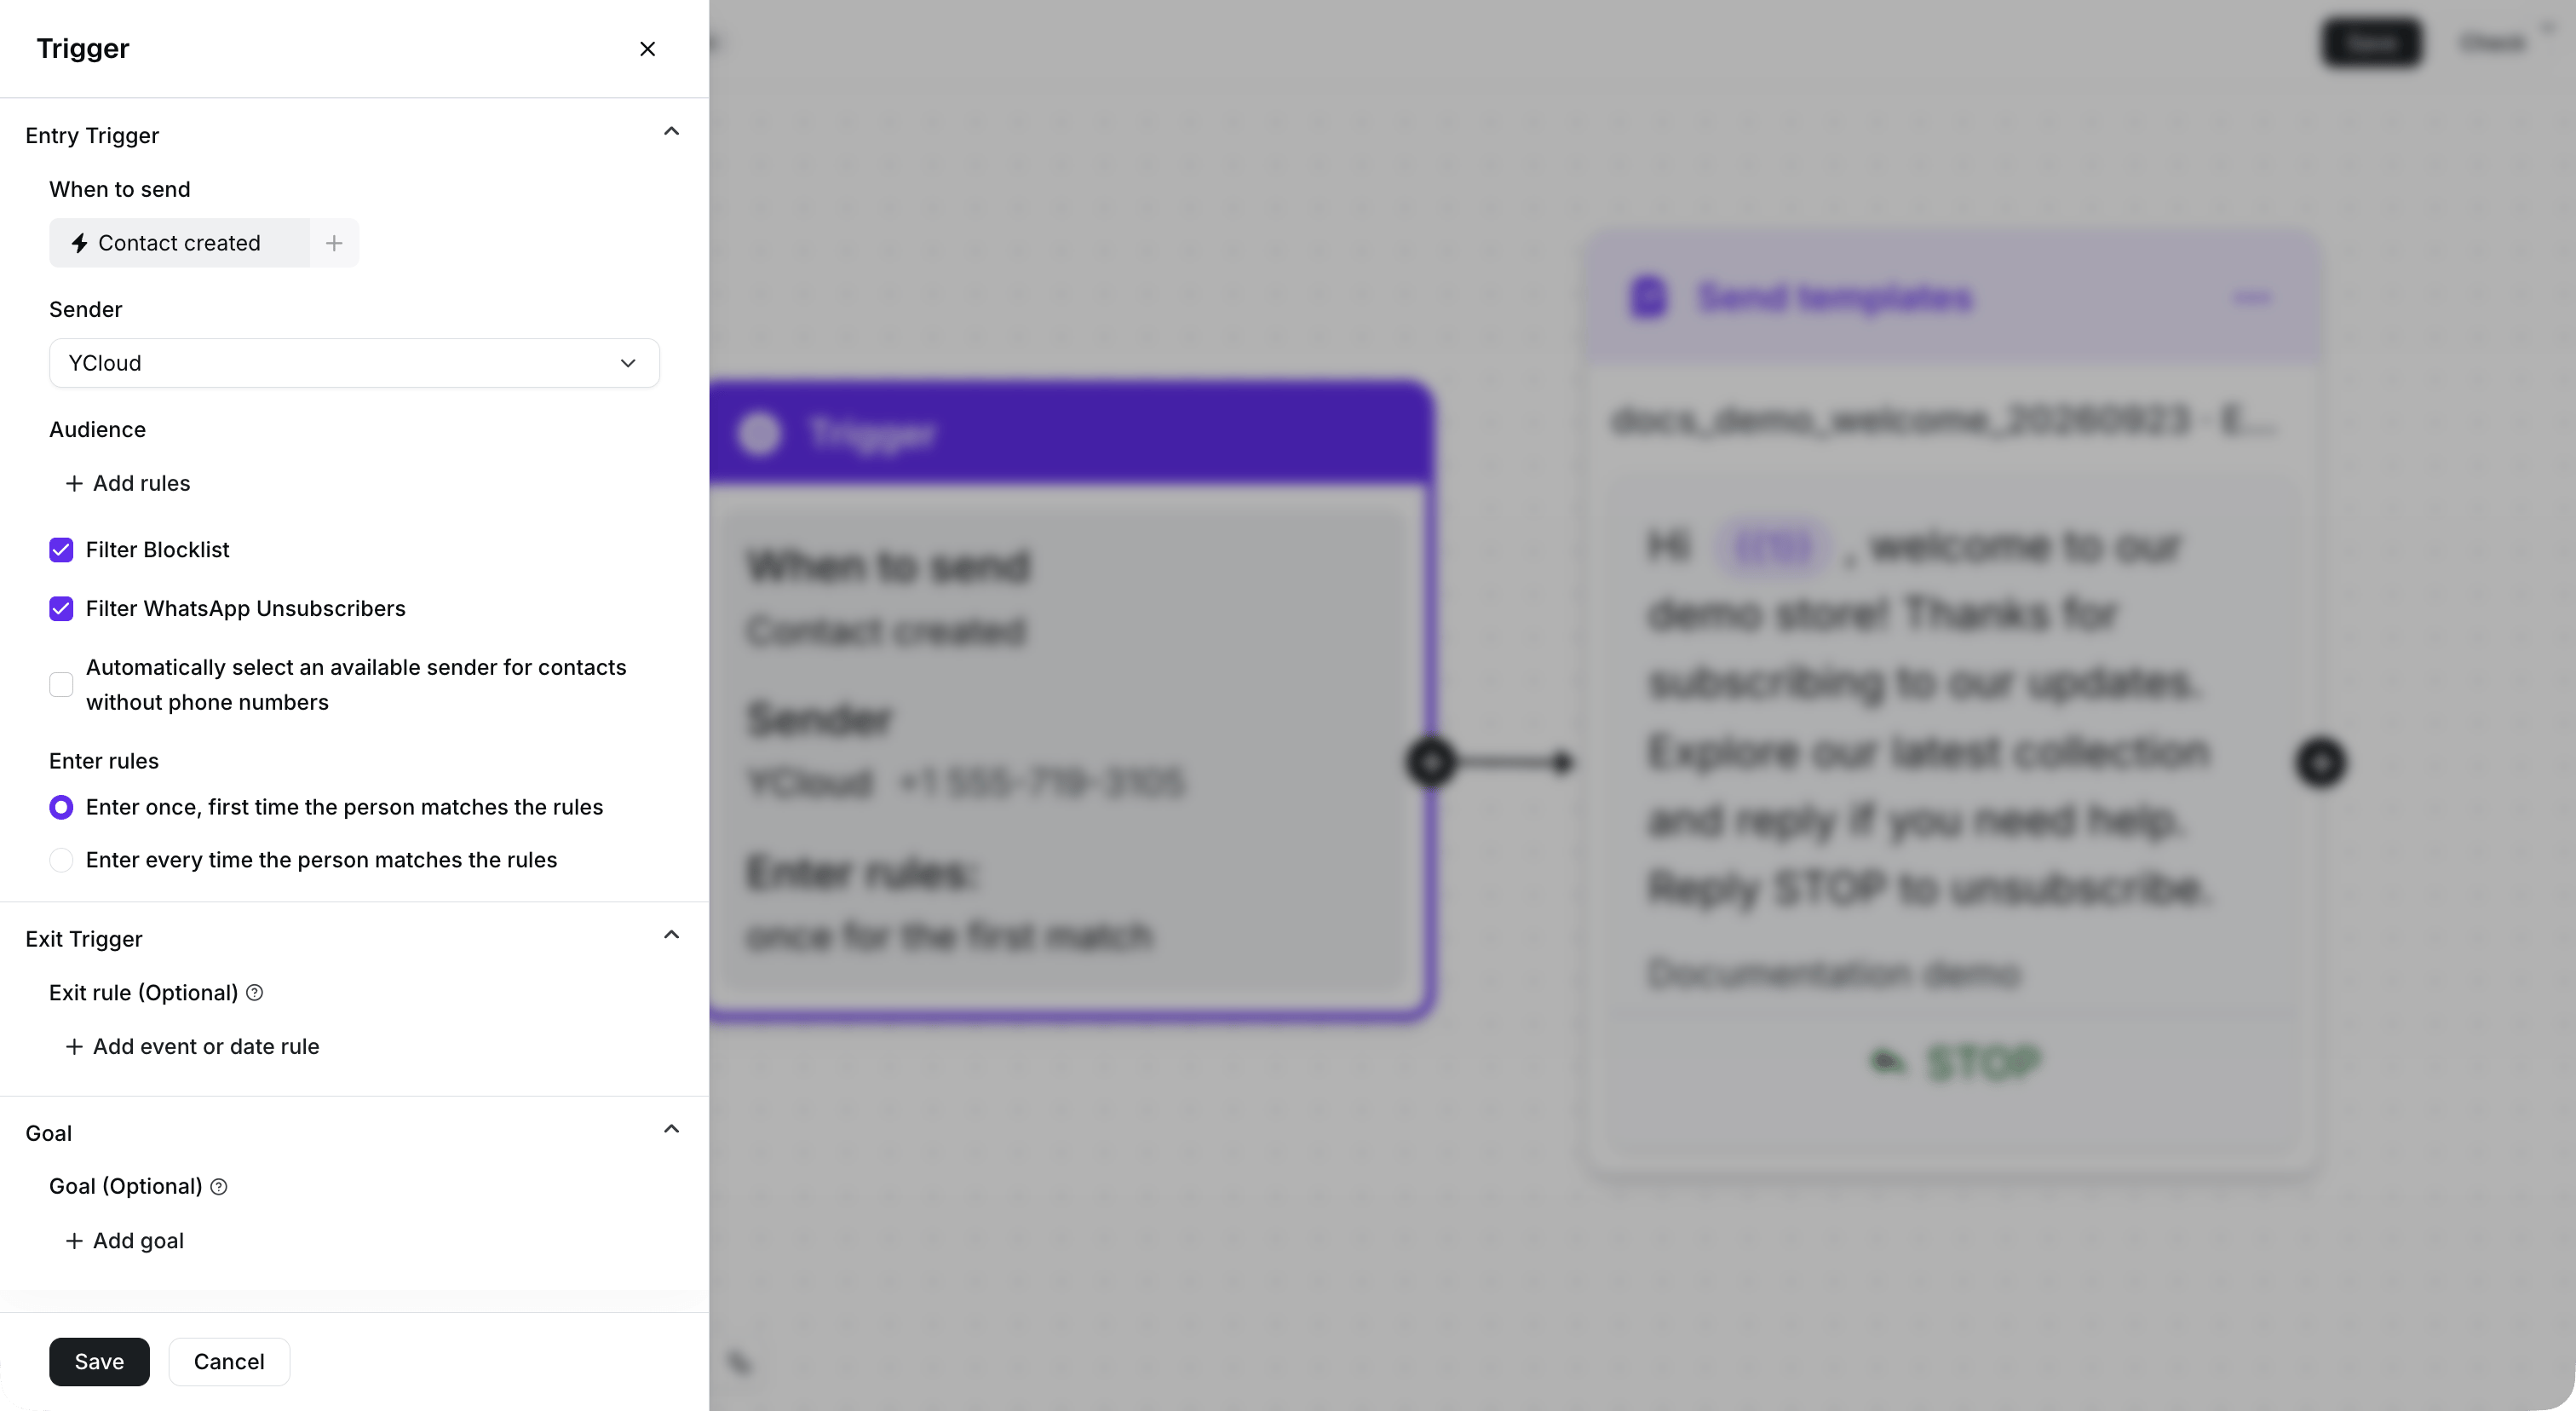
Configure the entry condition, Sender, and entry rule. This demonstration Journey remains inactive.
添加并配置步骤
添加在触发器之后运行的步骤。例如,您可以发送模板消息、在执行下一个操作前等待、检查消息状态或添加标签。 在将每个步骤连接到下一步之前完成其配置。保持流程聚焦于单一客户目标,例如发送消息后进行跟进,或在收到回复后添加标签。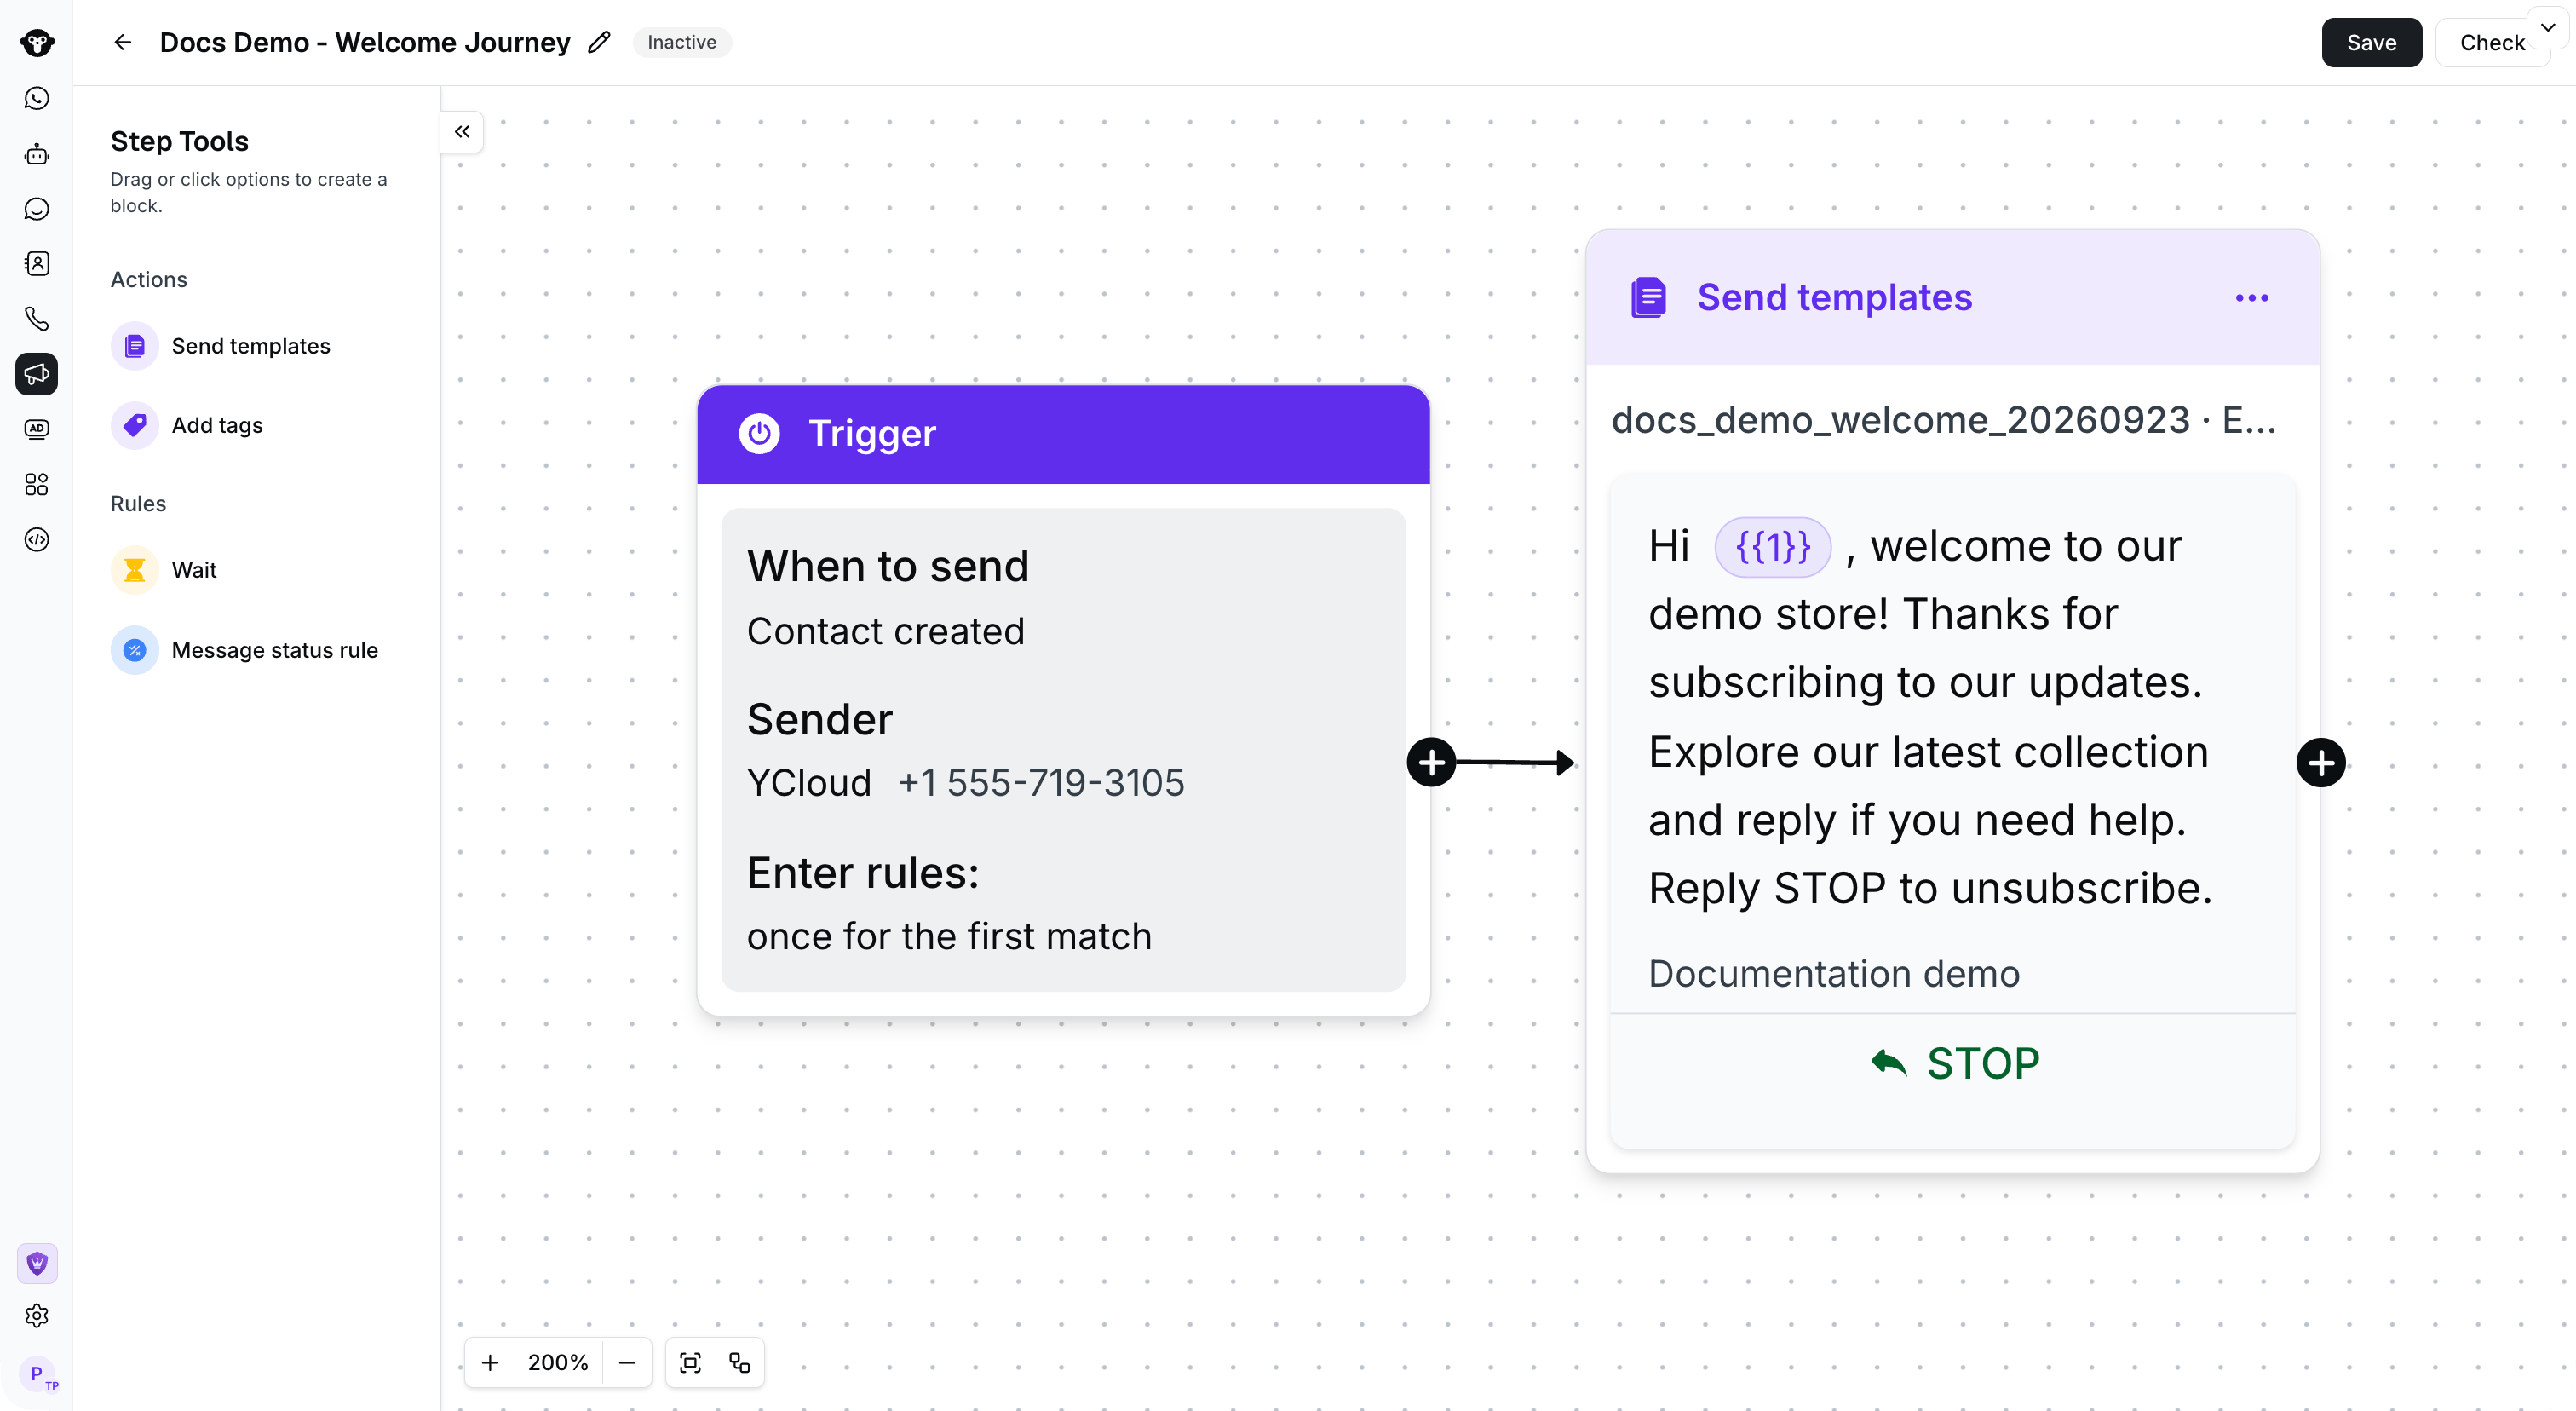
Connect the configured Trigger to the next step. This example sends a welcome template when activated.
检查并保存
检查触发器、每个步骤以及步骤之间的连接。在将 Journey 保存为 Active 之前,请修正配置错误。 如果您想在激活前保存流程,请选择 Inactive 。流程准备好运行后,请选择 Active 。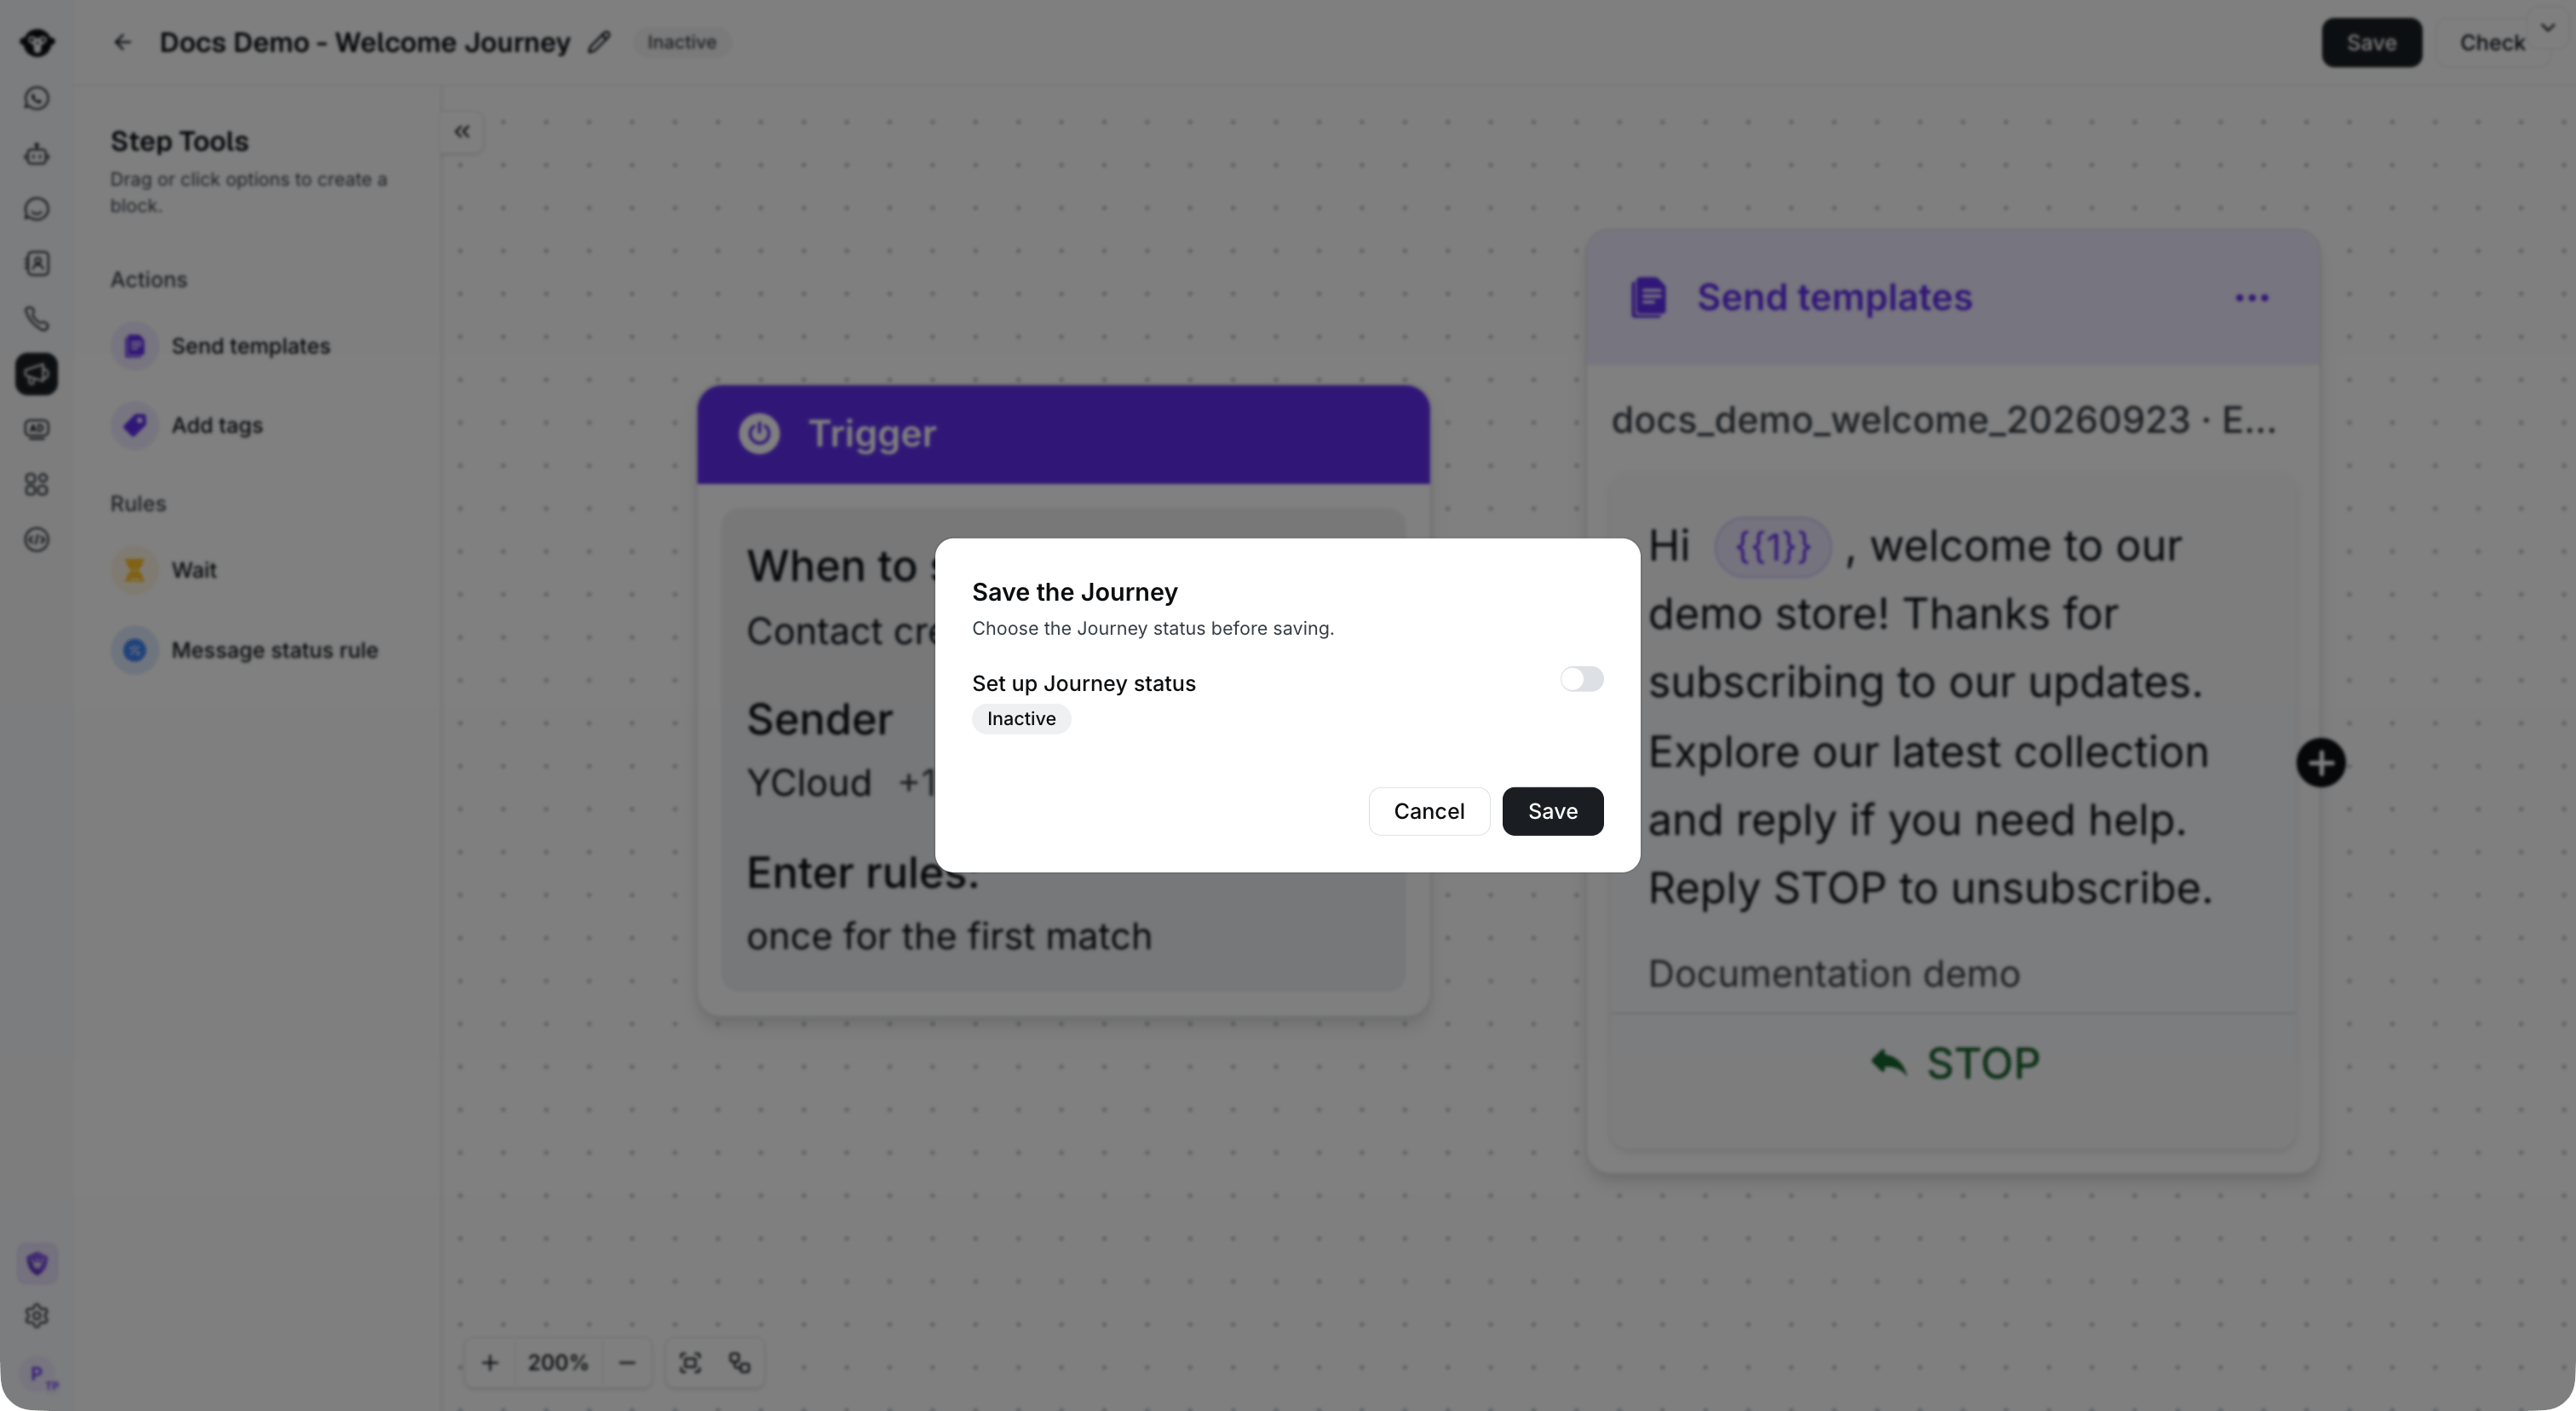
Choose the Journey status before saving. This example remains Inactive.
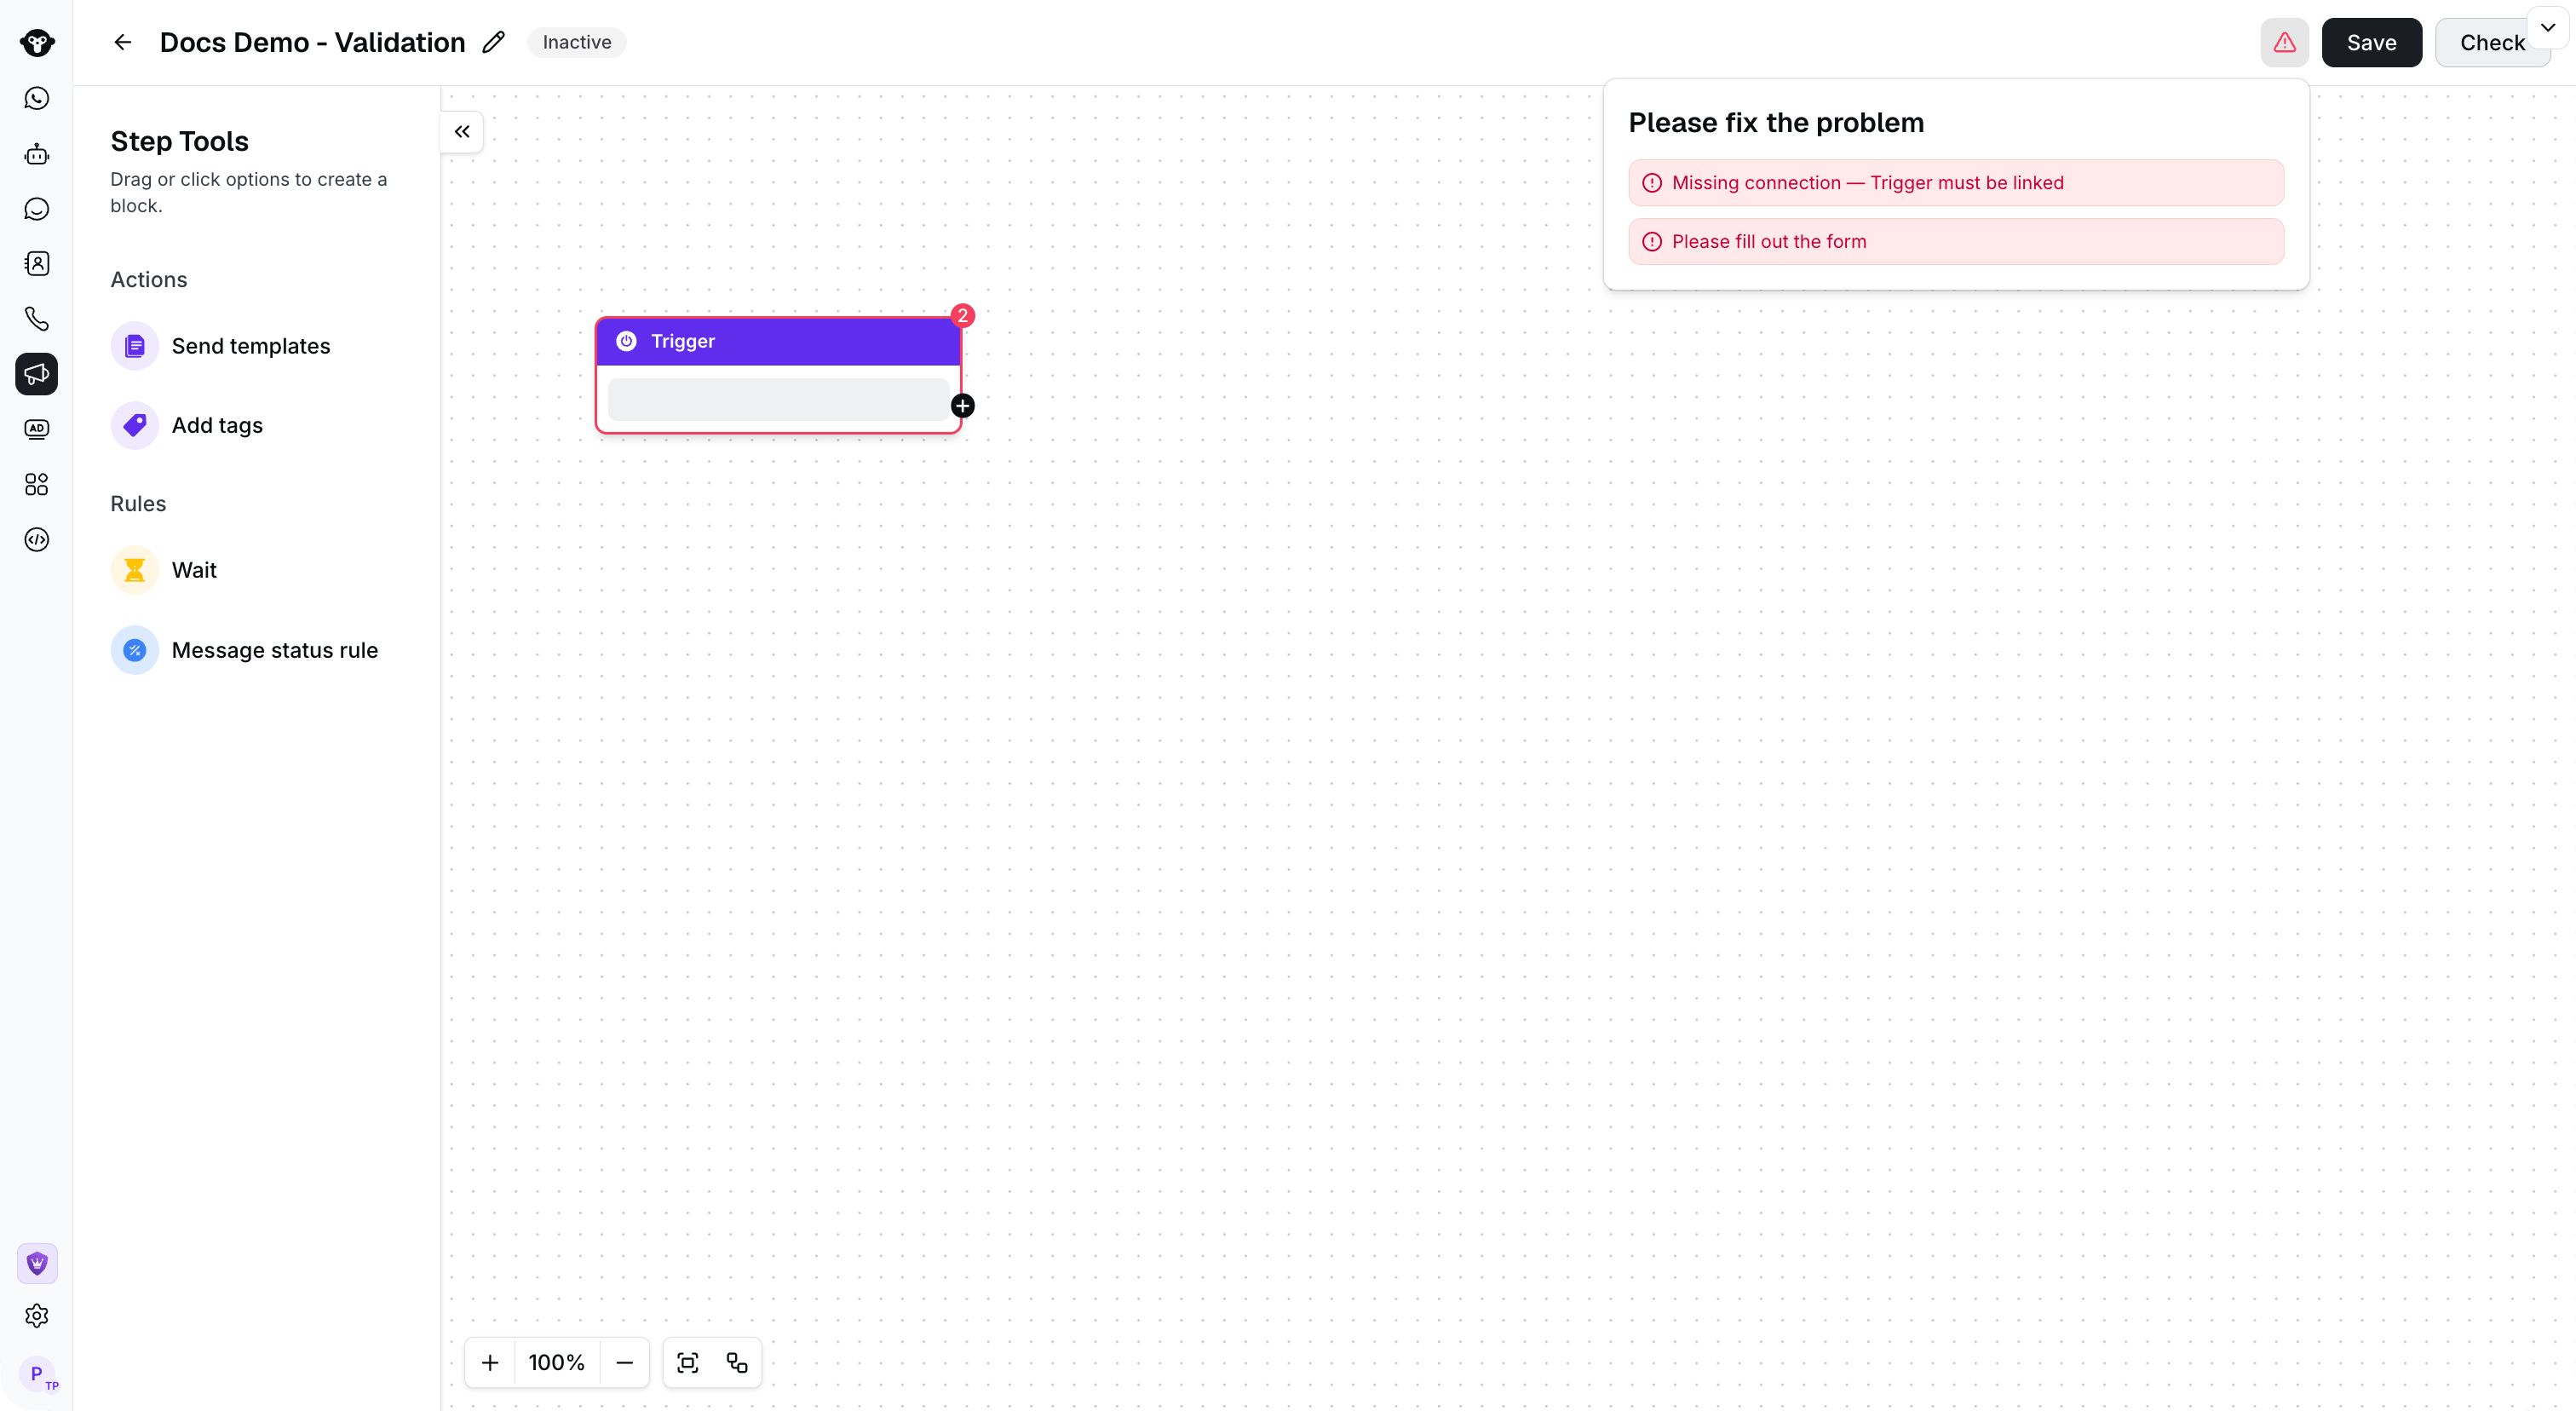
Select Check to find incomplete fields and missing connections before activating the Journey.