

Before you start
Make sure you have:- Messenger Channel management permission in your YCloud workspace.
- A Facebook account with permission to authorize the Facebook Page you want to use.
- A customer list that you are authorized to use for marketing and upload to Meta.
1. Connect your Facebook Page
-
Open Integrations, find Messenger, and click Install. If the integration is already enabled, click Details or open Messenger from the sidebar.
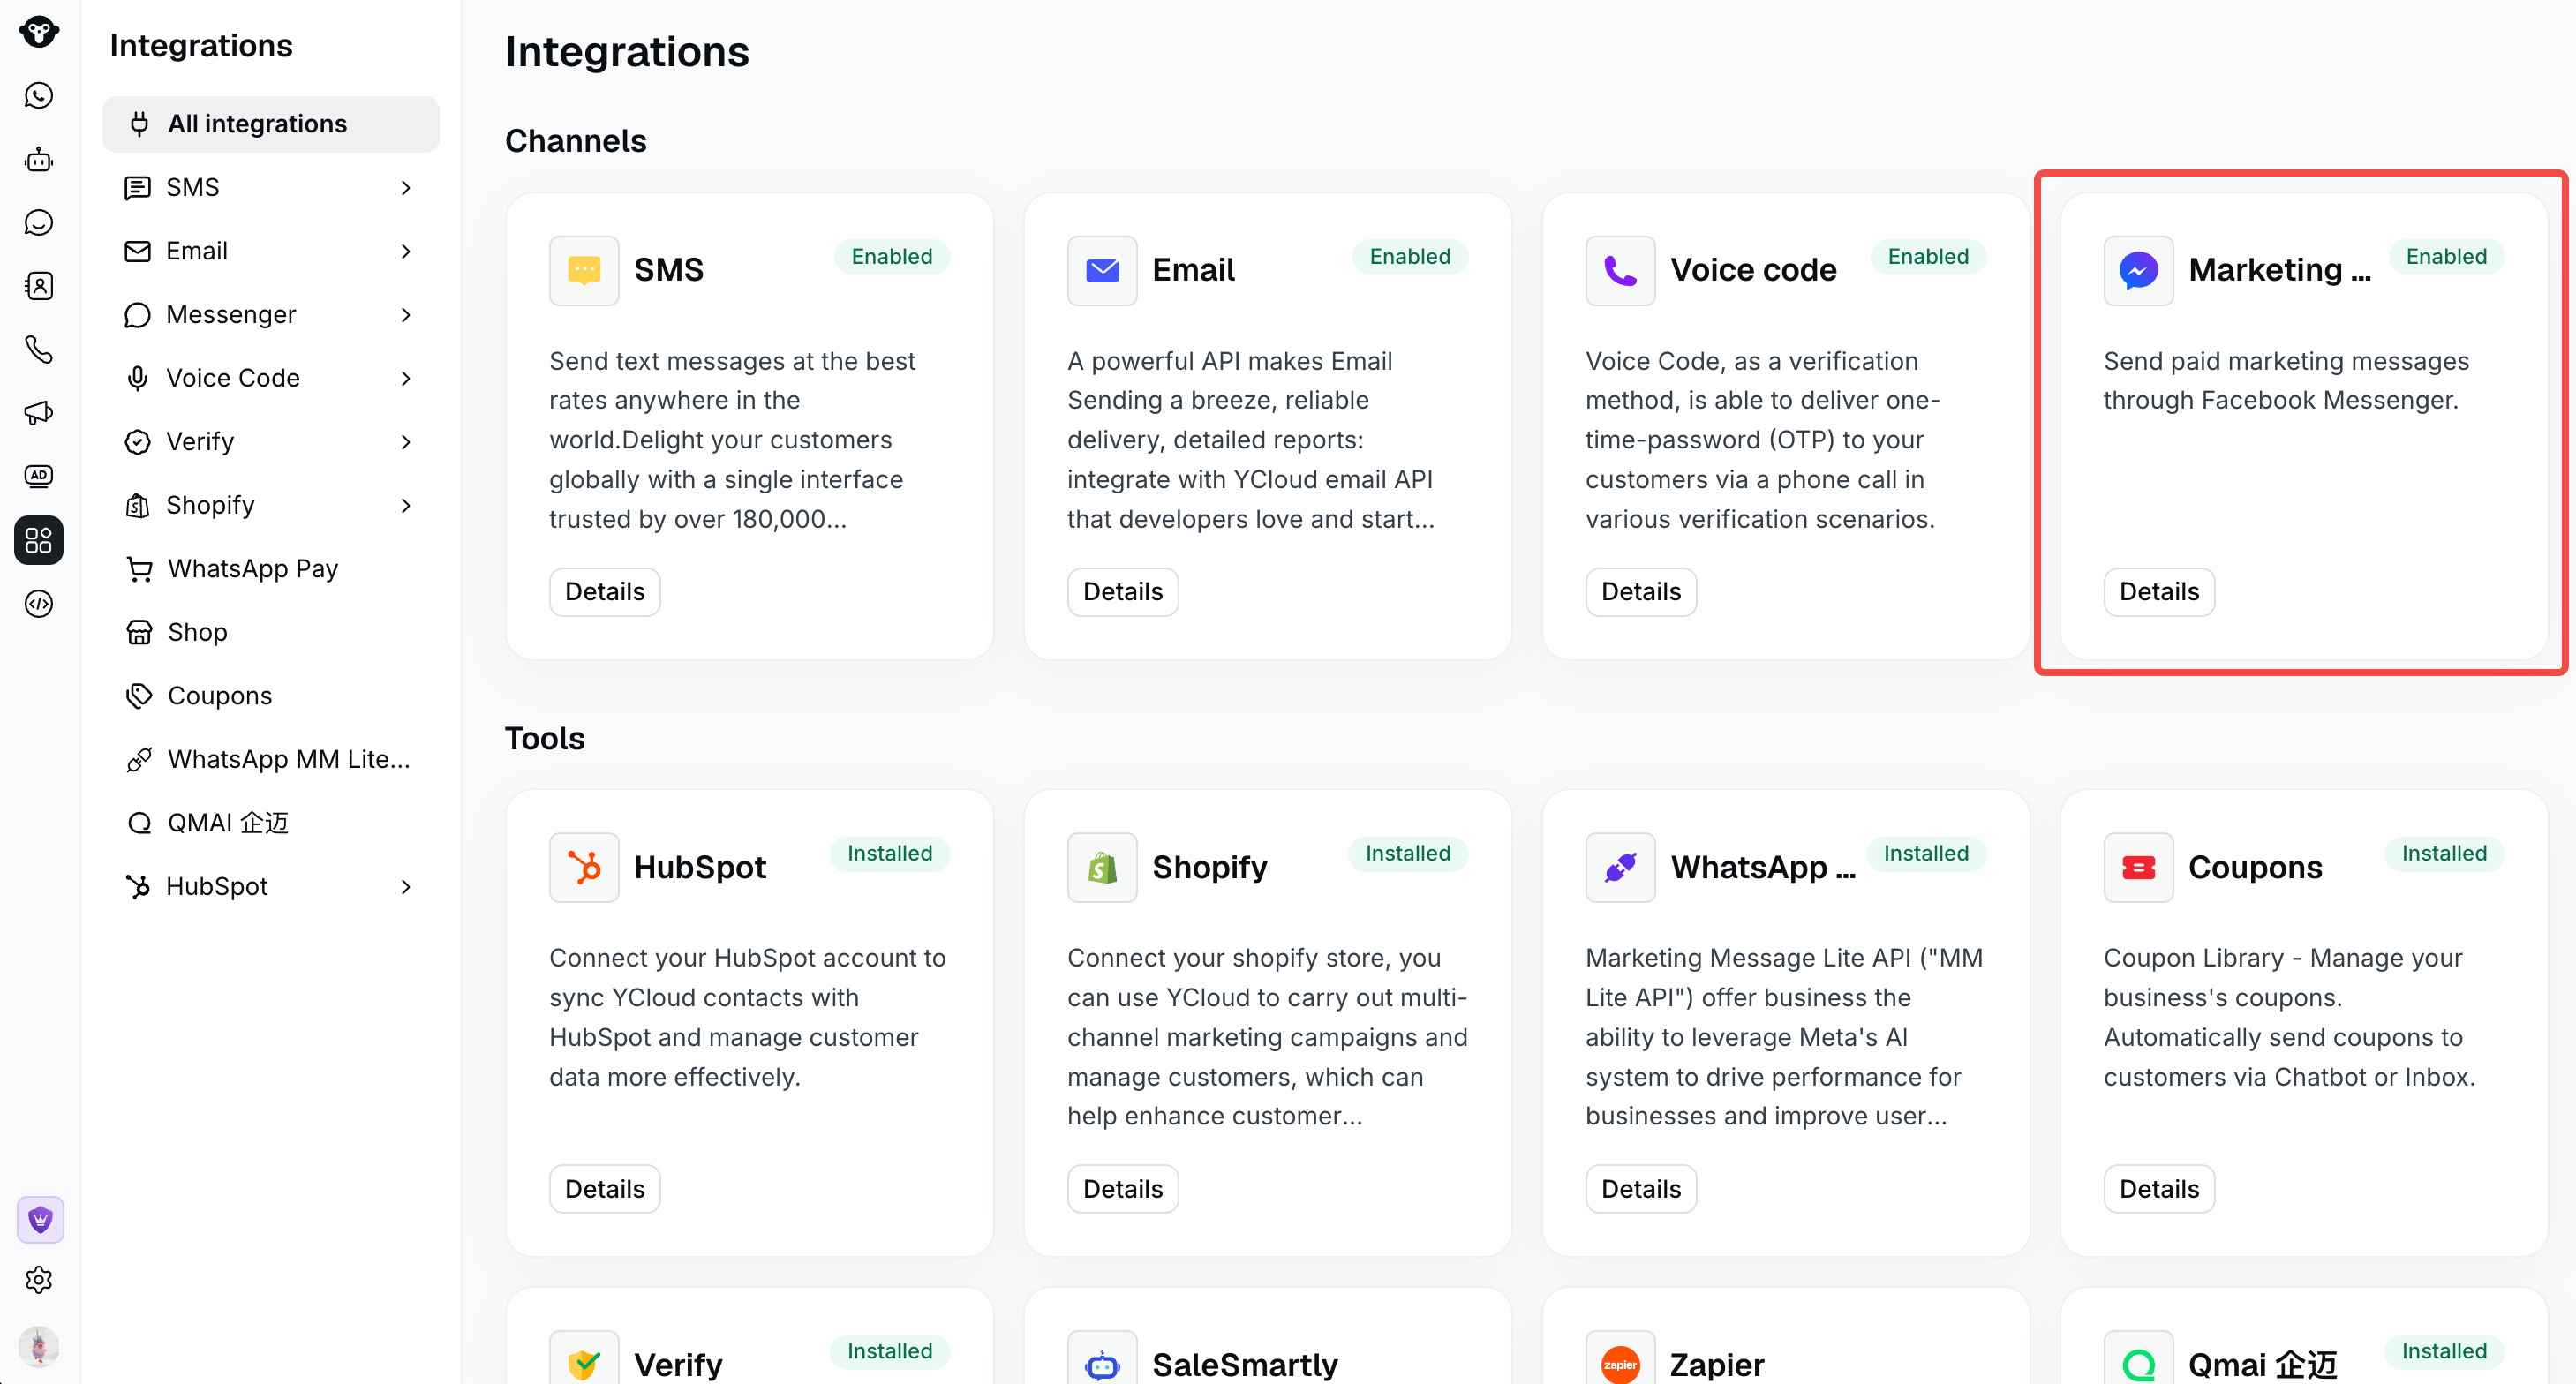
Open the Messenger marketing integration.
-
In Messenger, open Guide and click Connect Page.
You can also open Facebook Pages and click Connect Facebook Page.
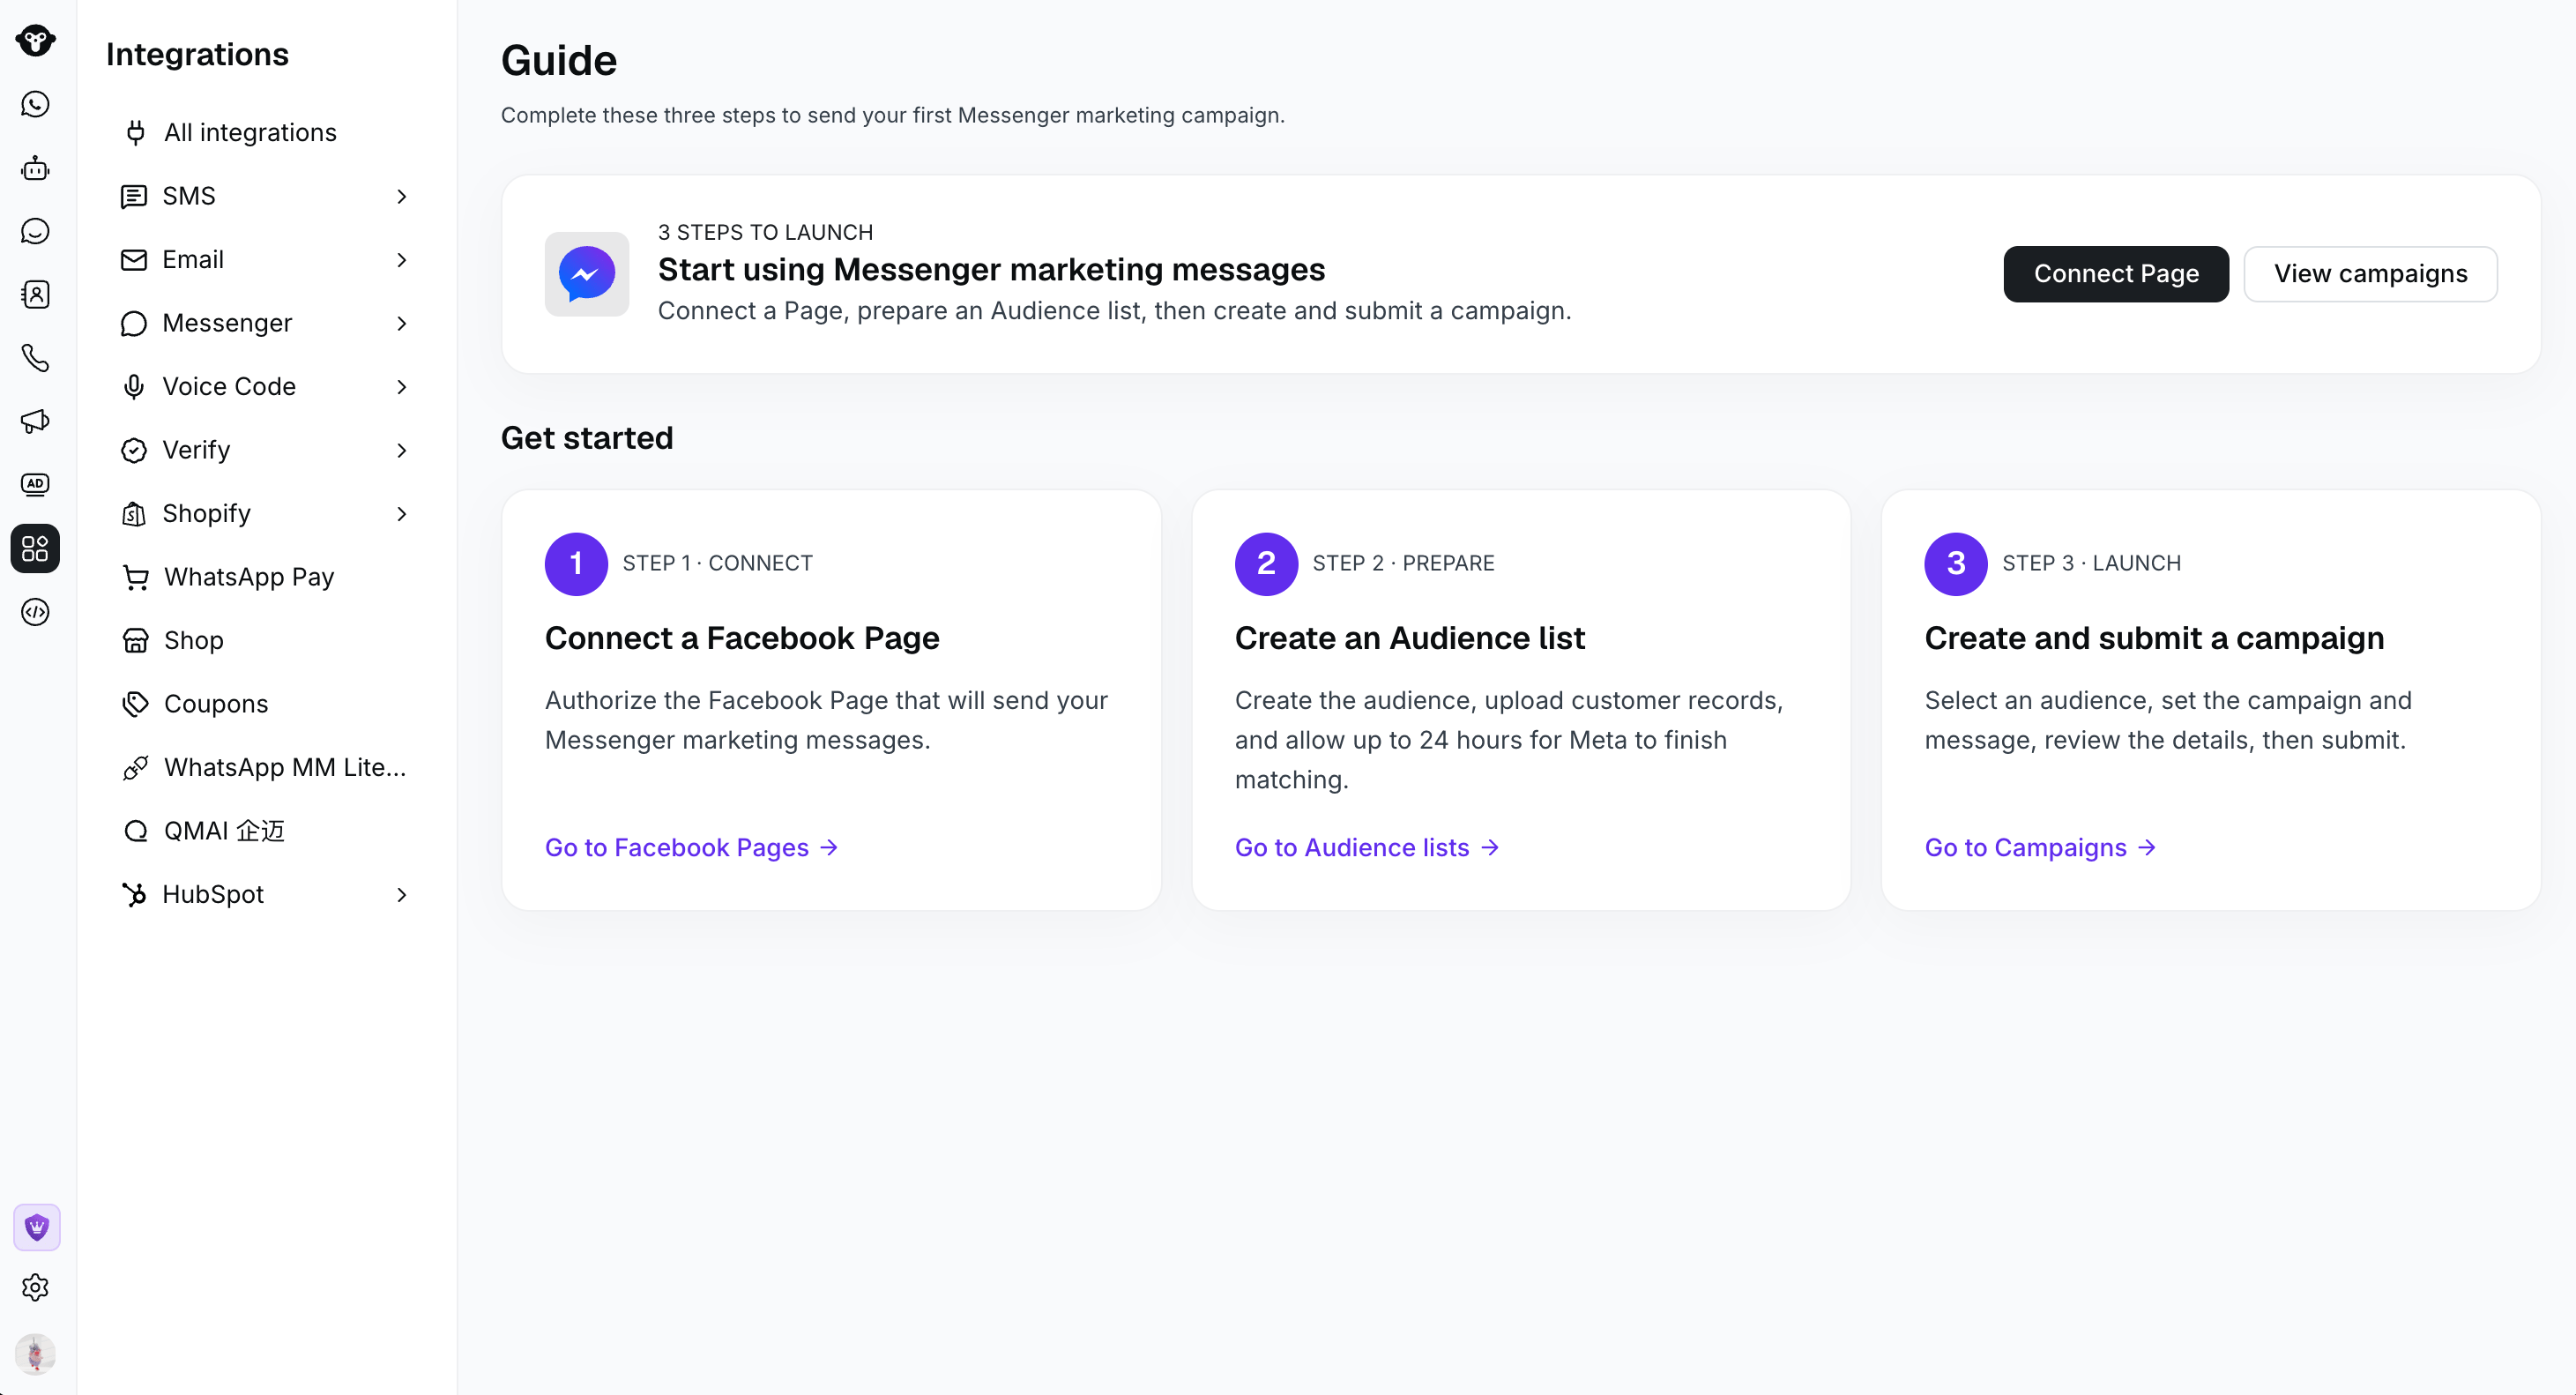
Use the Guide to connect a Page, prepare an audience, and launch a campaign. Matching can take up to 6 hours; the 24-hour estimate shown in this screenshot is outdated.
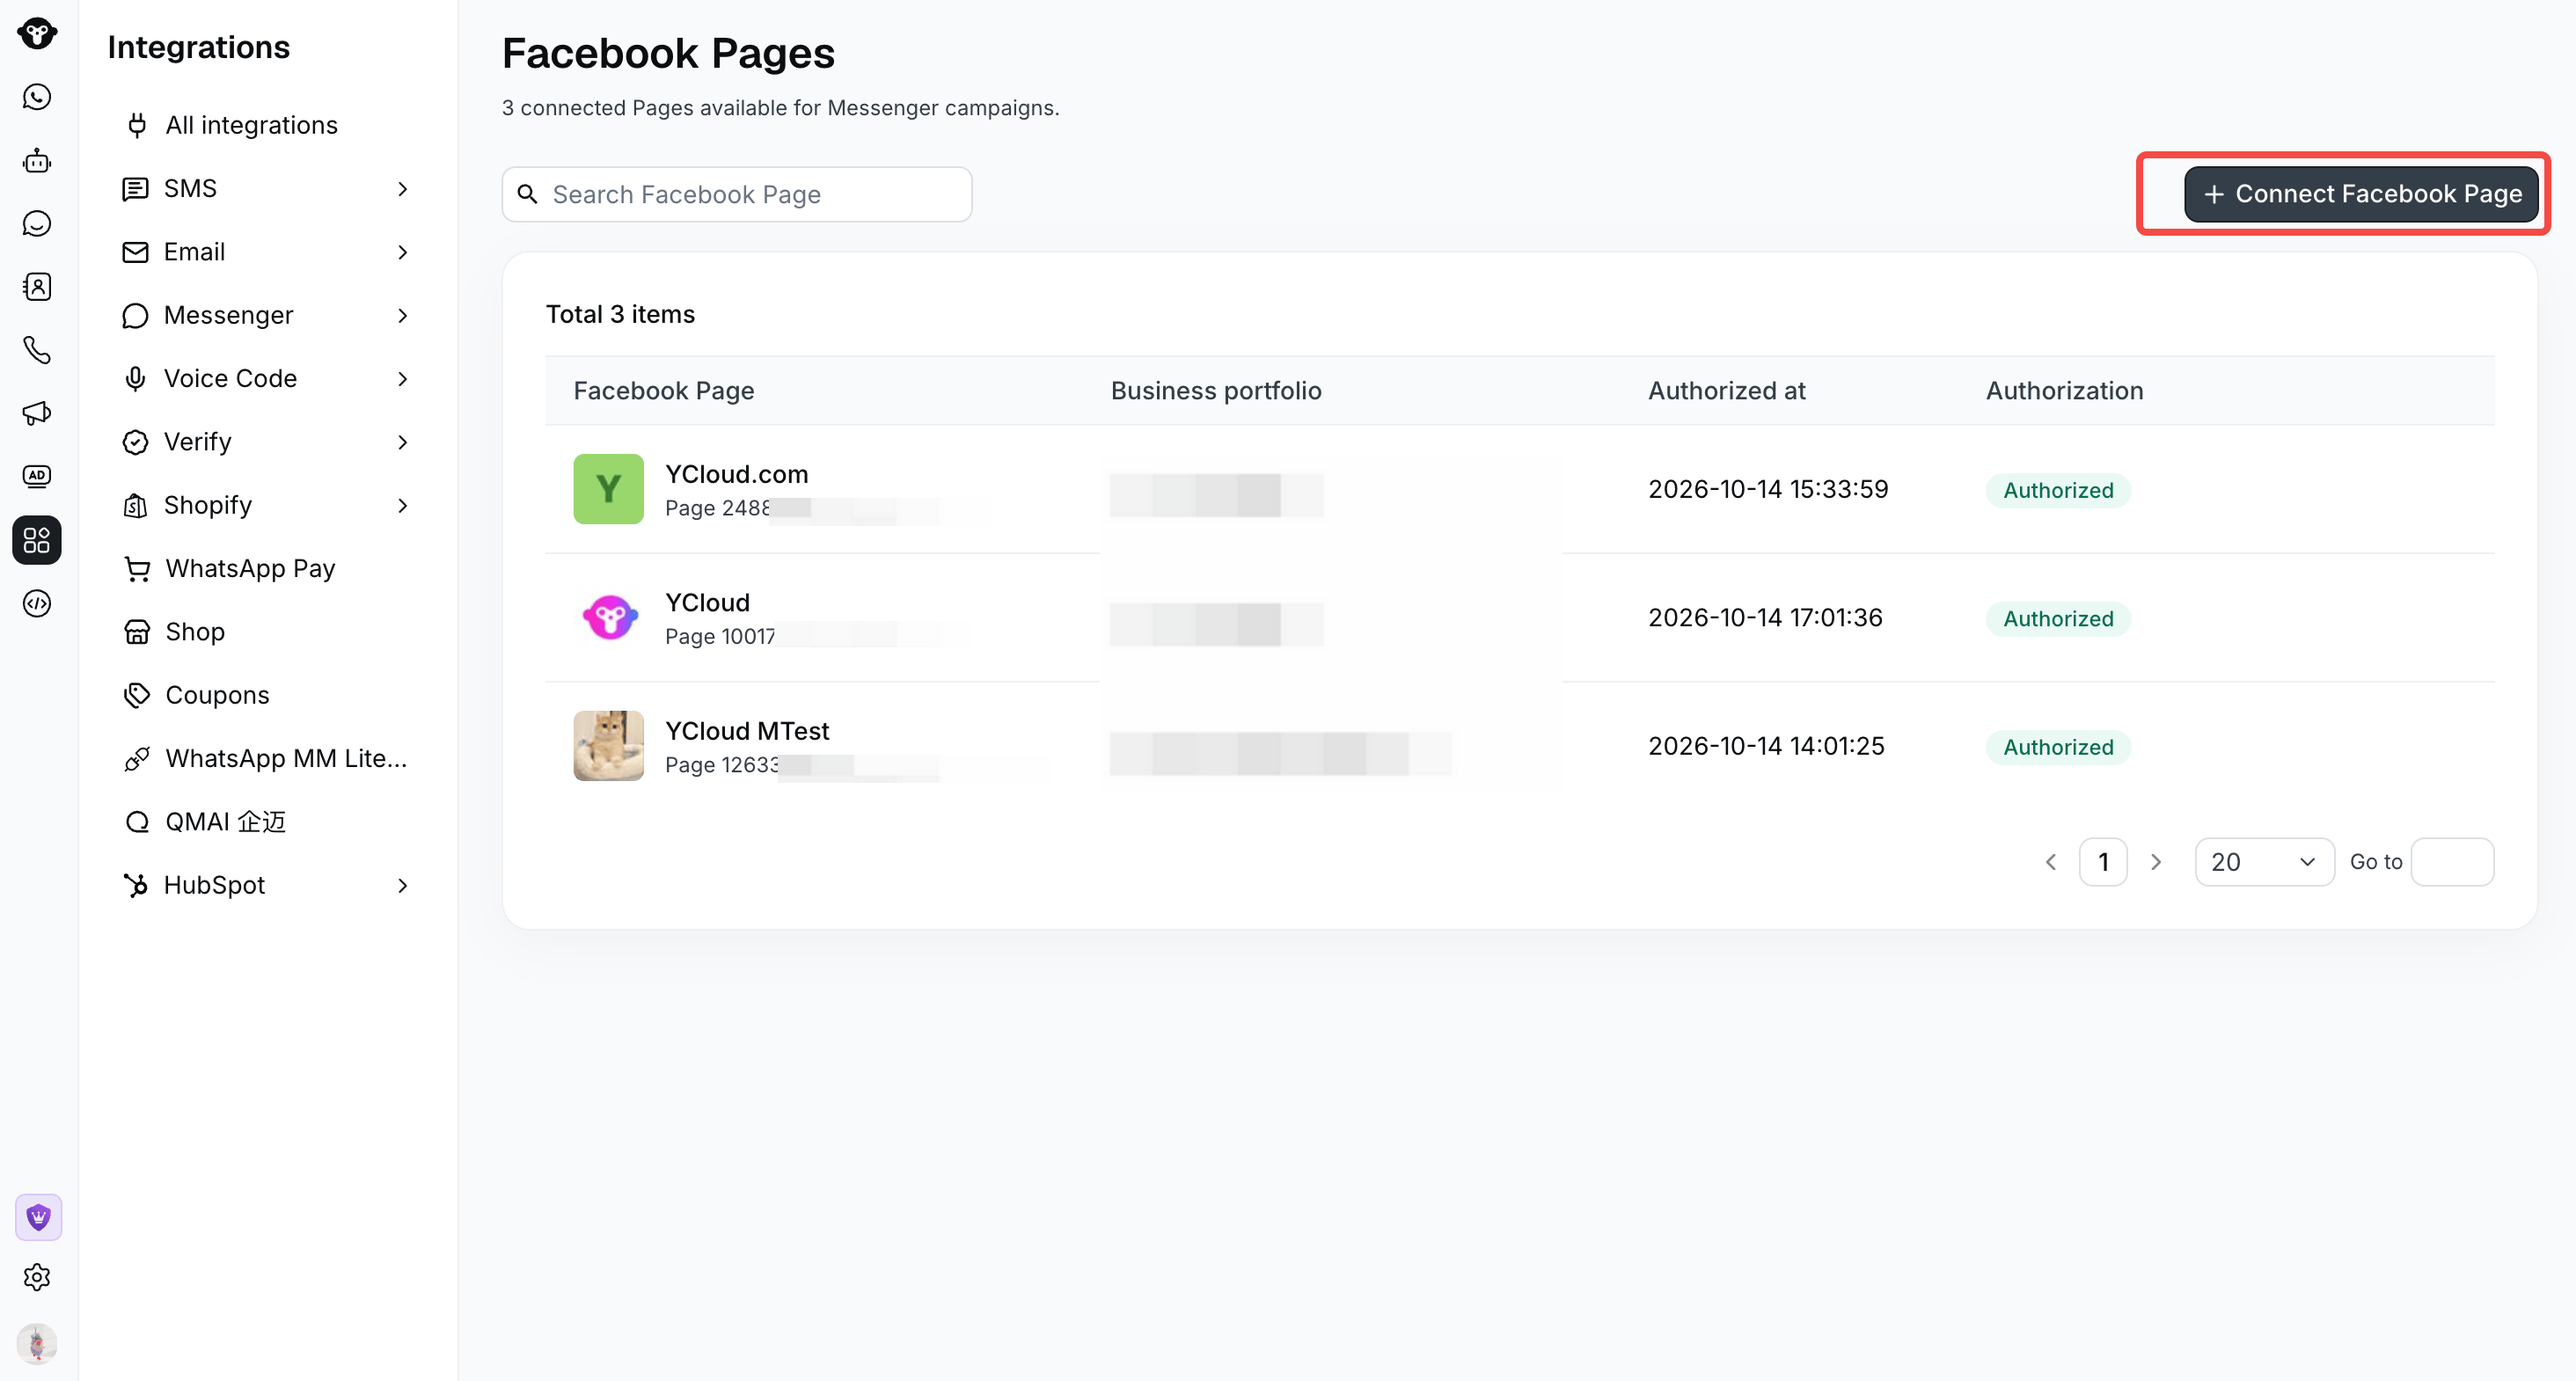
Connect a Facebook Page or review your authorized Pages.
-
Complete the Meta authorization flow. Select the business portfolio and Facebook Page you want to connect, and grant the requested permissions.
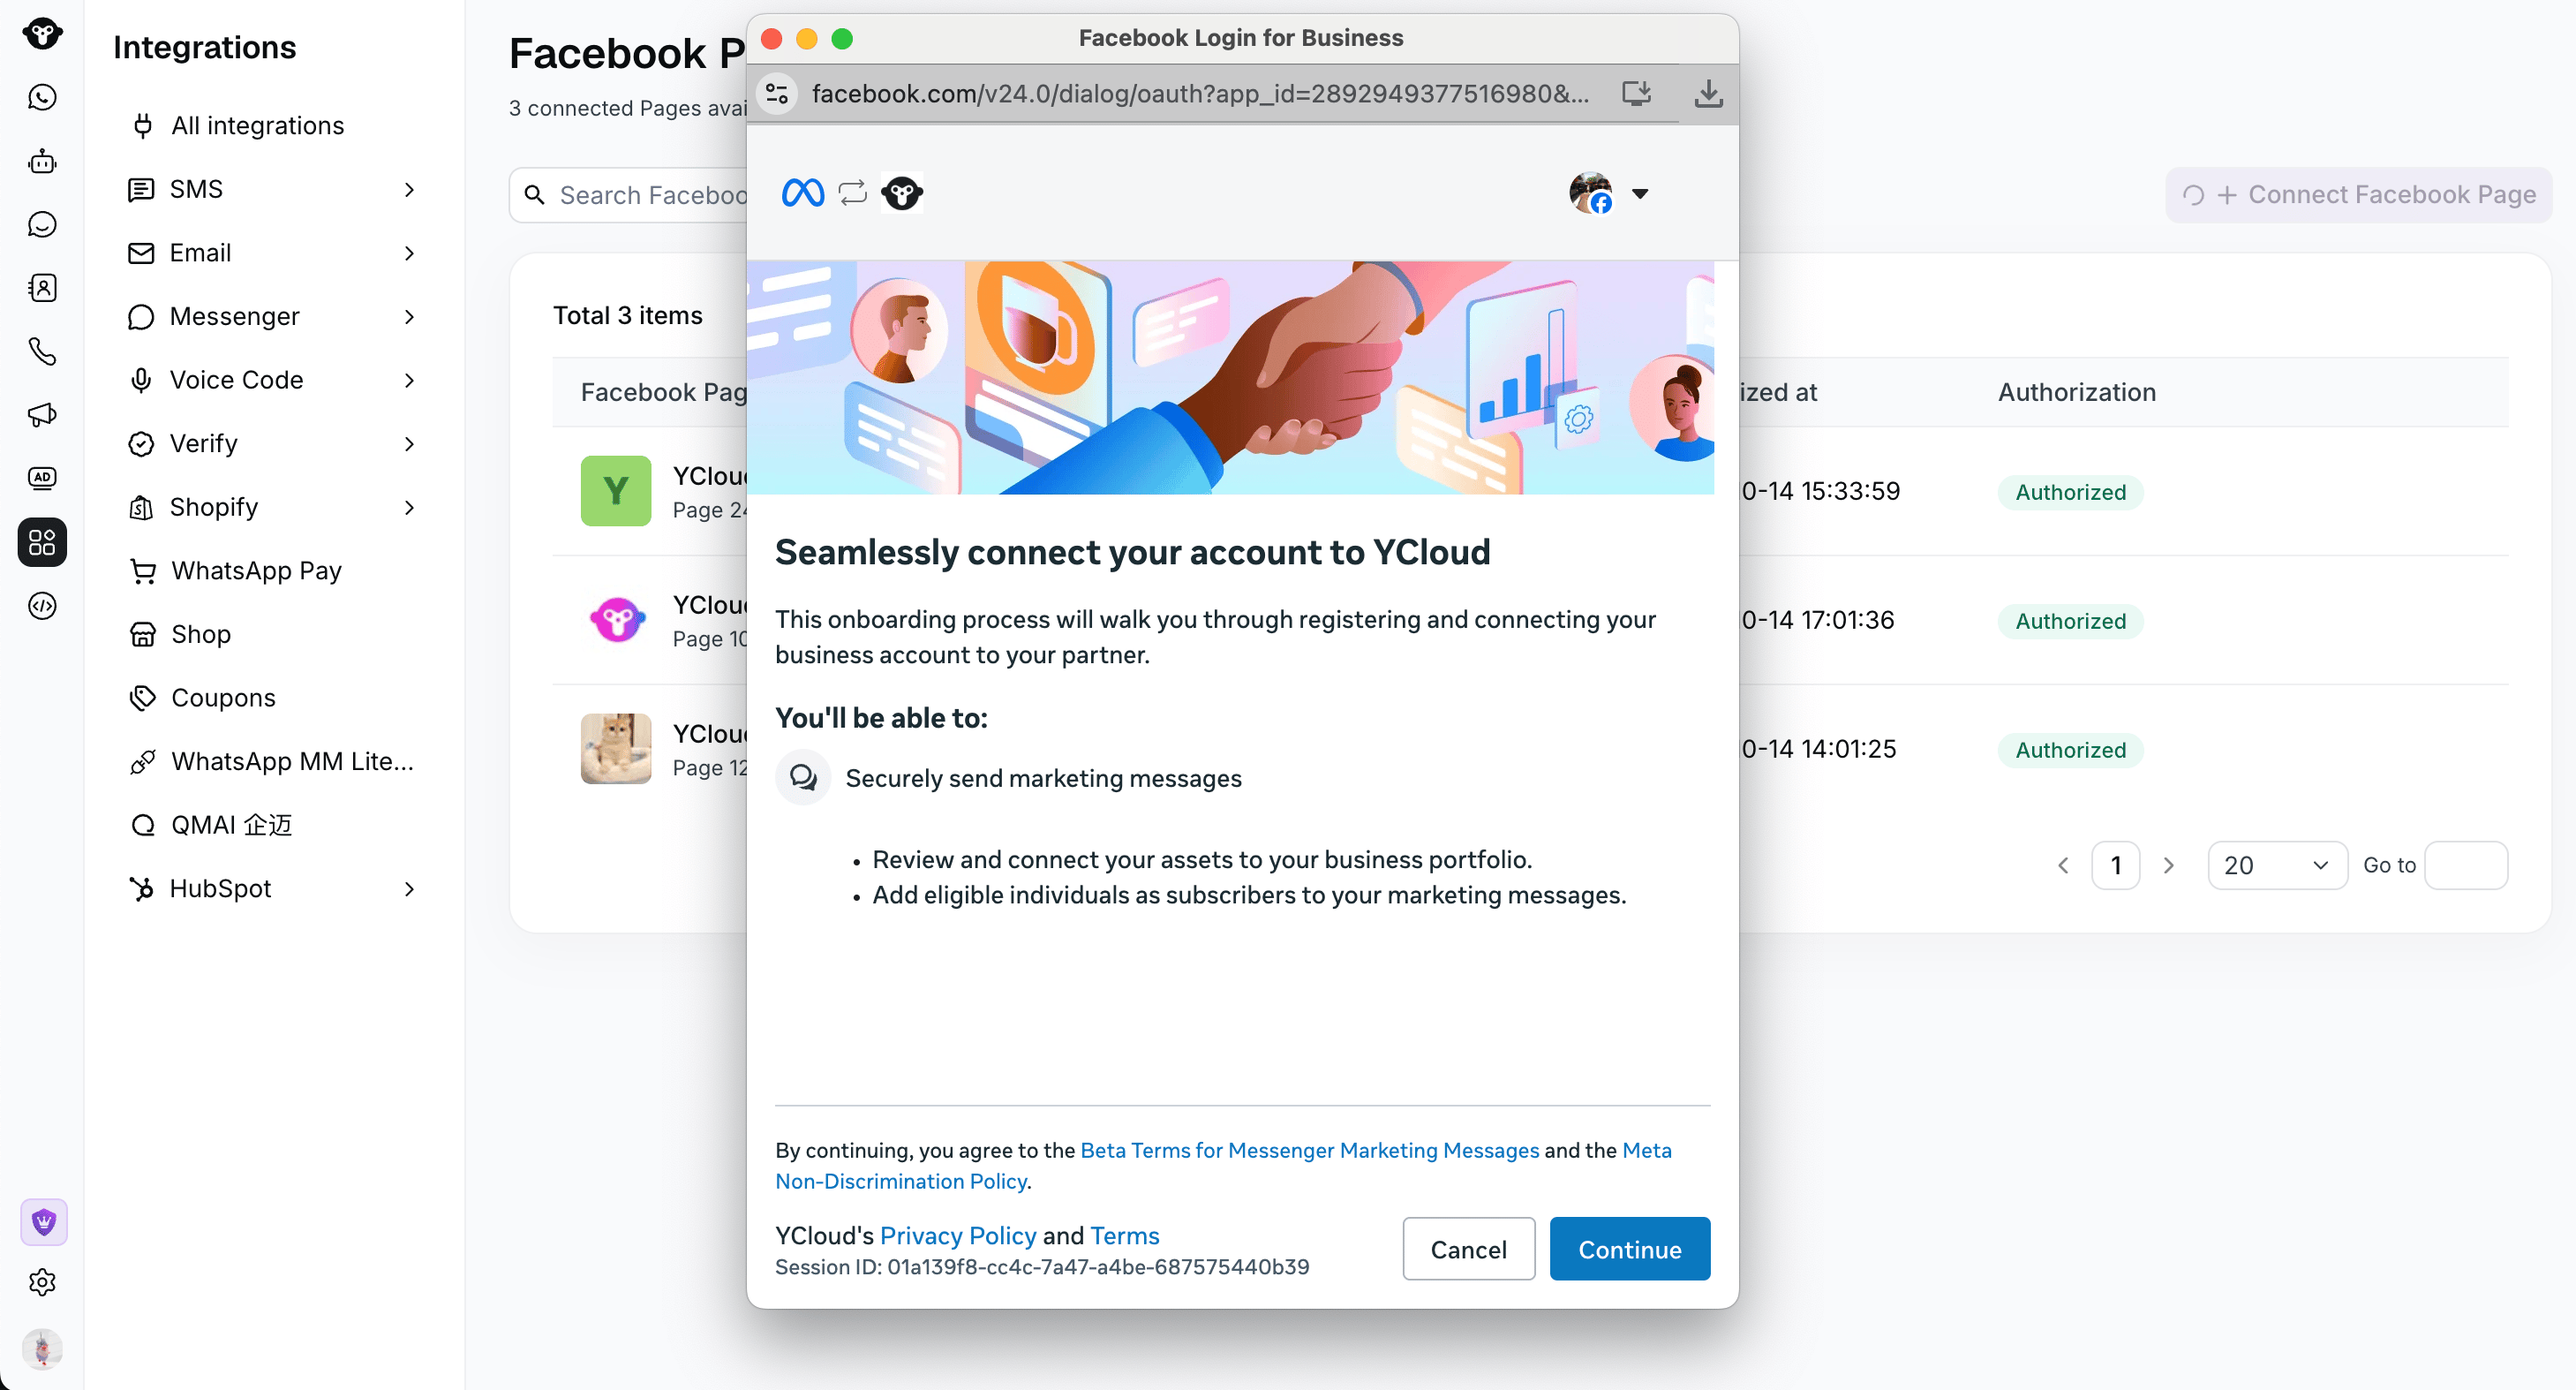
Follow the Meta onboarding flow to authorize your Facebook Page.
- Return to YCloud. Check that the Page appears under Facebook Pages with its Page ID, business portfolio, and Authorized status.
2. Create and upload an audience
A Custom Audience connects a customer list to a Facebook Page. Meta matches the uploaded customer information to people who may be eligible to receive your campaign.Create the audience
- Open Audience lists and click Create Custom Audience.
- Enter an Audience name and an optional Description.
- Select a connected Facebook Page.
- Click Create Audience to continue to Upload customer list.
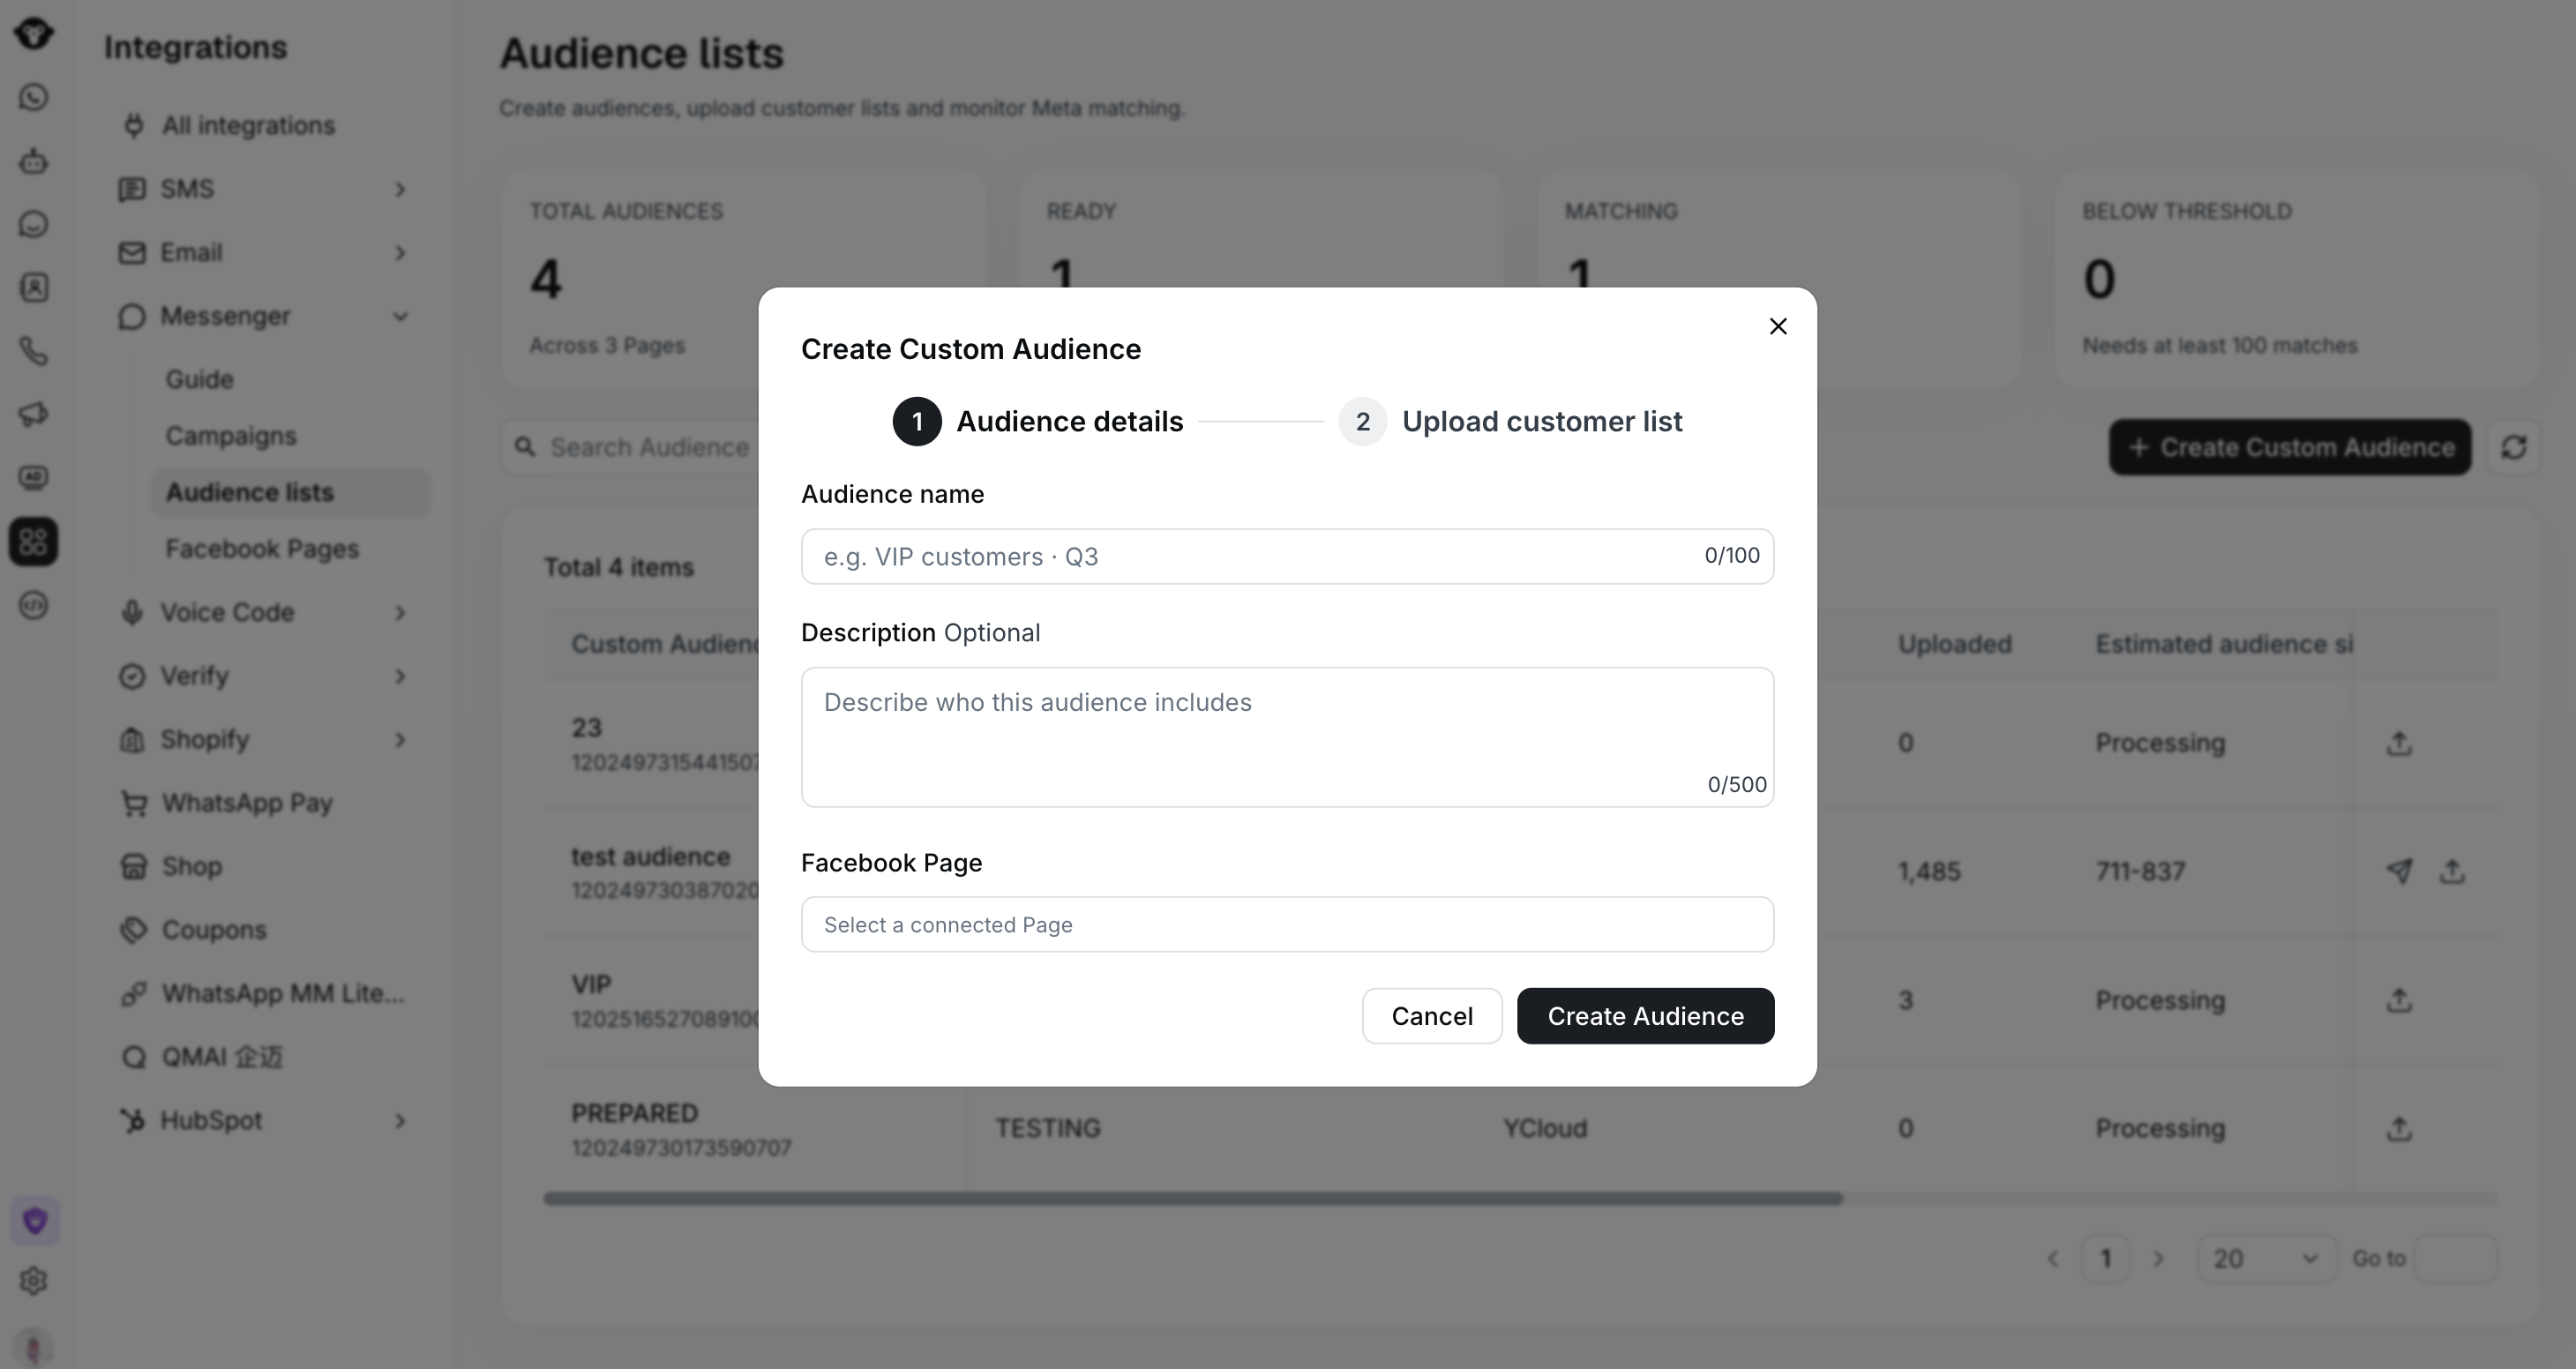
Enter an audience name, an optional description, and the connected Facebook Page.
The Facebook Page is fixed after you create the audience. Campaigns using this audience inherit the same Page. To use another Page, create another audience.
Upload your customer list
Click Download import example (.xlsx) in the upload dialog and use it to prepare your file. The template contains only two columns:phone and email.
Each row represents one customer. You can provide only their phone number, only their email address, or both. Leave the other cell blank if you only have one identifier. If you provide both, the phone number and email address must belong to the same person.
Meta uses the phone number and/or email address you provide to match the customer to its users. At least one of the two fields must be filled in each row.
Choose an
.xlsx or .xls file and click Confirm. Each file can be up to 15 MB and contain up to 1,000,000 rows. Split larger lists into smaller files.
If the upload fails, correct the issue and retry in the upload dialog. The audience already has an ID, so you do not need to create another audience.
Check the matching status
Matching can take up to 6 hours. Check the audience’s status in Audience lists: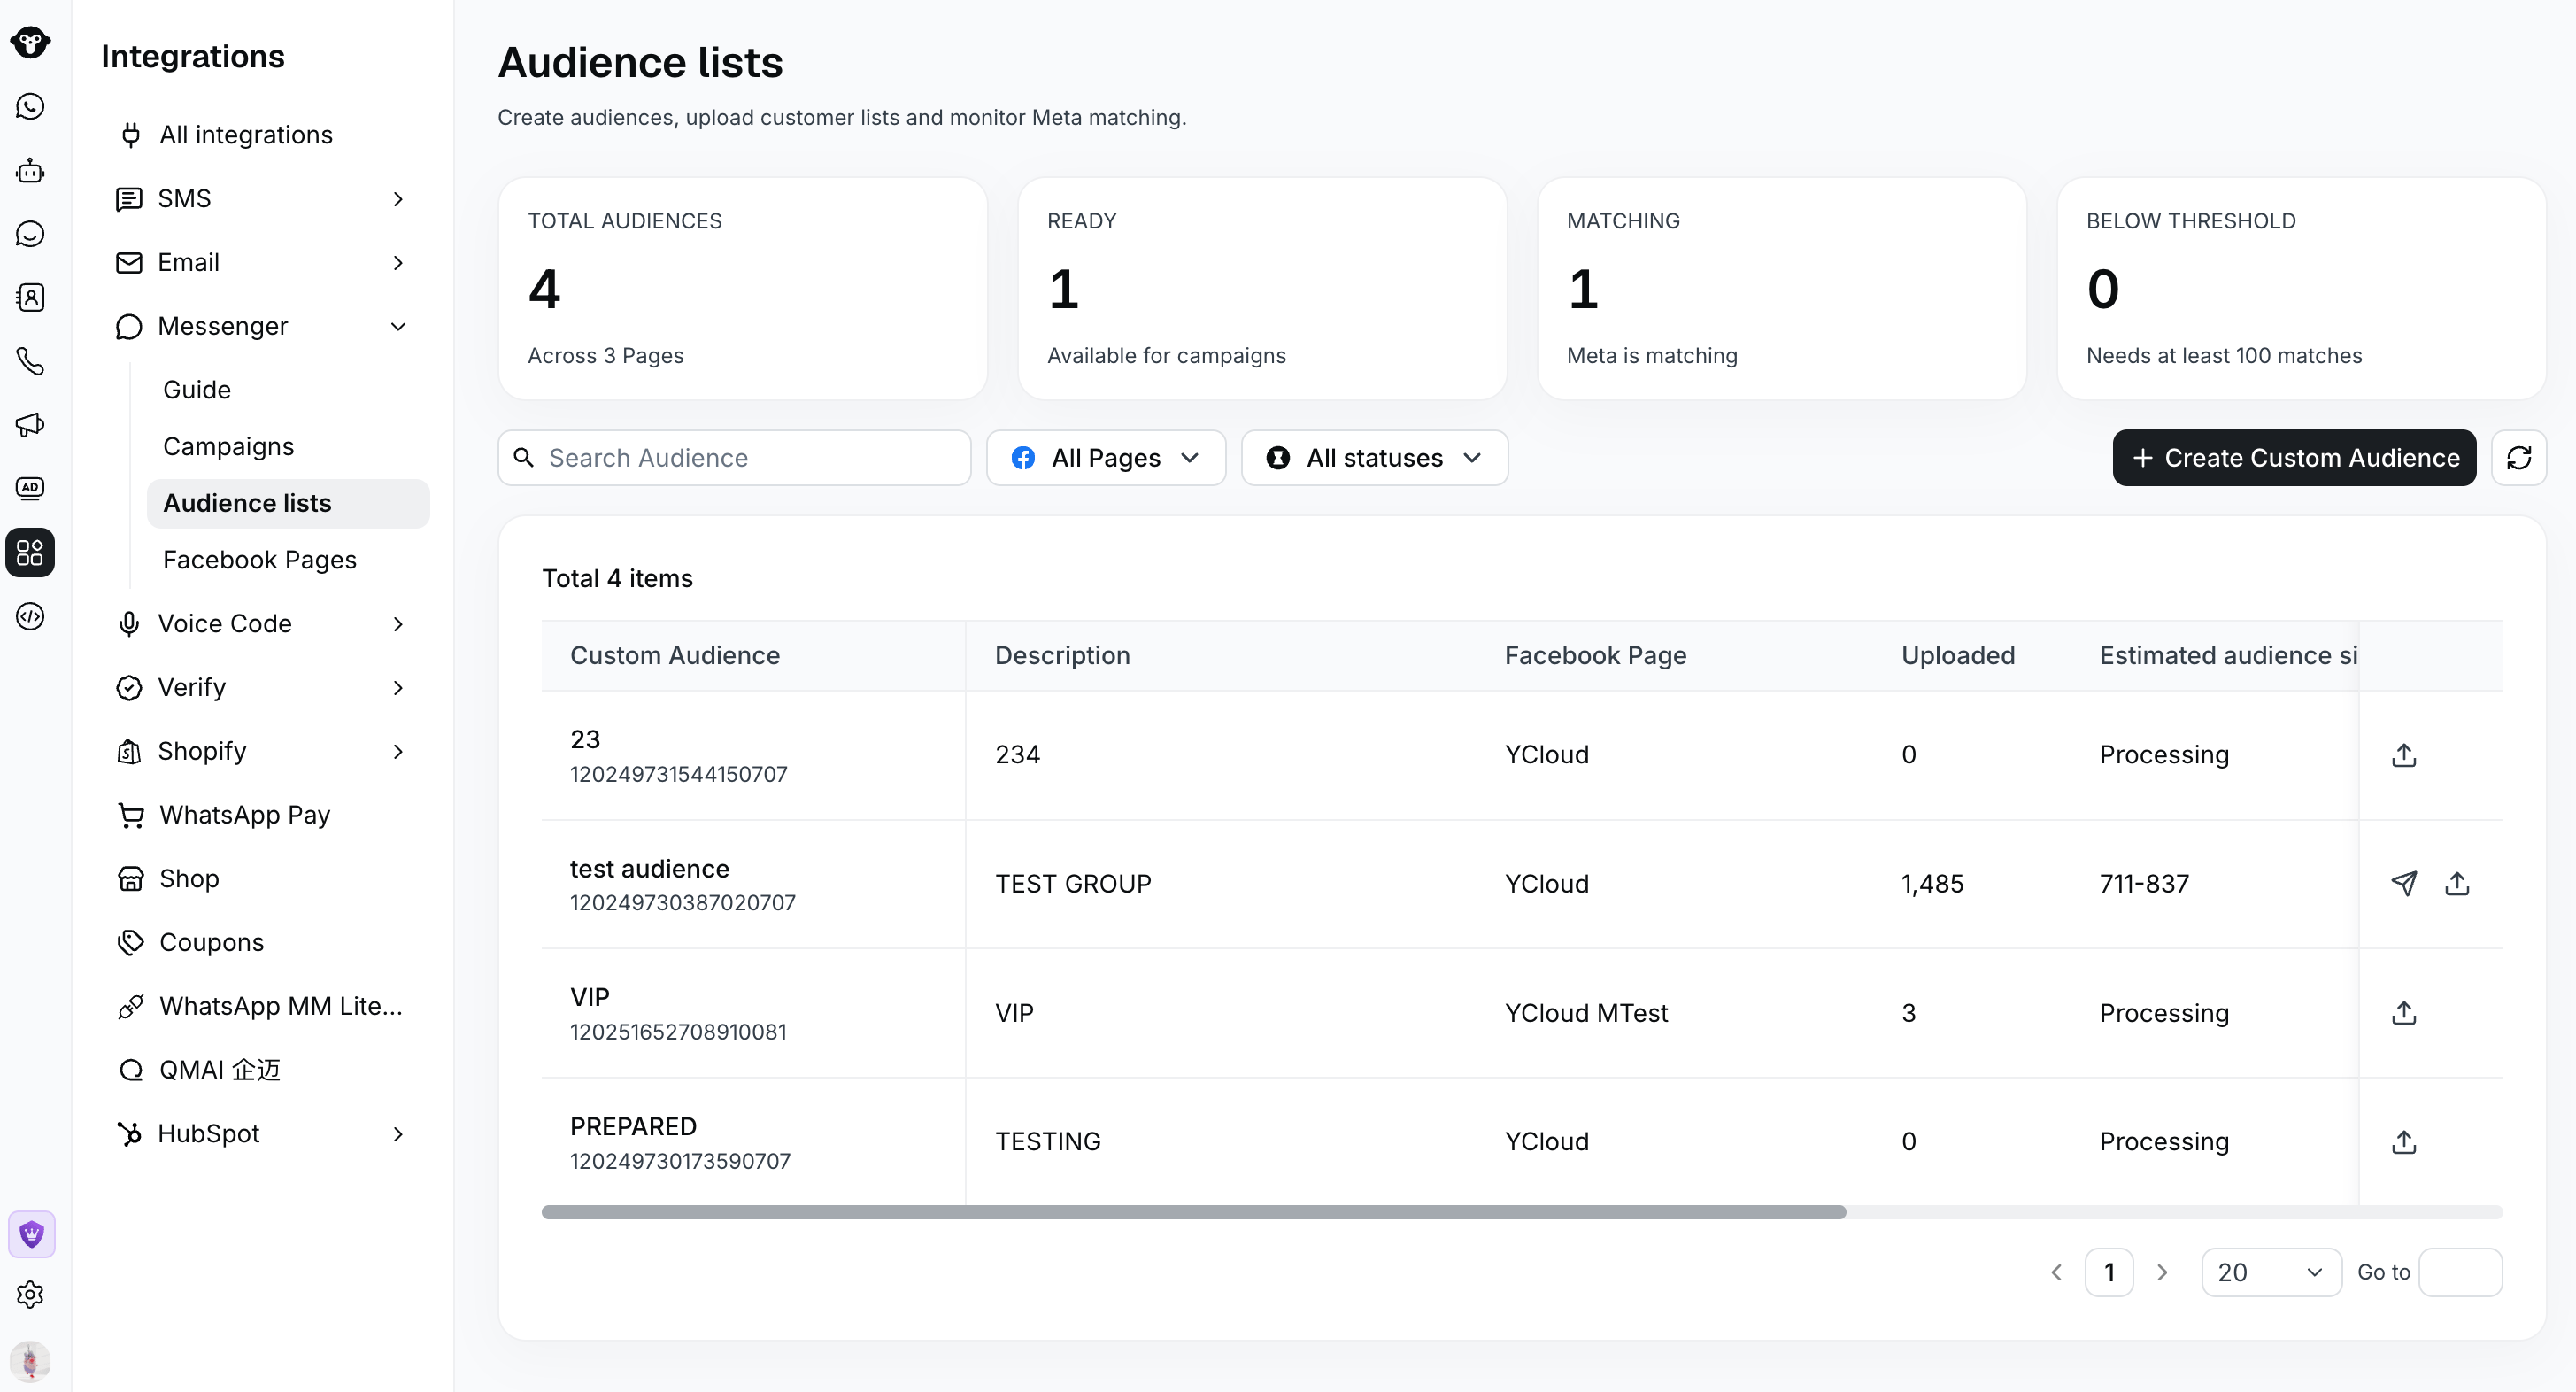
Review uploaded customer counts and estimated audience sizes in Audience lists.
3. Set up a campaign
Open Campaigns and click Create campaign. The editor has three steps: Campaign setup, Message template, and Review.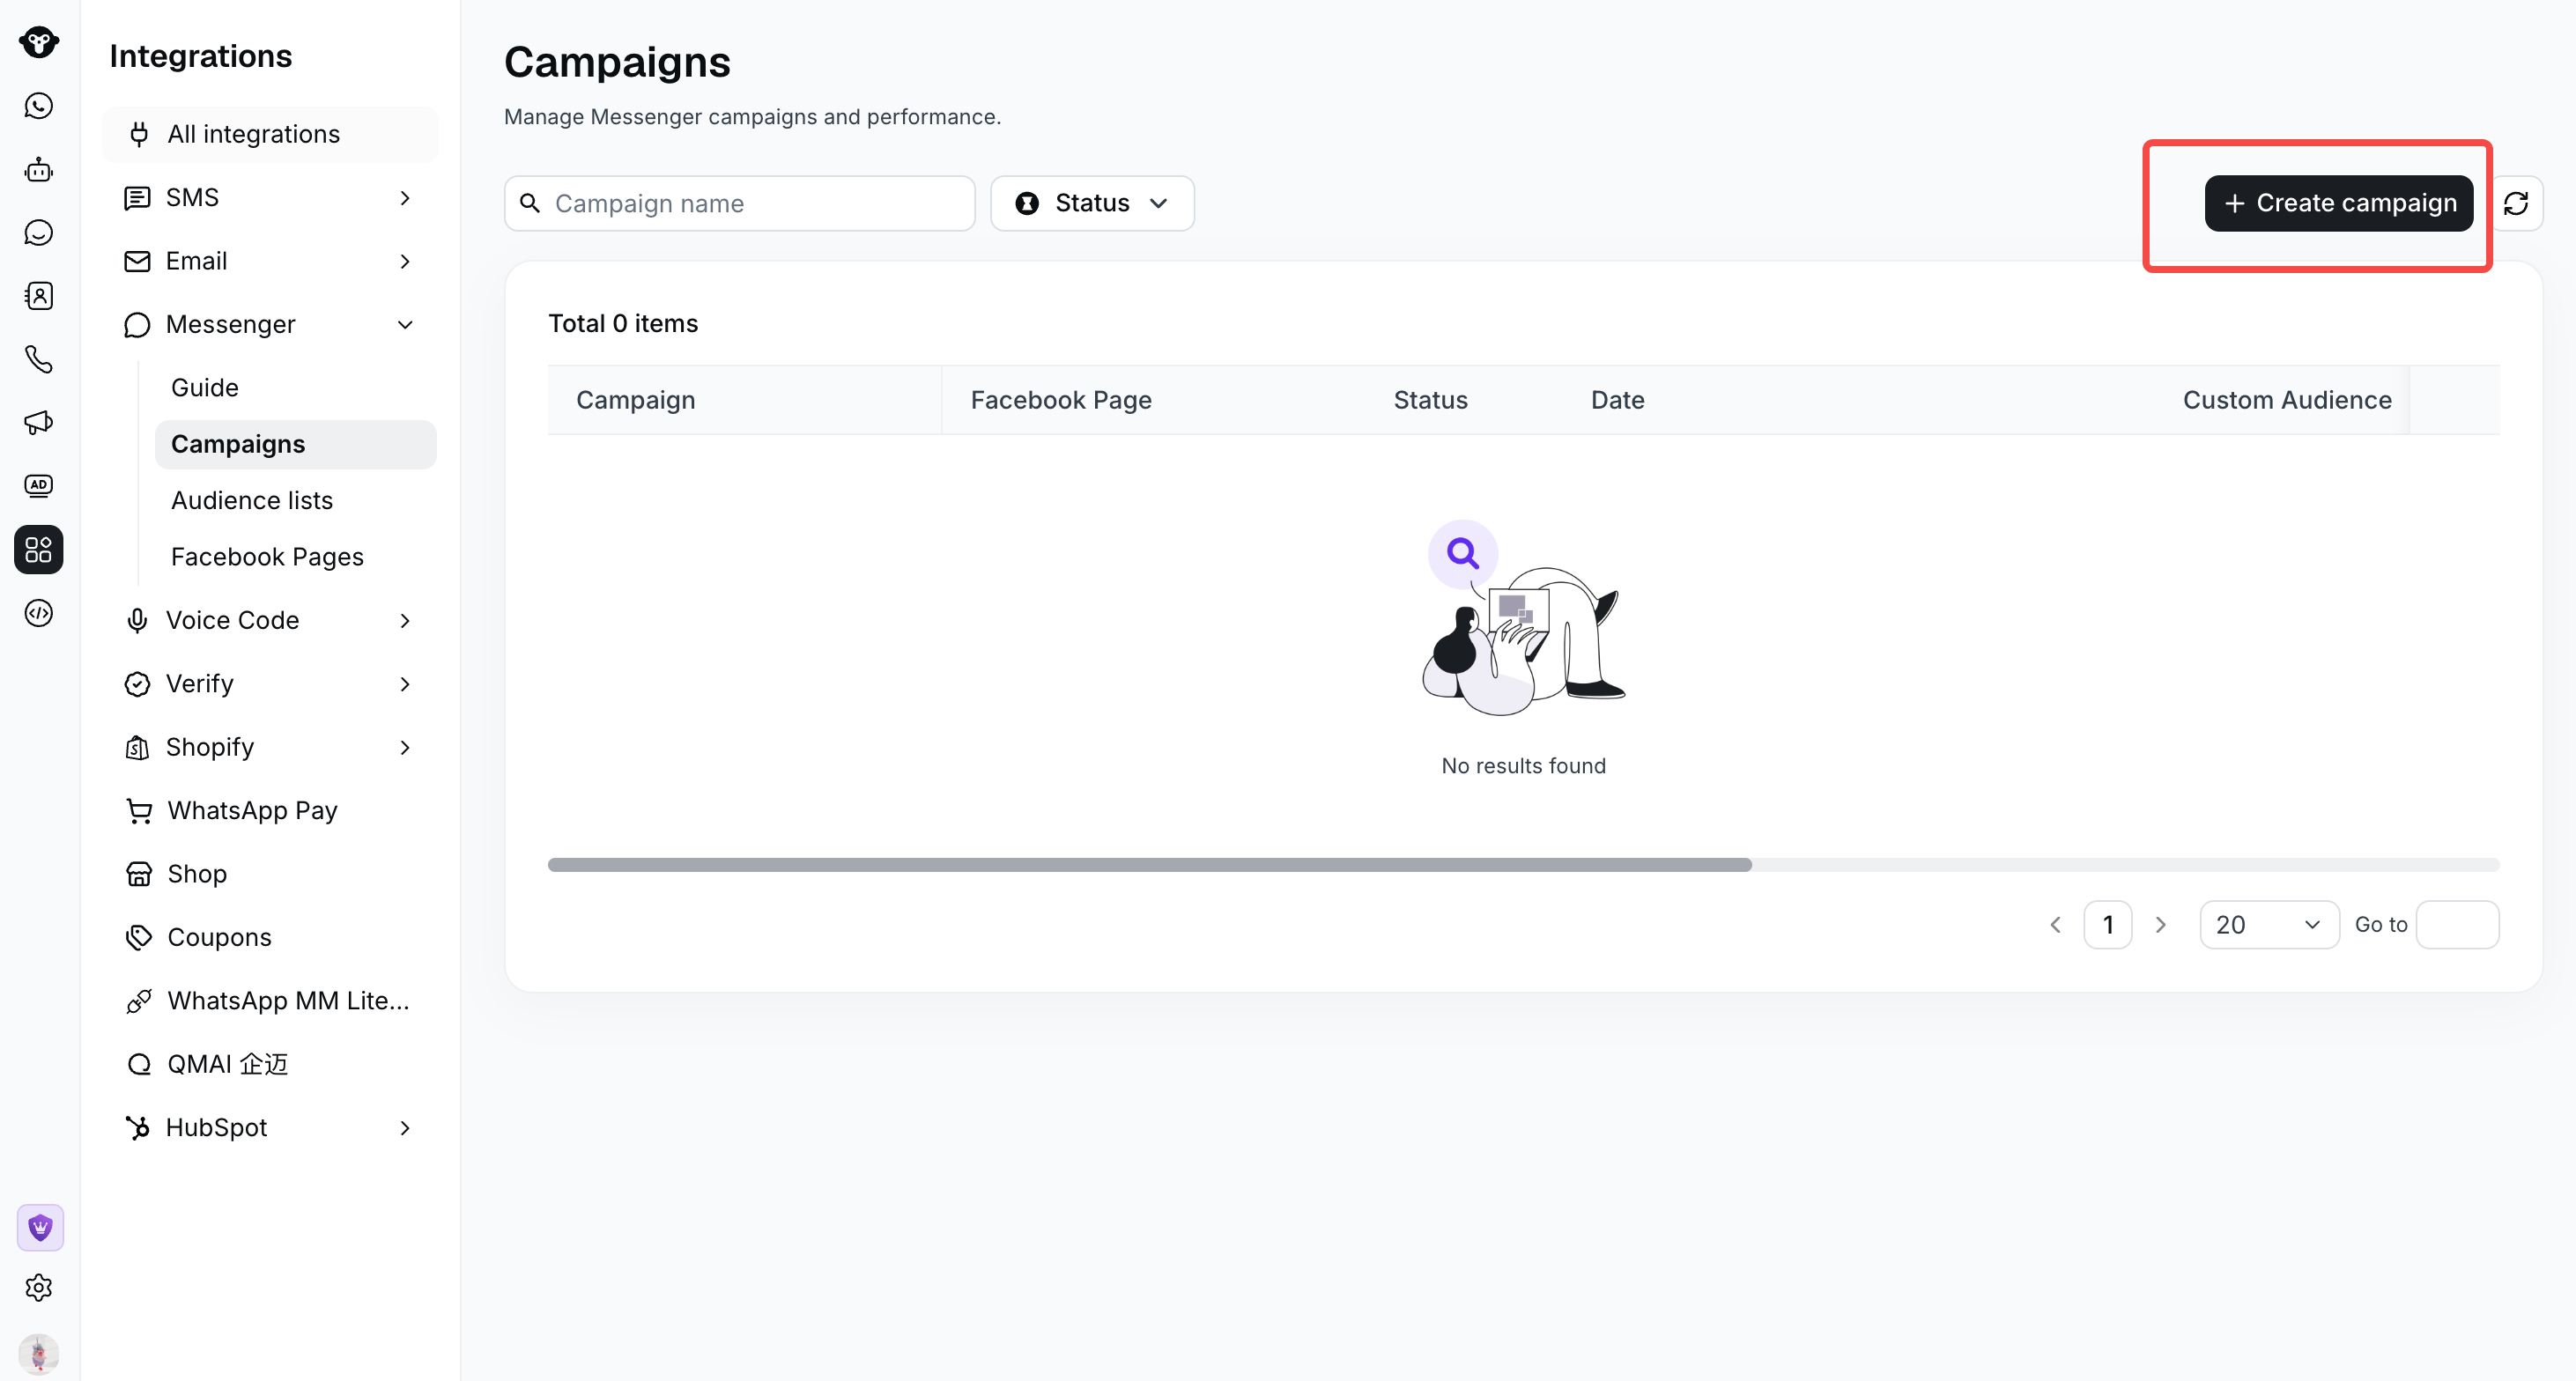
Click Create campaign to start a Messenger marketing campaign.
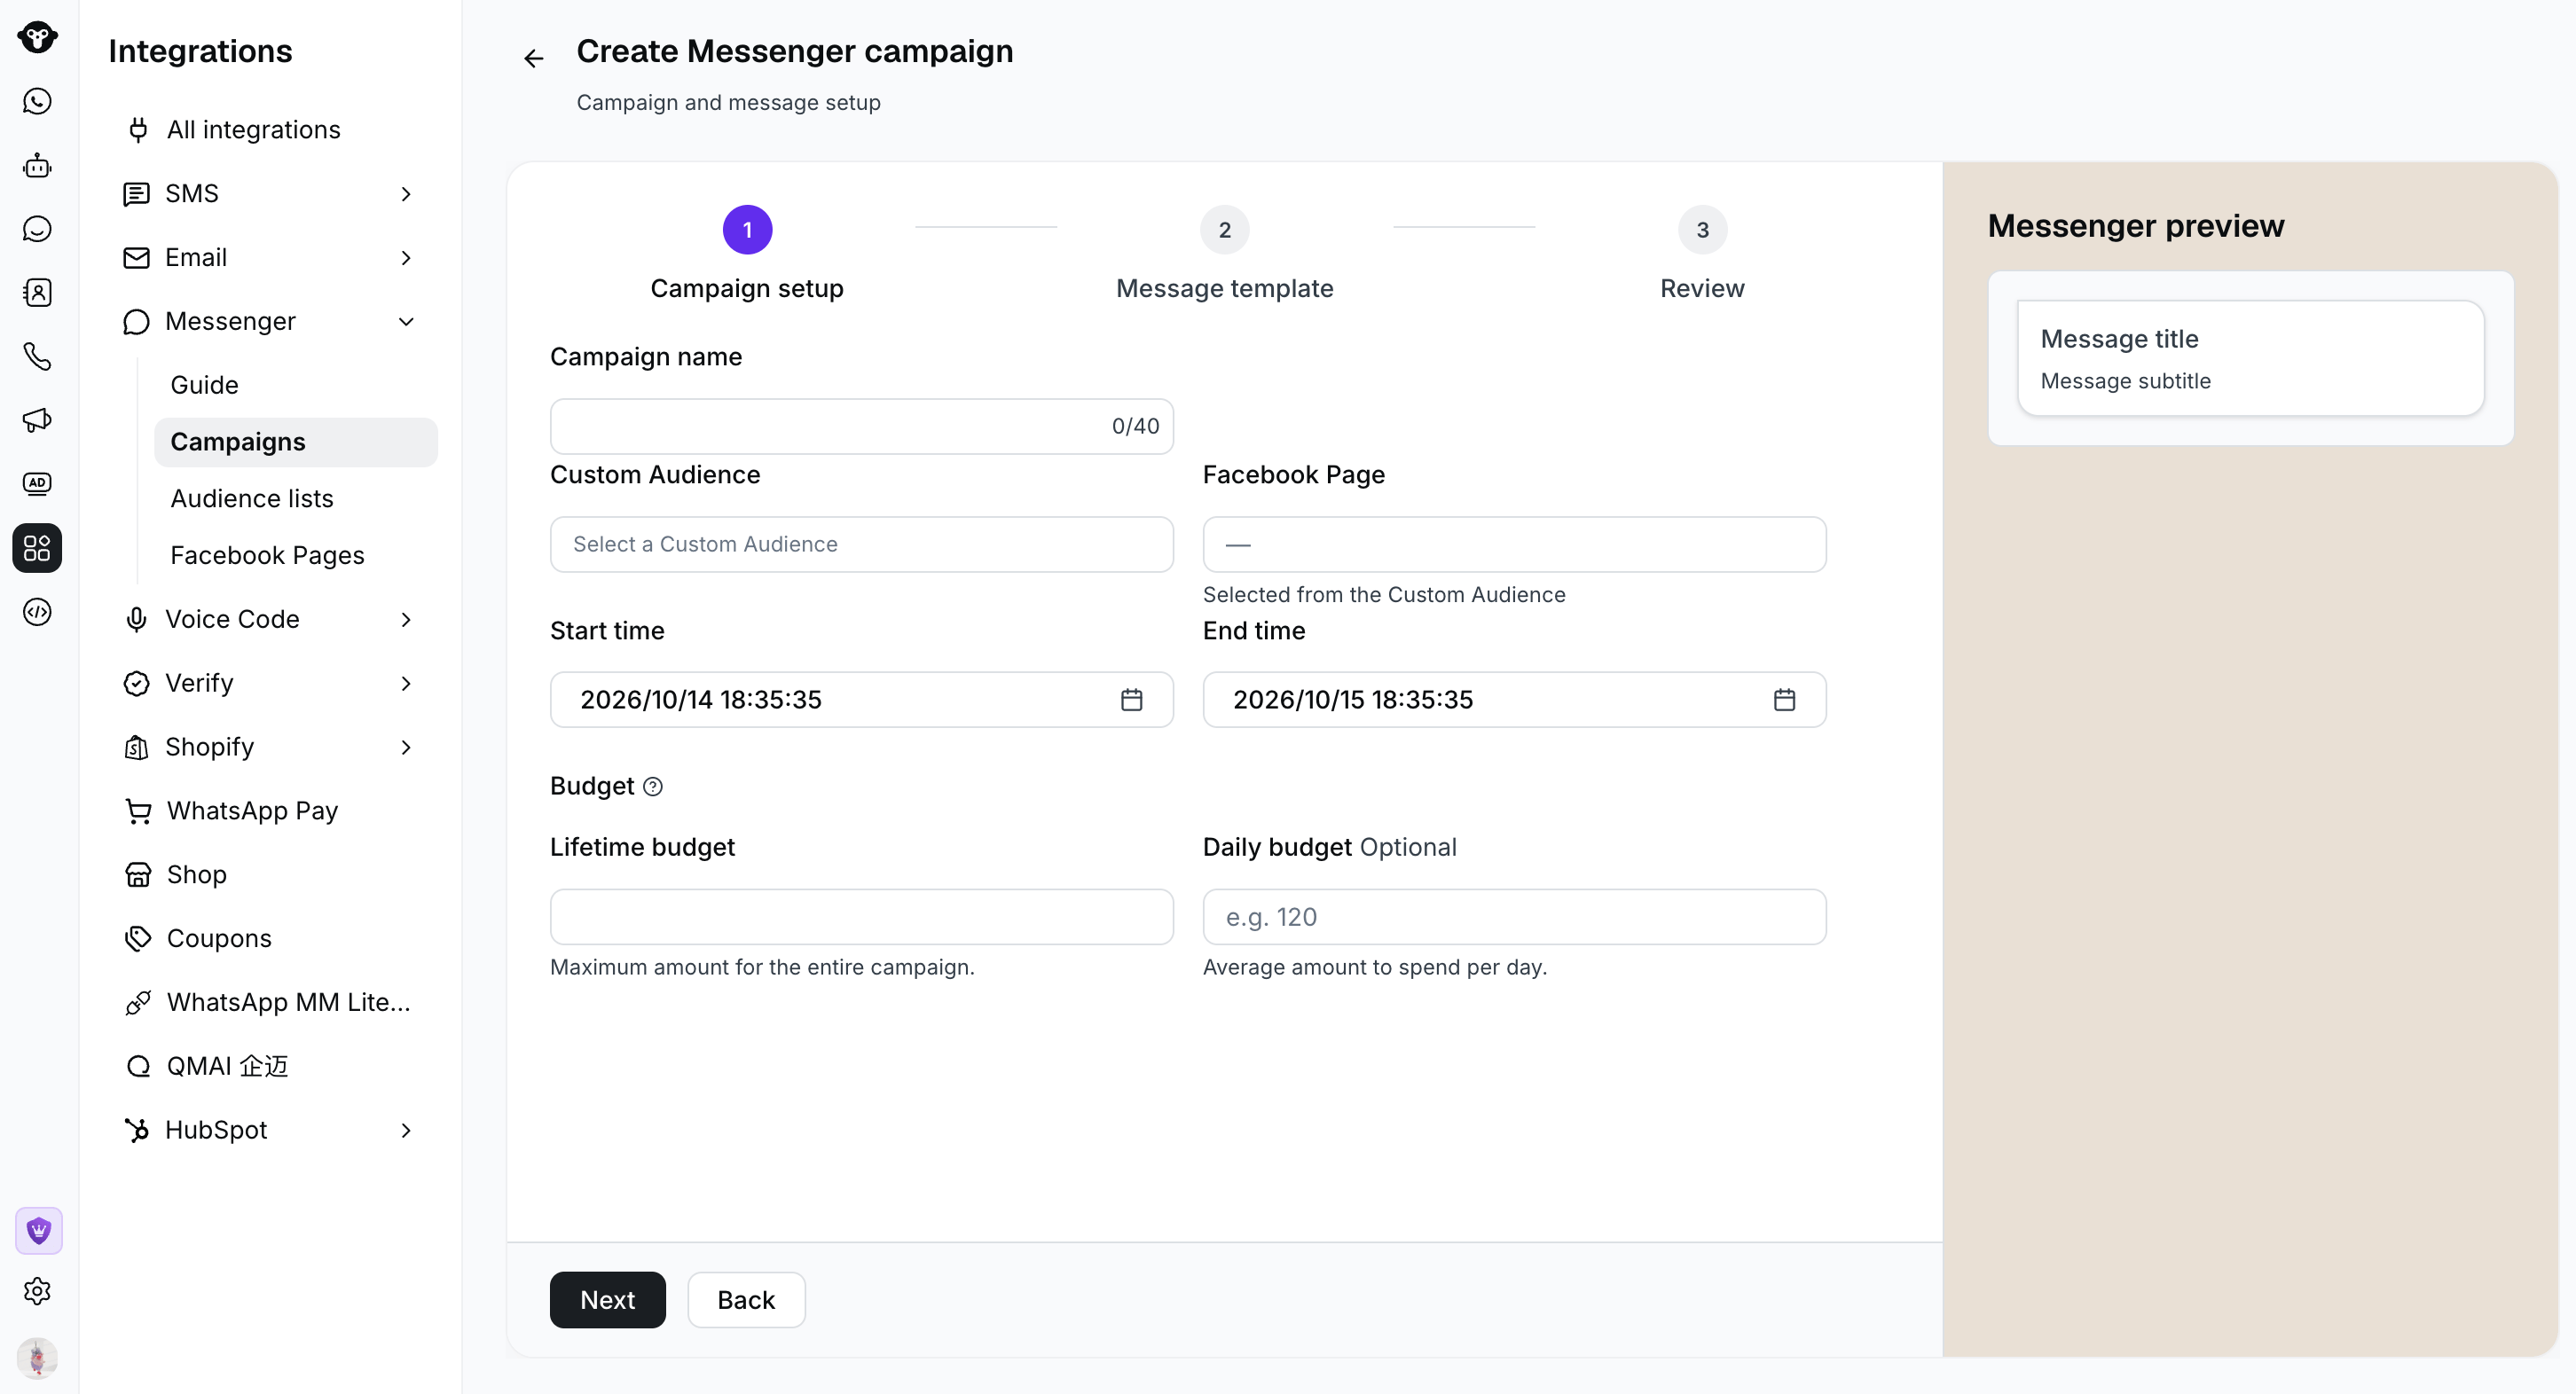
Choose your audience, set the schedule, and configure lifetime and daily budgets.
Daily budget represents average daily spending; do not treat it as a strict daily spending ceiling. Use the lifetime budget to plan the campaign’s total budget.
4. Write and preview your message
Use the Generic message editor to compose the message. The preview updates as you edit.
Greeting, title, and subtitle support plain text. Personalization variables are not supported.
Add media
- None: Send the message without an image or video.
- Image: Upload 1–6 JPG or PNG images, each under 2 MB. Select one image as the main image. If you upload more than one image, recipients can browse them in a carousel. Square images at 450 × 450 pixels are recommended. Use the preview arrows to check every image.
- Video: Upload one MP4 file.
Example message
For a seasonal promotion, you could use:
Keep the headline focused on one offer, choose media that supports it, and make the button’s destination match the message. Check the preview before continuing.
5. Review and submit
- Click Next to open Review.
- Check the Facebook Page, audience, estimated reach, schedule, and budgets.
- Review the message preview, including every image and the button destination.
- Click Submit.
6. Manage campaigns and track results
Use the campaign name search and status filter in Campaigns to find a campaign. Click its name to open the details, or refresh the list to retrieve updated results.
Campaign details include the Page, audience, schedule, budgets, amount spent, message preview, and performance metrics.
Delivery reporting is aggregate only. You can see how many people received your message, but you cannot identify which customers in your uploaded audience received it. Individual recipient delivery records are not available.
—) means a value is unavailable or a percentage cannot be calculated; it does not necessarily mean zero activity.
Tips for your first campaign
- Add a Visit website button to every campaign. Link to a relevant landing page and use campaign tracking parameters, such as UTM tags, together with conversion tracking in your website analytics to measure outcomes such as purchases or sign-ups. The button provides a path to your website; adding it alone does not automatically track conversions.
- Prepare the audience early. Allow up to 6 hours for matching before your planned start time.
- Start with a focused customer segment. Use accurate customer identifiers and a message relevant to that group.
- Test with a manageable budget. Review delivery, reads, clicks, and actual spend before increasing your investment in future campaigns.
- Check your timezone. Campaign schedules use your computer’s local timezone.
- Review content before submission. Editing is available while scheduled or waiting for matching. Pausing an active campaign does not make it editable.