

Create a journey
Create a Journey to automate the next actions for contacts who meet the conditions you set. Start with an available template or build a flow from scratch.Before you start
Prepare the entry condition, Sender, template message, and follow-up actions you want to use. If you plan to add tags or use message-status checks, decide how they should support the flow before you begin.Open Journey
Open the Journey workspace in YCloud to view your existing Journeys or create a new one.
Open Outbound > Journey to view existing Journeys or select Create Journey.
Start from a template or build from scratch
Select Create Journey, then choose one of the following options:- Start from a template to begin with an available flow that you can adapt to your use case.
- Build from scratch to configure every part of the flow yourself.

Choose Build from scratch or an available template. Shopify templates require a connected store.
Configure the trigger
A Journey needs a Trigger. Configure the entry conditions, select a Sender, and choose the entry rule for your flow. The entry rule determines whether a contact enters only the first time that they match the conditions or each time that they match them.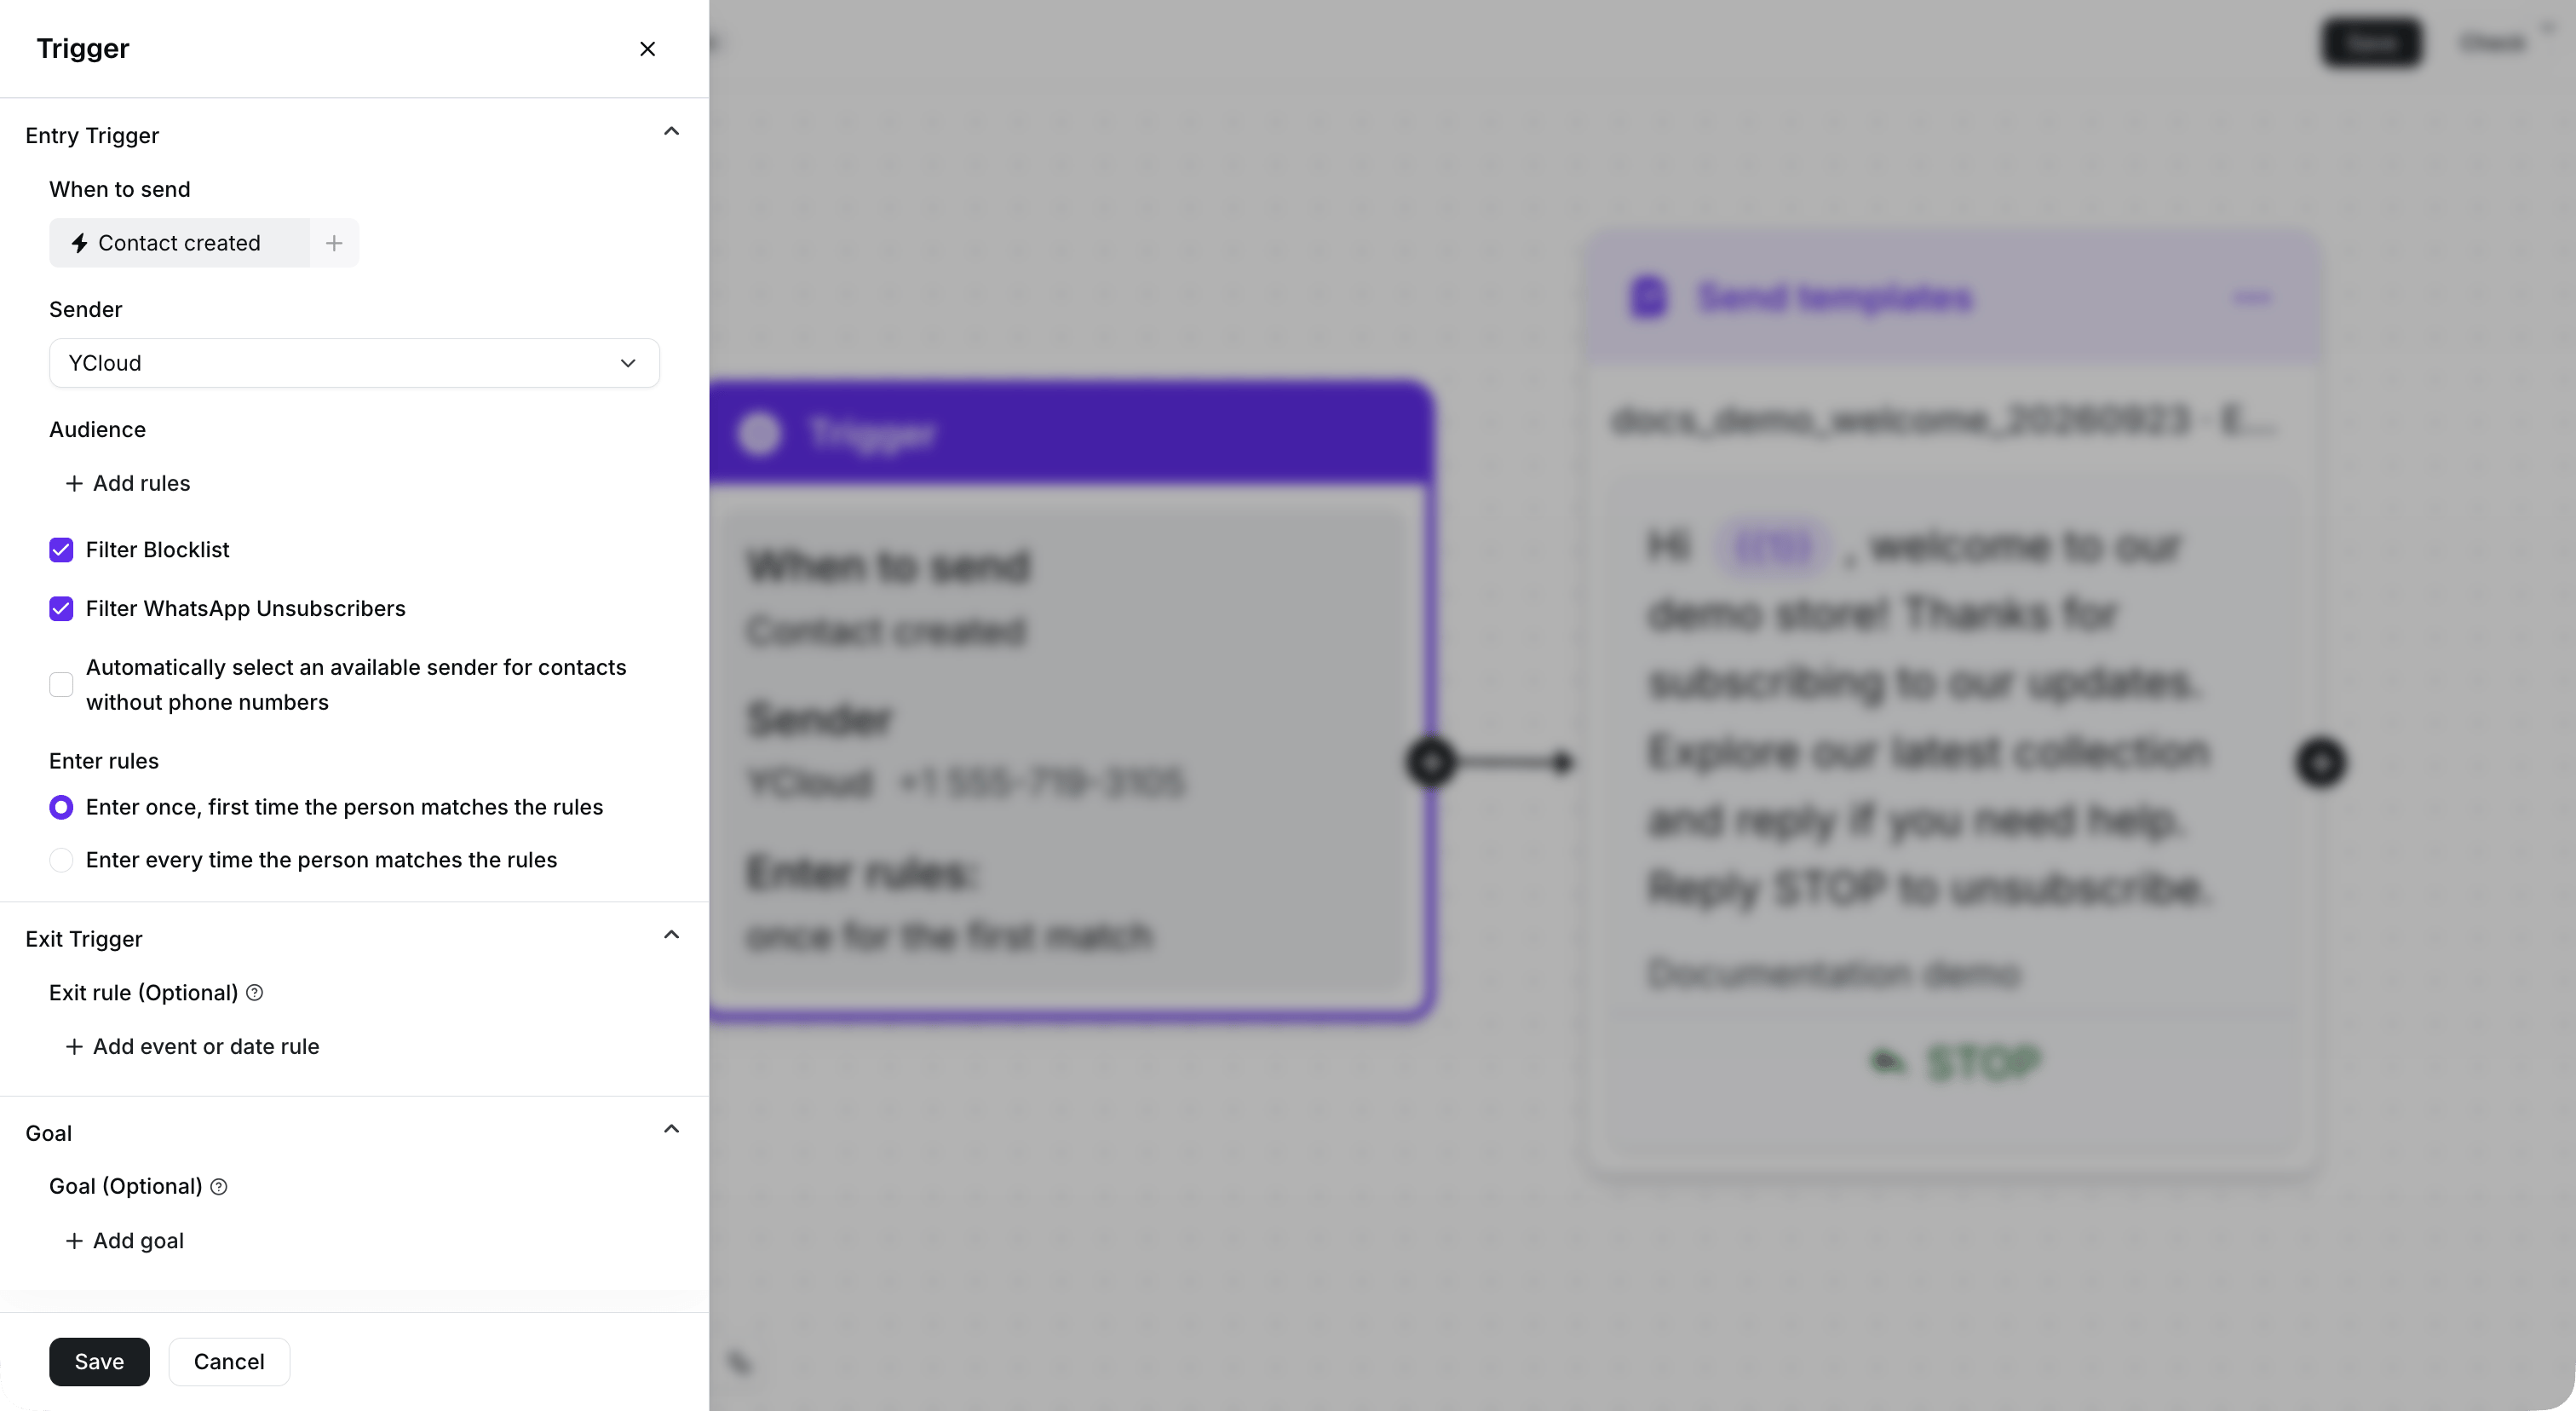
Configure the entry condition, Sender, and entry rule. This demonstration Journey remains inactive.
Add and configure steps
Add the steps that should run after the Trigger. For example, you can send a template message, wait before the next action, check a message status, or add a tag. Configure each step before you connect it to the next step. Keep the flow focused on one customer outcome, such as following up after a message or applying a tag after a response.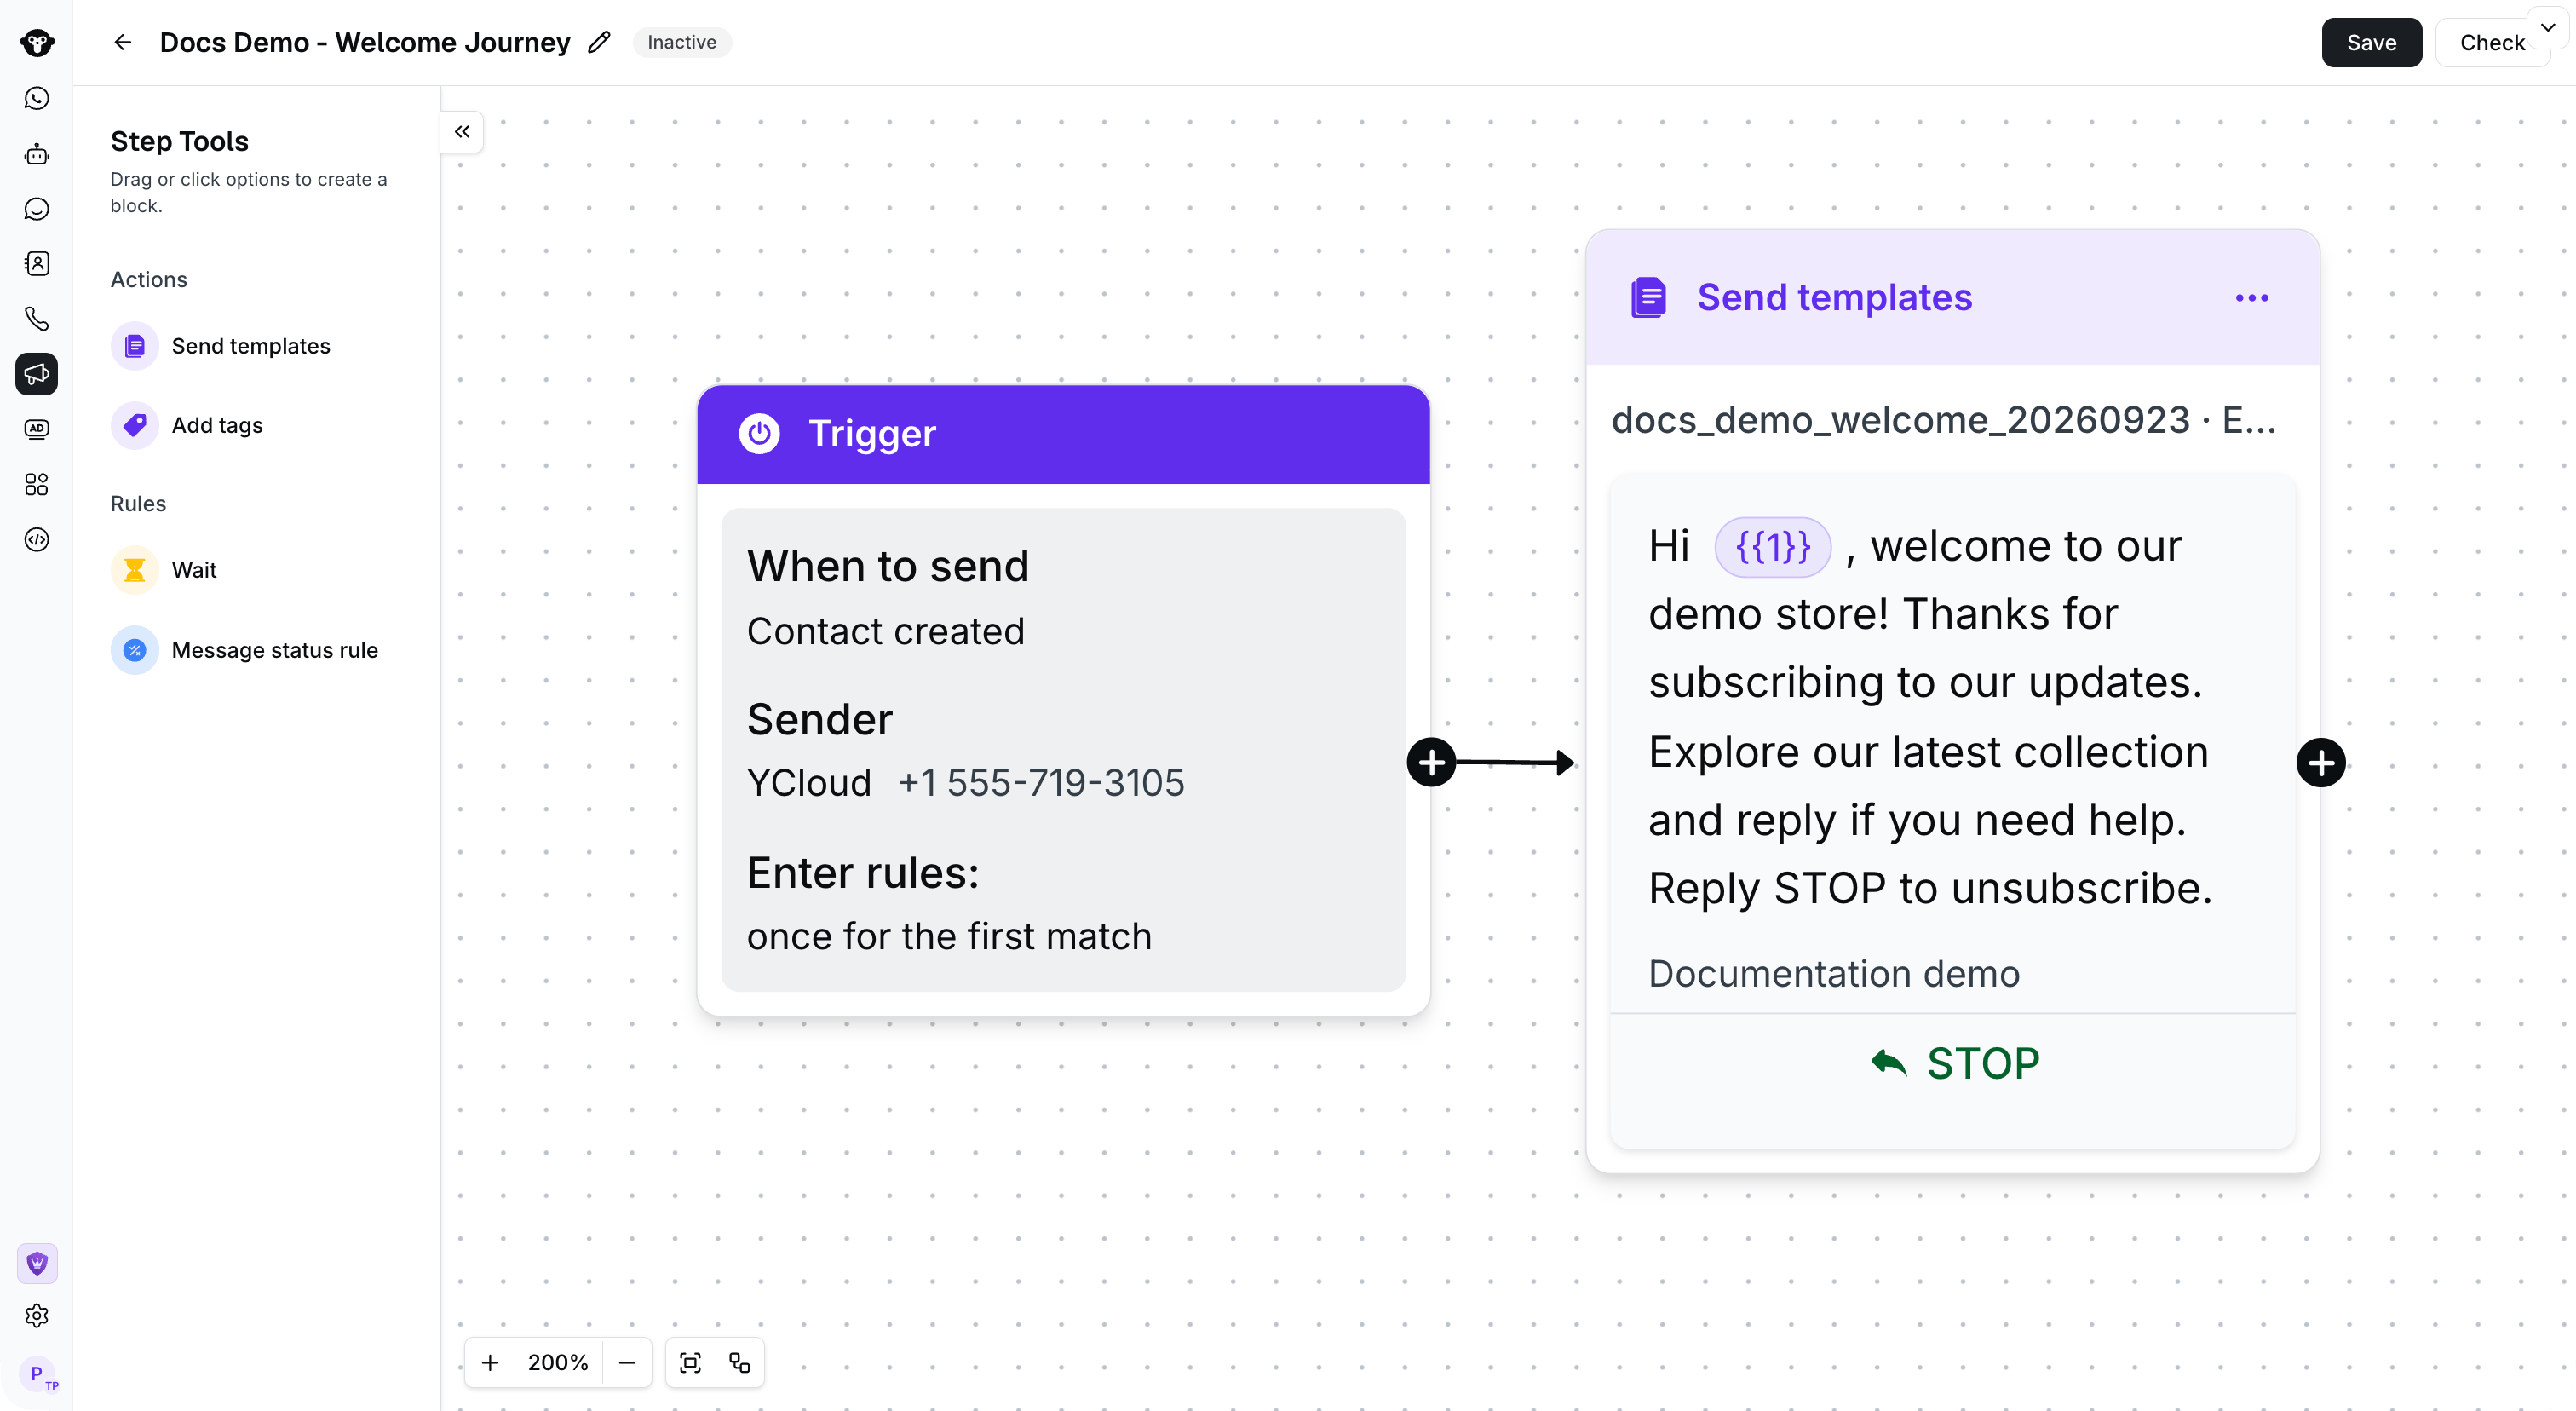
Connect the configured Trigger to the next step. This example sends a welcome template when activated.
Review and save
Review the Trigger, every step, and the connections between steps. Correct configuration errors before you save the Journey as Active. Choose Inactive if you want to save the flow before activating it. Choose Active when the flow is ready to run.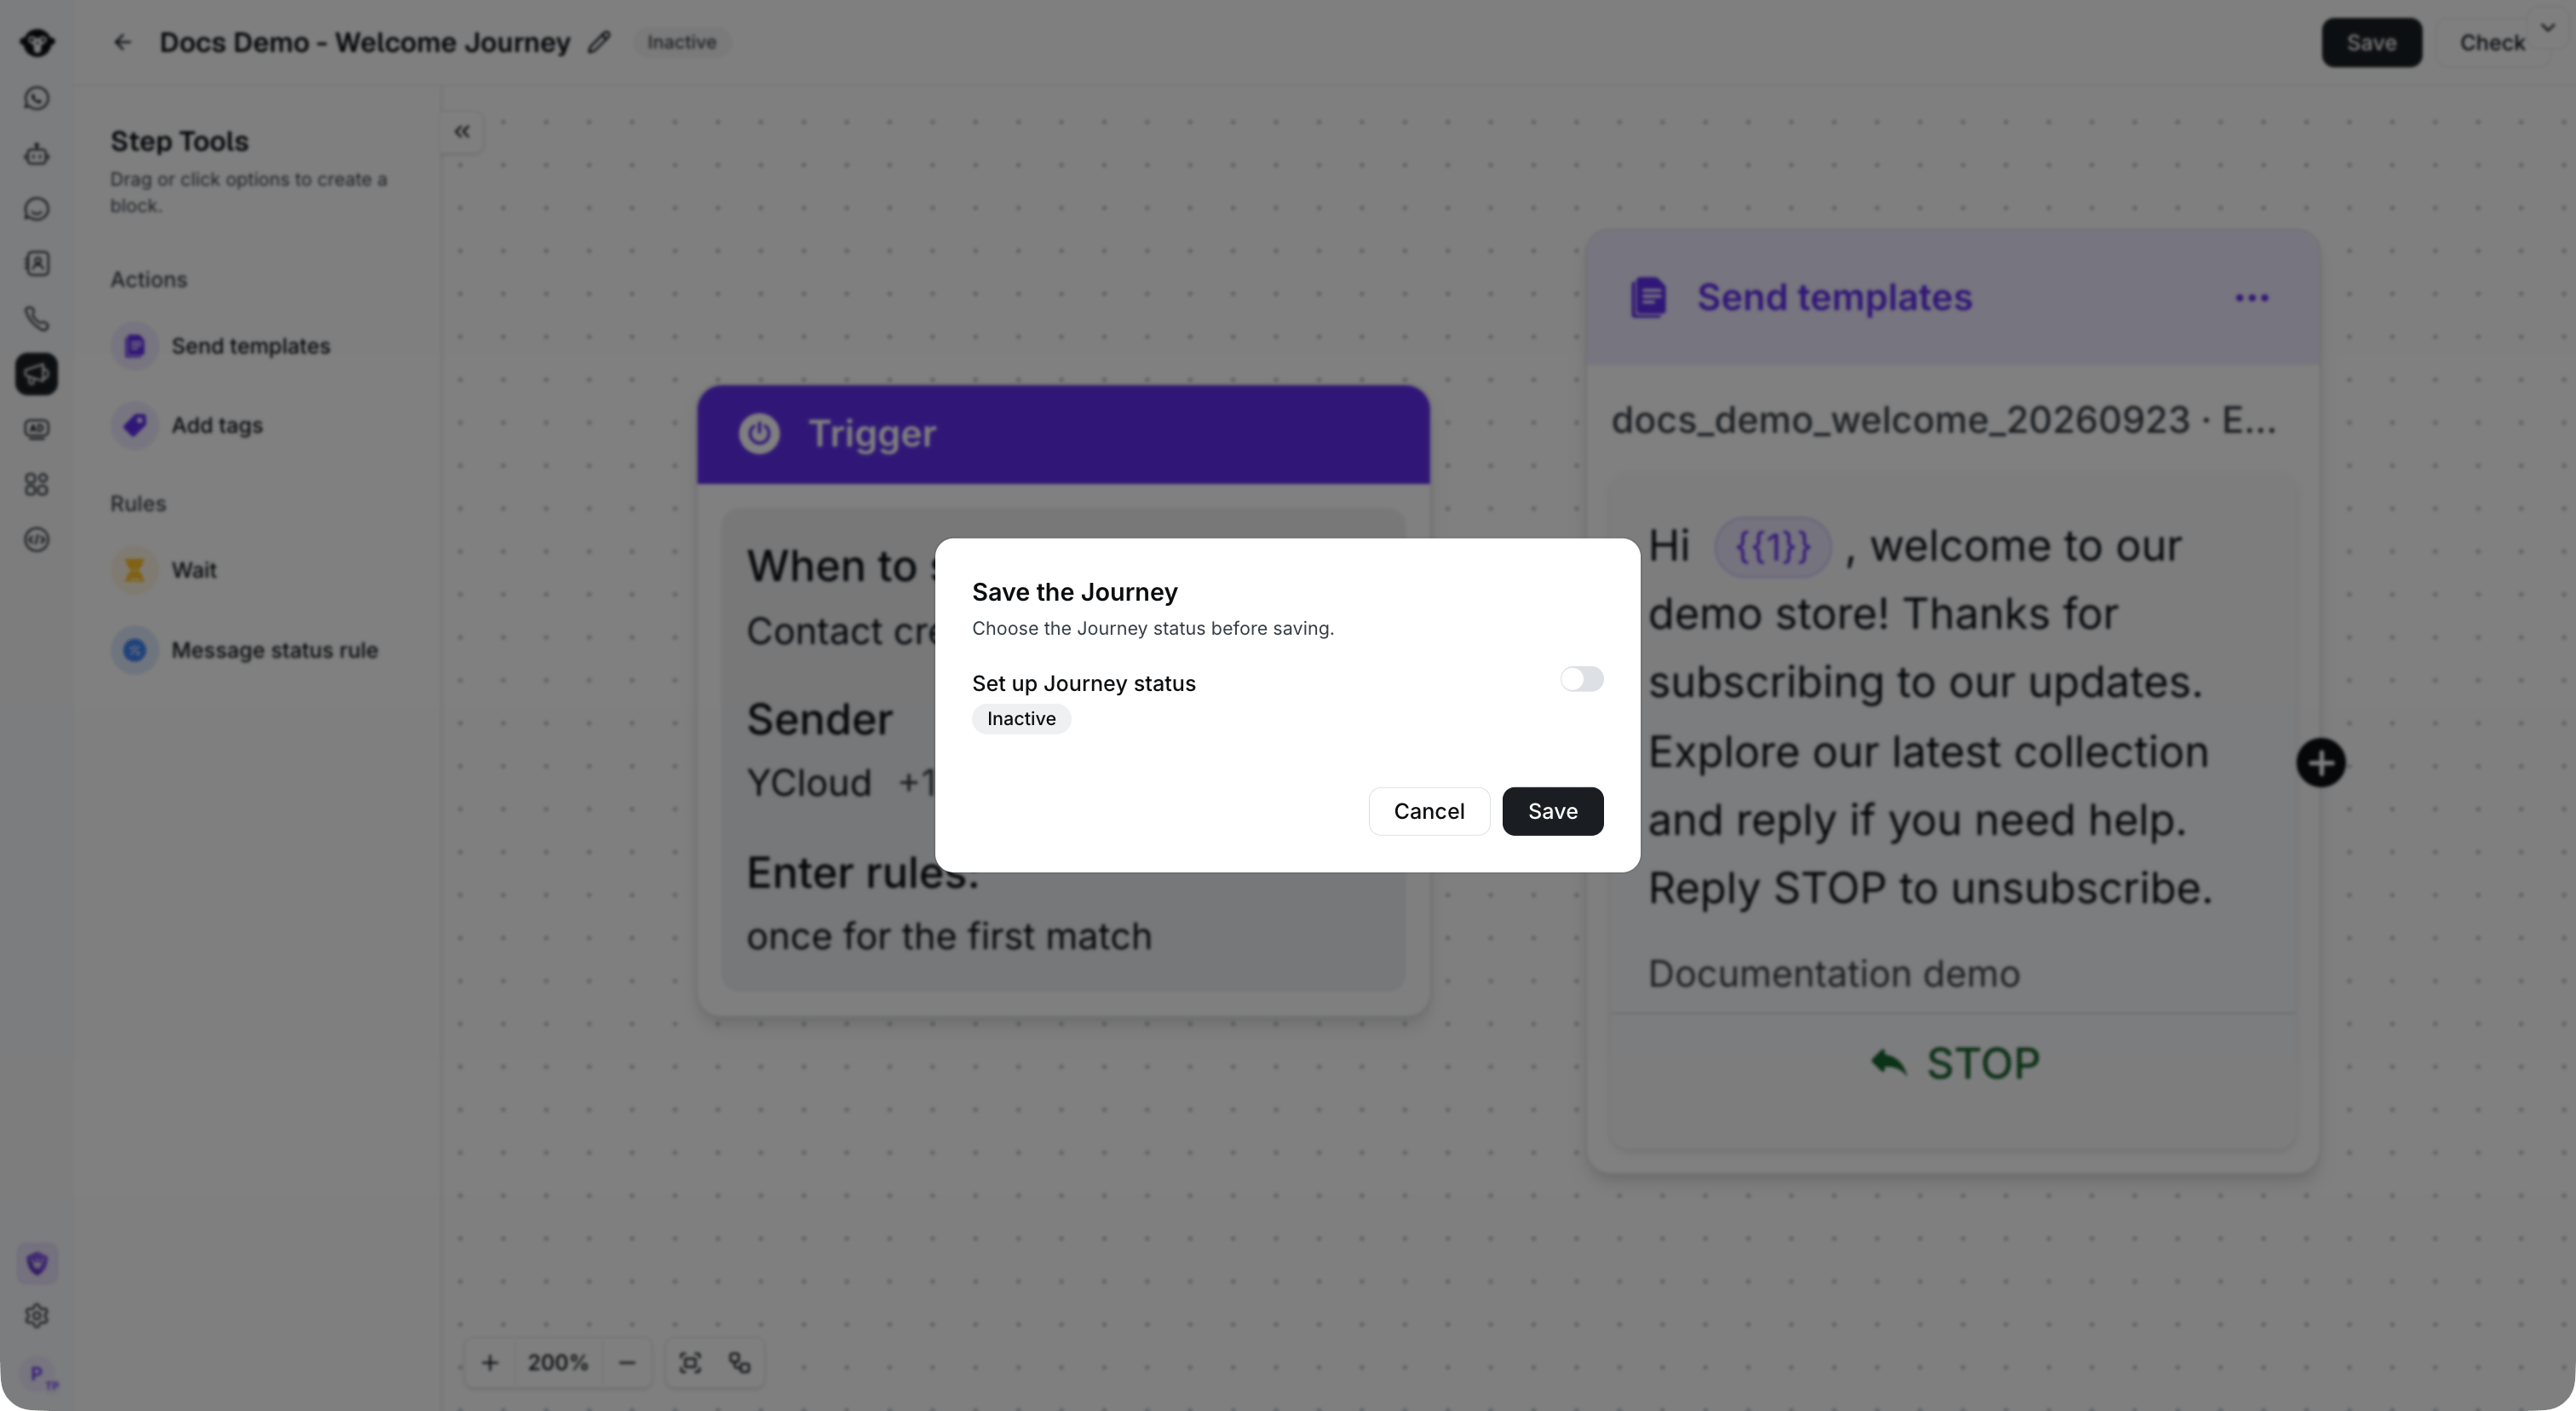
Choose the Journey status before saving. This example remains Inactive.
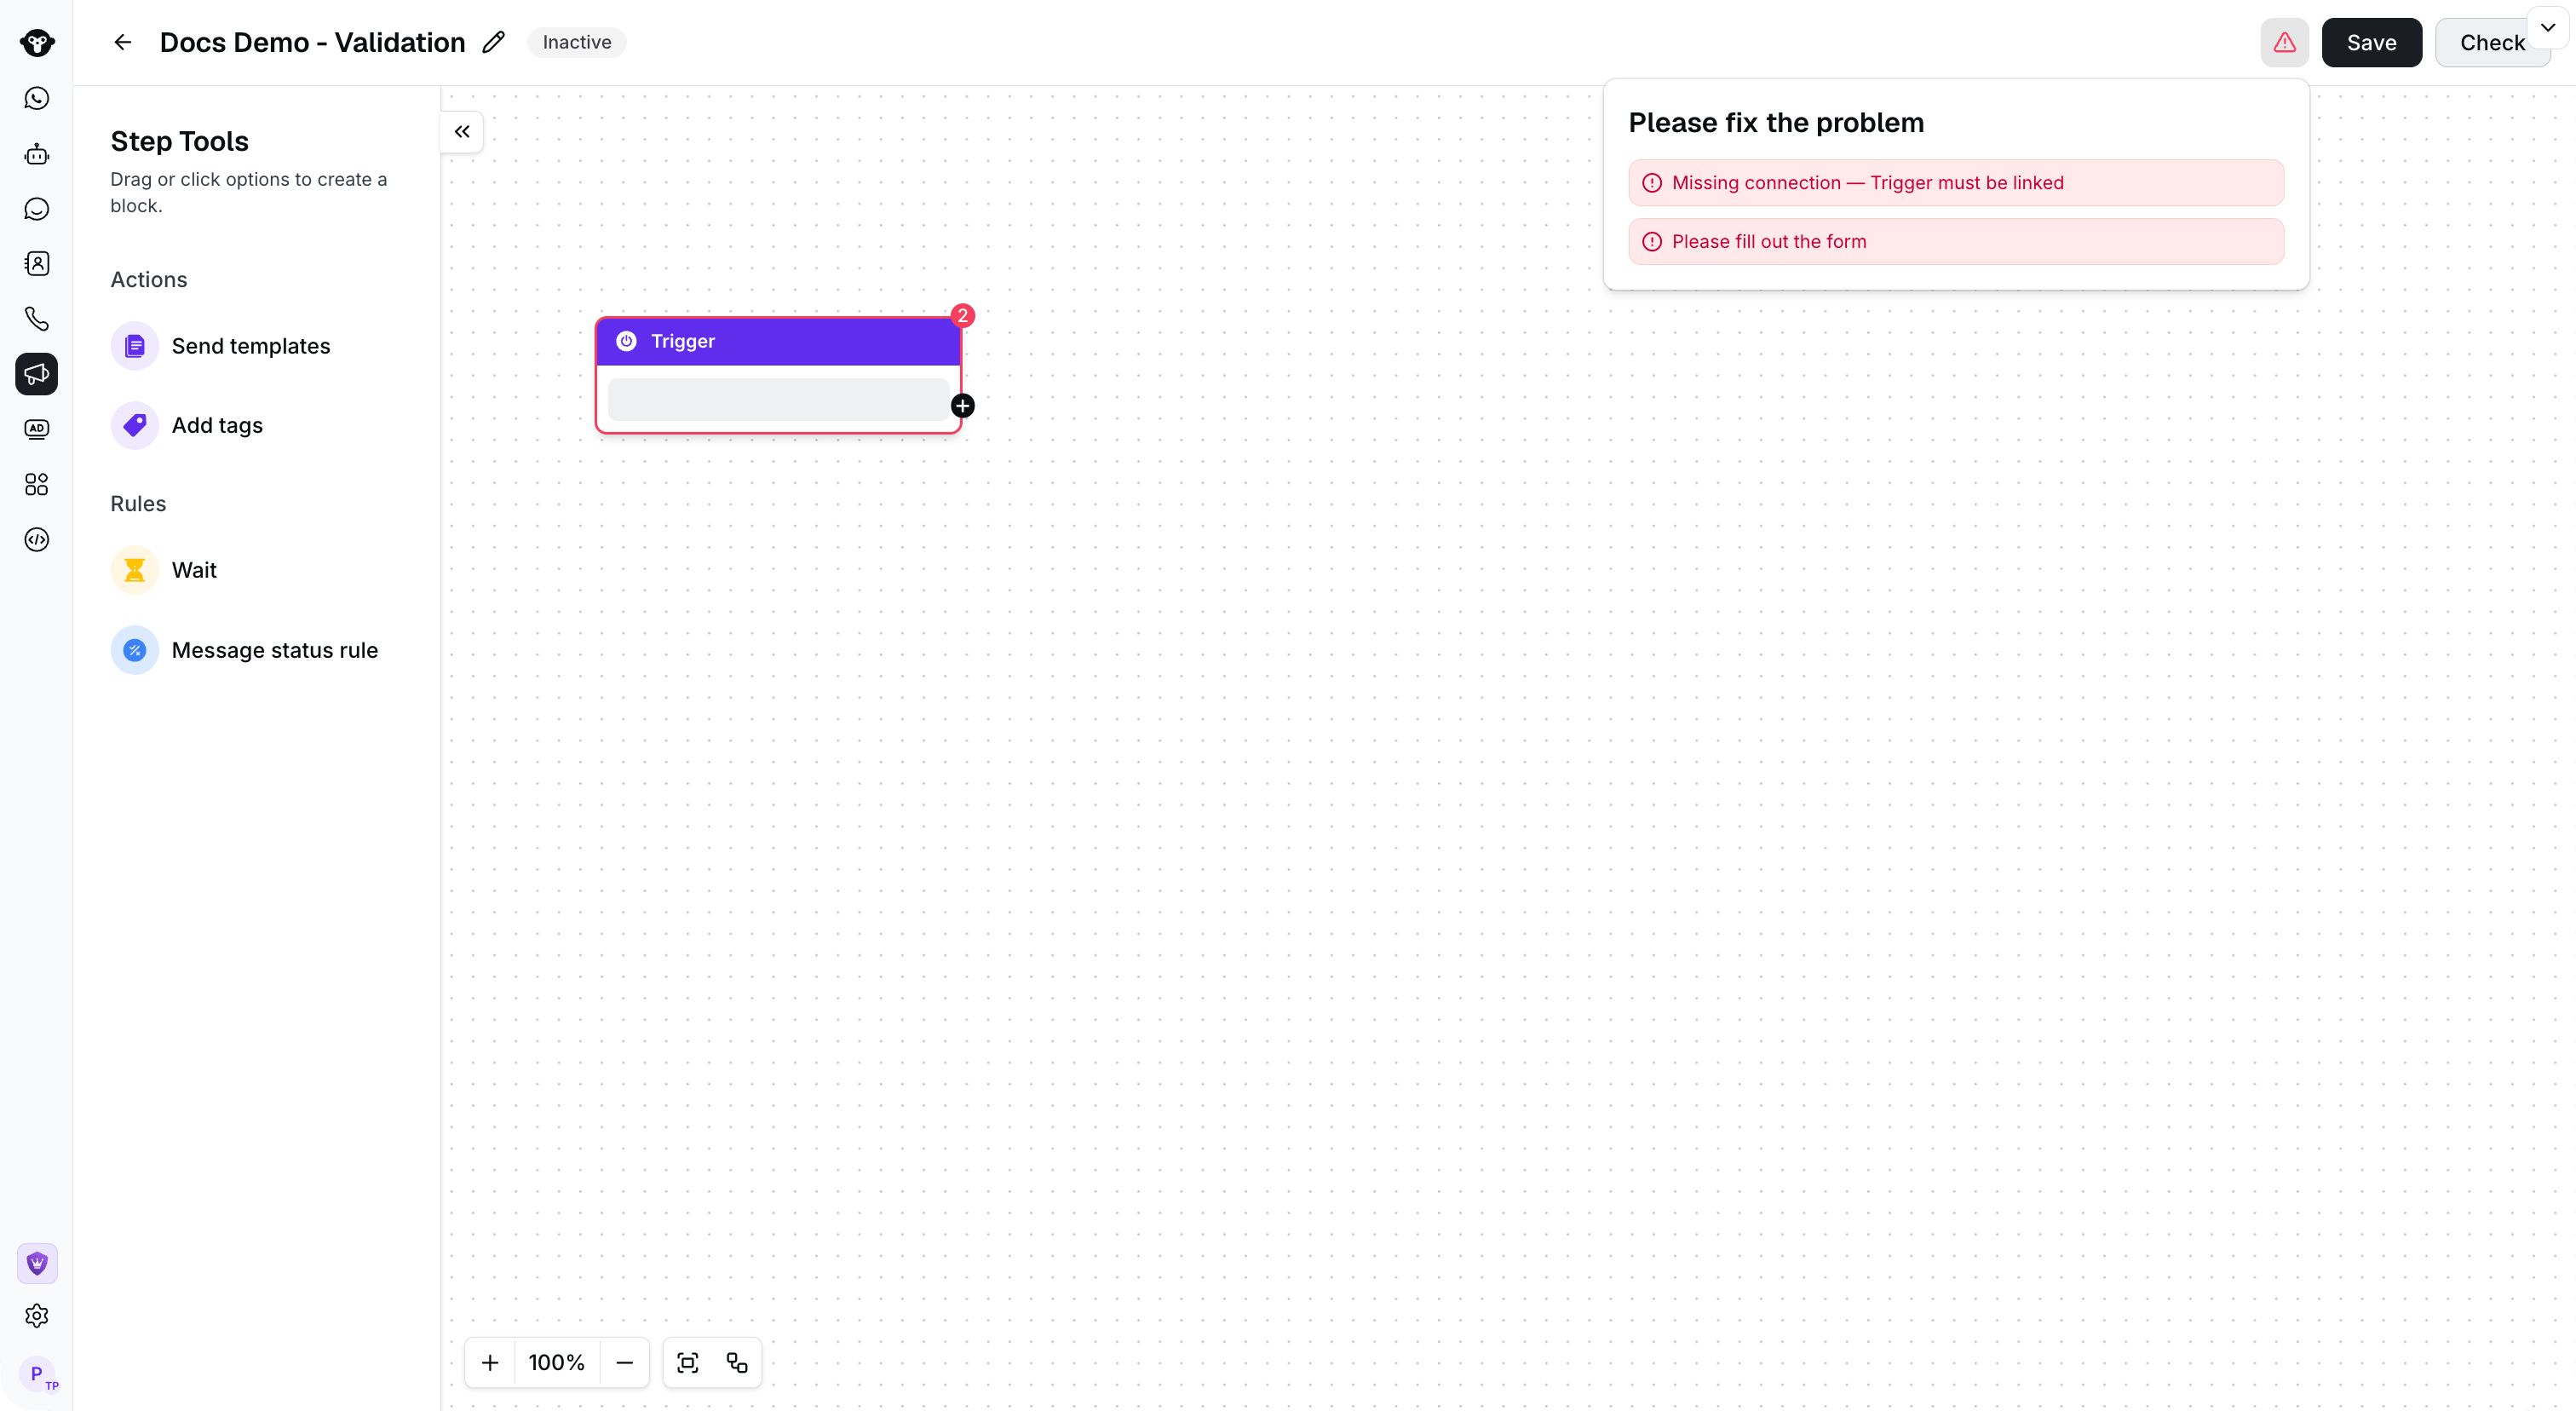
Select Check to find incomplete fields and missing connections before activating the Journey.