

1. Set up the Campaign
- In YCloud, go to Outbound > Bulk Campaigns > Add Campaign > WhatsApp.
- Enter a Campaign name.
- Select an available WhatsApp sender.
- Select an approved template and a language available for the selected Sender and Campaign.
- Choose to send the Campaign immediately or schedule it for later.
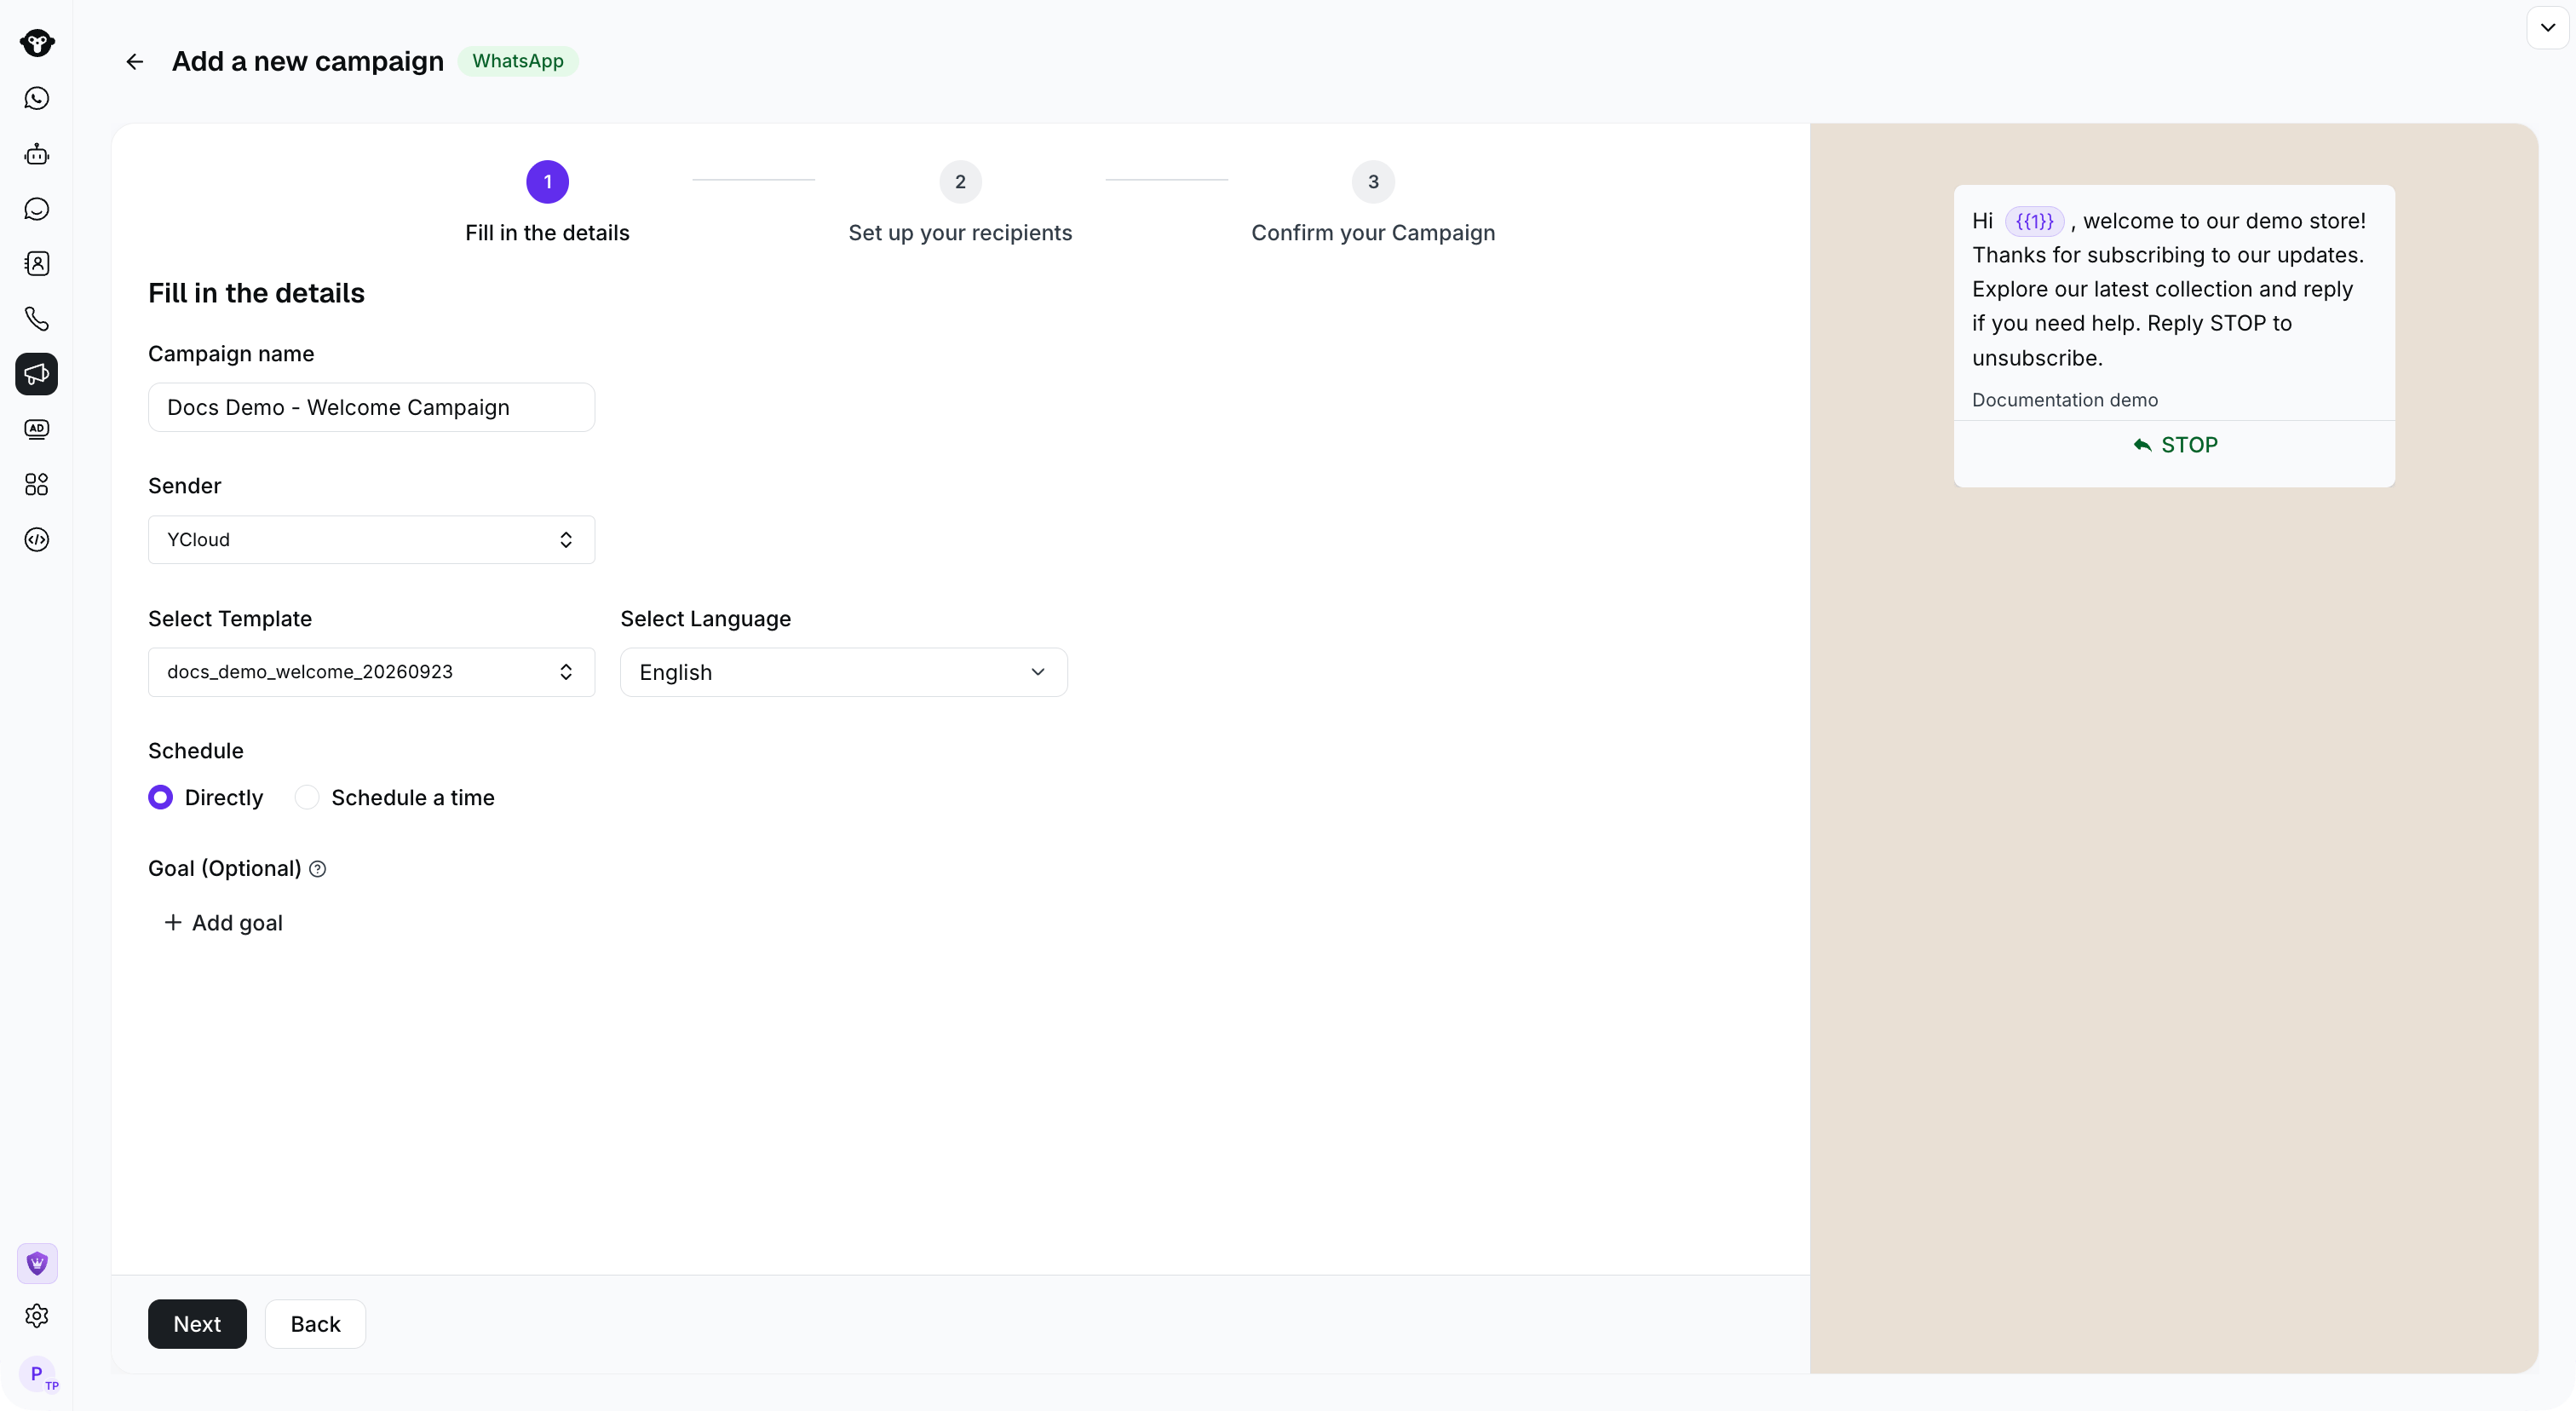
Select the sender, approved template, language, and schedule before choosing recipients.
2. Choose recipients
Choose one of the following methods.Enter phone numbers manually
Enter one phone number per line in international format, including the country code. For example, use+14155550106 as a fictional US number.
Use this method when every recipient should receive the same values for template variables. You can set those values as fixed text under Edit Variable on the same page.
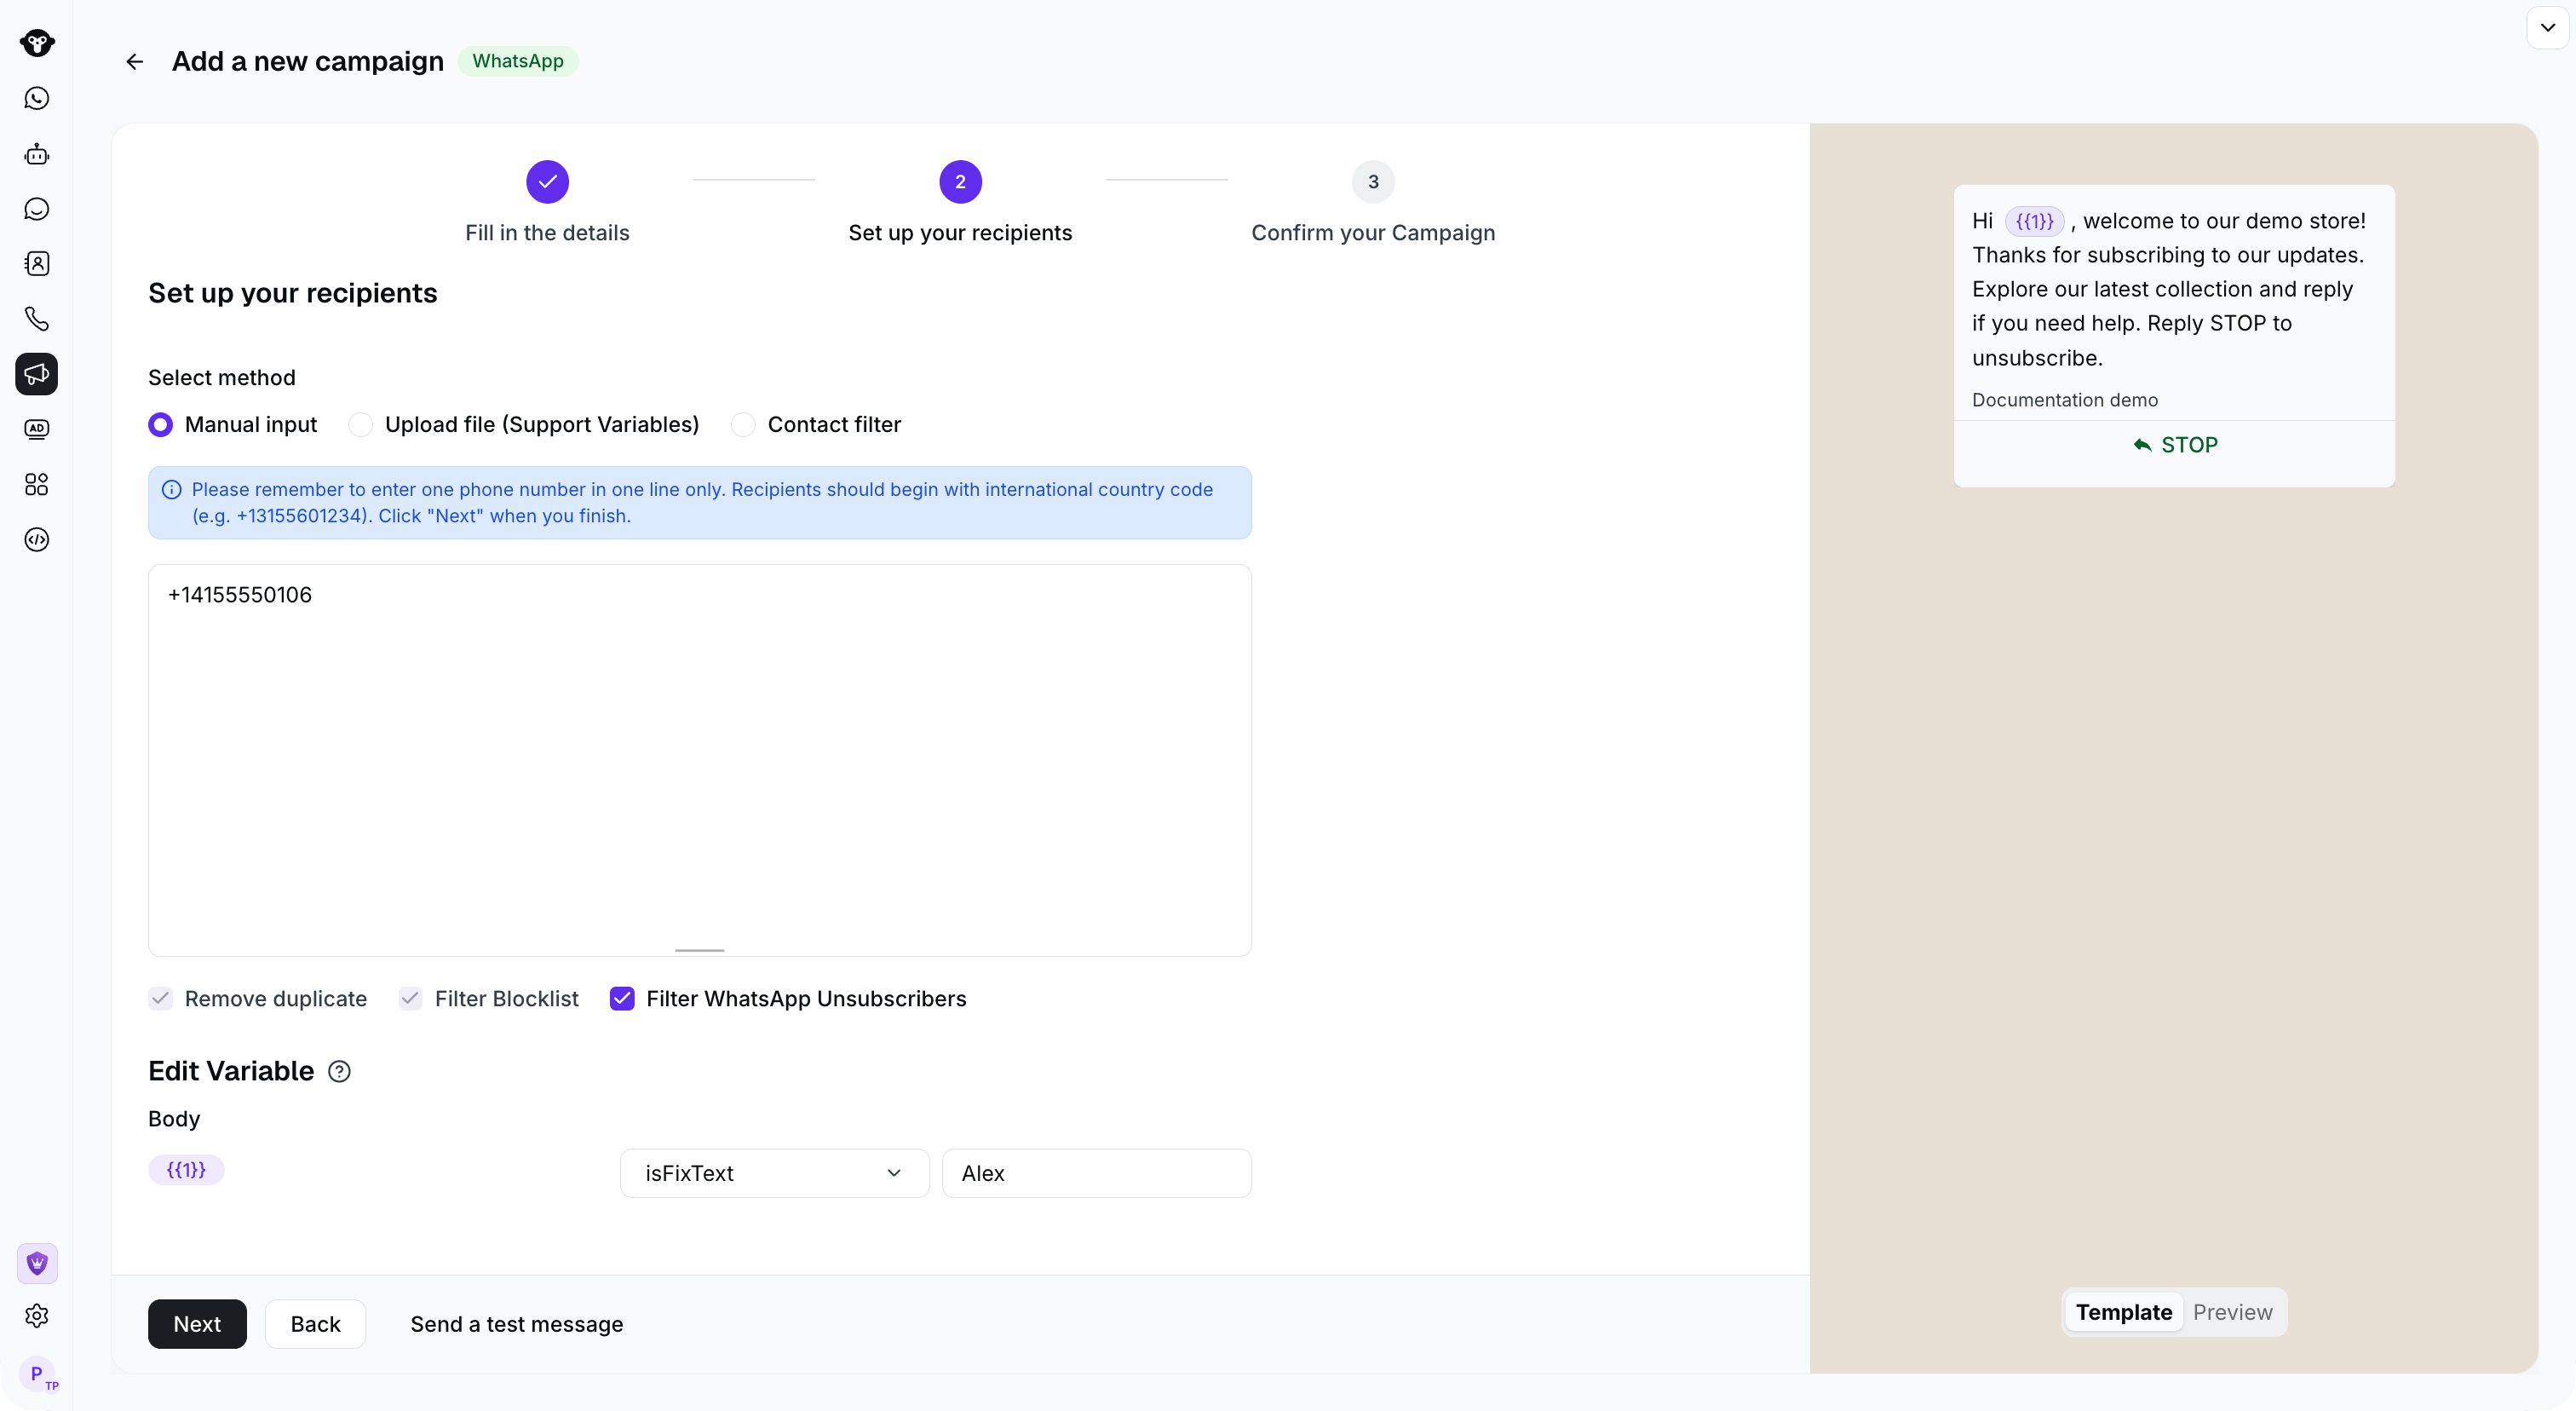
Enter one international phone number per line. This example uses a fictional number.
Upload an XLSX file
Use an.xlsx file when you need to send different variable values to different recipients.
- Name the first column
phoneand put each recipient’s phone number in that column. - Add one column for each template variable after the
phonecolumn. - Under Edit Variable on the same page, map each template variable to a file column or set a fixed value.
{{1}}, you can add a name column to your file and map that column to Body {{1}} under Edit Variable.
These are fictional example numbers. Save the columns as an
.xlsx file before uploading it. After the upload, check the valid, invalid, and duplicate counts shown on the recipient step.
Use a Contact filter
Use a Contact filter to select existing contacts by either Contact segment or Contact attributes.- Contact segment: Select one or more saved segments. You can select up to 10 segments.
- Contact attributes: Select Add Filter, then define the contact attributes that recipients must match.
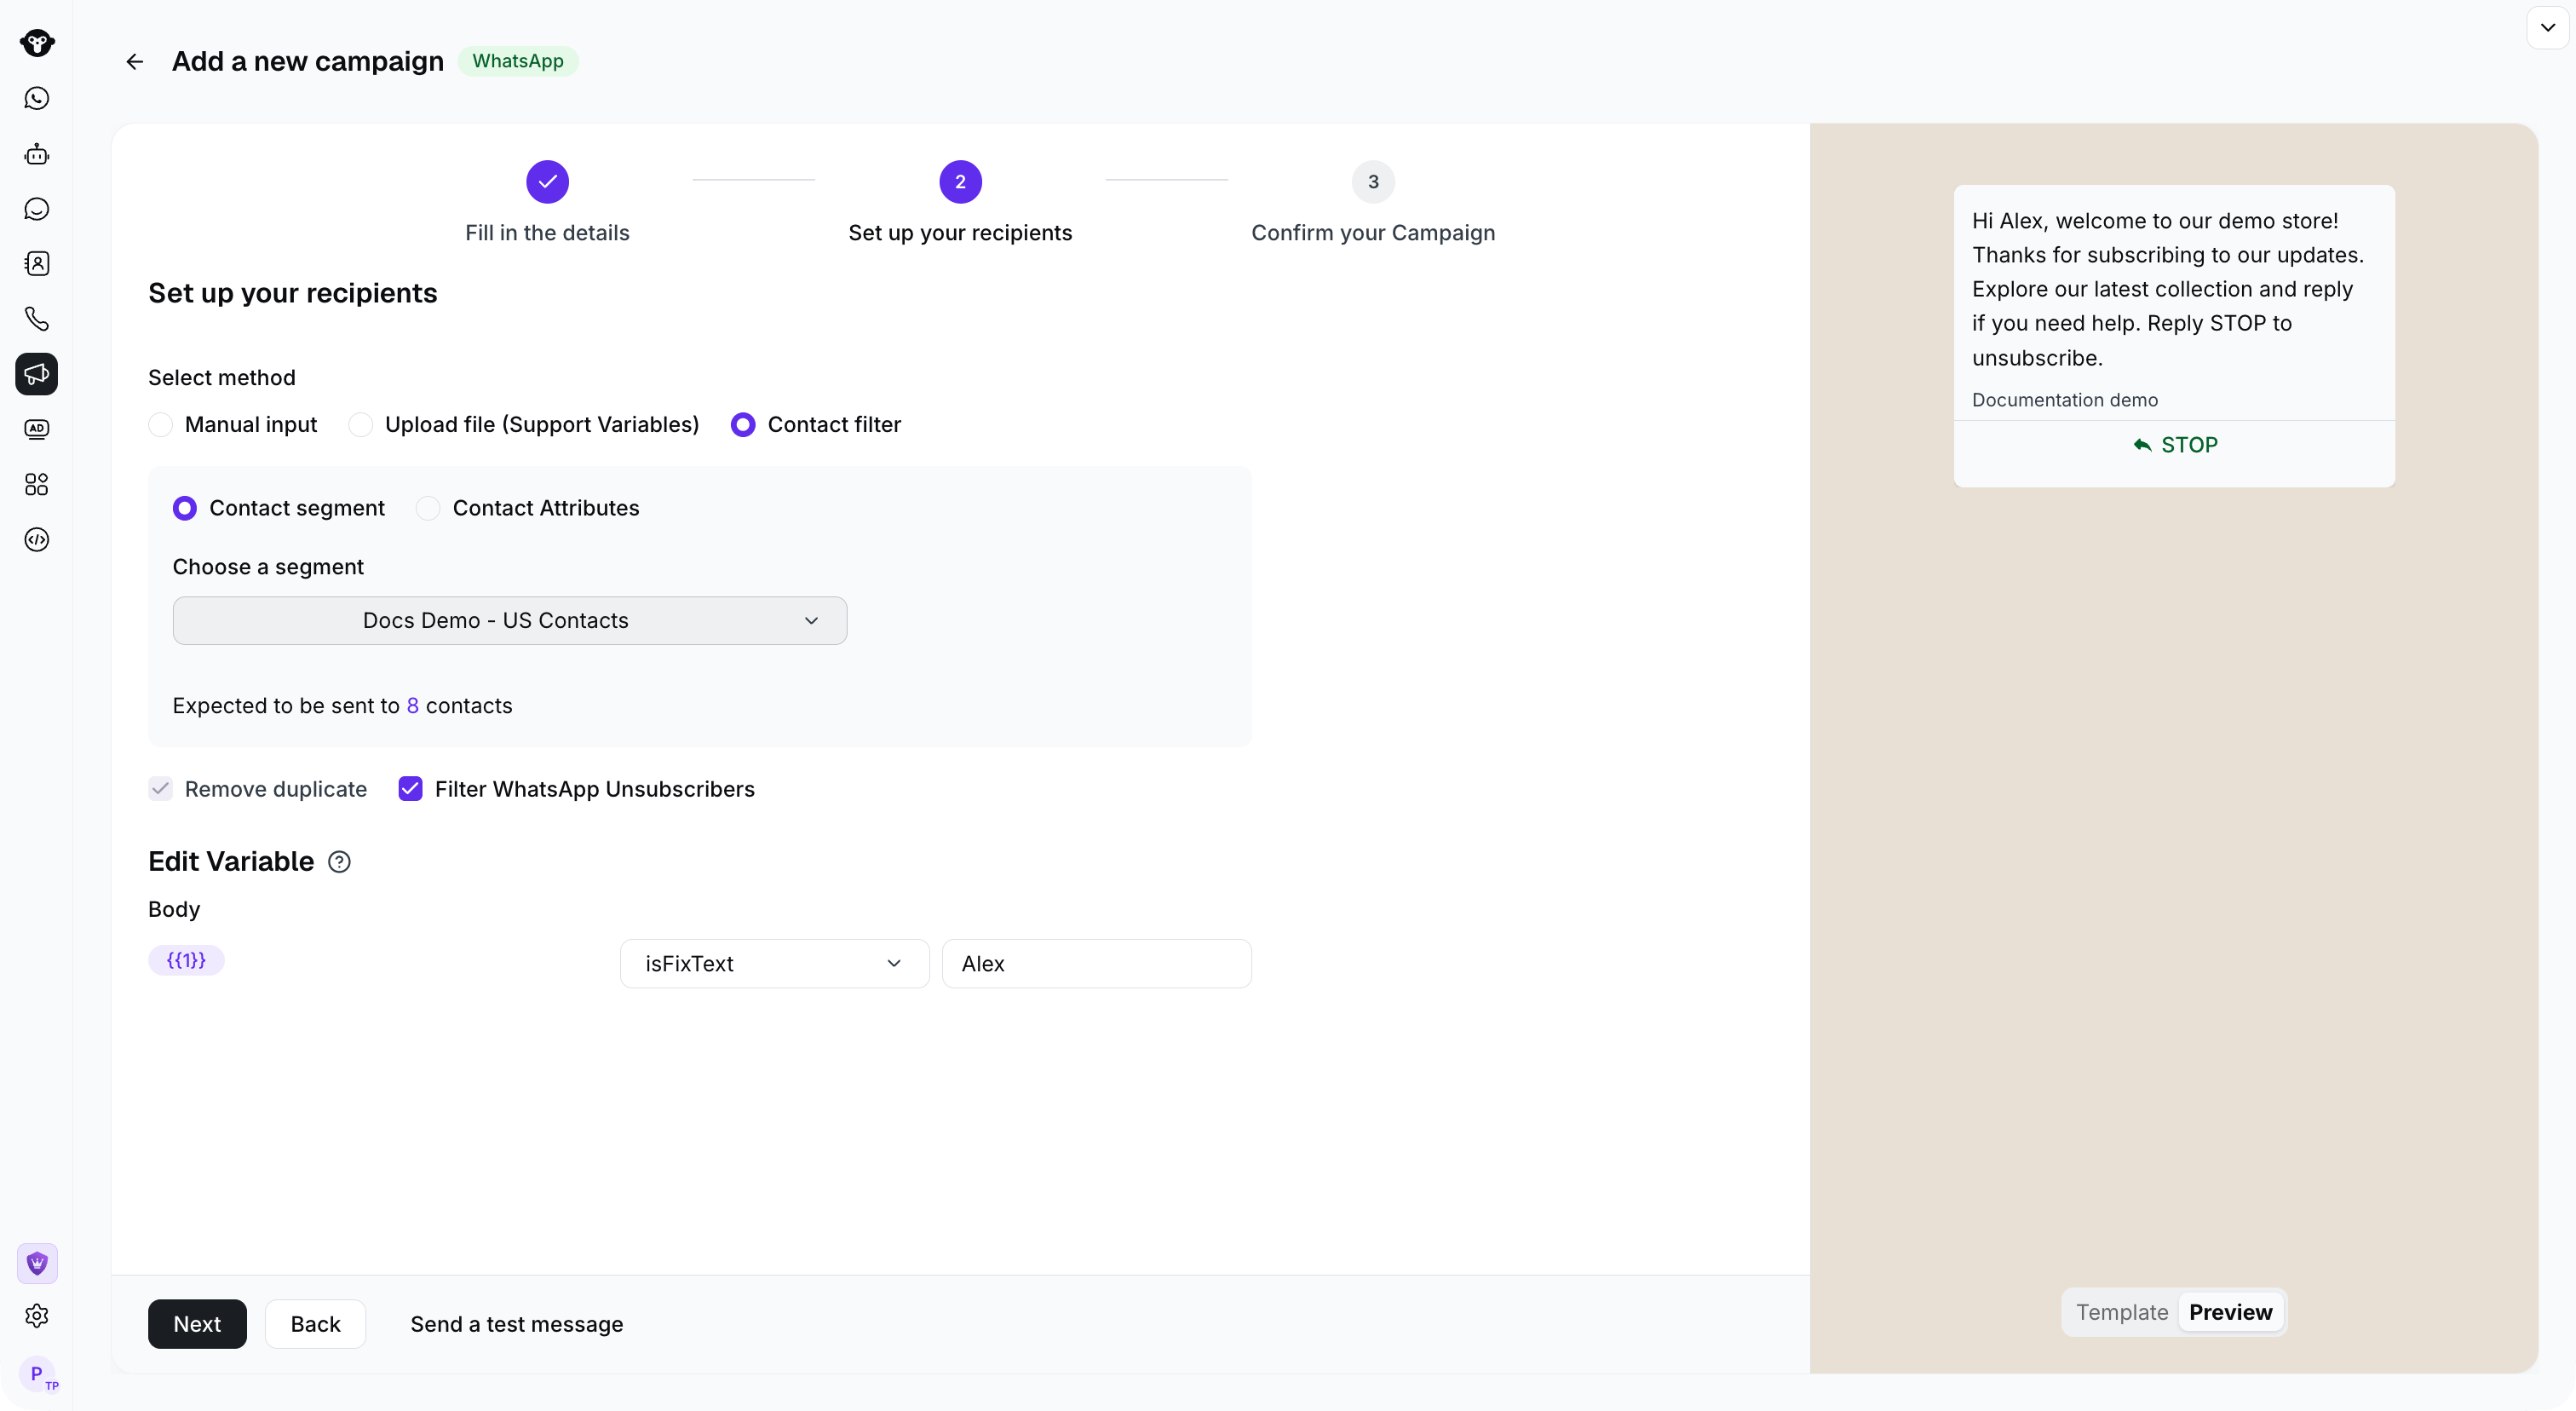
Choose a saved segment and check the estimated audience size.
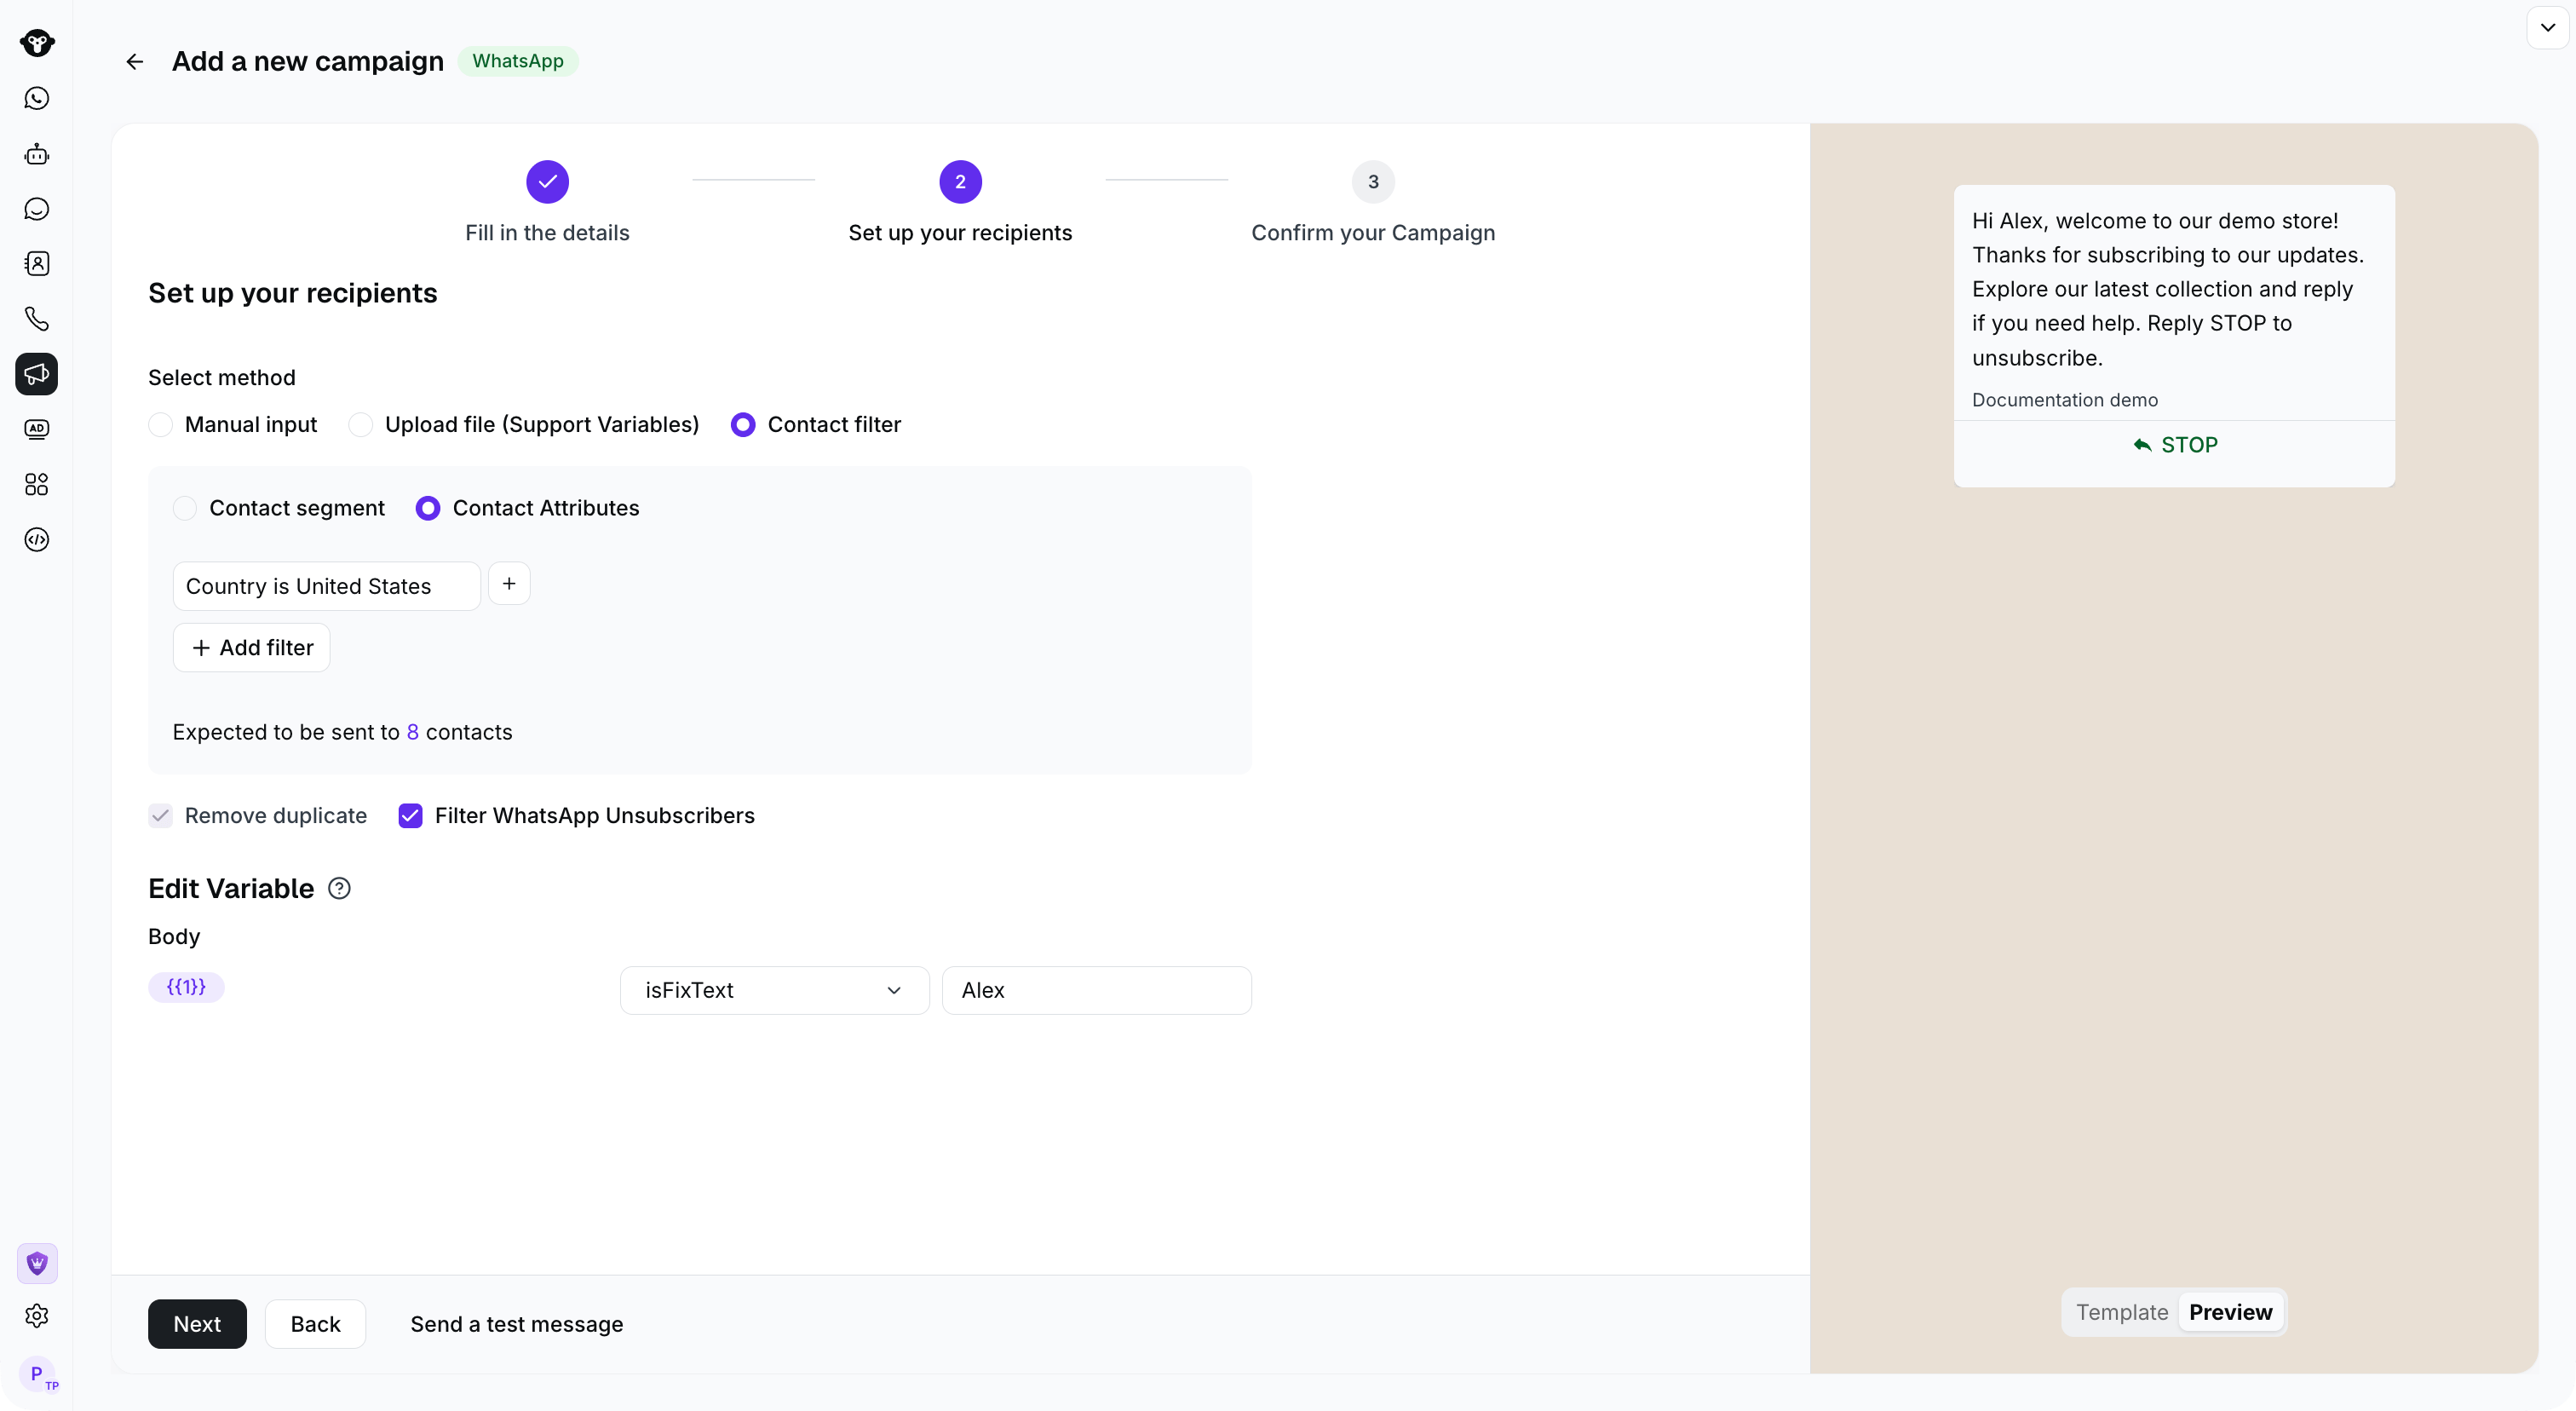
Use Contact Attributes to define the audience, such as Country is United States.
3. Configure template content
On Set up your recipients, configure the content when the selected template contains variables or a media header.Set variable values
For each variable, choose one of the available sources:- Map it to an uploaded file column.
- Map it to a system or custom Contact attribute when you use a Contact filter.
- Set a fixed text value for every recipient.
name column for Body {{1}} under Edit Variable. The recipient step shows the file validation counts and the selected column together. Select Preview to inspect the resulting message before proceeding.
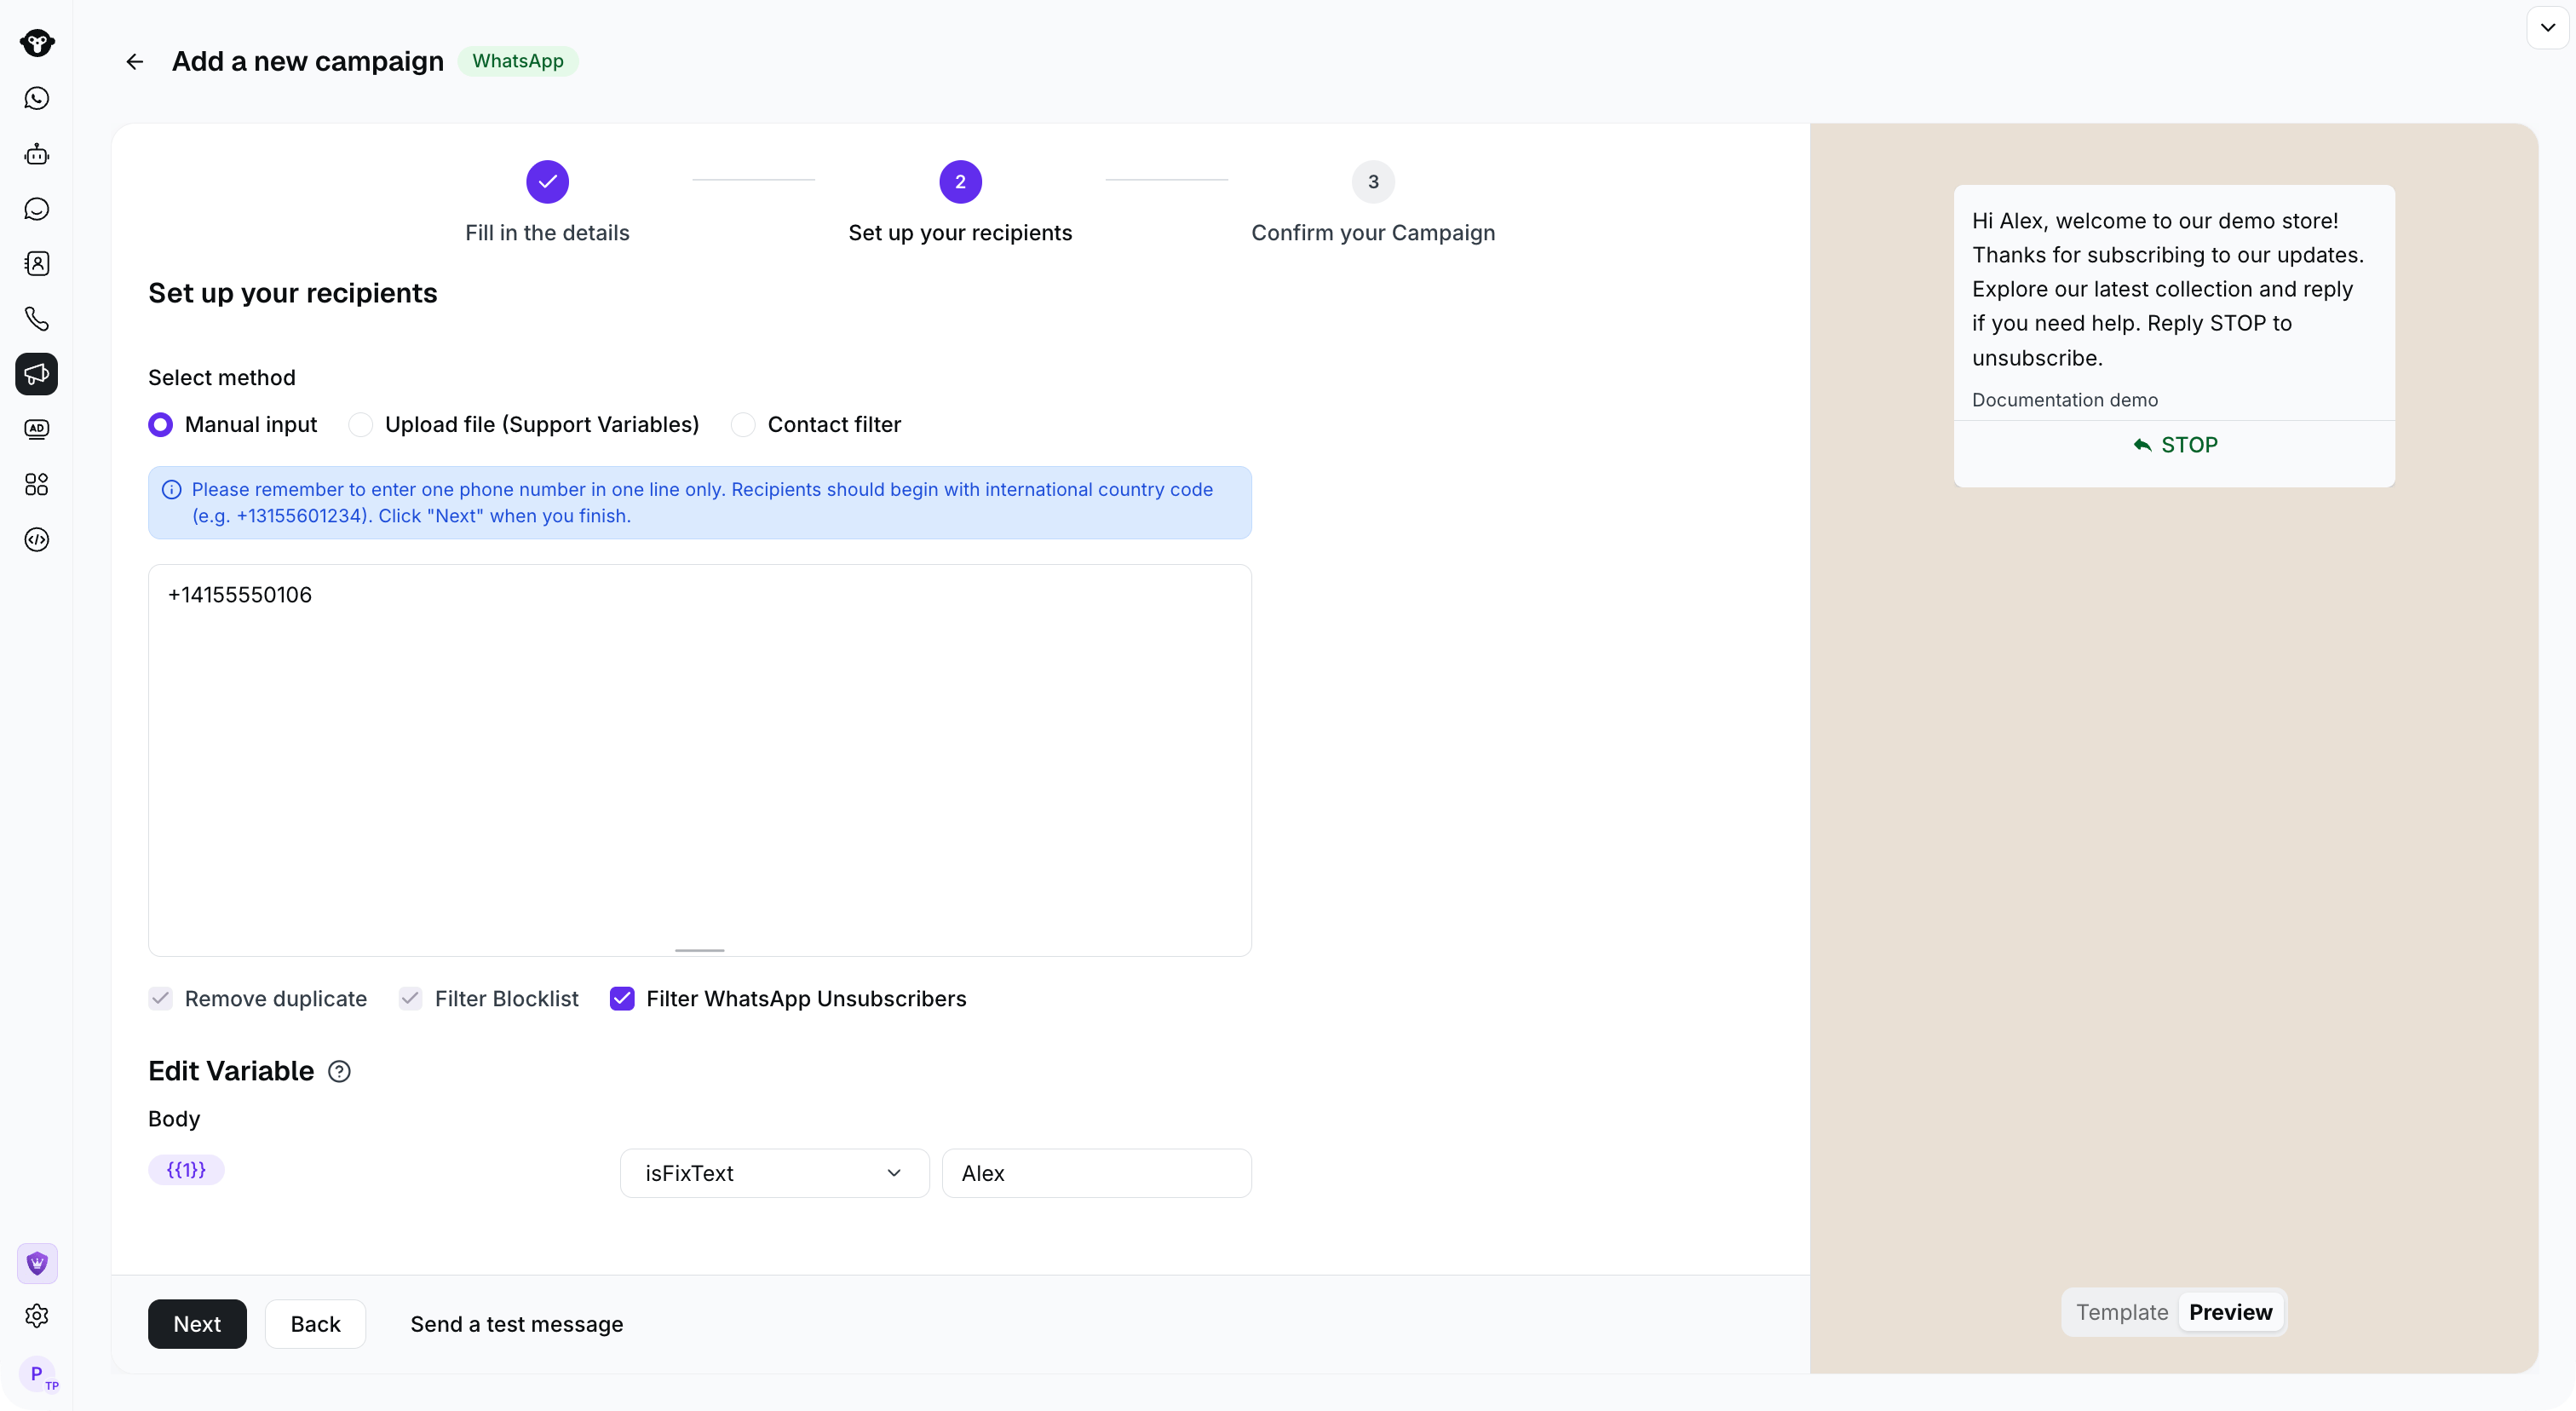
Select Preview on the recipient step to check the message with its variable values.
Set header media
For a template with an image, video, document, or GIF header, review the prefilled media and upload the file that you want to send with this Campaign. If the existing media link has expired, upload the file again. Select Next to review the Campaign.4. Review and submit
Review the Campaign details. Confirm that the sender, recipients, variable values, media, and schedule are correct, then select Submit.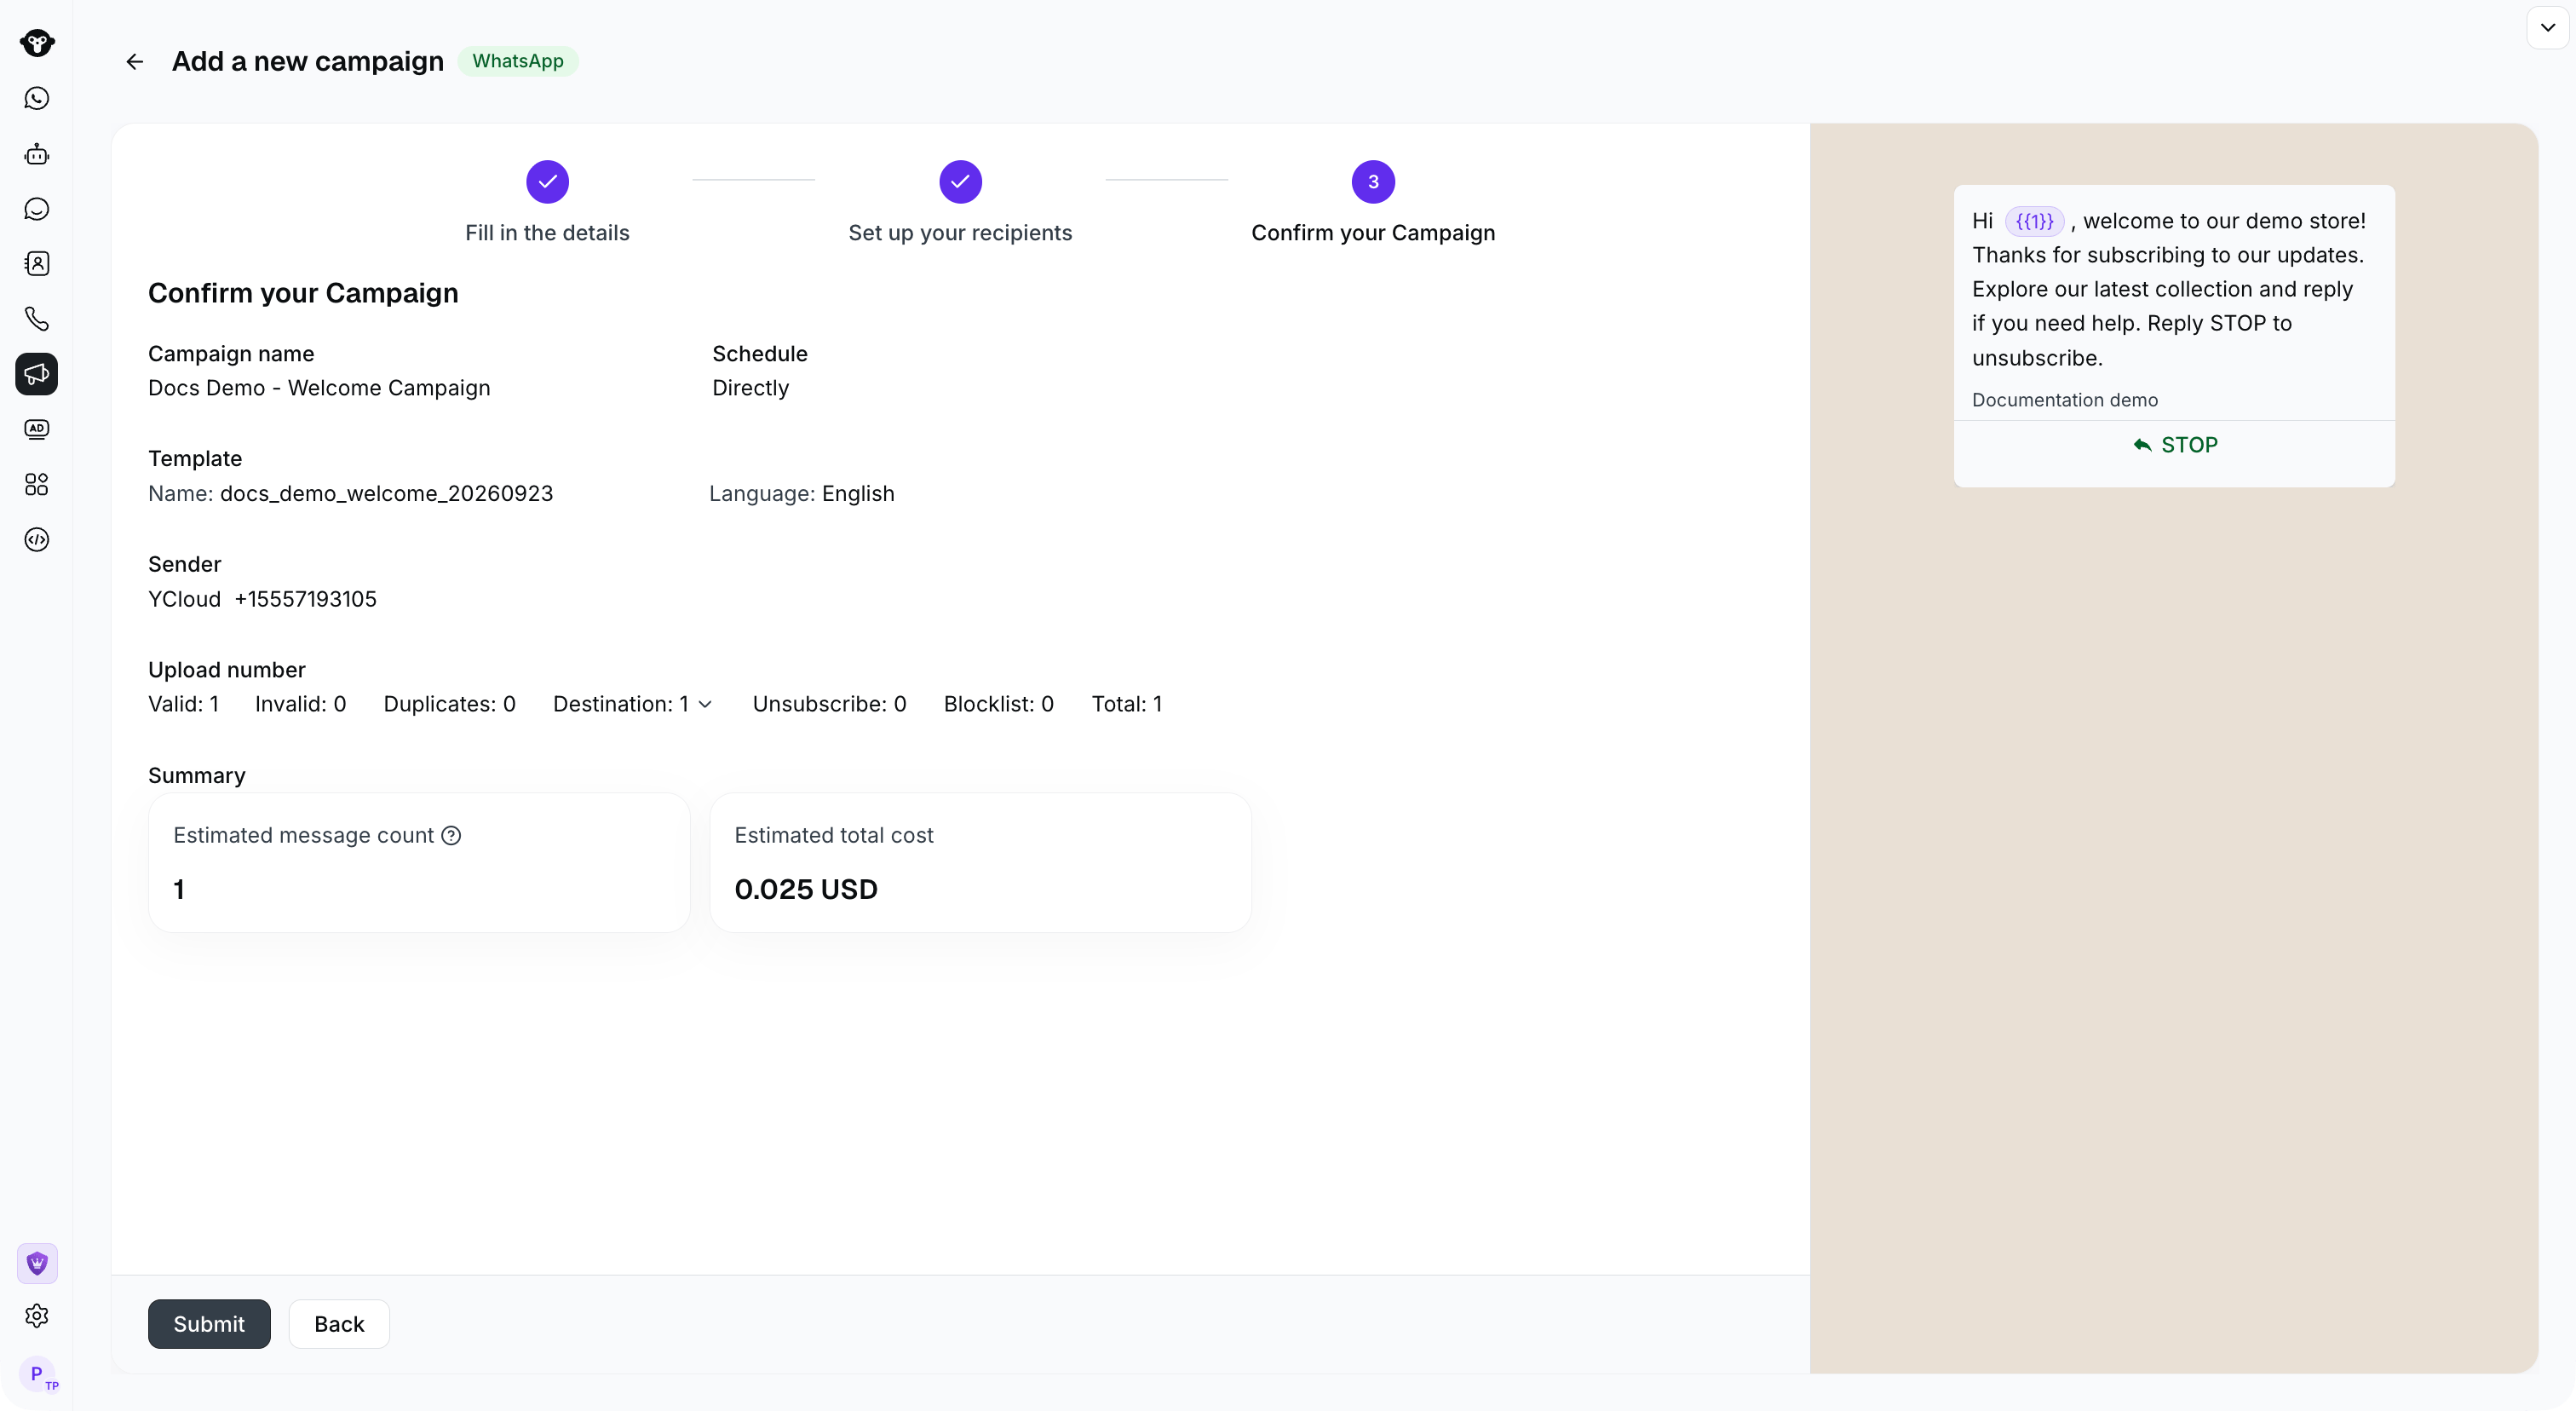
Review the sender, audience counts, schedule, and estimated cost before selecting Submit. This example has not been submitted.