

What is a message template?
A WhatsApp message template is a message format that a business creates and submits to Meta for review. After approval, it can be used for repeatable business-initiated communication, including messages sent outside the customer service window. Templates can contain fixed text, variables, media, and supported buttons. Their category, content, approval status, and messaging rules are managed by Meta. For a detailed introduction to template concepts, categories, formats, review, and lifecycle, see Message templates.Template ownership and identity
A template is a resource of a specific WhatsApp Business Account (WABA). It can only be used by business phone numbers that belong to that WABA. A template is uniquely identified by the combination of its name and language. Templates with the same name but different languages are separate localized versions. When sending a template message, use the exact approved template name and language for the relevant WABA.Tutorial for Creating Marketing and Utility Templates
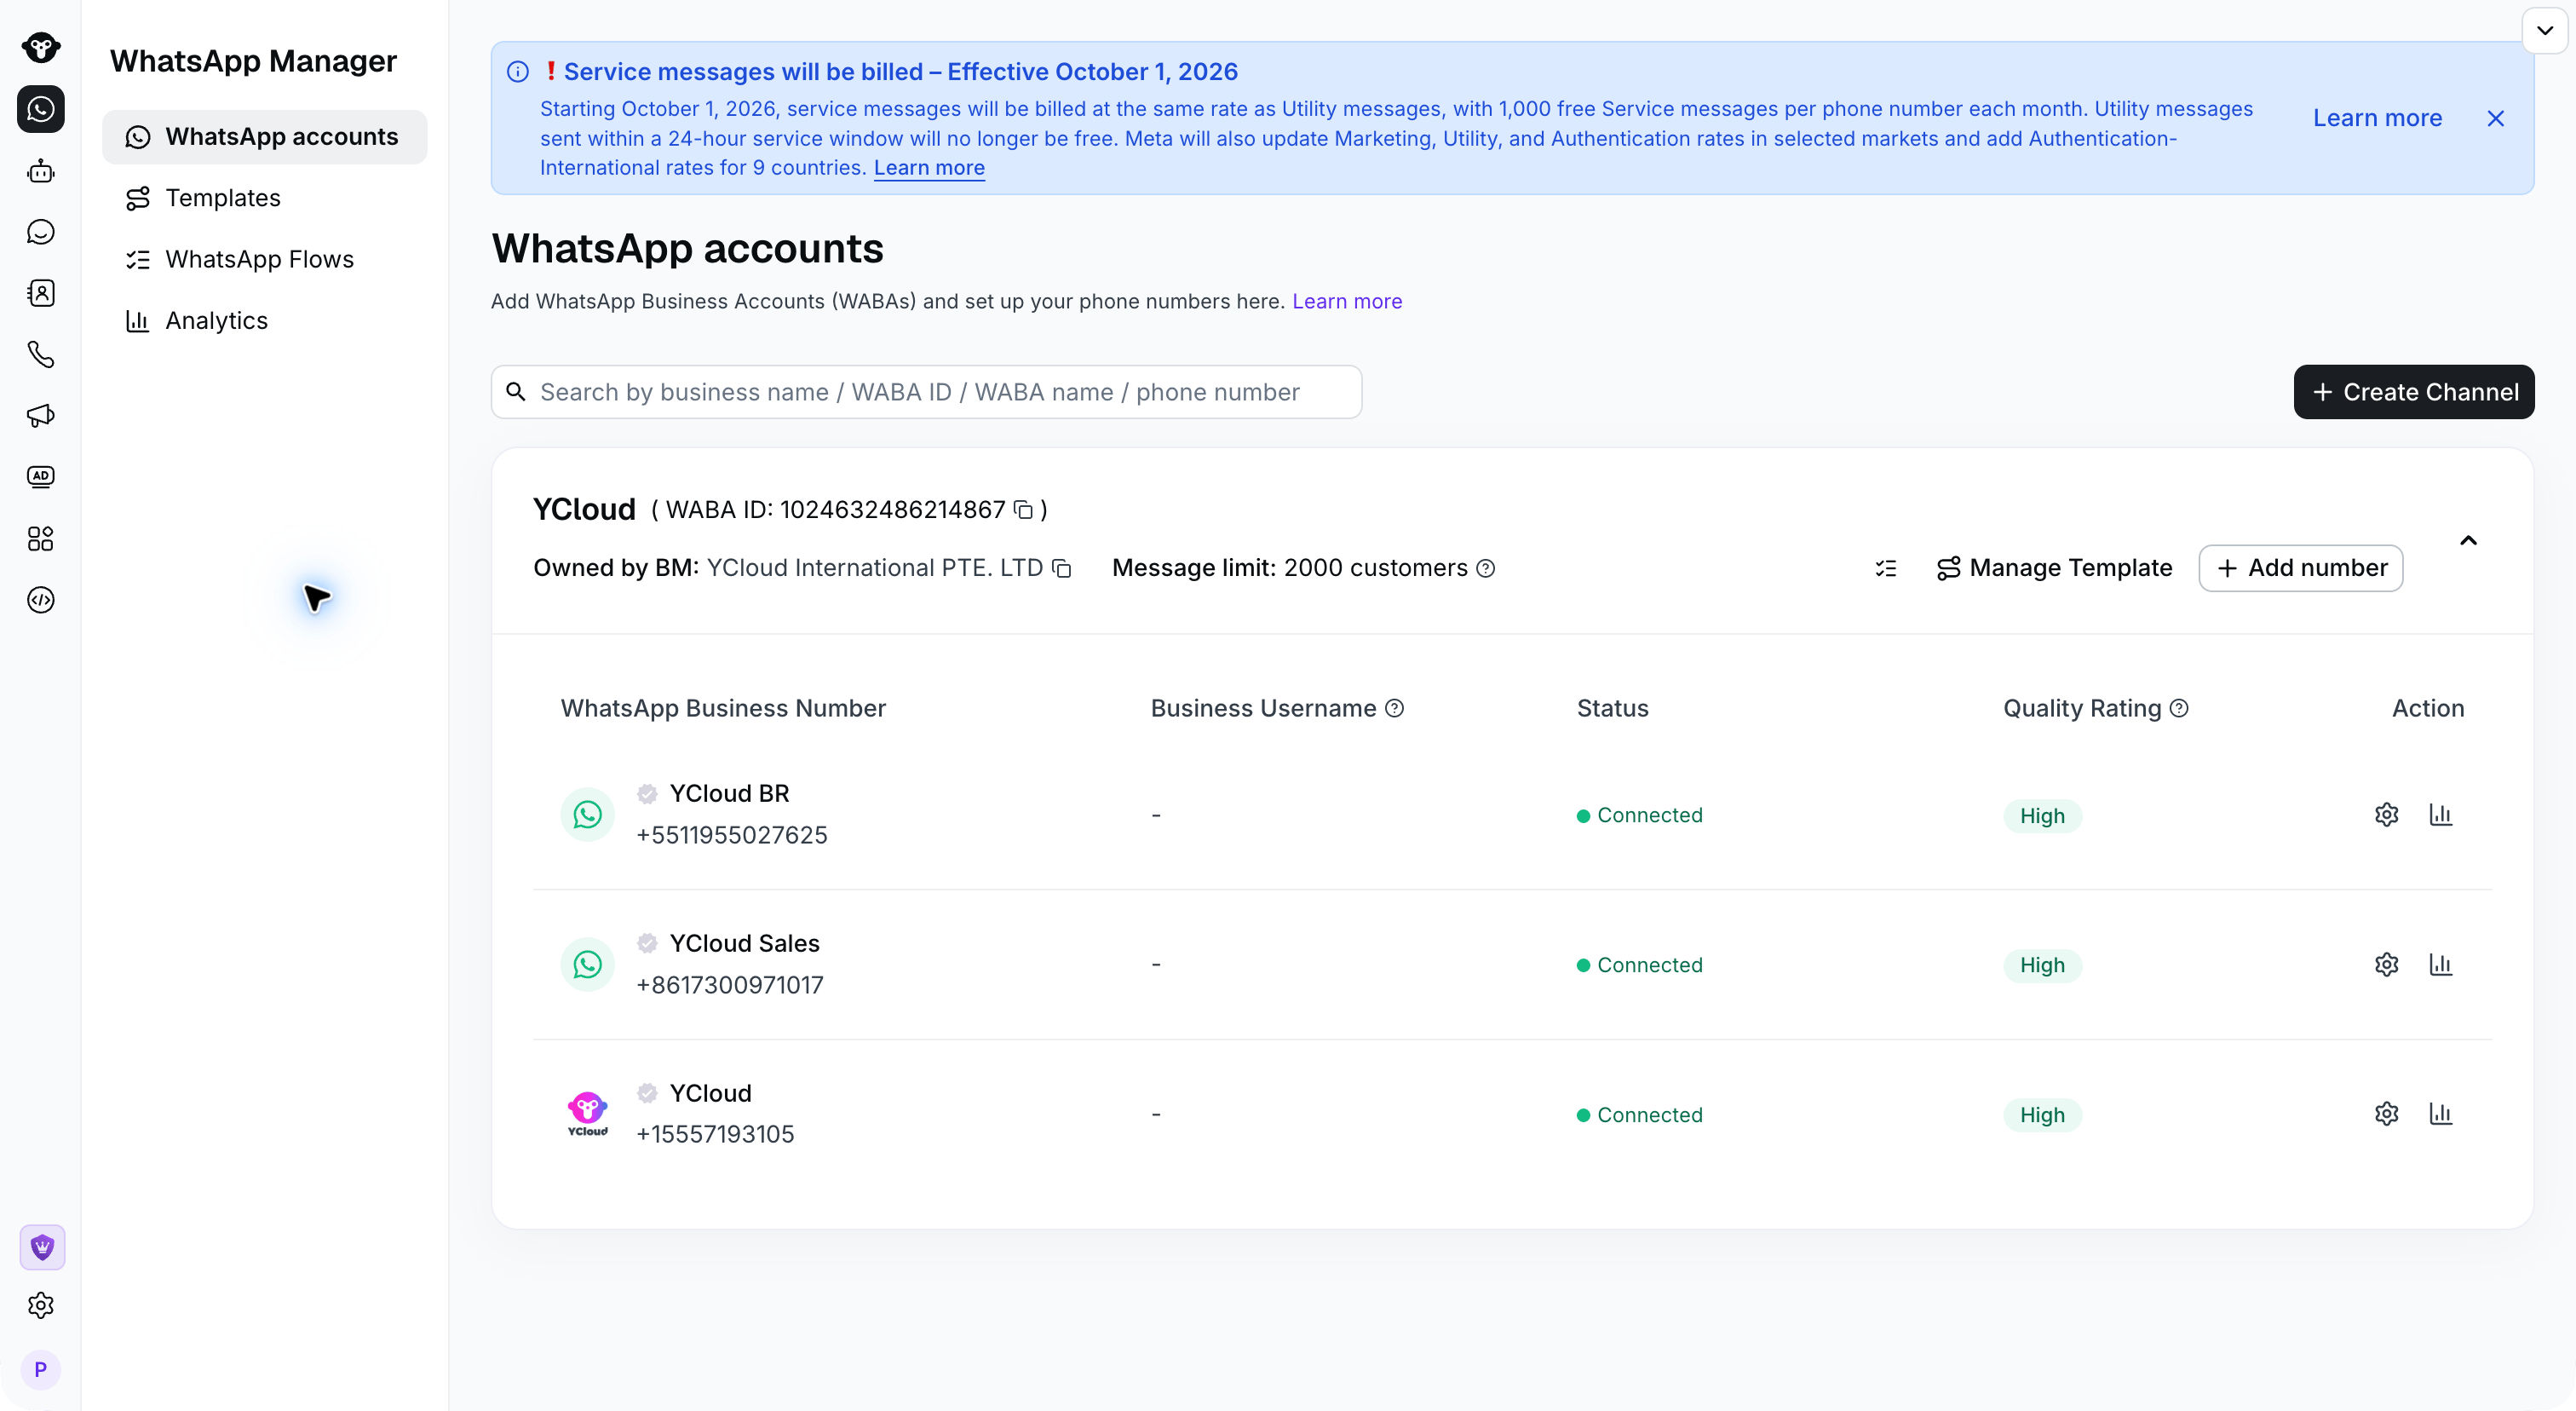
Step 1: Access the Templates Page
- Navigate to Templates from the left-hand navigation. Users with multiple WABA accounts should switch the WABA space in the top right corner.

Select New Template to choose the category for your message.
- Visit Templates from the WhatsApp accounts.
Step 2: Name & Select Template Type
Click New Template. Choose a category and select Start from scratch when creating a Marketing or Utility template.- Template name: The name of the template. Names only support numbers, lowercase letters, and underscores _.
- Category: The type of template. There are three types of templates; select based on the content:
- Utility: Transactional templates. Used for sending notification messages.
- Marketing: Marketing templates. All messages with marketing implications, as well as all greeting messages.
- Authentication: Verification code templates. Fixed content; only supports sending verification codes.

Set the template name and category before editing the selected language.
Step 3: Choose Language
One template content can be configured in multiple languages. Click Add language to continue adding. Multiple languages can be edited together and then submitted.
Select Add language, search for the required language, and choose its exact locale.

Select Edit beside the language tabs to reveal their removal controls; select Done when finished.
Step 4: Edit Template Content
Taking marketing and notification templates as examples:- Header (optional): Header types supported: text, image, video, file.
- Body (required): Text content. Supports emoji, bold, and other text styles.
- Footer (optional): Text footer.
- Button (optional)
- Up to 10 buttons can be added
- Button types include:
- Quick reply
- Visit website
- Call phone number
- Copy offer code
- Variables: Variables can be added in Header, Body, or Visit website. When adding variables, a Sample must be provided for reviewers to judge the content of the entire template. The Sample is only used for review, and the actual variable value must be sent when issuing.
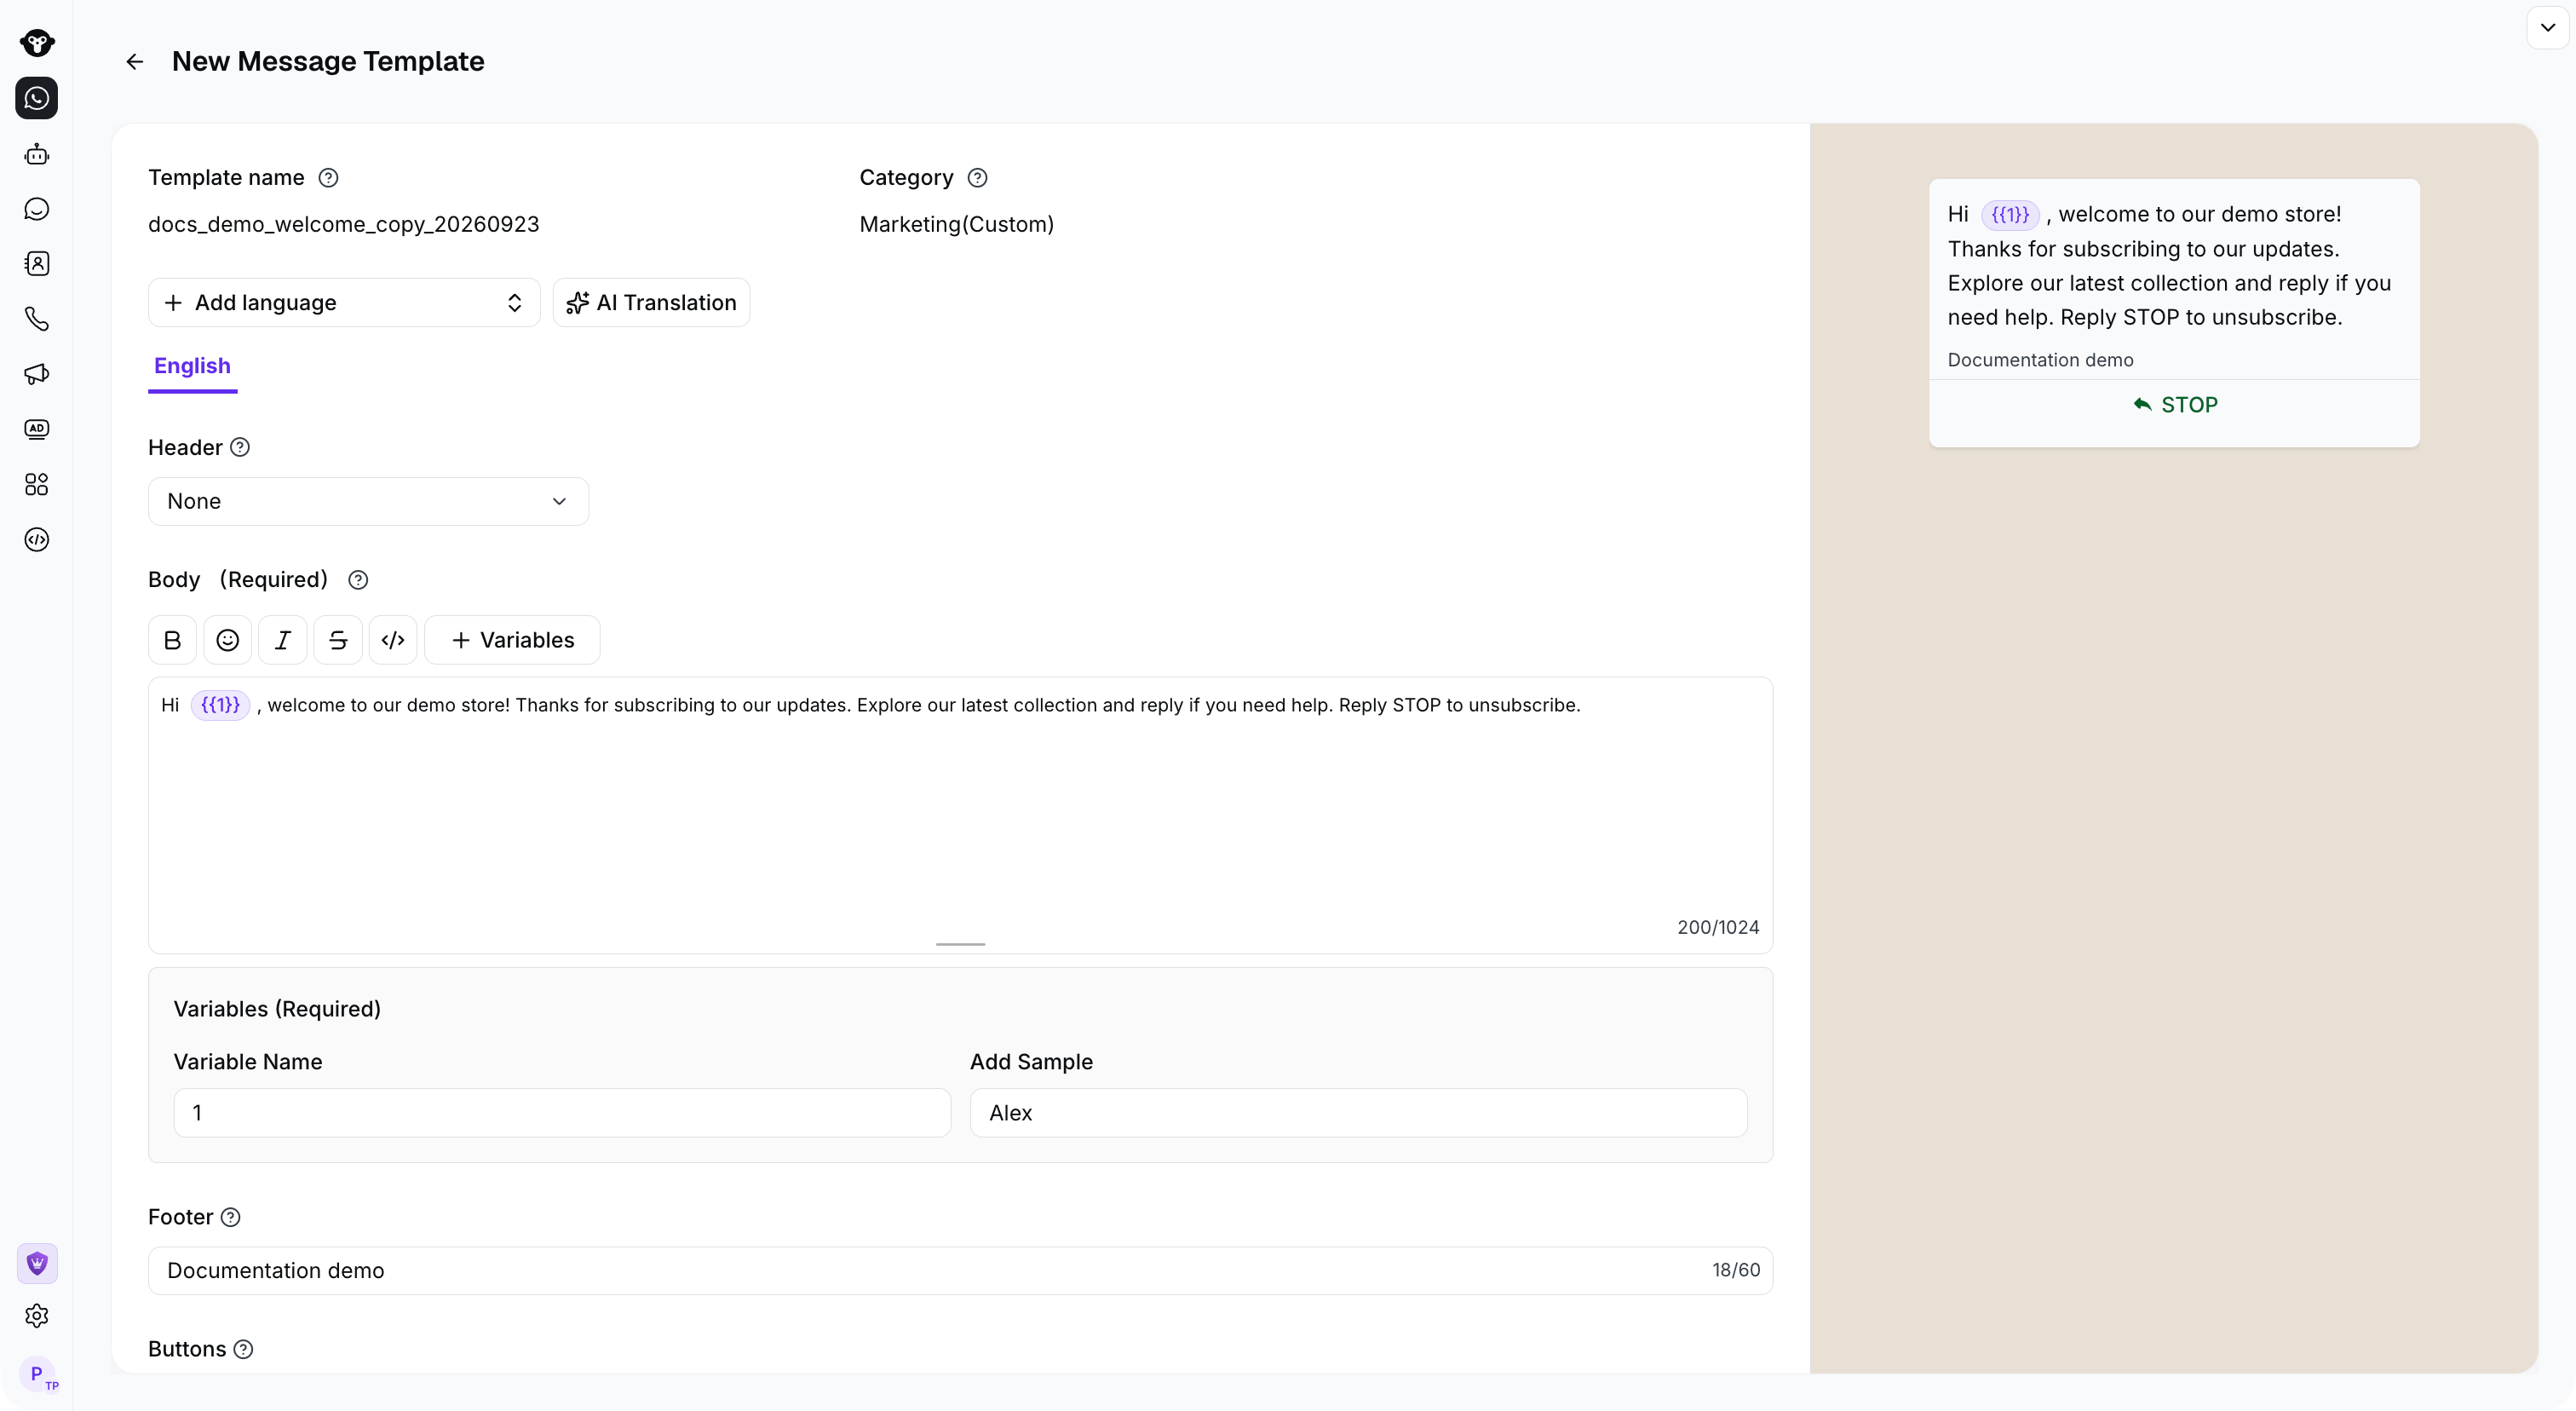
Configure the body and provide a sample for each variable; review the message preview.

Configure the button text, URL type, and destination URL. The preview shows the unsaved example.
Step 5: Submit Template
After all languages are edited, scroll to the bottom of the page and click the submit button.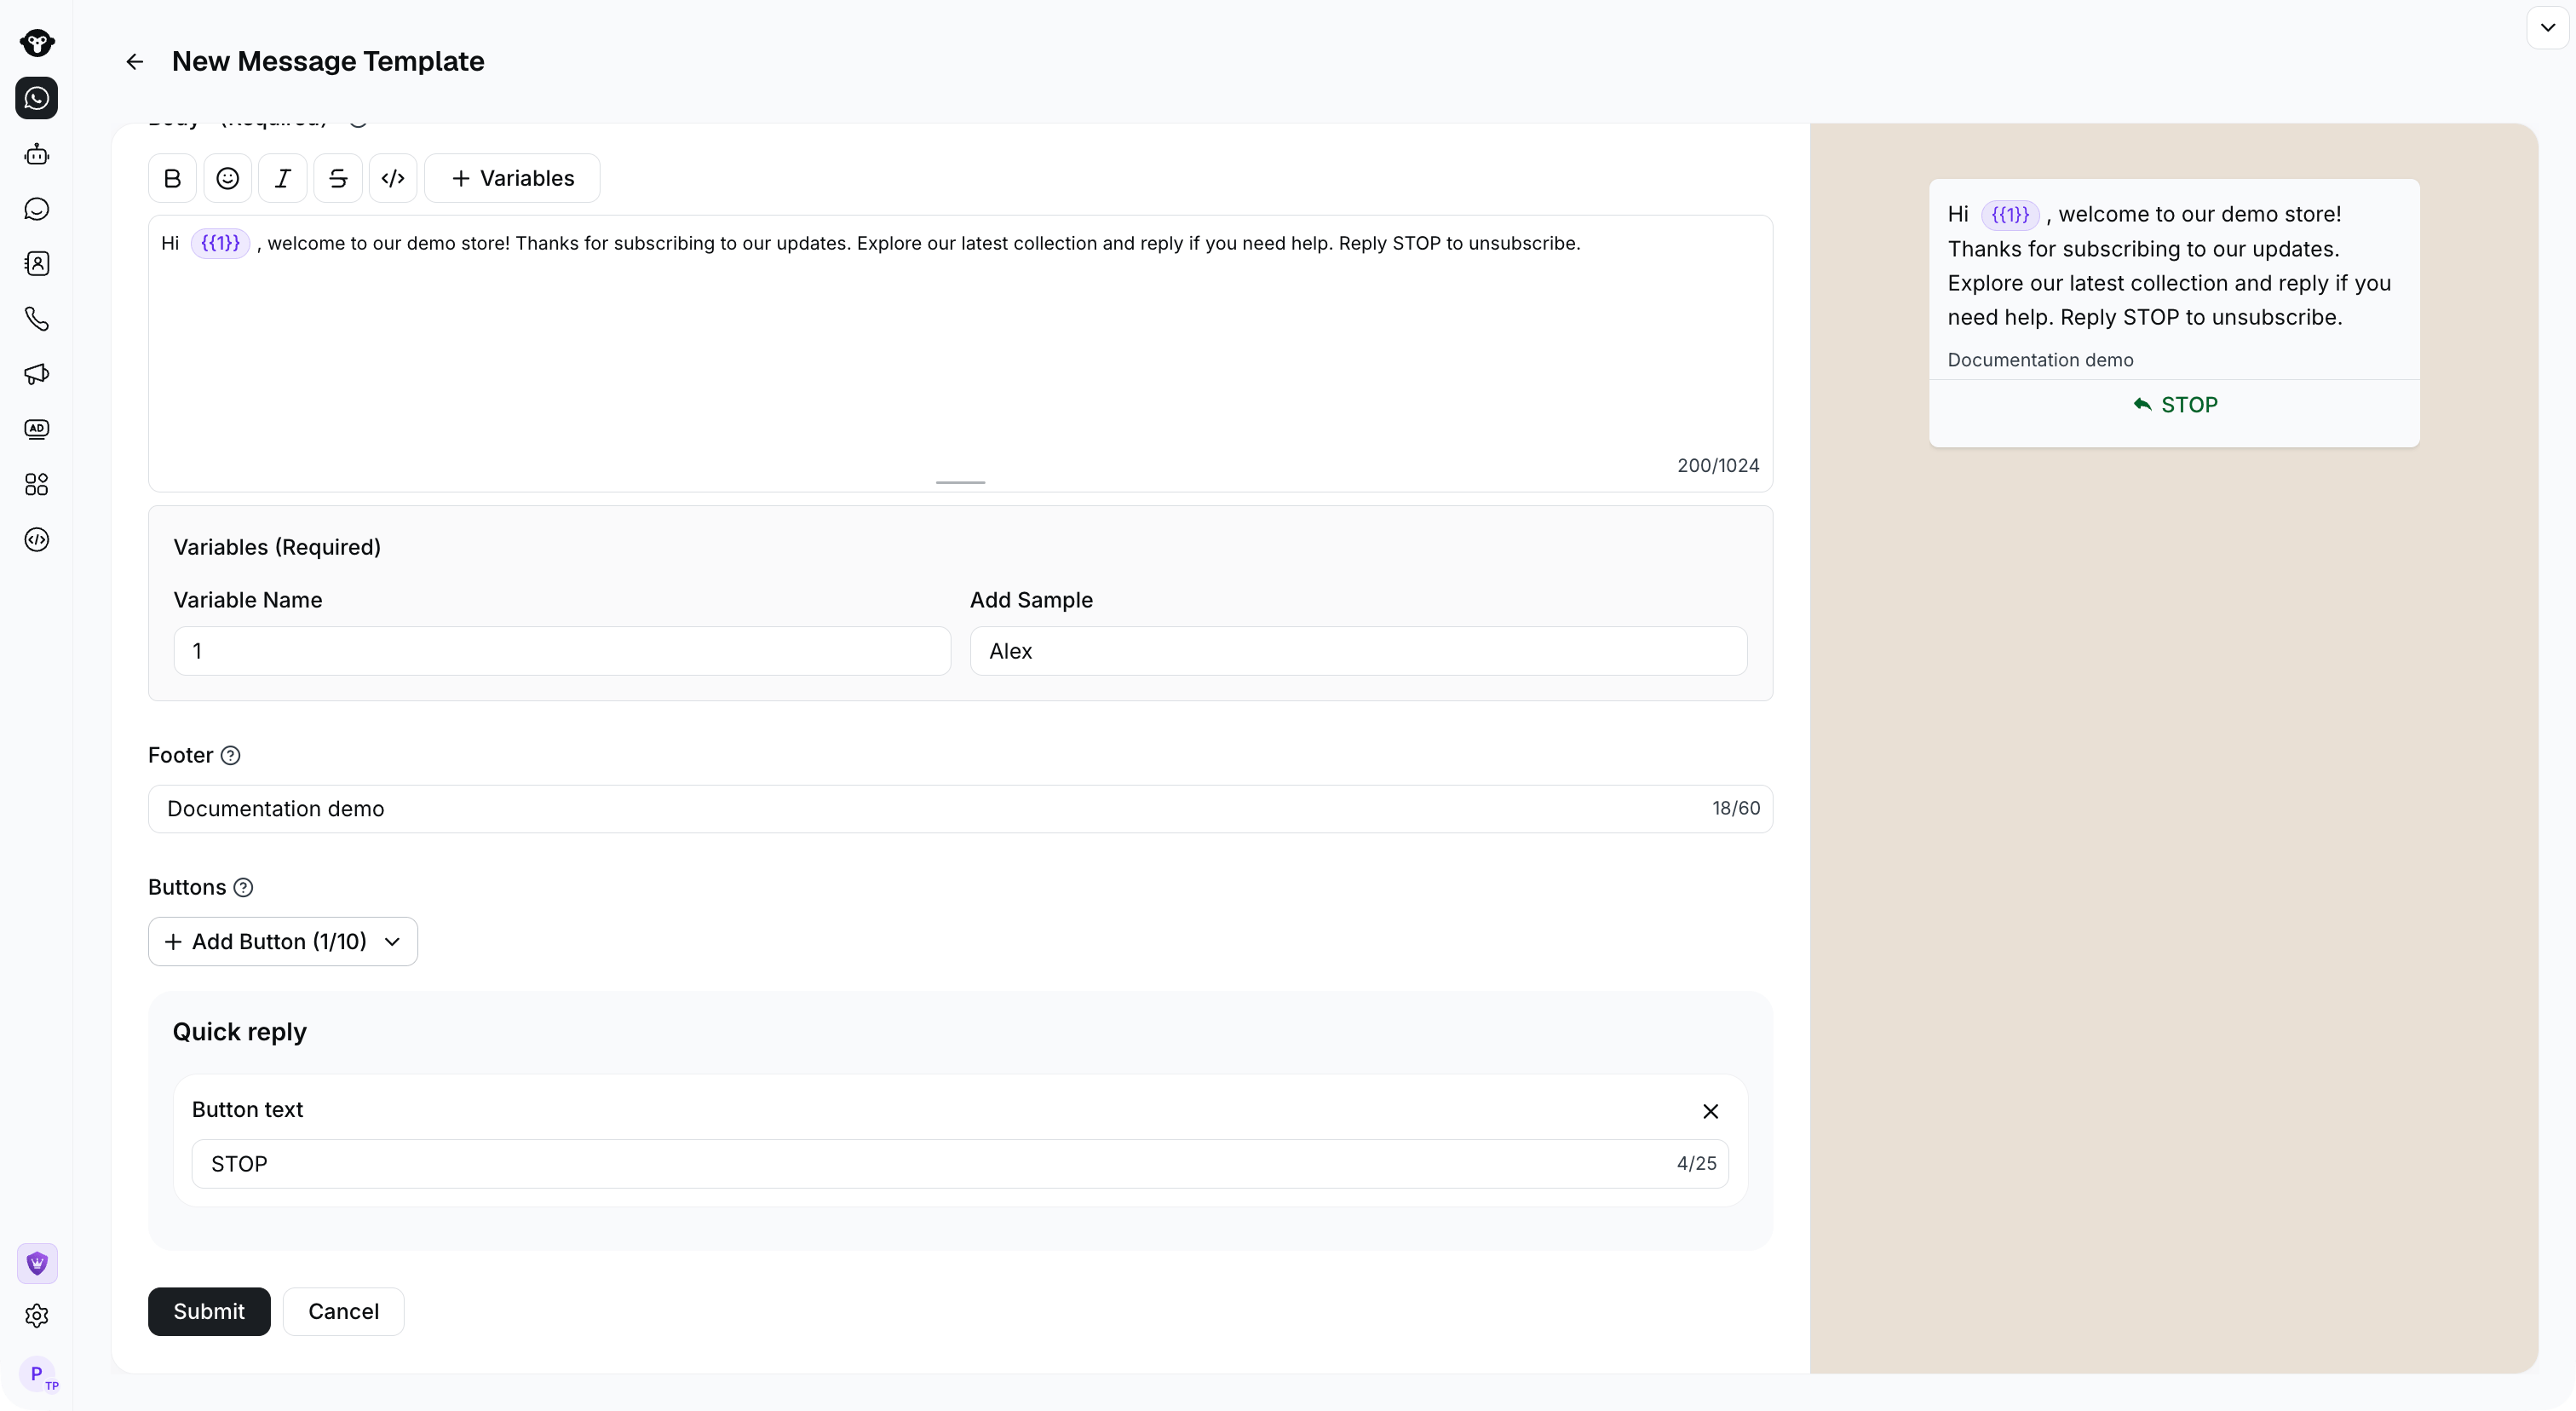
Scroll to the bottom of the editor and click Submit.
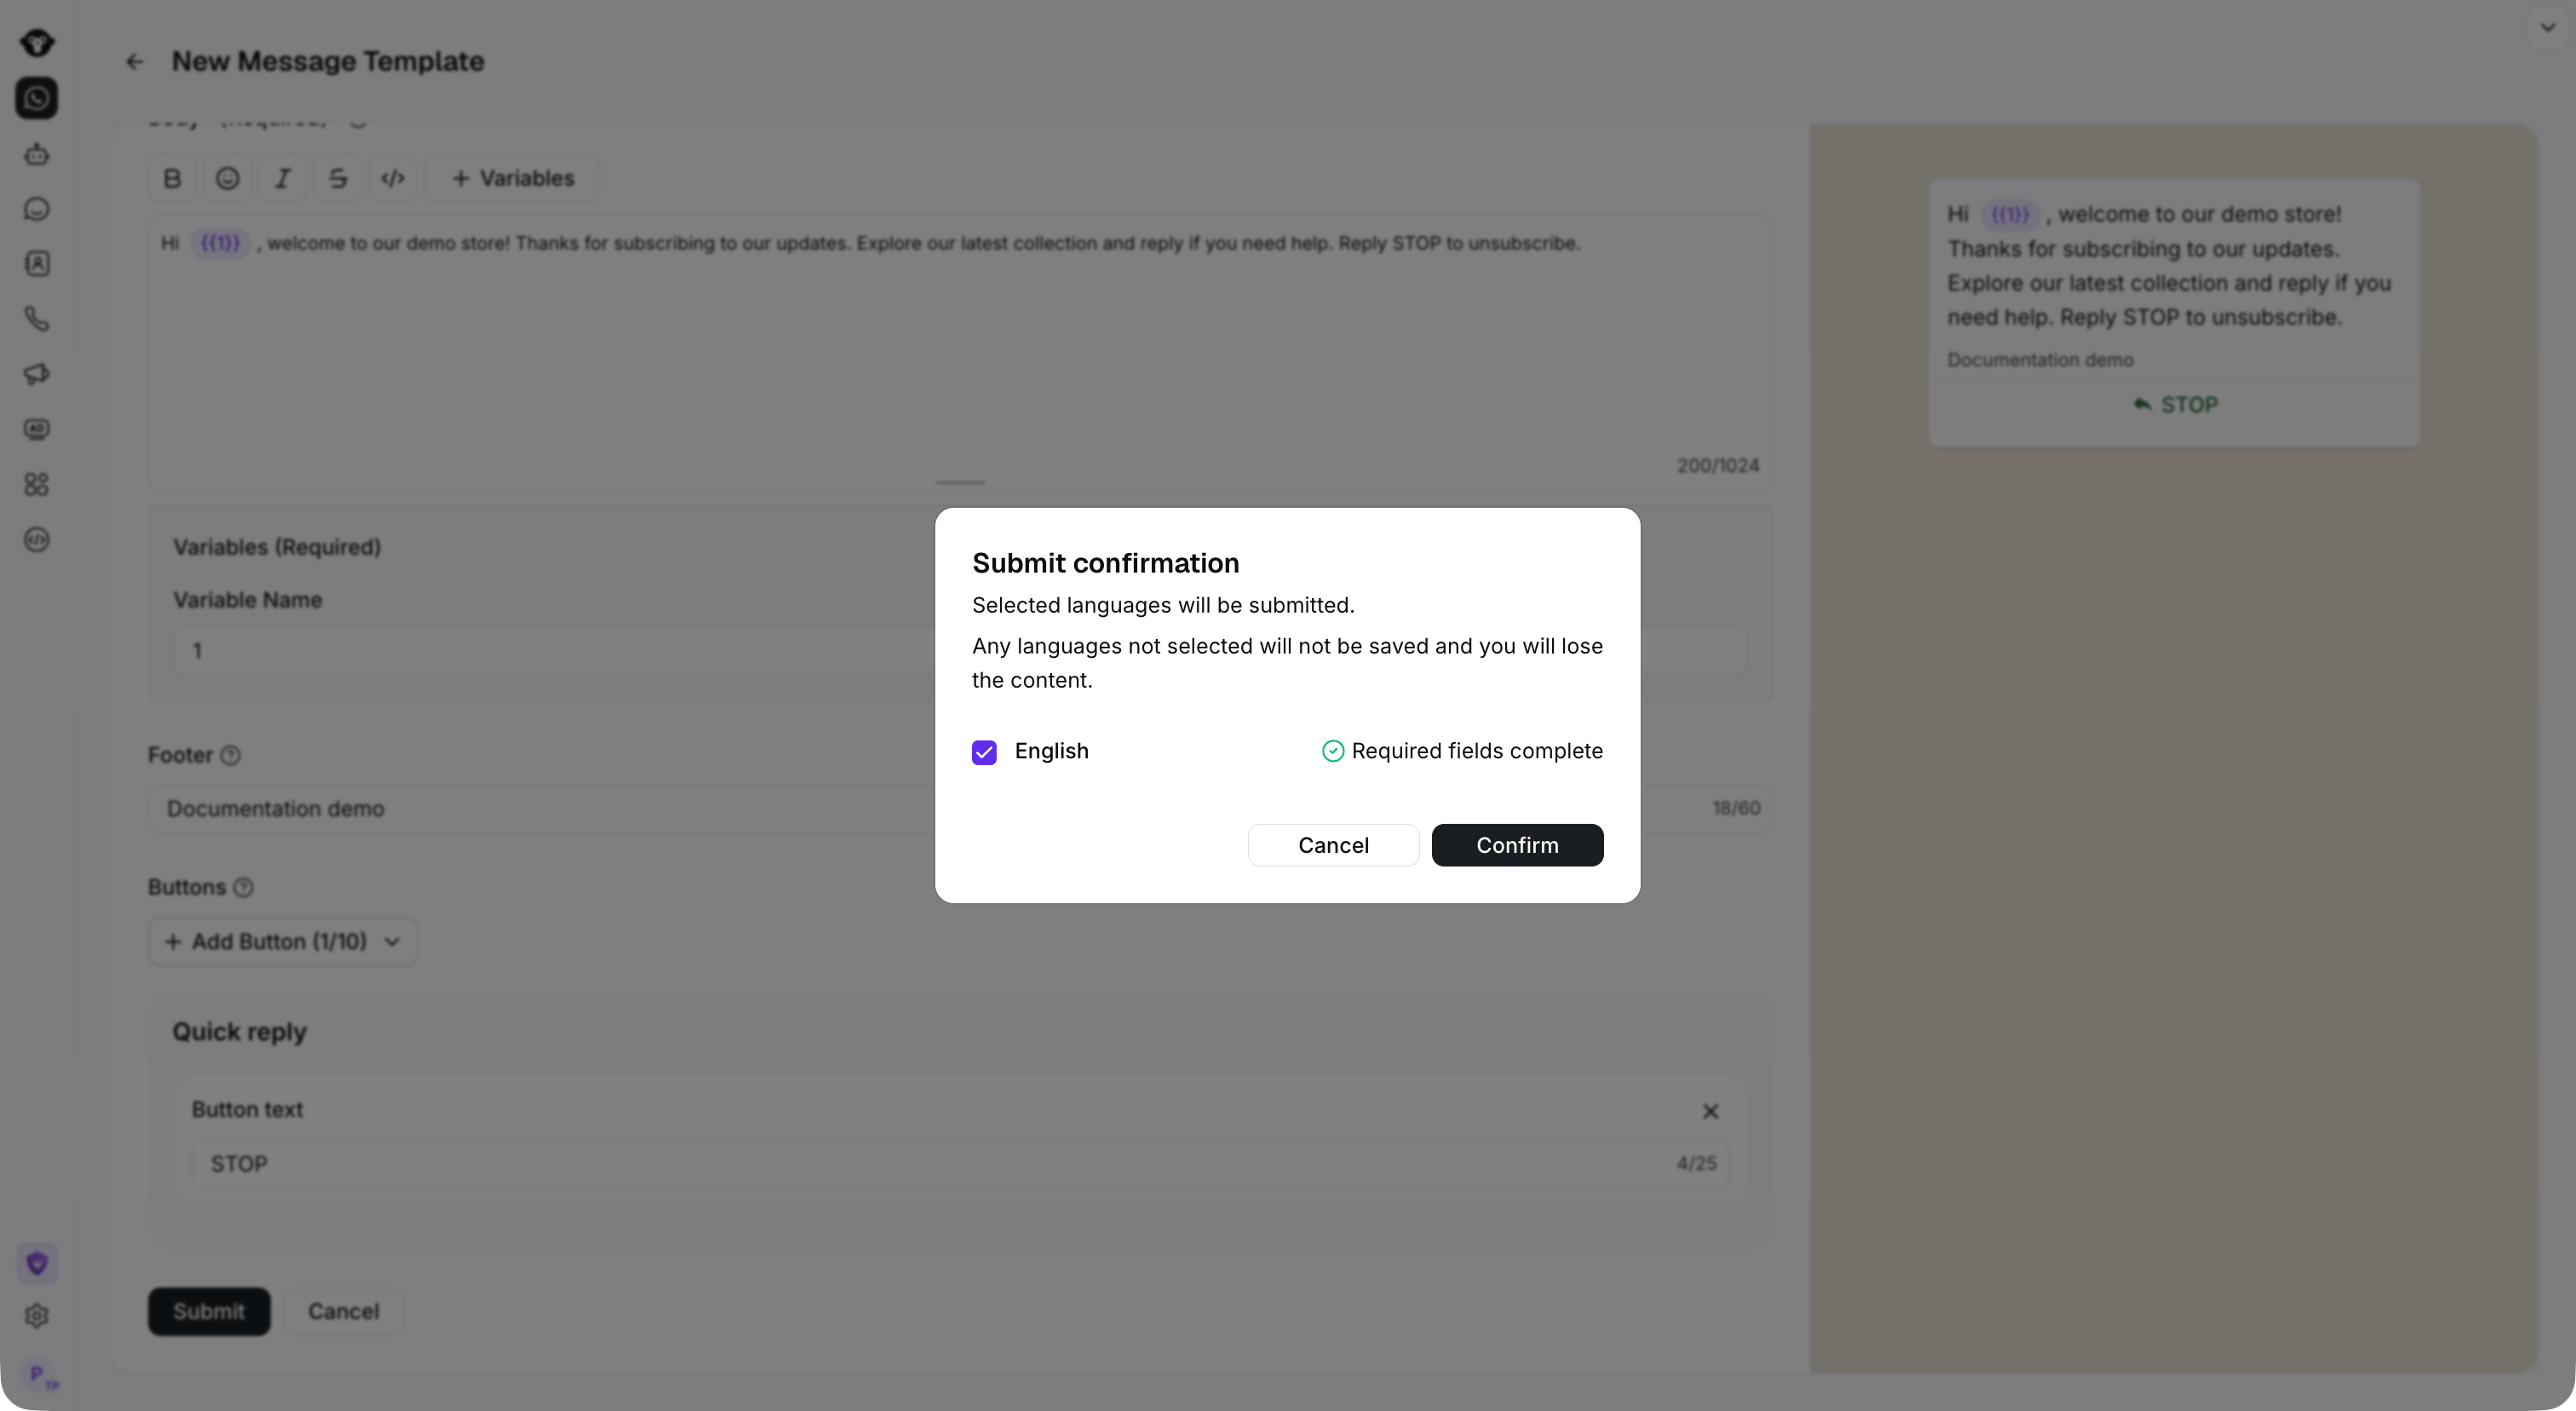
Select the completed languages you want to submit, then click Confirm.
Step 6: Wait for Approval
The template is reviewed by Meta, please be patient. Generally, the review will be completed within one day. Use the Status filter to find In review or Rejected templates. If a template is rejected, you can enter the edit page to view the reason and modify the template or appeal according to the prompt.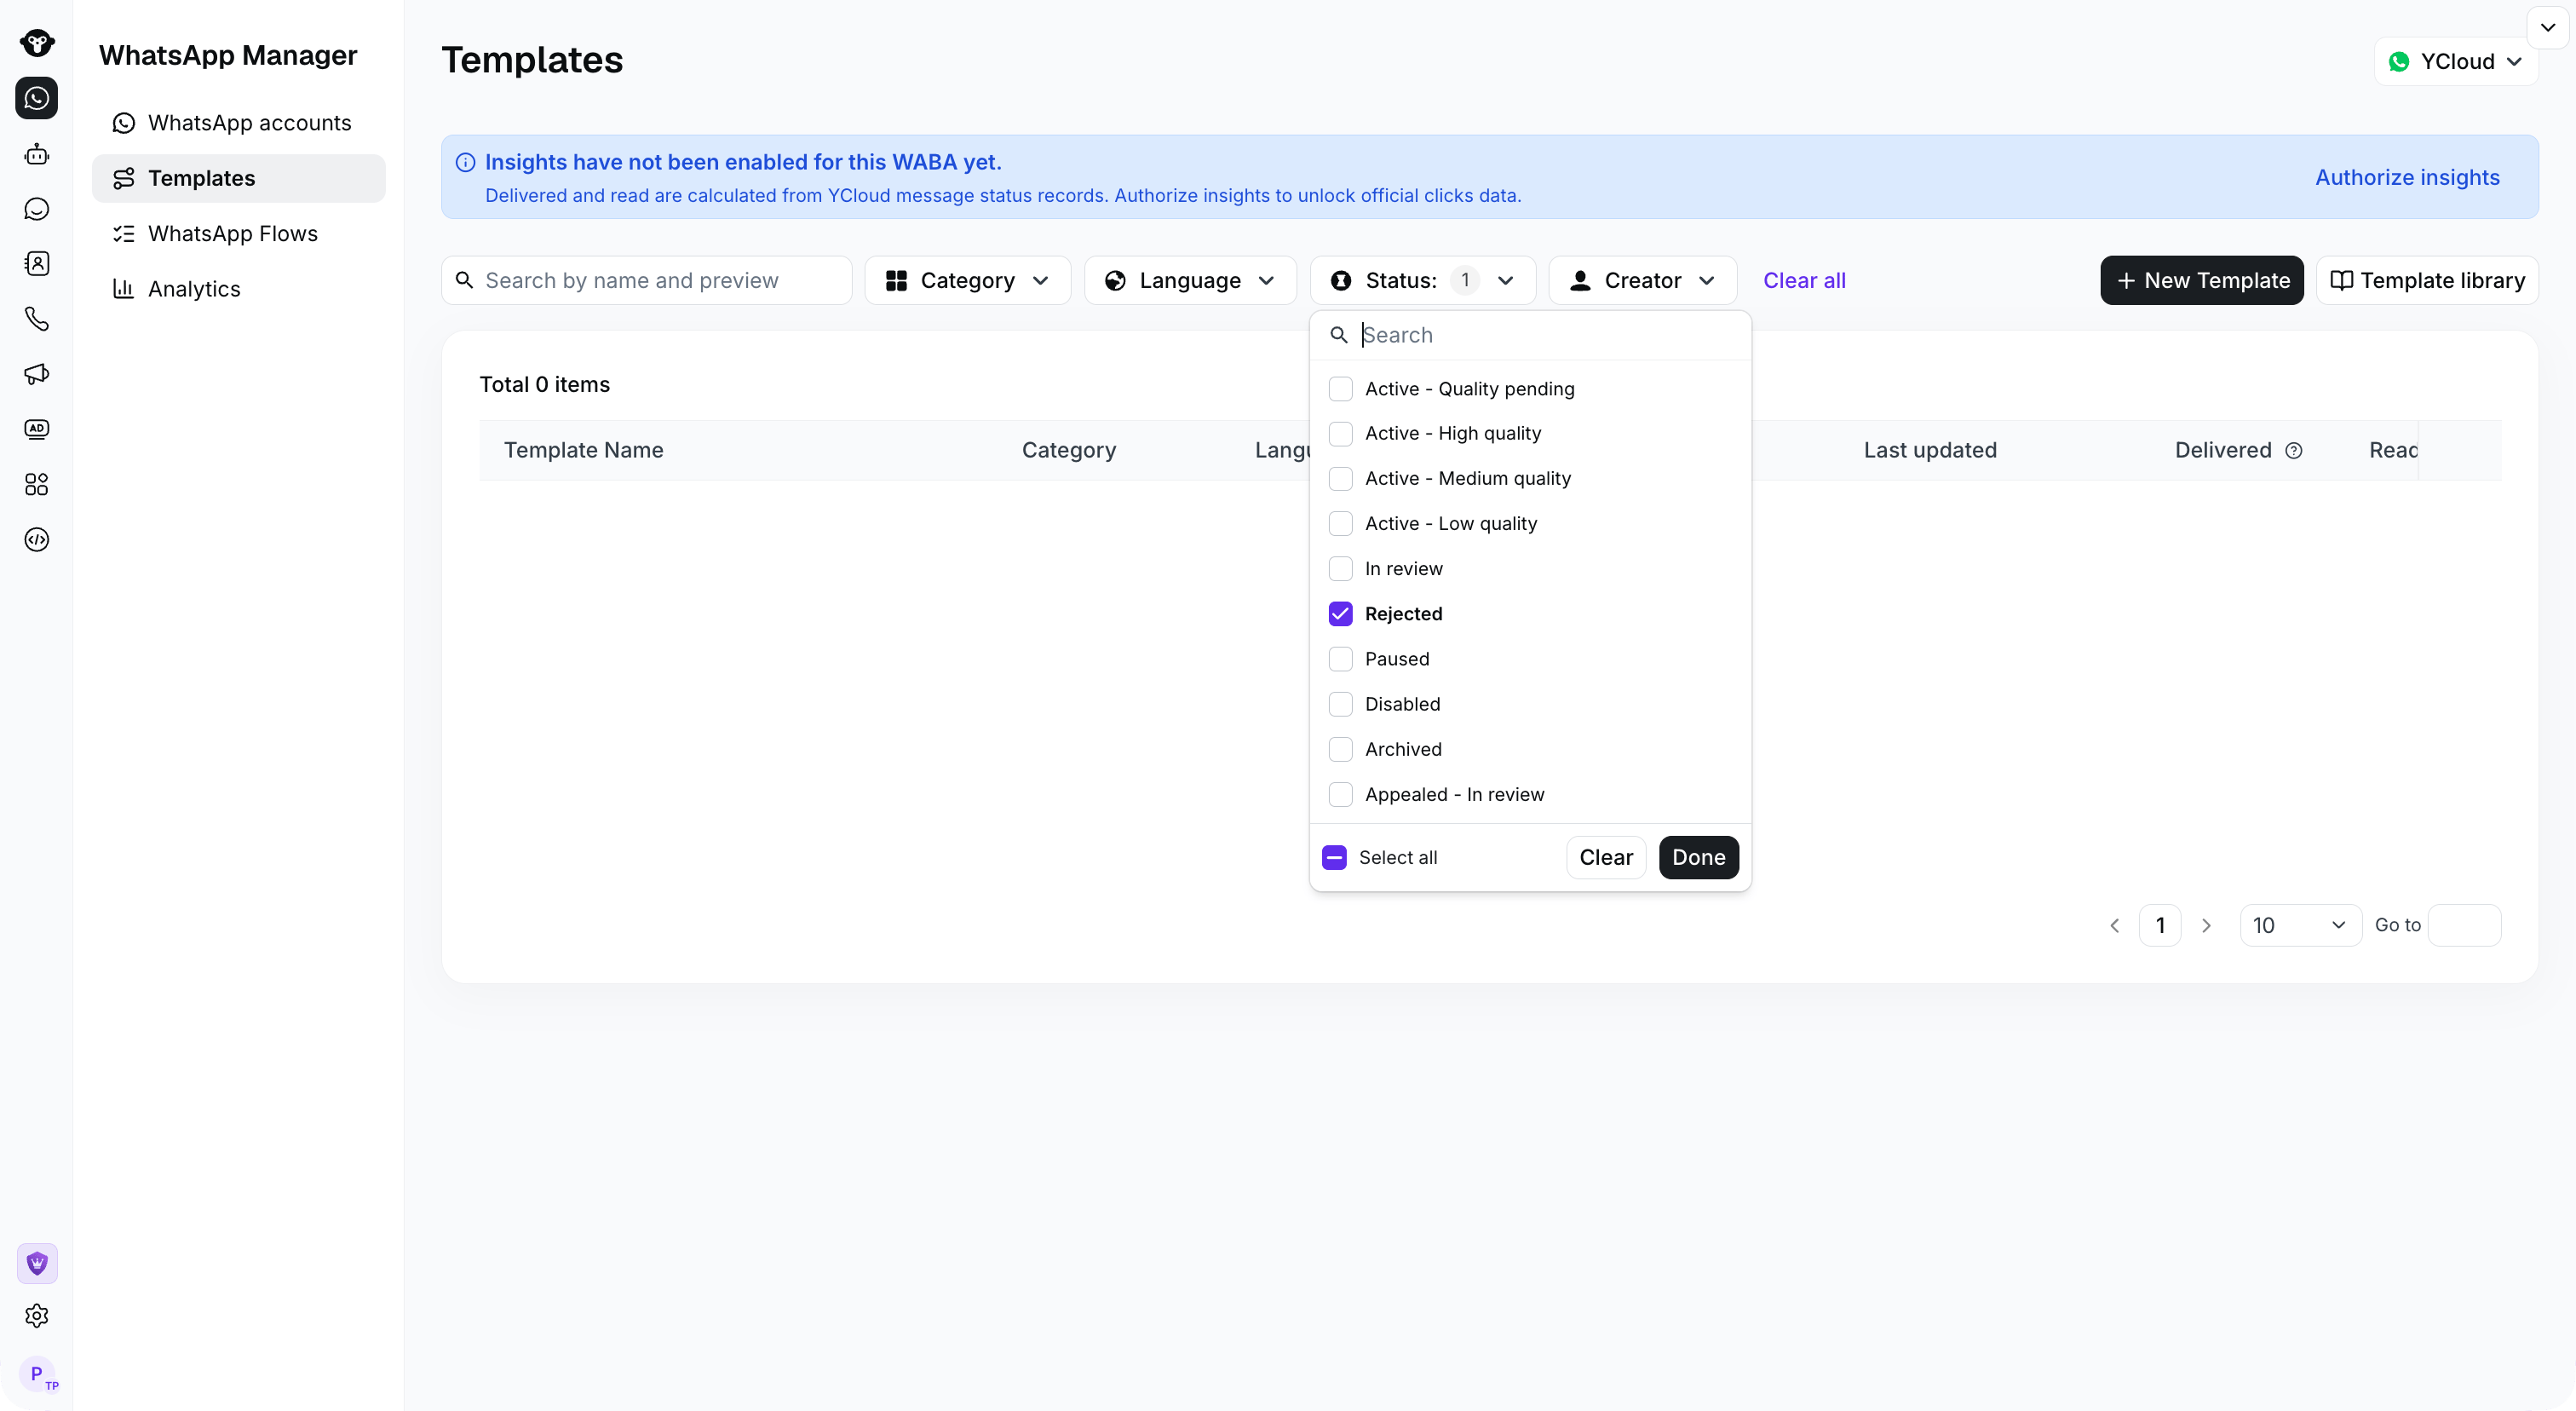
Use Status to find templates that need attention. No rejected templates are present in this example.
Create Authentication Templates
The steps to create authentication templates are the same as above, this section mainly introduces the settings for verification code templates.Code Delivery Methods
There are 3 methods of delivering the verification code, with three options:Copy Code Template
Choose the Copy Code, You can customize the button name.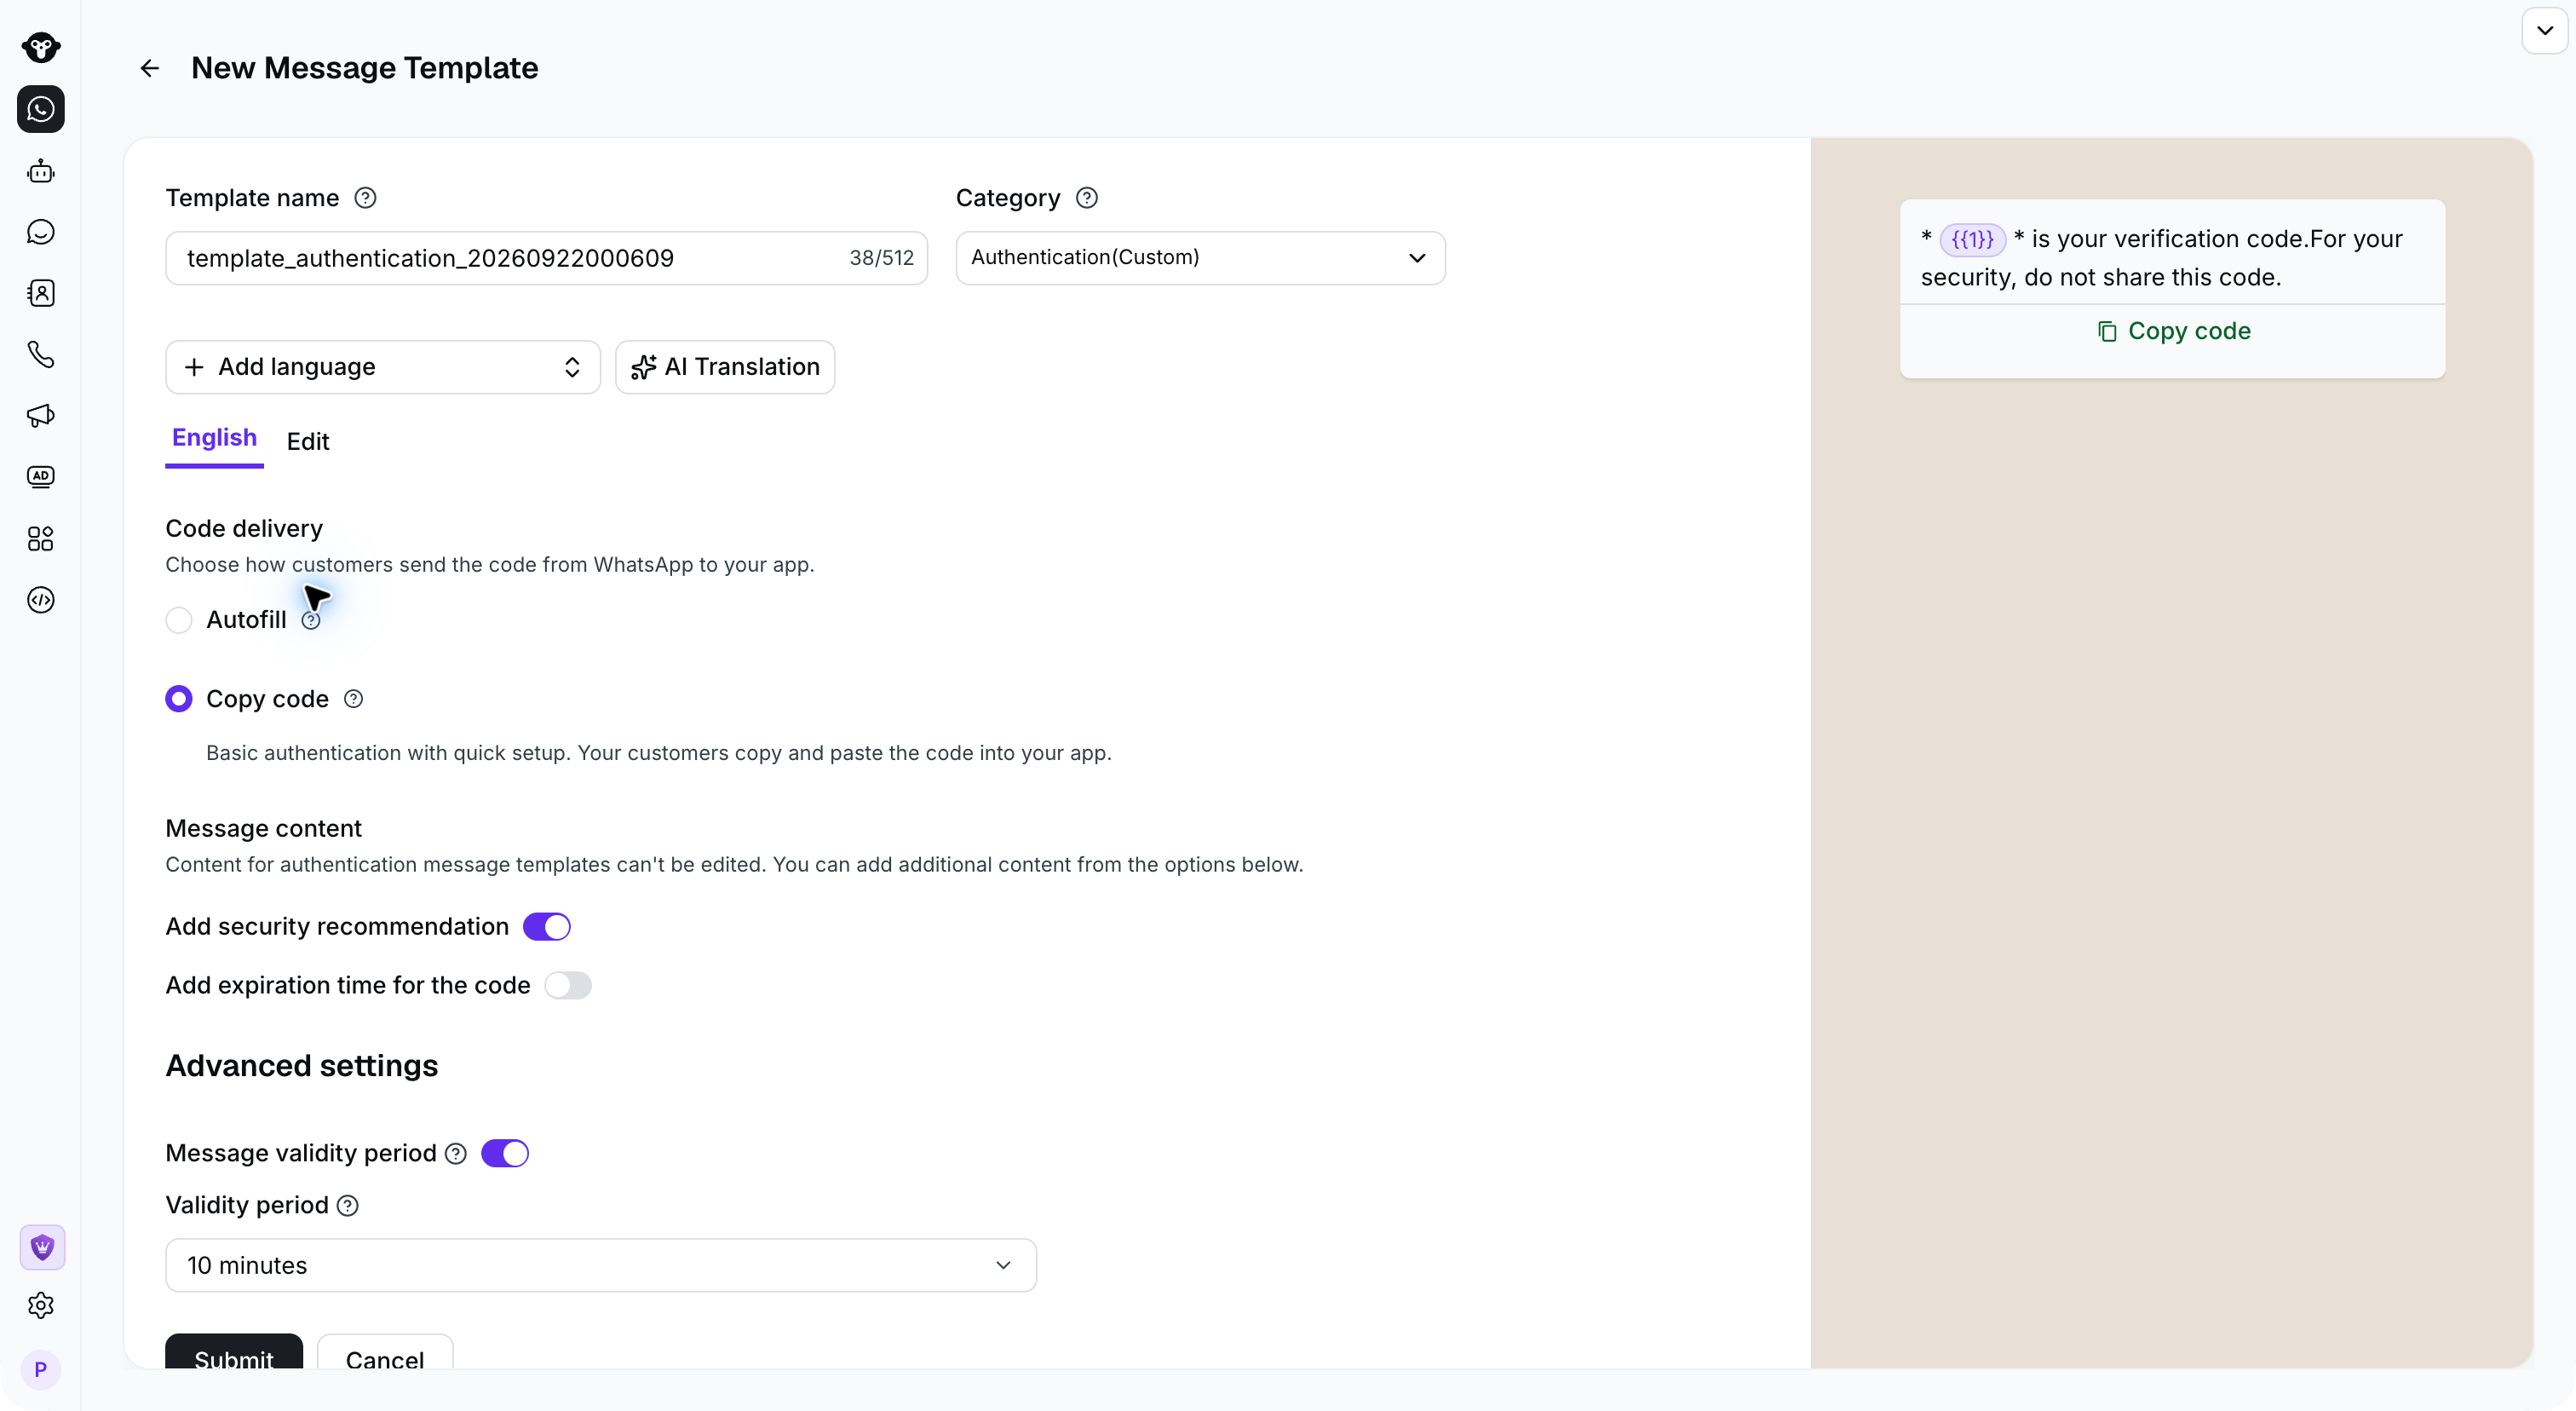
Autofill Template
Select Autofill as the code delivery method. You can customize the button label and add up to five App package configurations. Each configuration requires the app’s package name and signature hash. Autofill requires your application to support the handshake used for one-tap verification code delivery.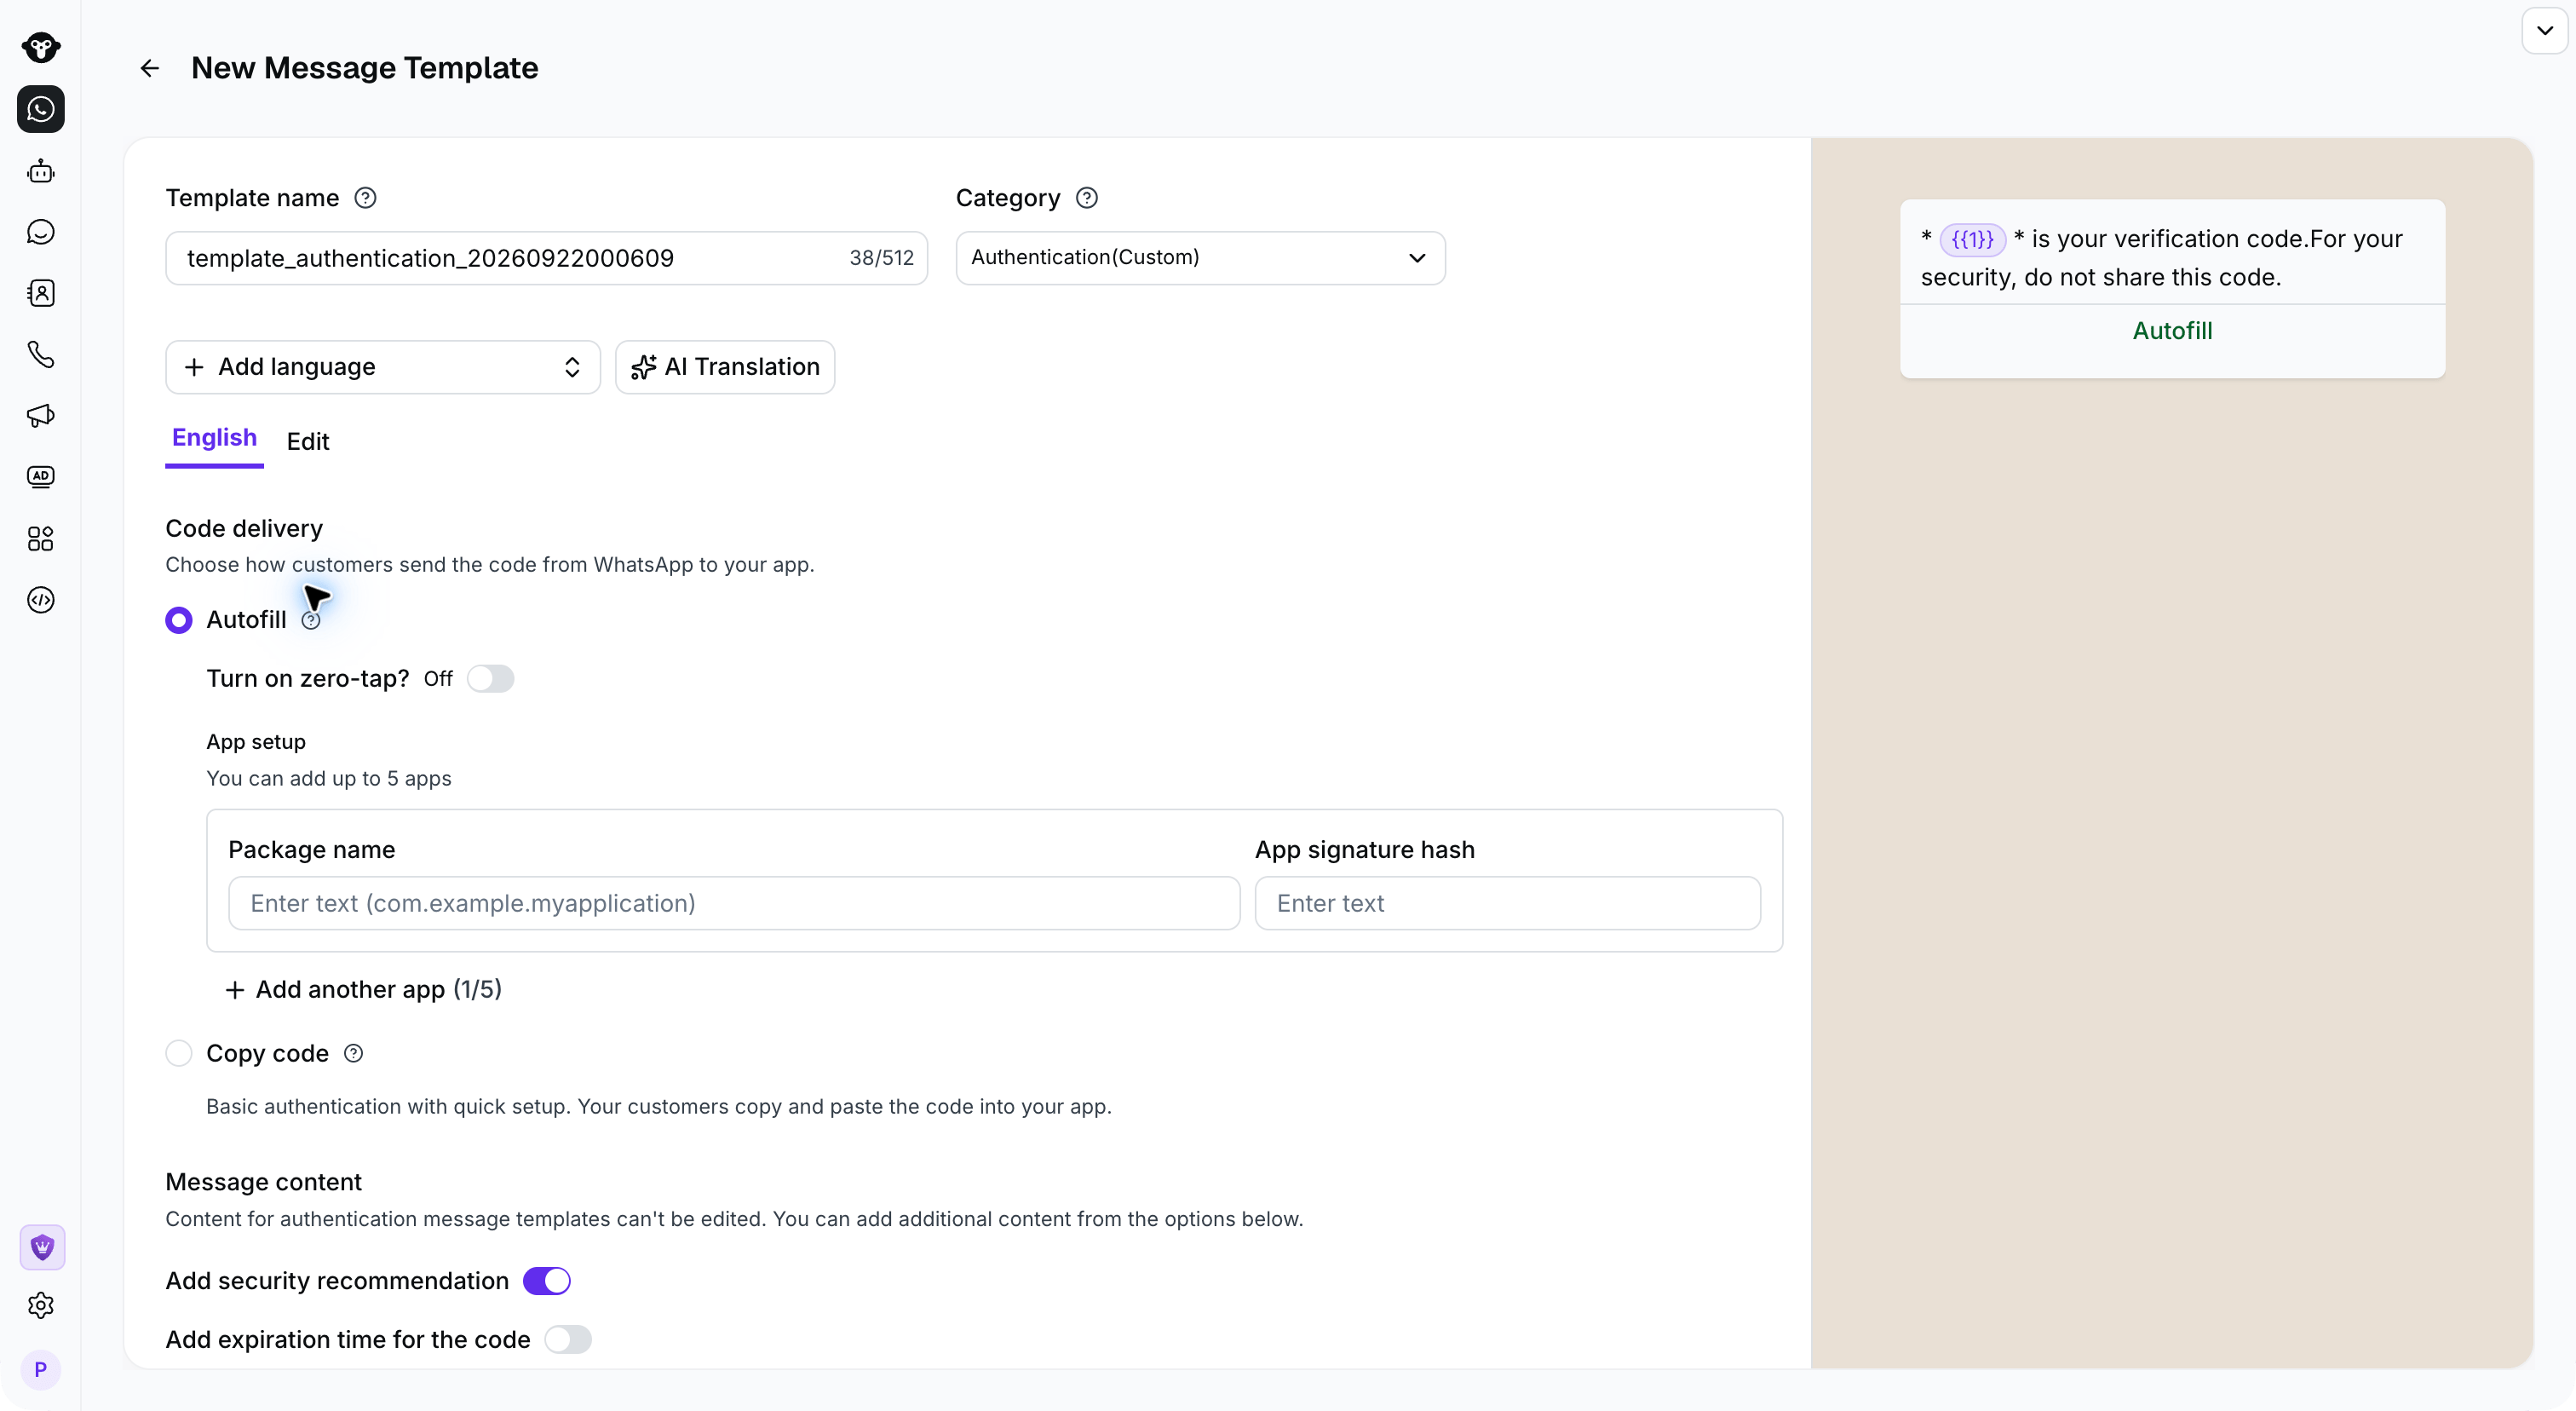
Zero-Tap Template
Select Zero Tap as the code delivery method. Add the app’s package name and signature hash, enable the Zero-tap option, and accept the applicable terms. You can add up to five App package configurations. Zero-tap builds on the Autofill flow, so your application must also support the required handshake.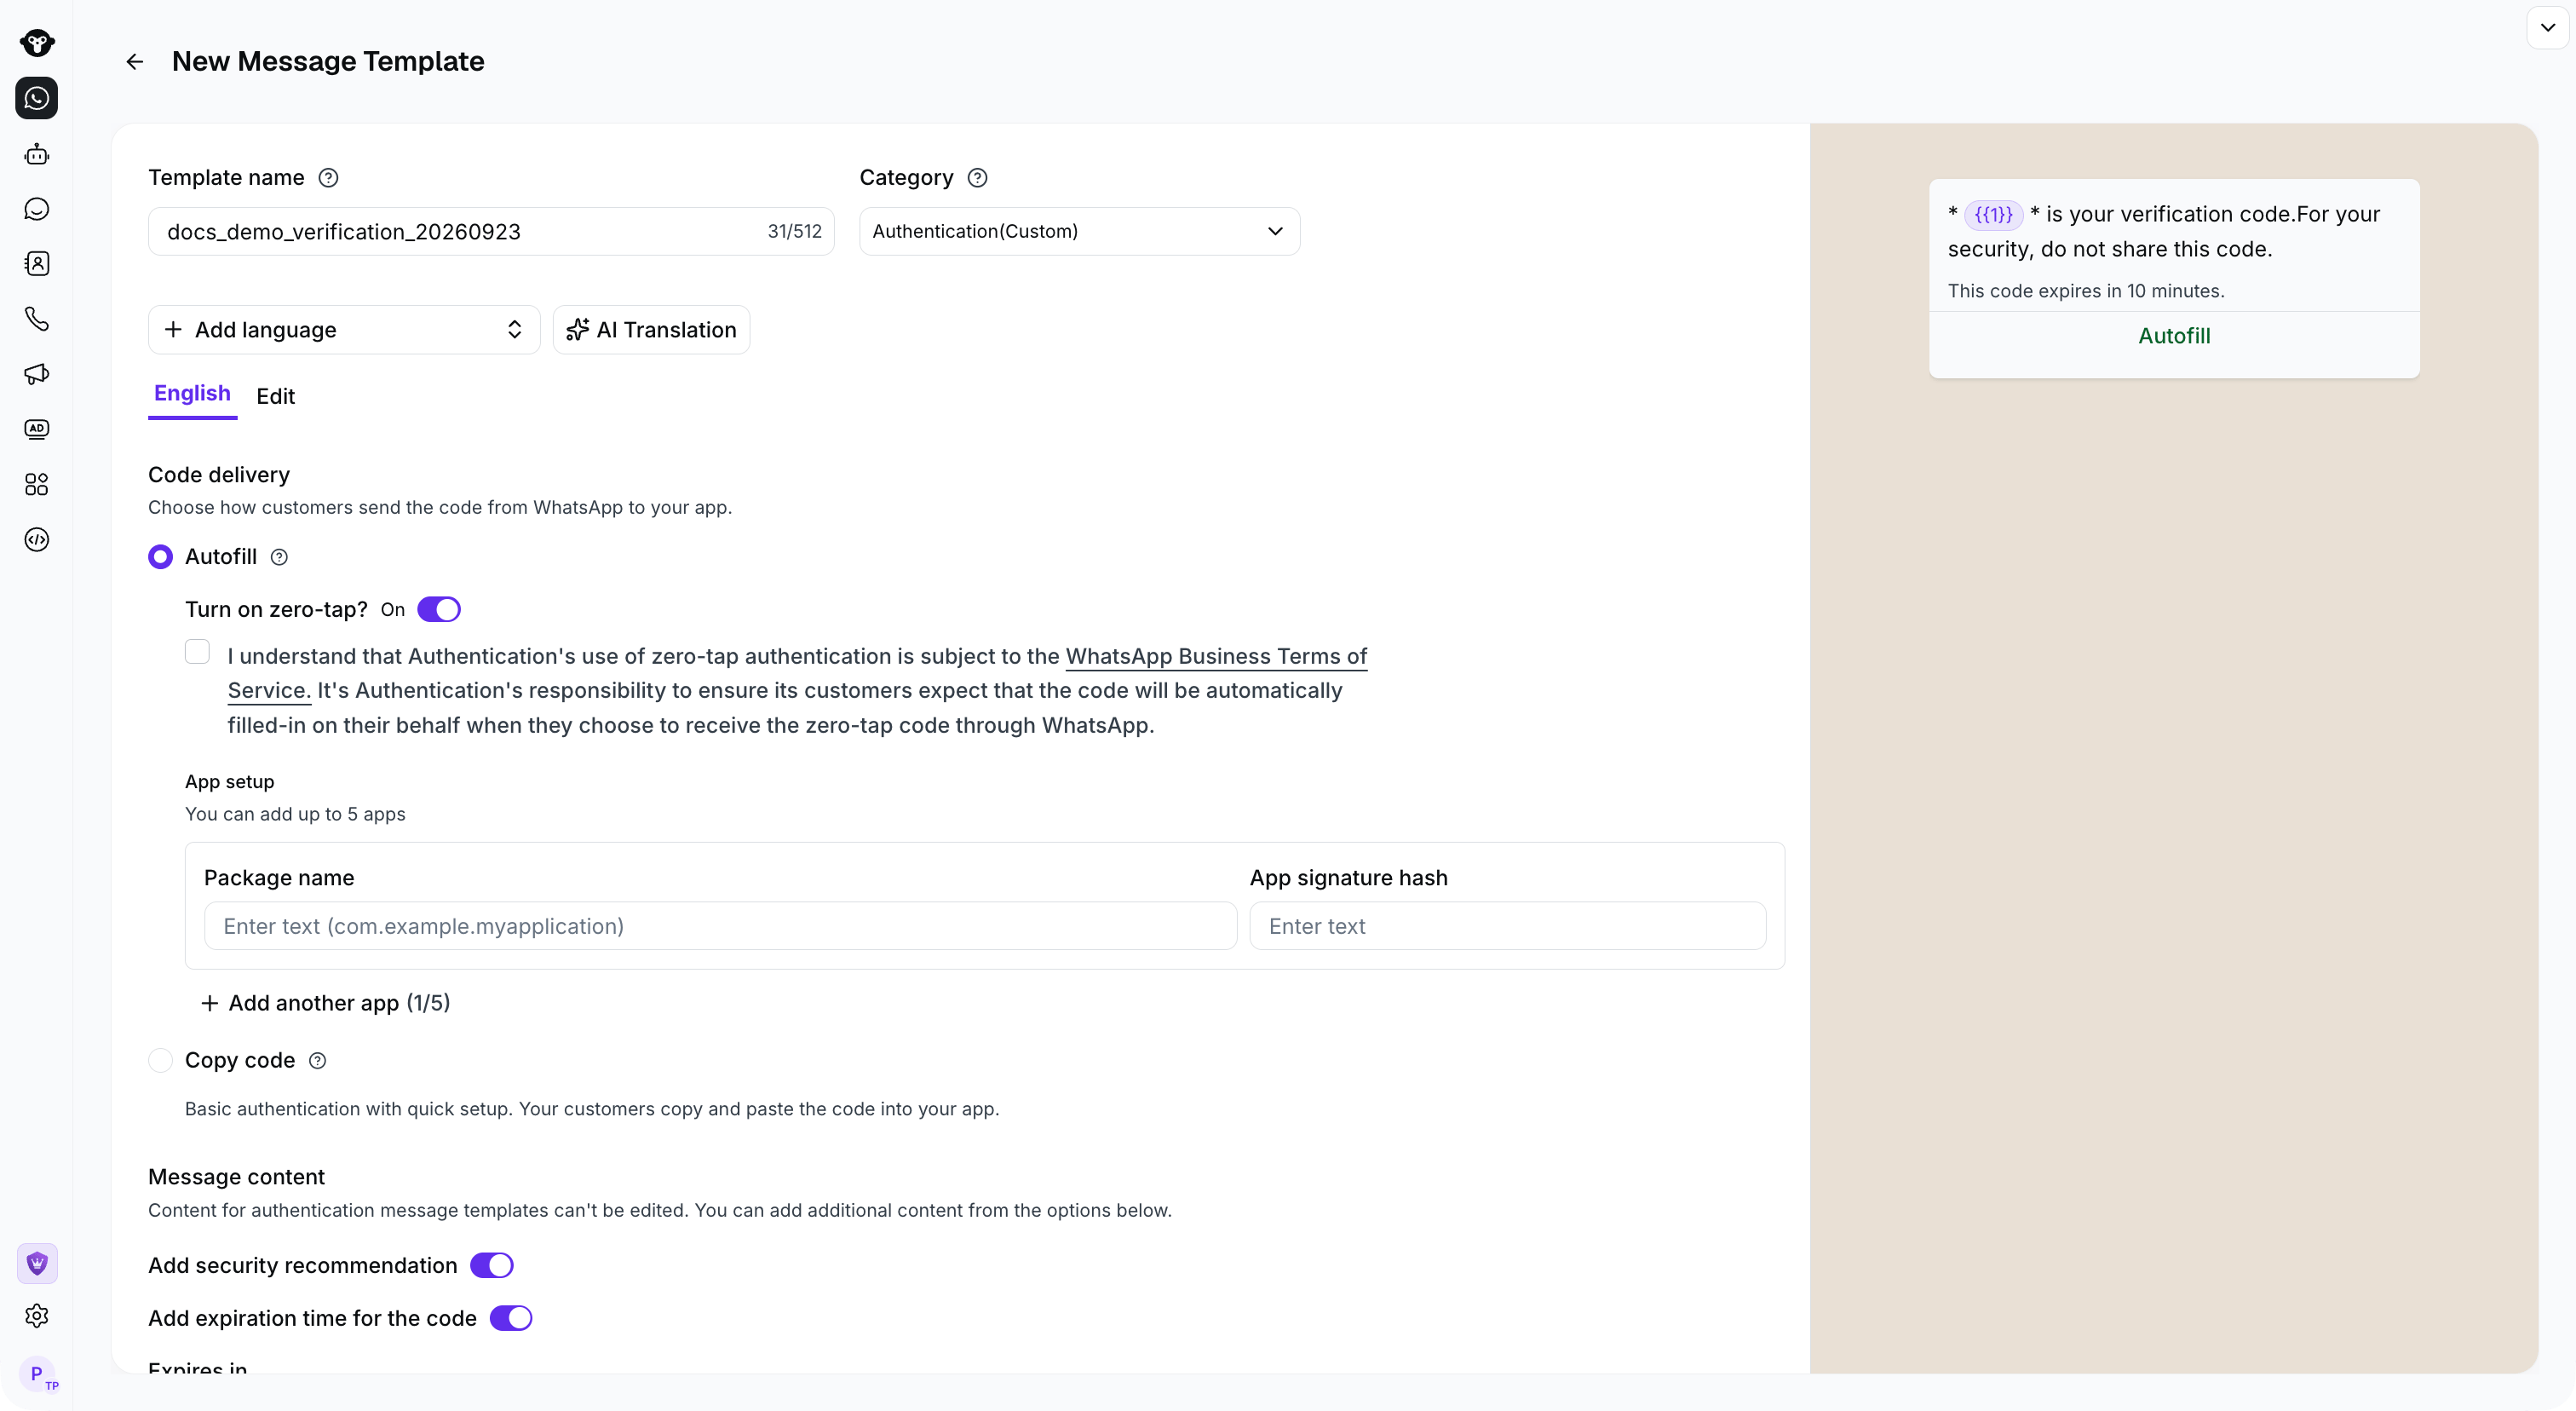
Enable Zero-tap under Autofill, configure your app, and review the applicable terms.
Template Content Settings
Although the content of the verification code template is fixed, you can still add verification code validity and security tips through switches.
Add a security recommendation and an expiration time to the authentication message.
Message validity period
WhatsApp messages can otherwise remain eligible for delivery for up to 30 days. That window is too long for authentication messages because verification codes usually expire within minutes. Authentication templates let you set a shorter message validity period. If WhatsApp cannot deliver the message within that period, it stops attempting delivery and no fee is incurred. For example, suppose you set the message validity period to five minutes while the verification code in your application remains valid for ten minutes. If the recipient is offline and the message is still processing after five minutes, WhatsApp stops trying to deliver it and no fee is incurred. If the recipient reconnects and opens WhatsApp after the five-minute window, the message will not appear. Configuration entry:
Set Message validity period in Advanced settings; this example uses five minutes.