When the YCloud platform receives an inbound message, it triggers an n8n workflow via a webhook. The workflow calls upon the large language model to generate a reply, and then sends the message back to the user via the YCloud node.
YCloud AI Agent has built a comprehensive AI workflow for you, offering an end-to-end, easy-to-understand AI knowledge base, corpora and automated processes. Click here for more details.
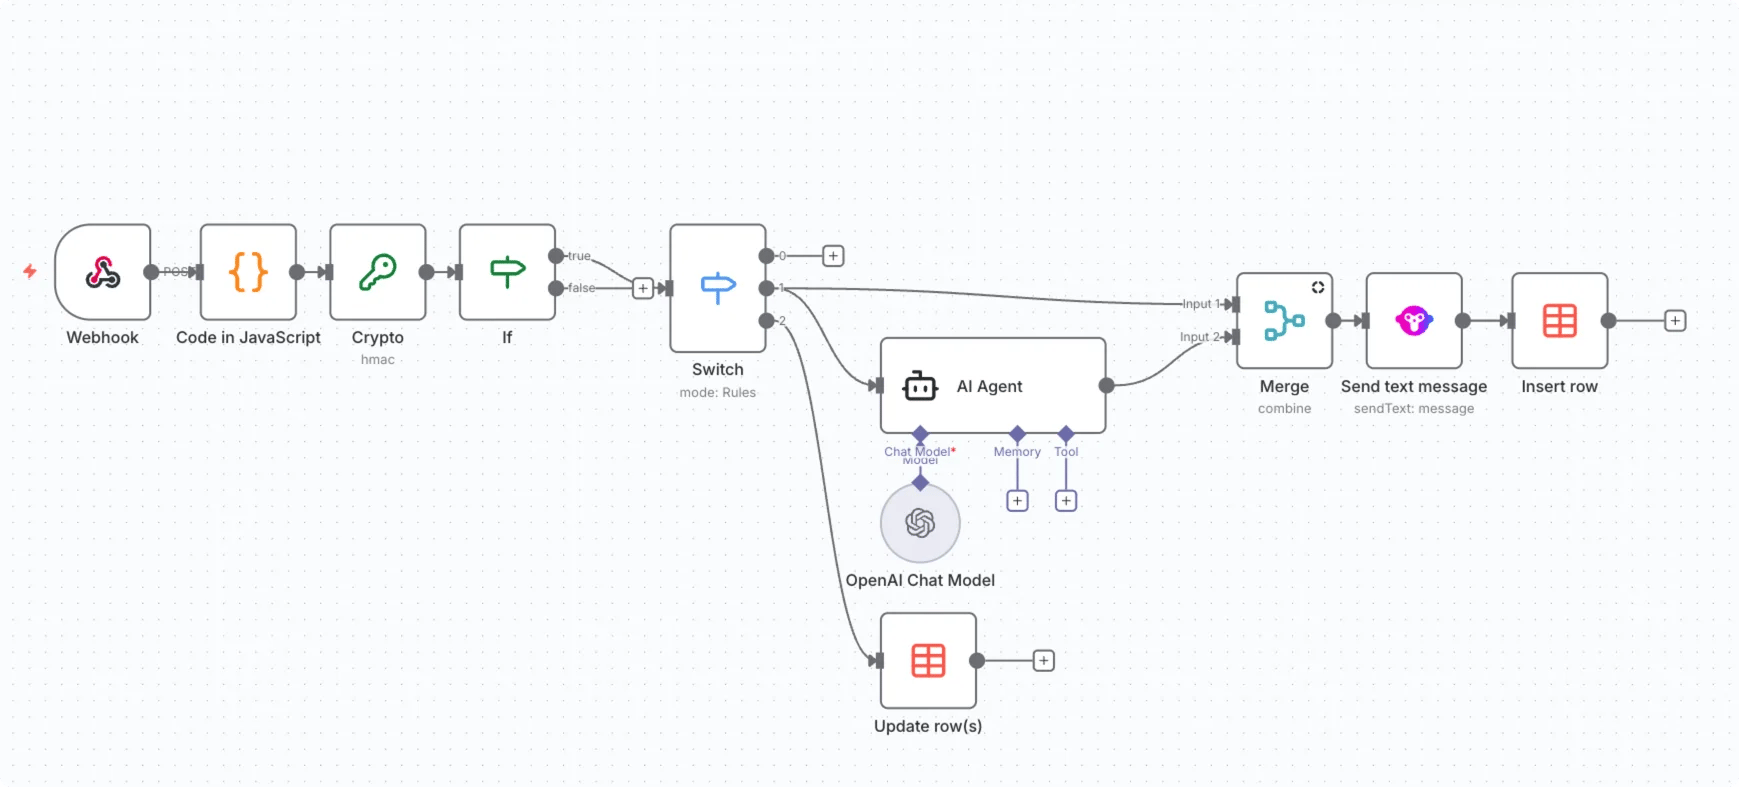
Overall Process
Webhook Event
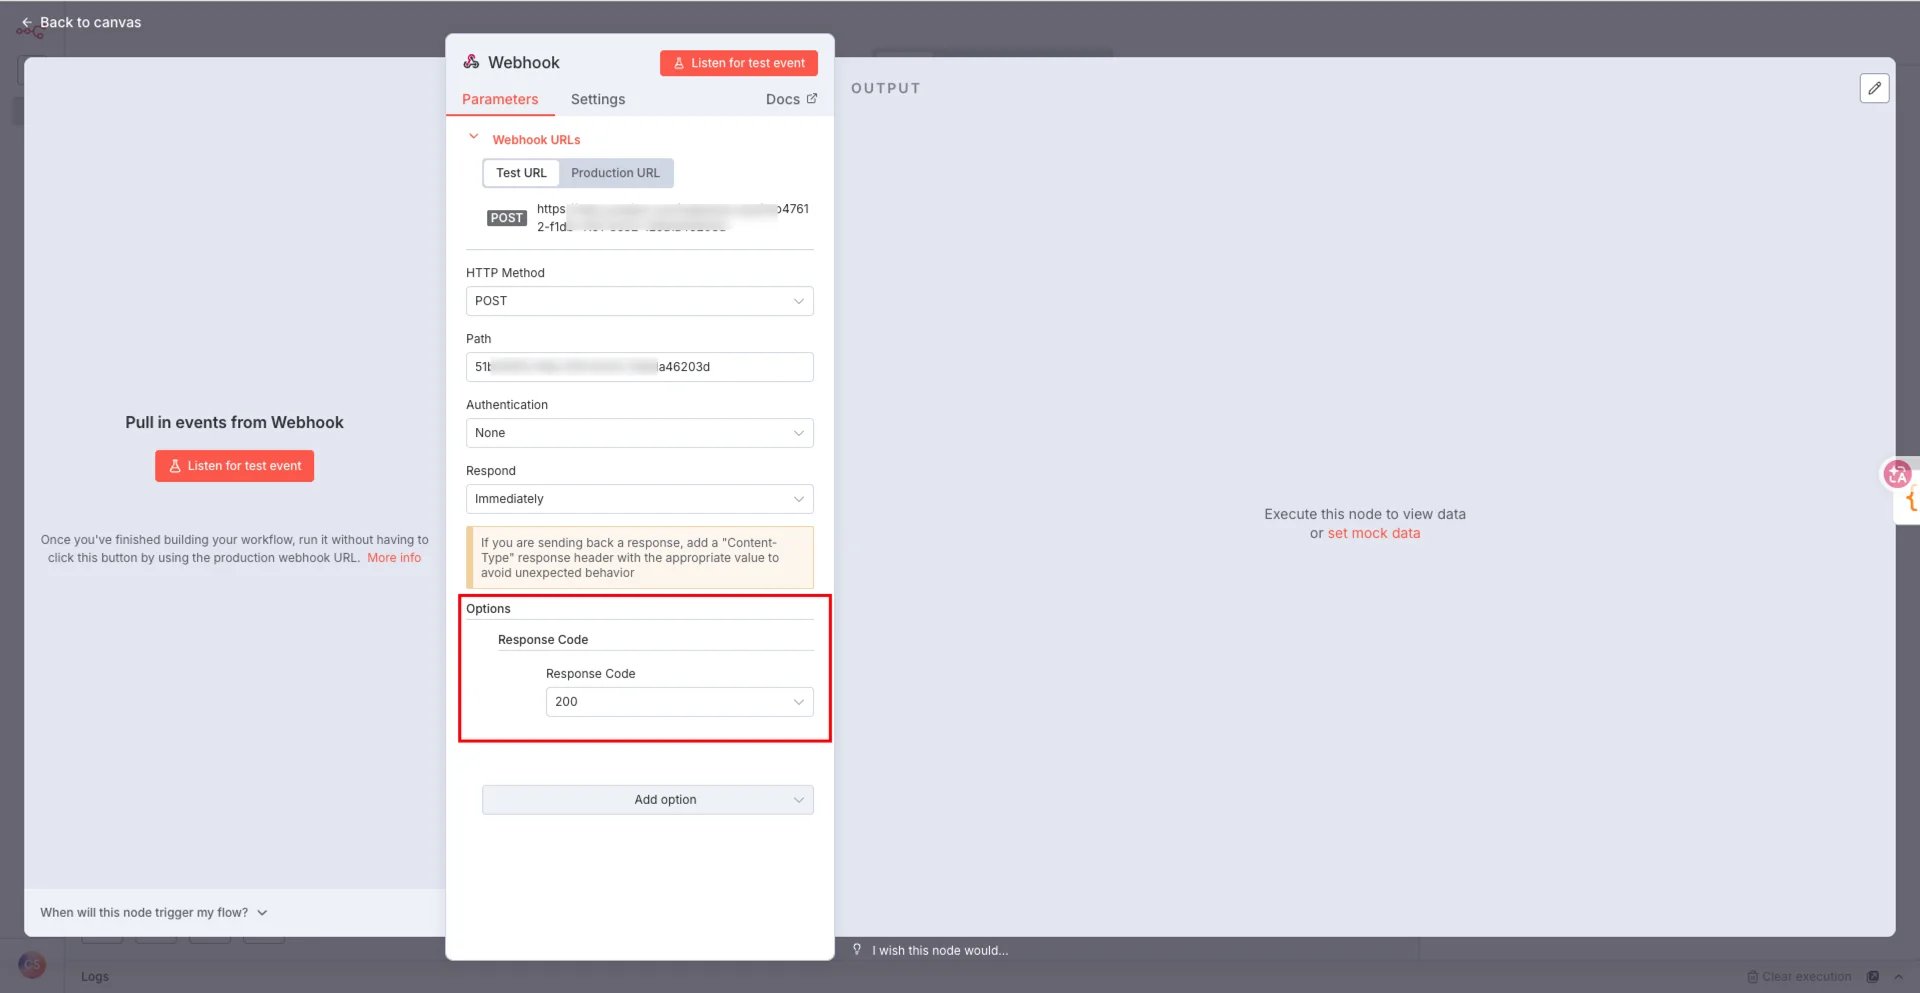
- Create a Webhook endpoint
- Use the n8n Webhook Node to create a new listener
- Select POST as the HTTP method
- In the Options, set the Response Code to 200 and ensure that ‘Immediately’ is selected

Use Search event to find the webhook events your n8n workflow needs before confirming.
Parse the return value and verify the signature
Parse the return value
Parsing the headers in the webhook response using N8N’s built-in ‘code’ node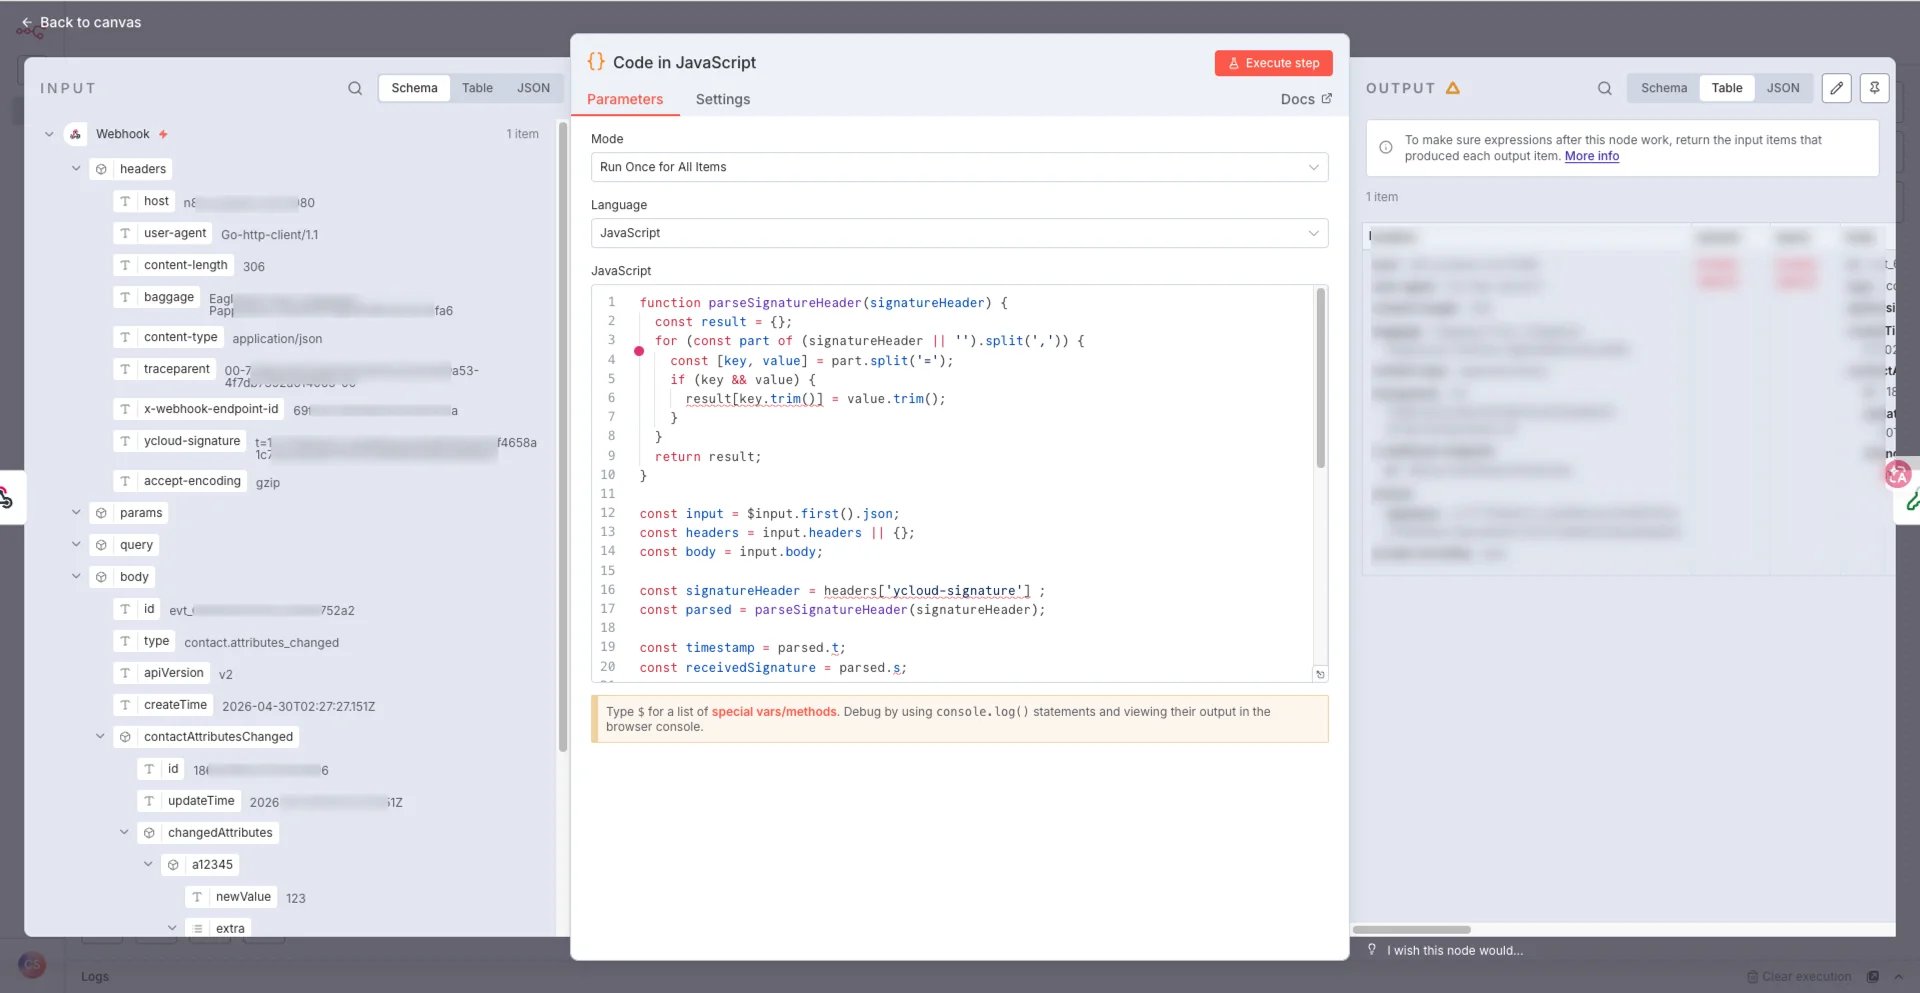
- The original value,
- The timestamp,
- The received signature, the payload, the signed payload, and the signature information in the request header
Encrypted data
In the previous step, the data was fully partitioned. In this node, we will use SignedPayload and Secret. We will use the Crypto node to encrypt the data.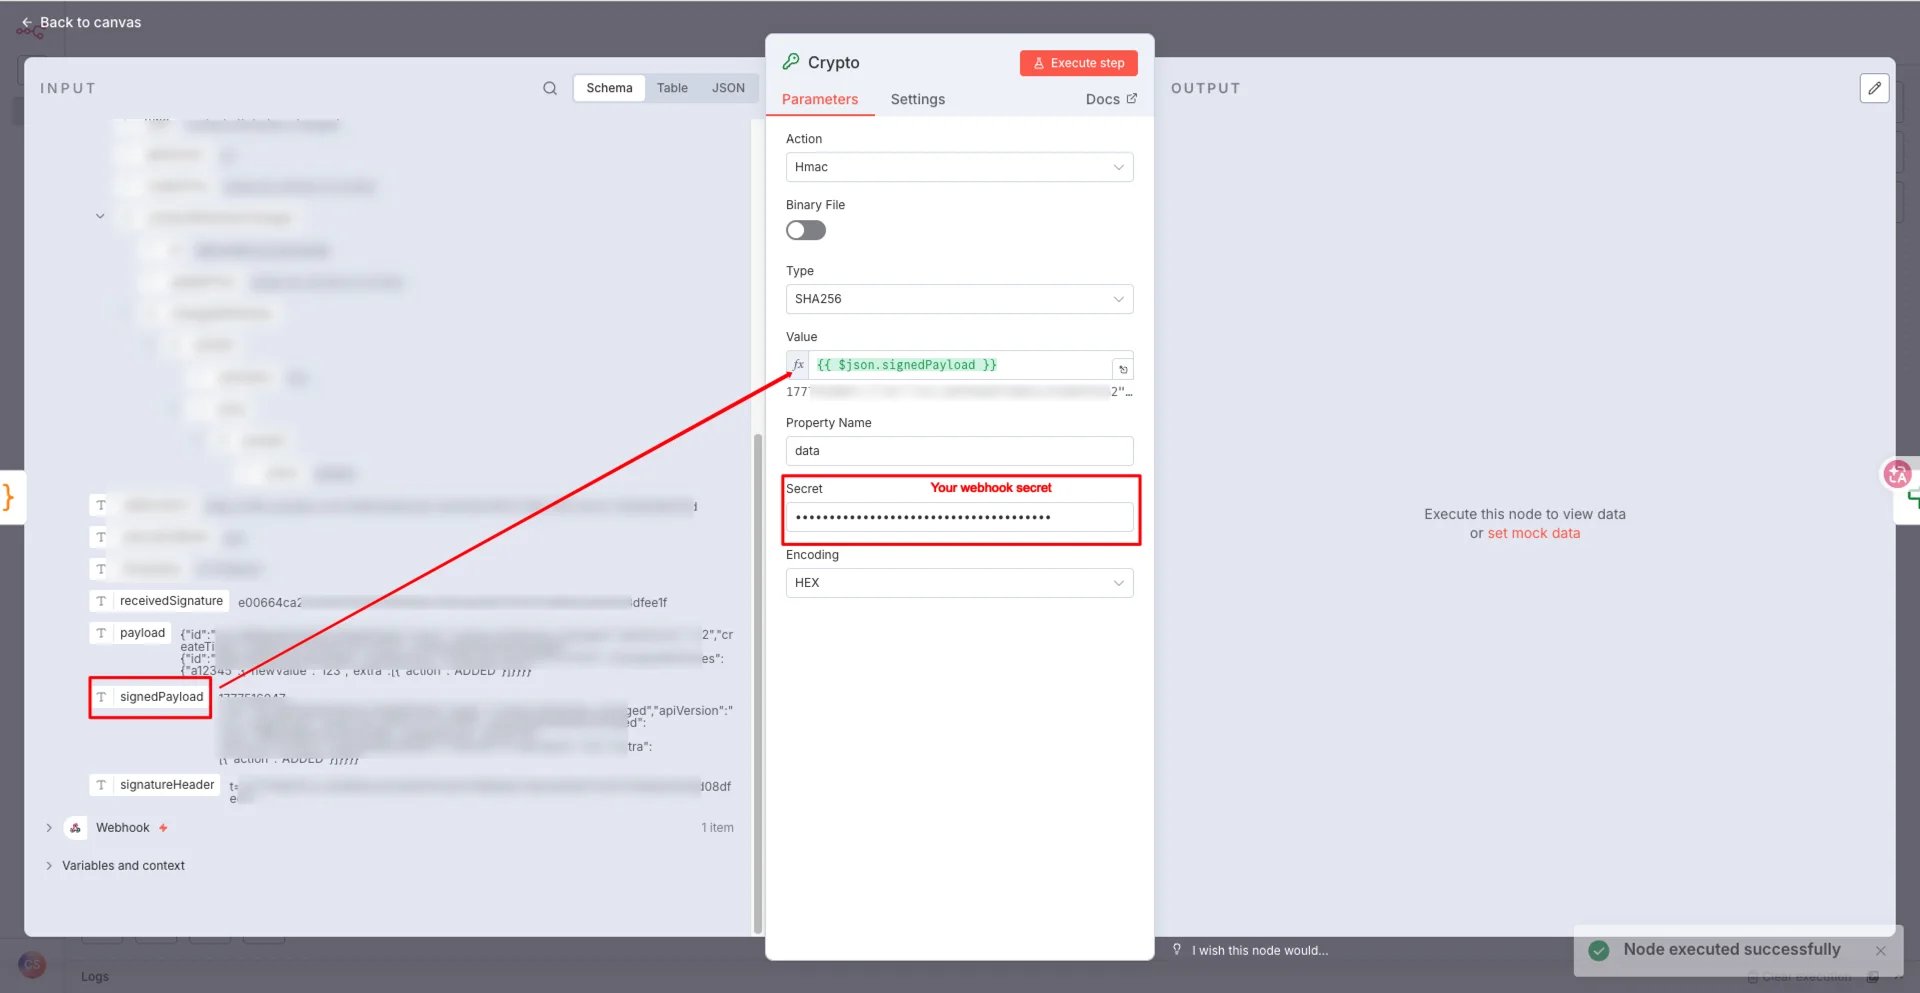
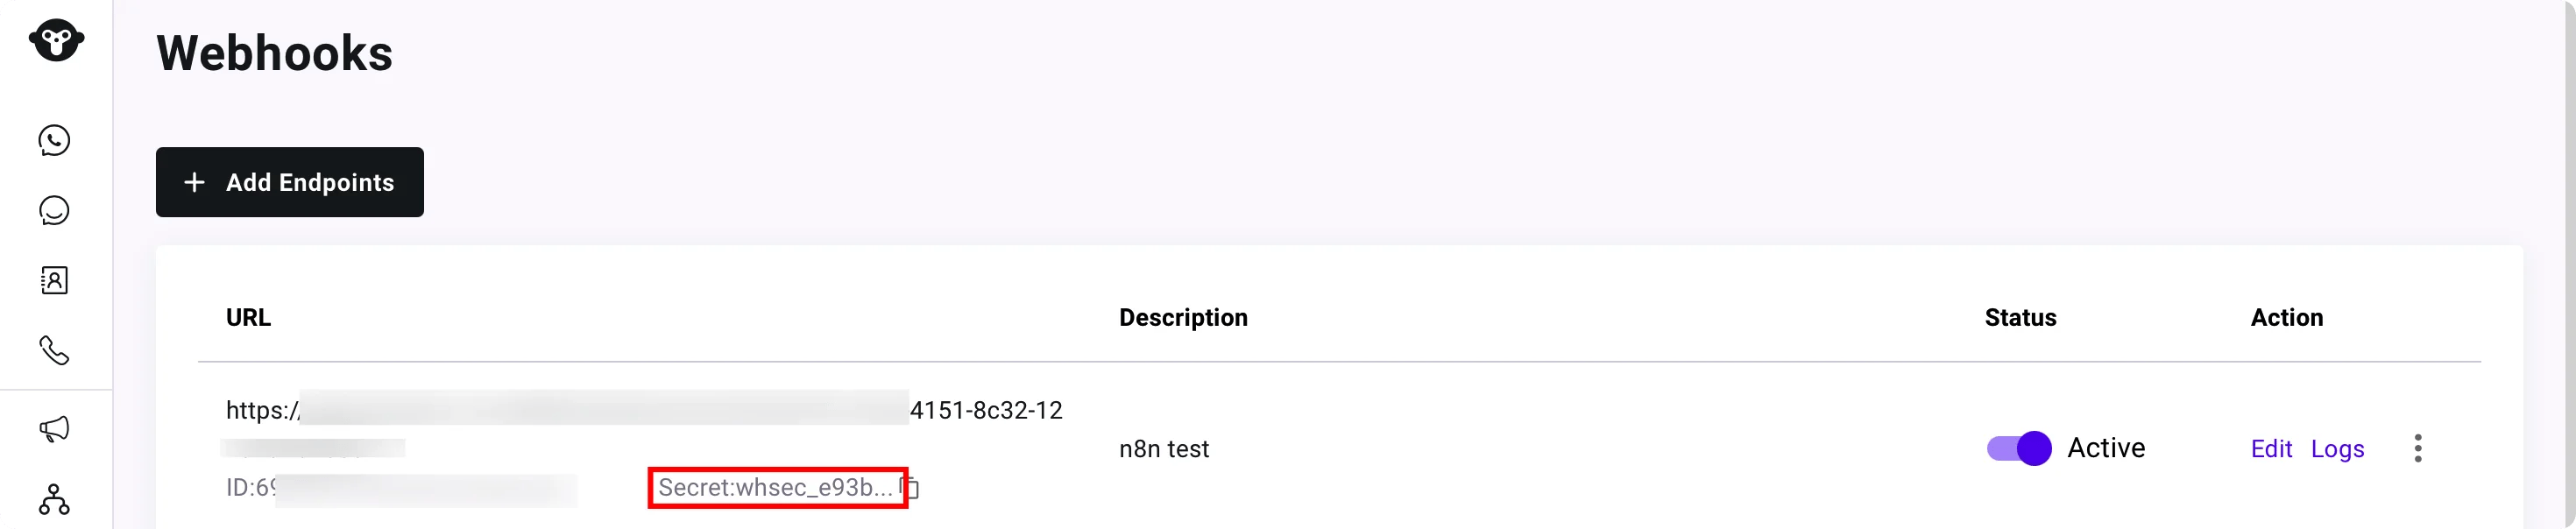
Compare signatures
Use an if statement to verify the signature information; if it matches, the verification is considered successful.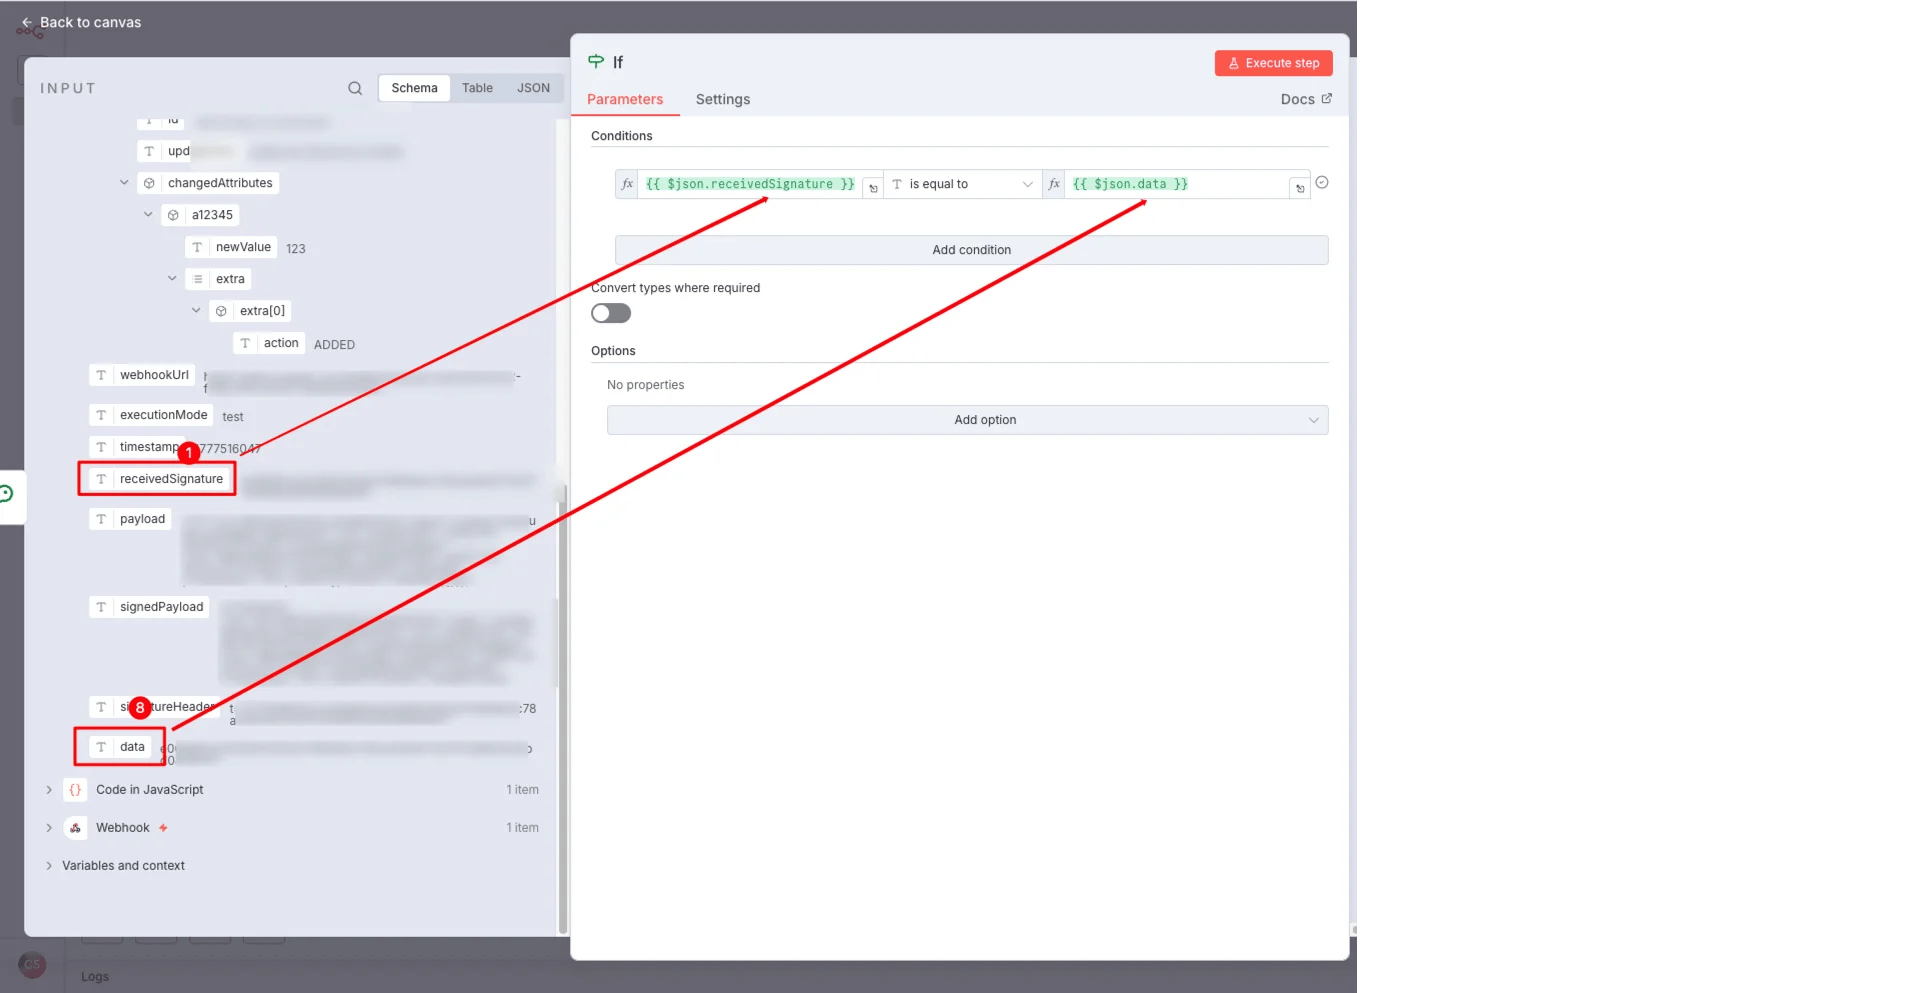
Reply to messages using AI
Once you have subscribed to thewhatsapp.inbound_message.received and whatsapp.message.updated events, you will receive a push notification when a message is received, or a follow-up status update after a message has been sent.
- Use the
switchnode to configure multiple webhook notification types.
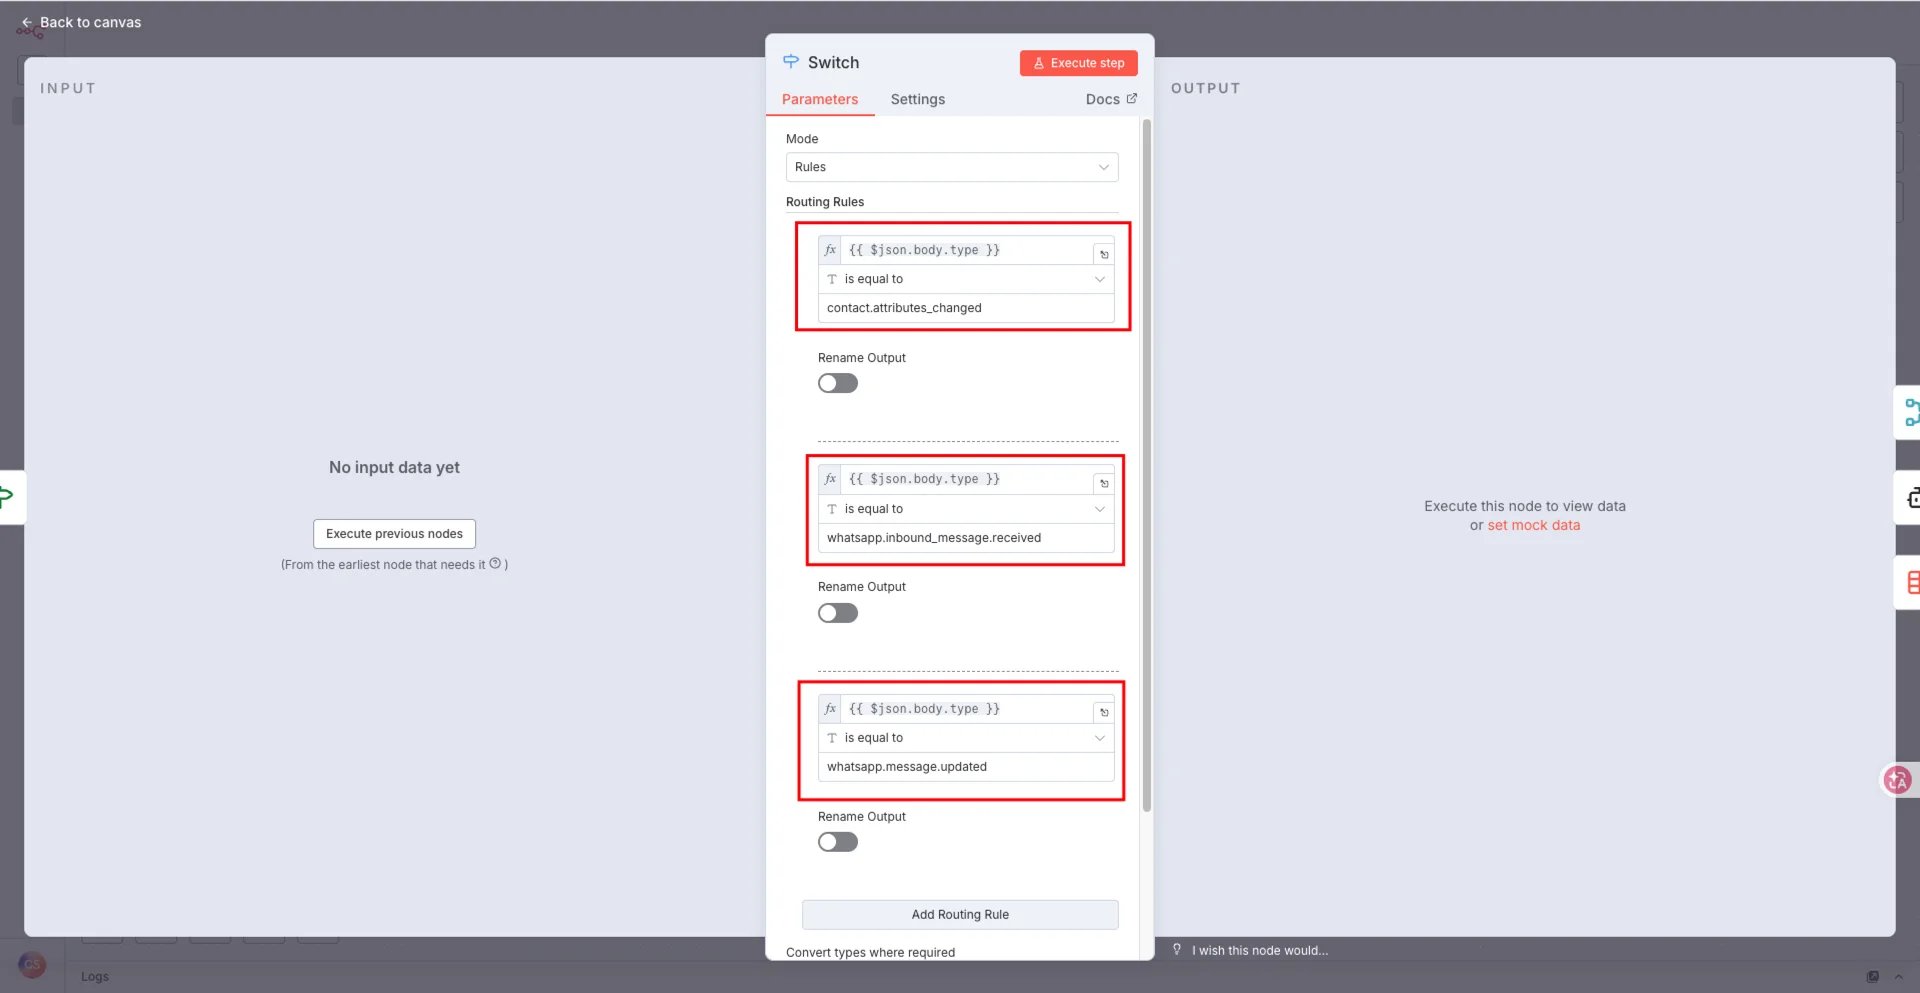
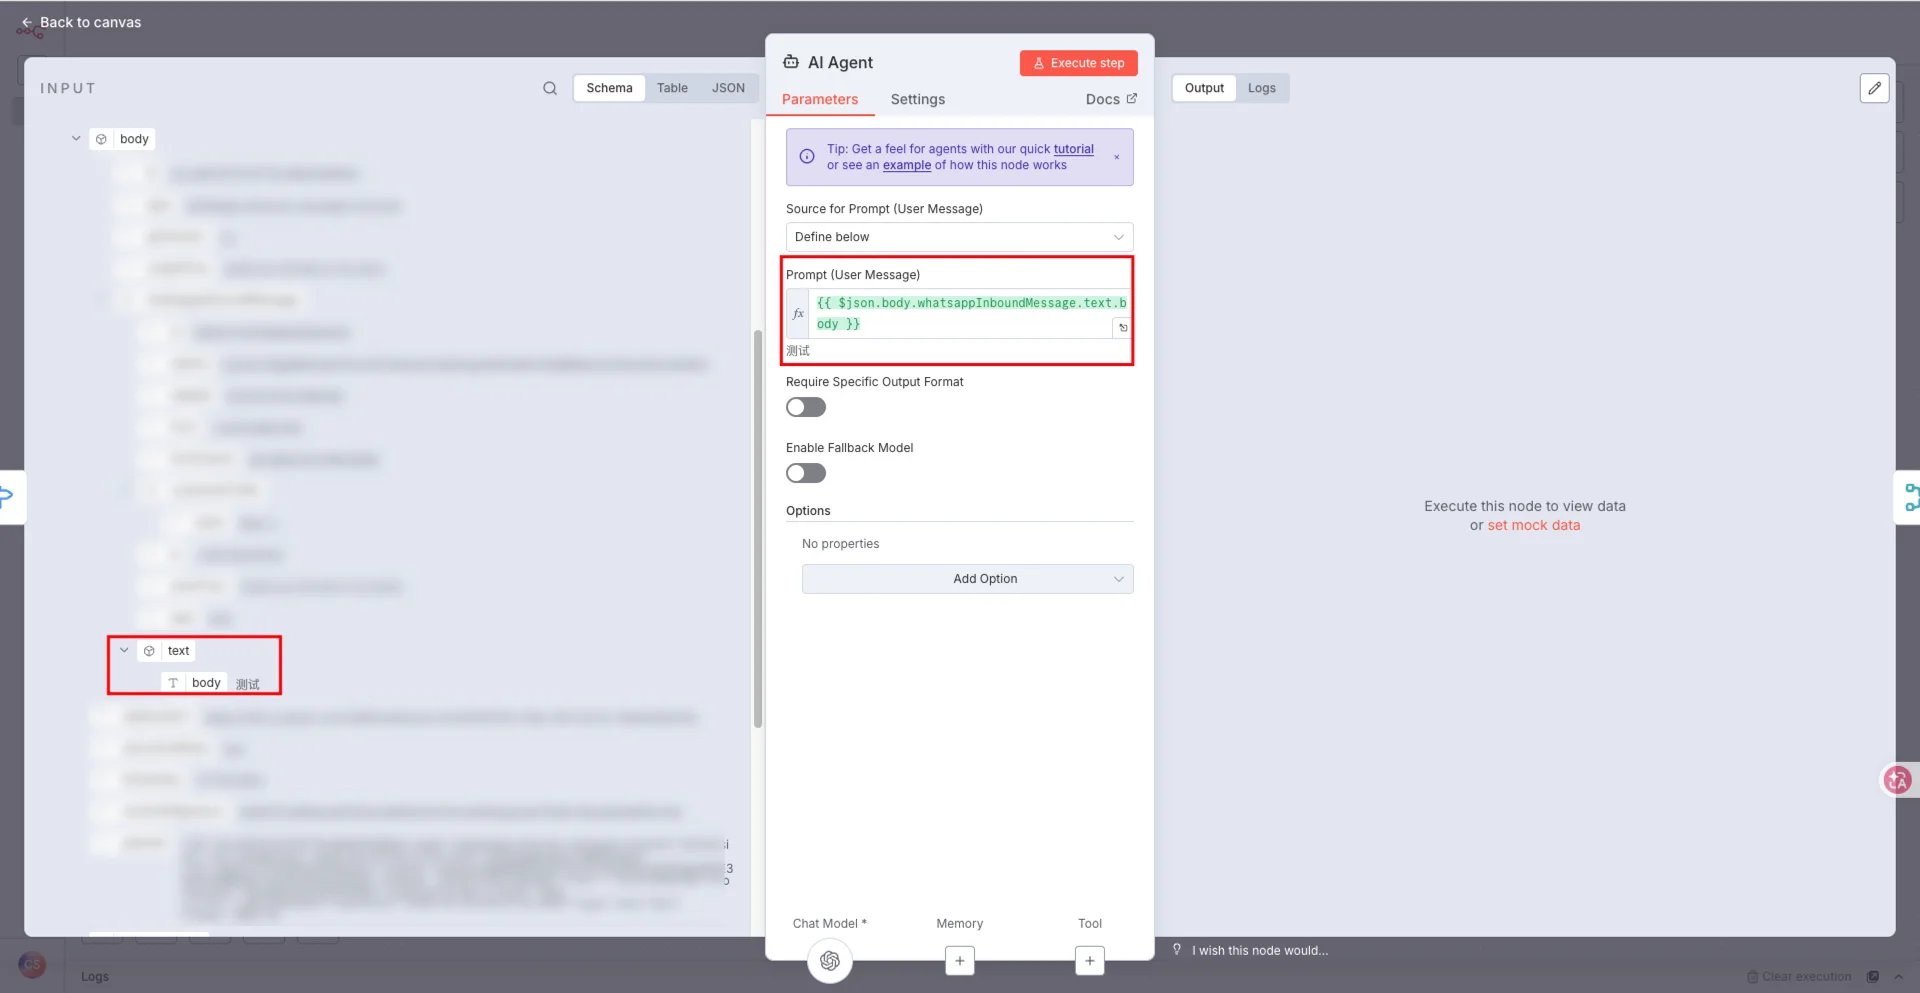
- When an
inbound_message_receivedevent is received, a reply can be generated by calling the AI API
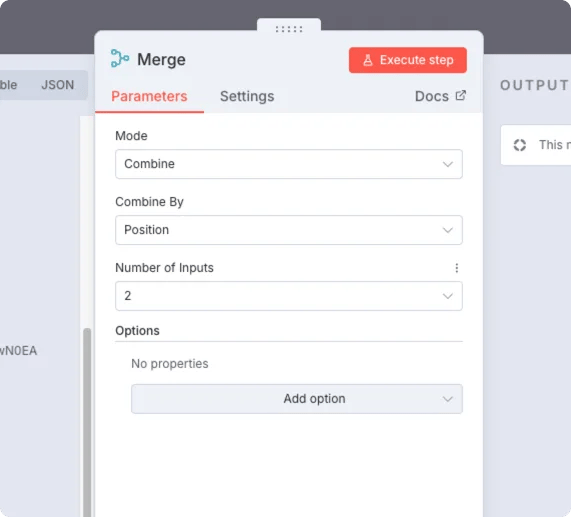
- Use the merge node to retain the collection of webhook push data from the preceding section
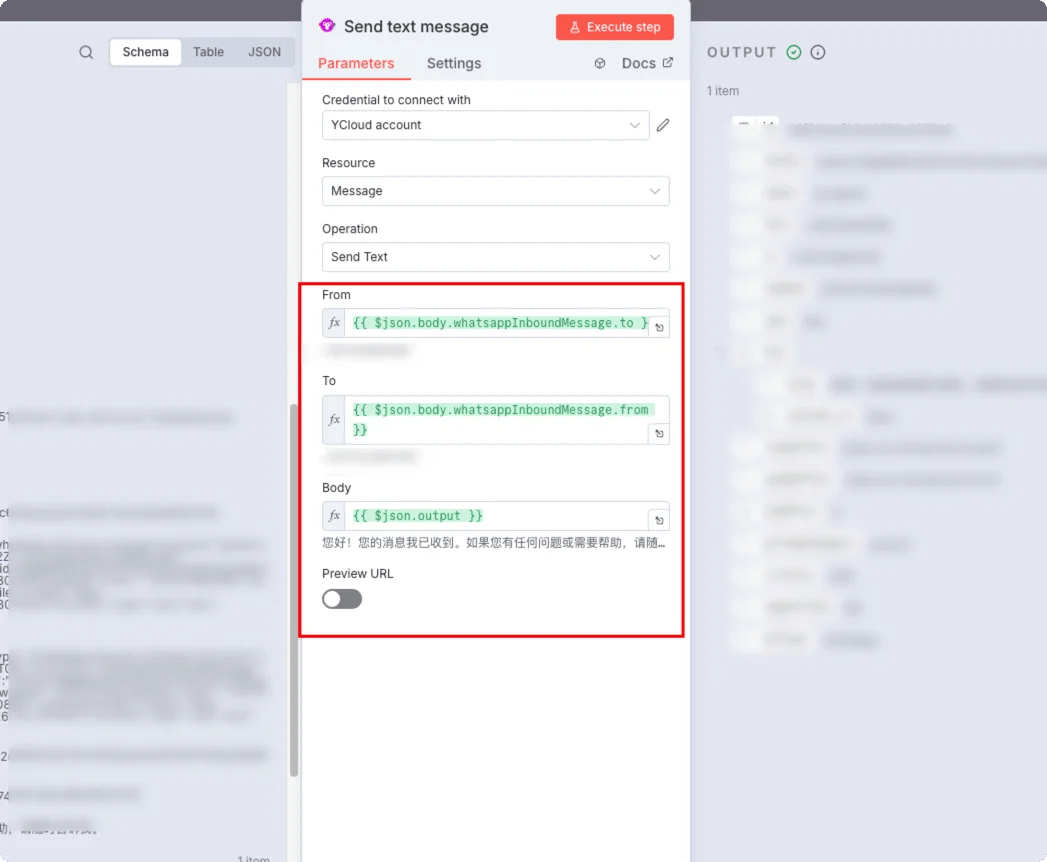
- Sending messages using YCloud nodes
Save to a data table (optional)
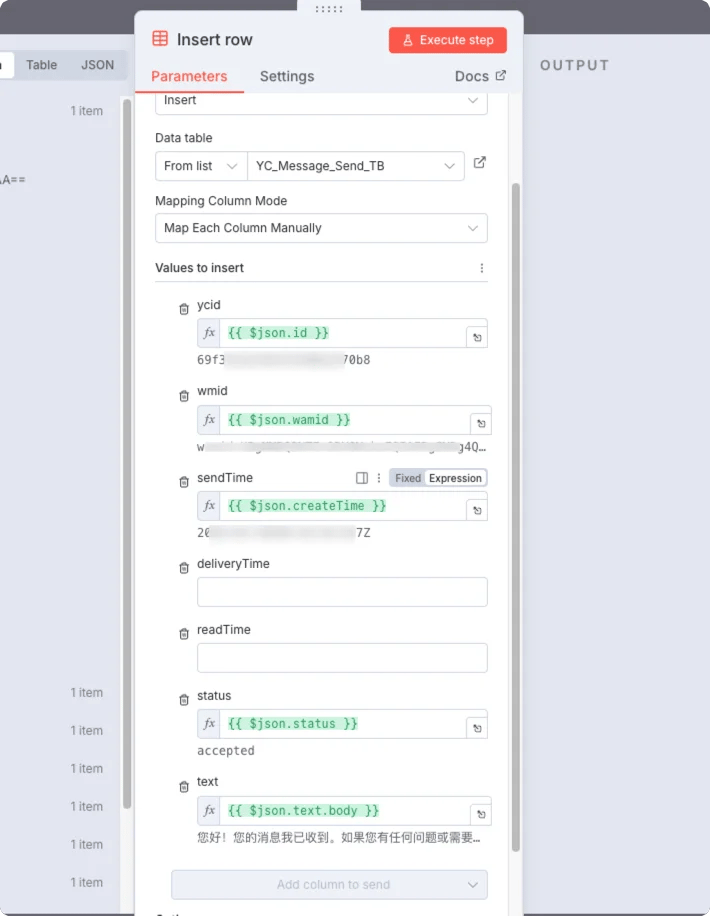
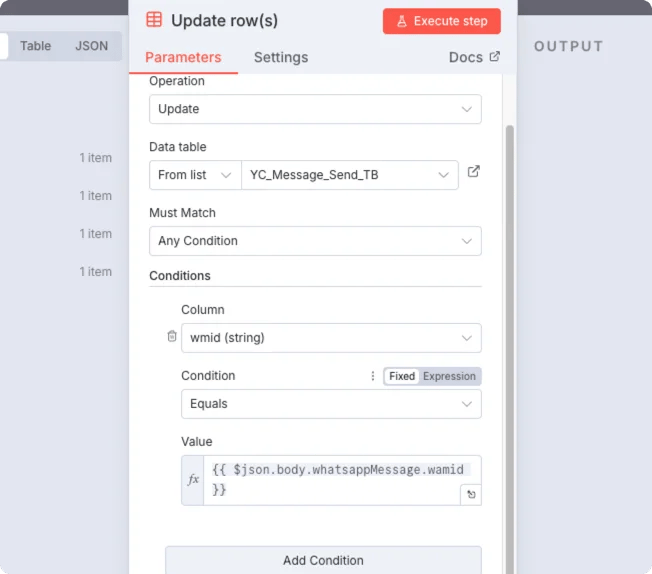
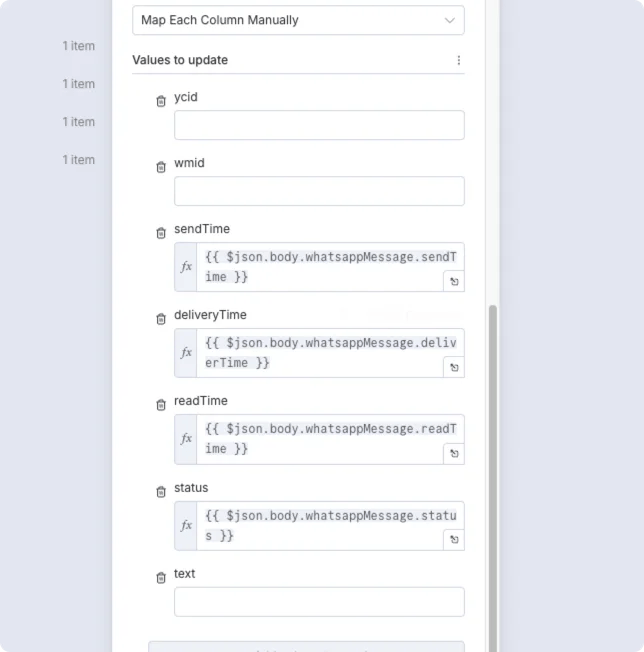
Monitor subsequent updates to the message sent (optional)
Once step 5 is complete, the data will be pushed via thewhatsapp.message.update event.
Upon receiving this push, you can use the datatable - update rows node to update the data table, thereby tracking the entire message delivery process.