

- Welcome message (Feature Deprecation)
- Ice breaker
- Auto-reply for unassigned conversation
- Auto-reply for in queue conversations
- Auto-reply for delayed agent responses
- Auto-close Inbox conversations
- CSAT
WhatsApp accounts > Number Settings > Inbox > Automations

Open Inbox > Automations to review the available settings for this number.
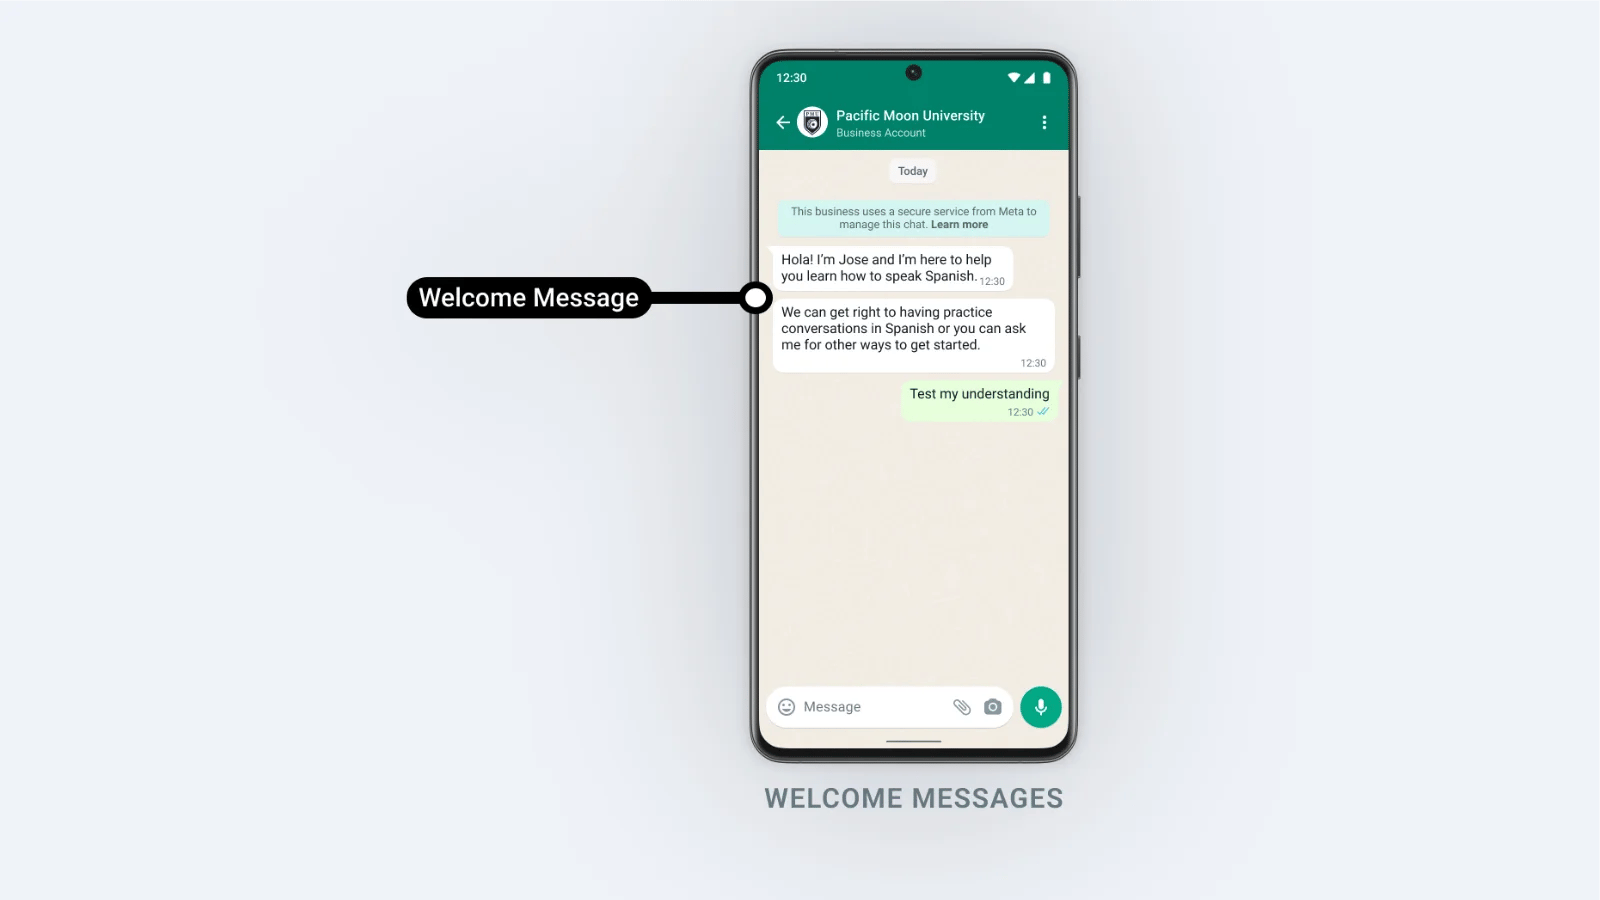
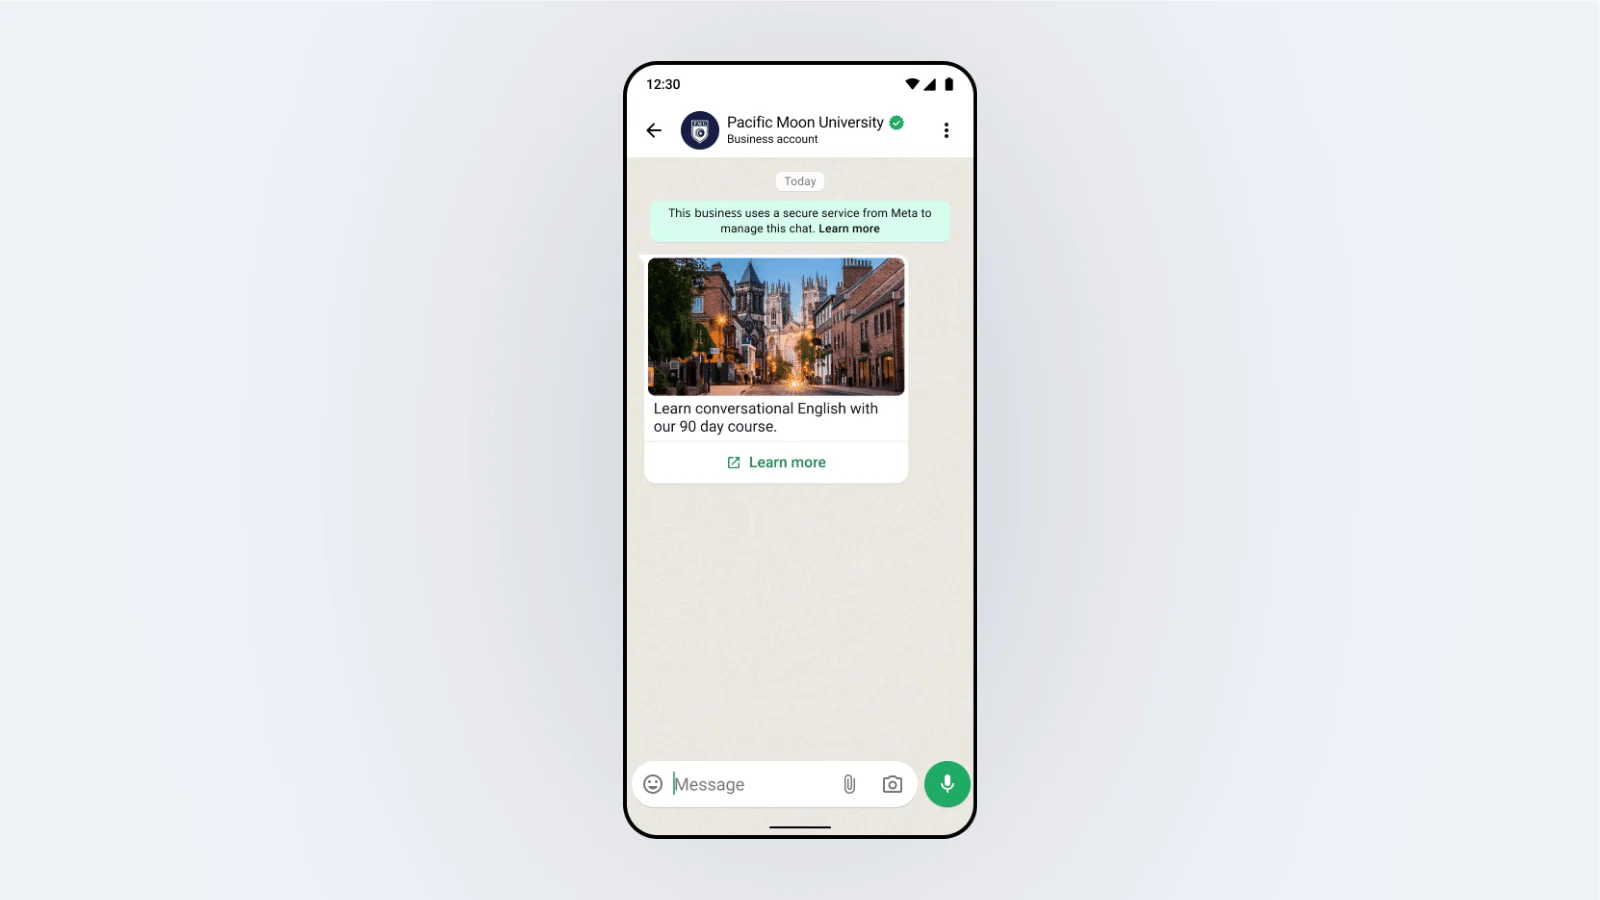
Welcome message (Feature Deprecation)
Timing of sending: Whenever a WhatsApp user fist opens a chat window with you.Note: It is triggered when the customer first opens a chat window with you, even before they send any message to you.
Steps
Step 1: Enable the welcome message switch
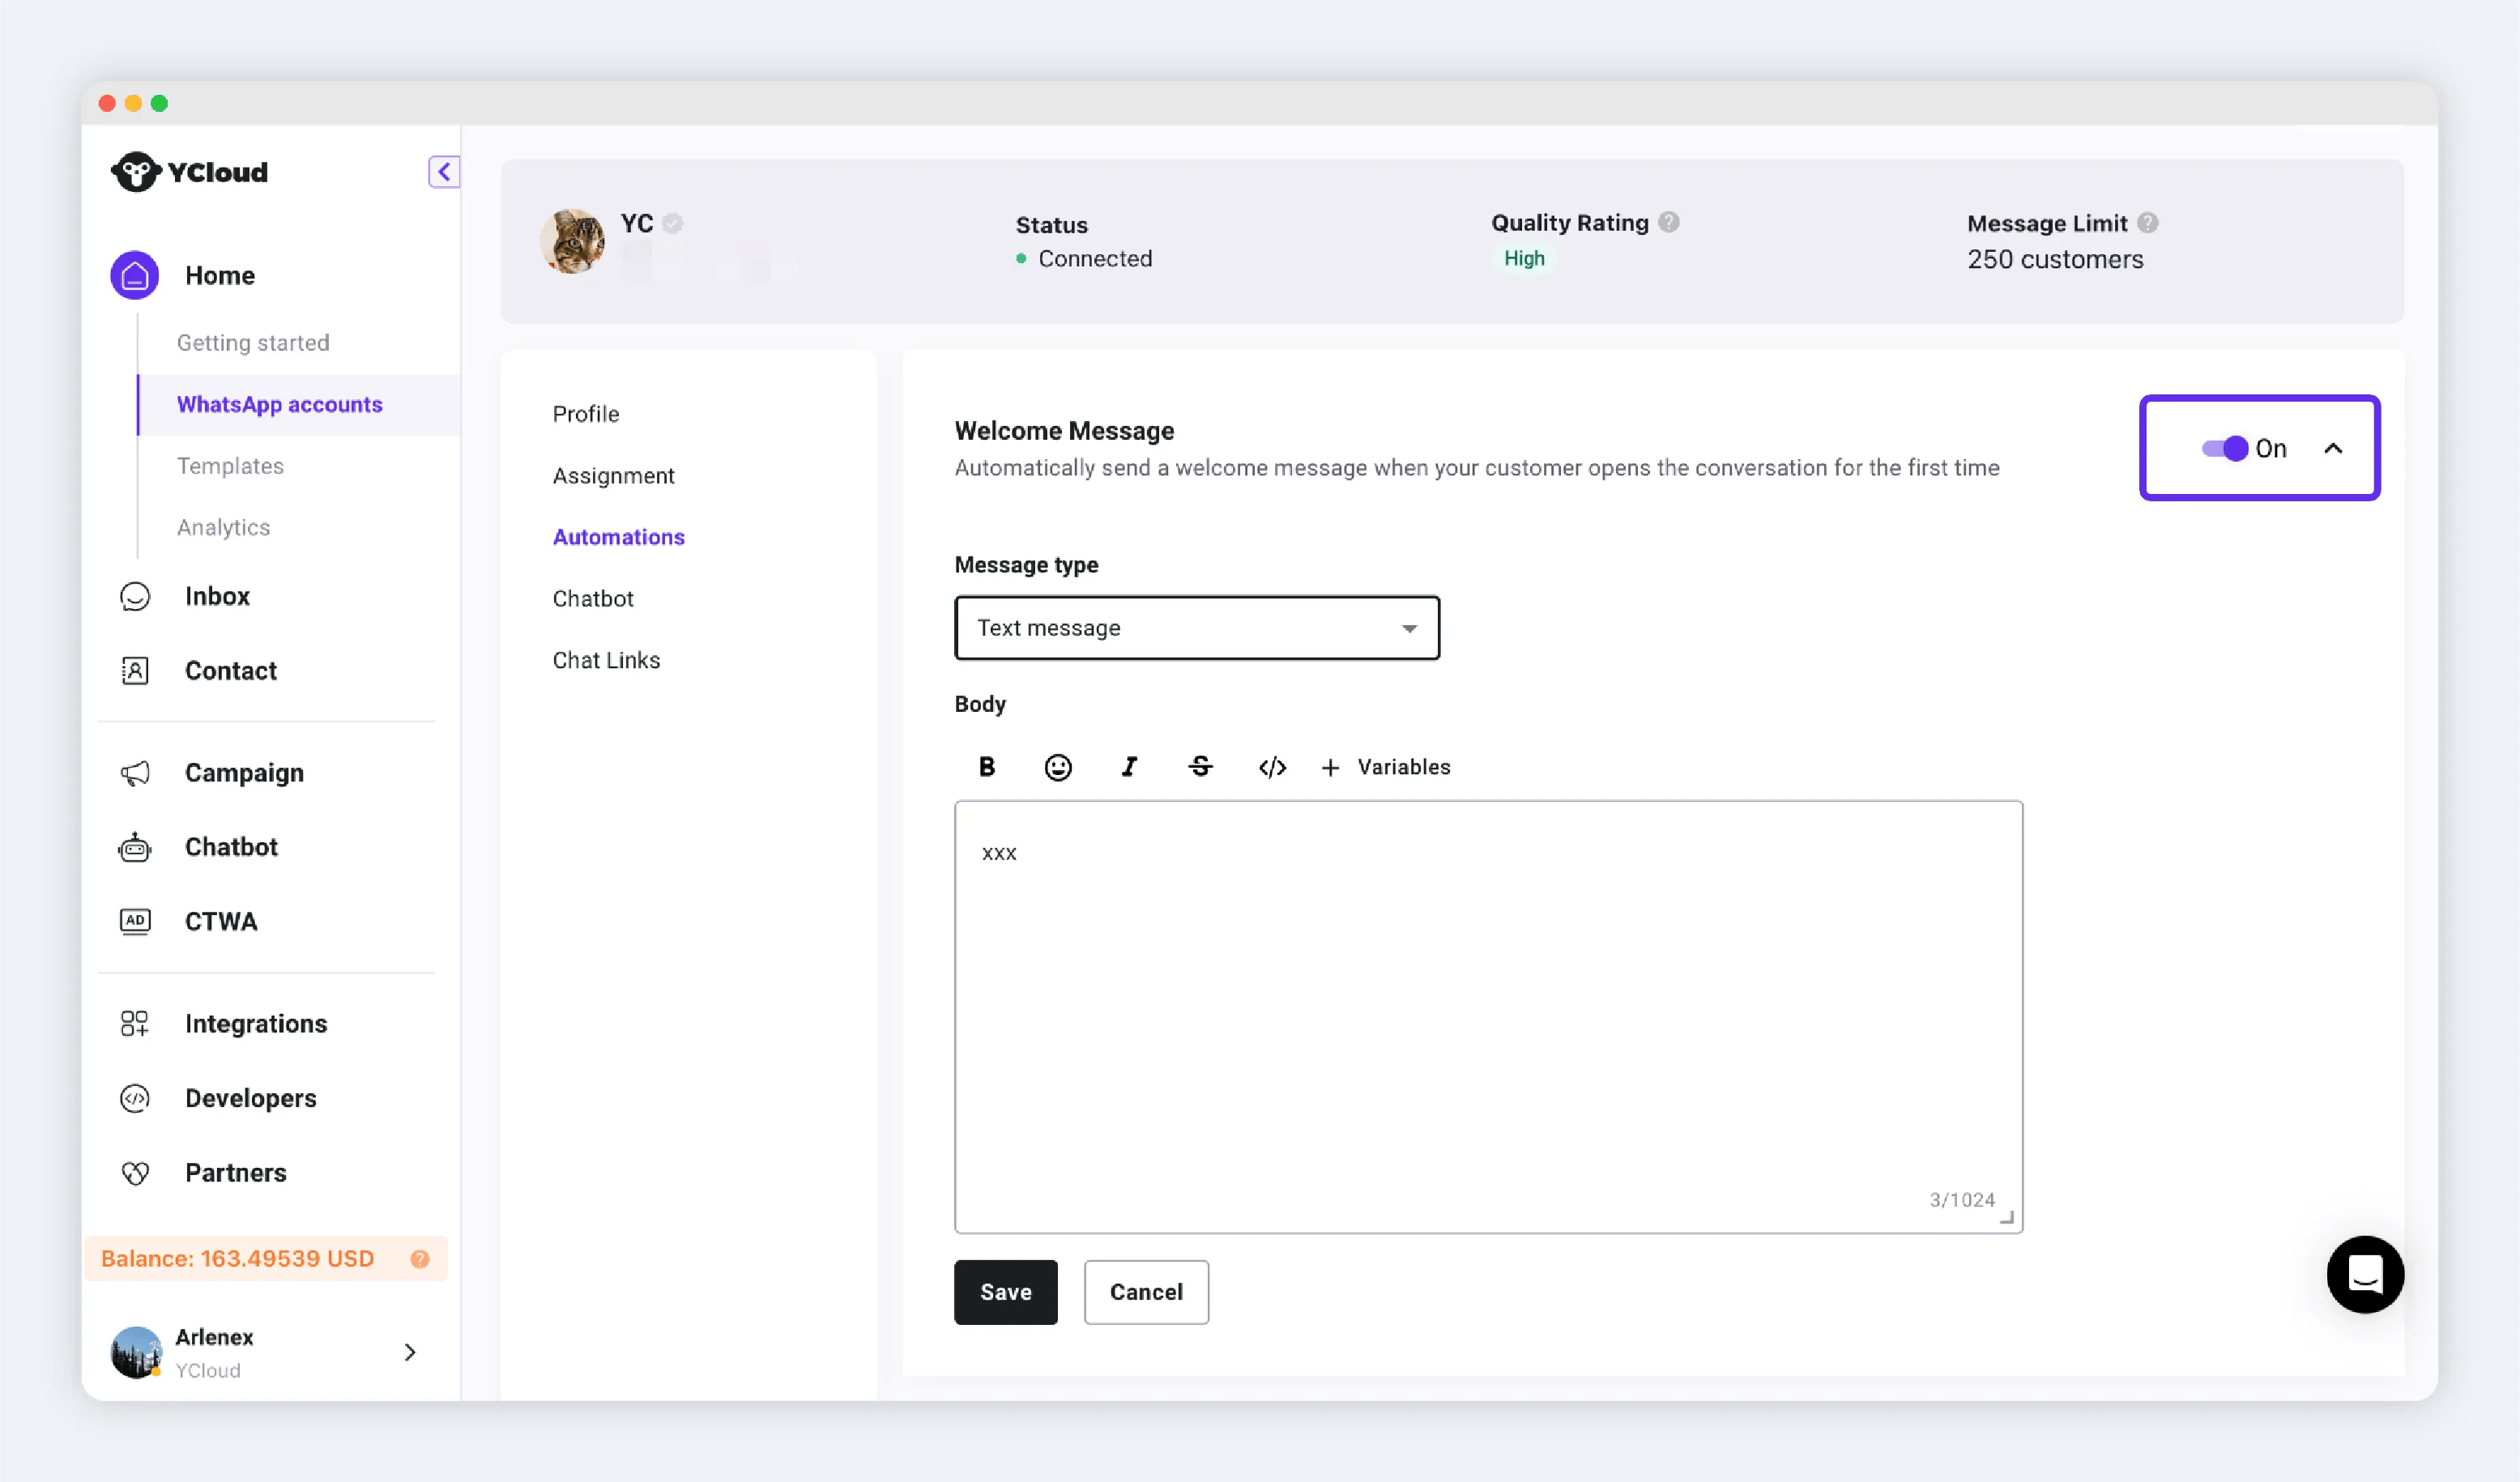
Step 2: Edit the auto-reply message content
Supported message types:- Text message: Pure text type message. Supports Emoji, bold, italic, etc.
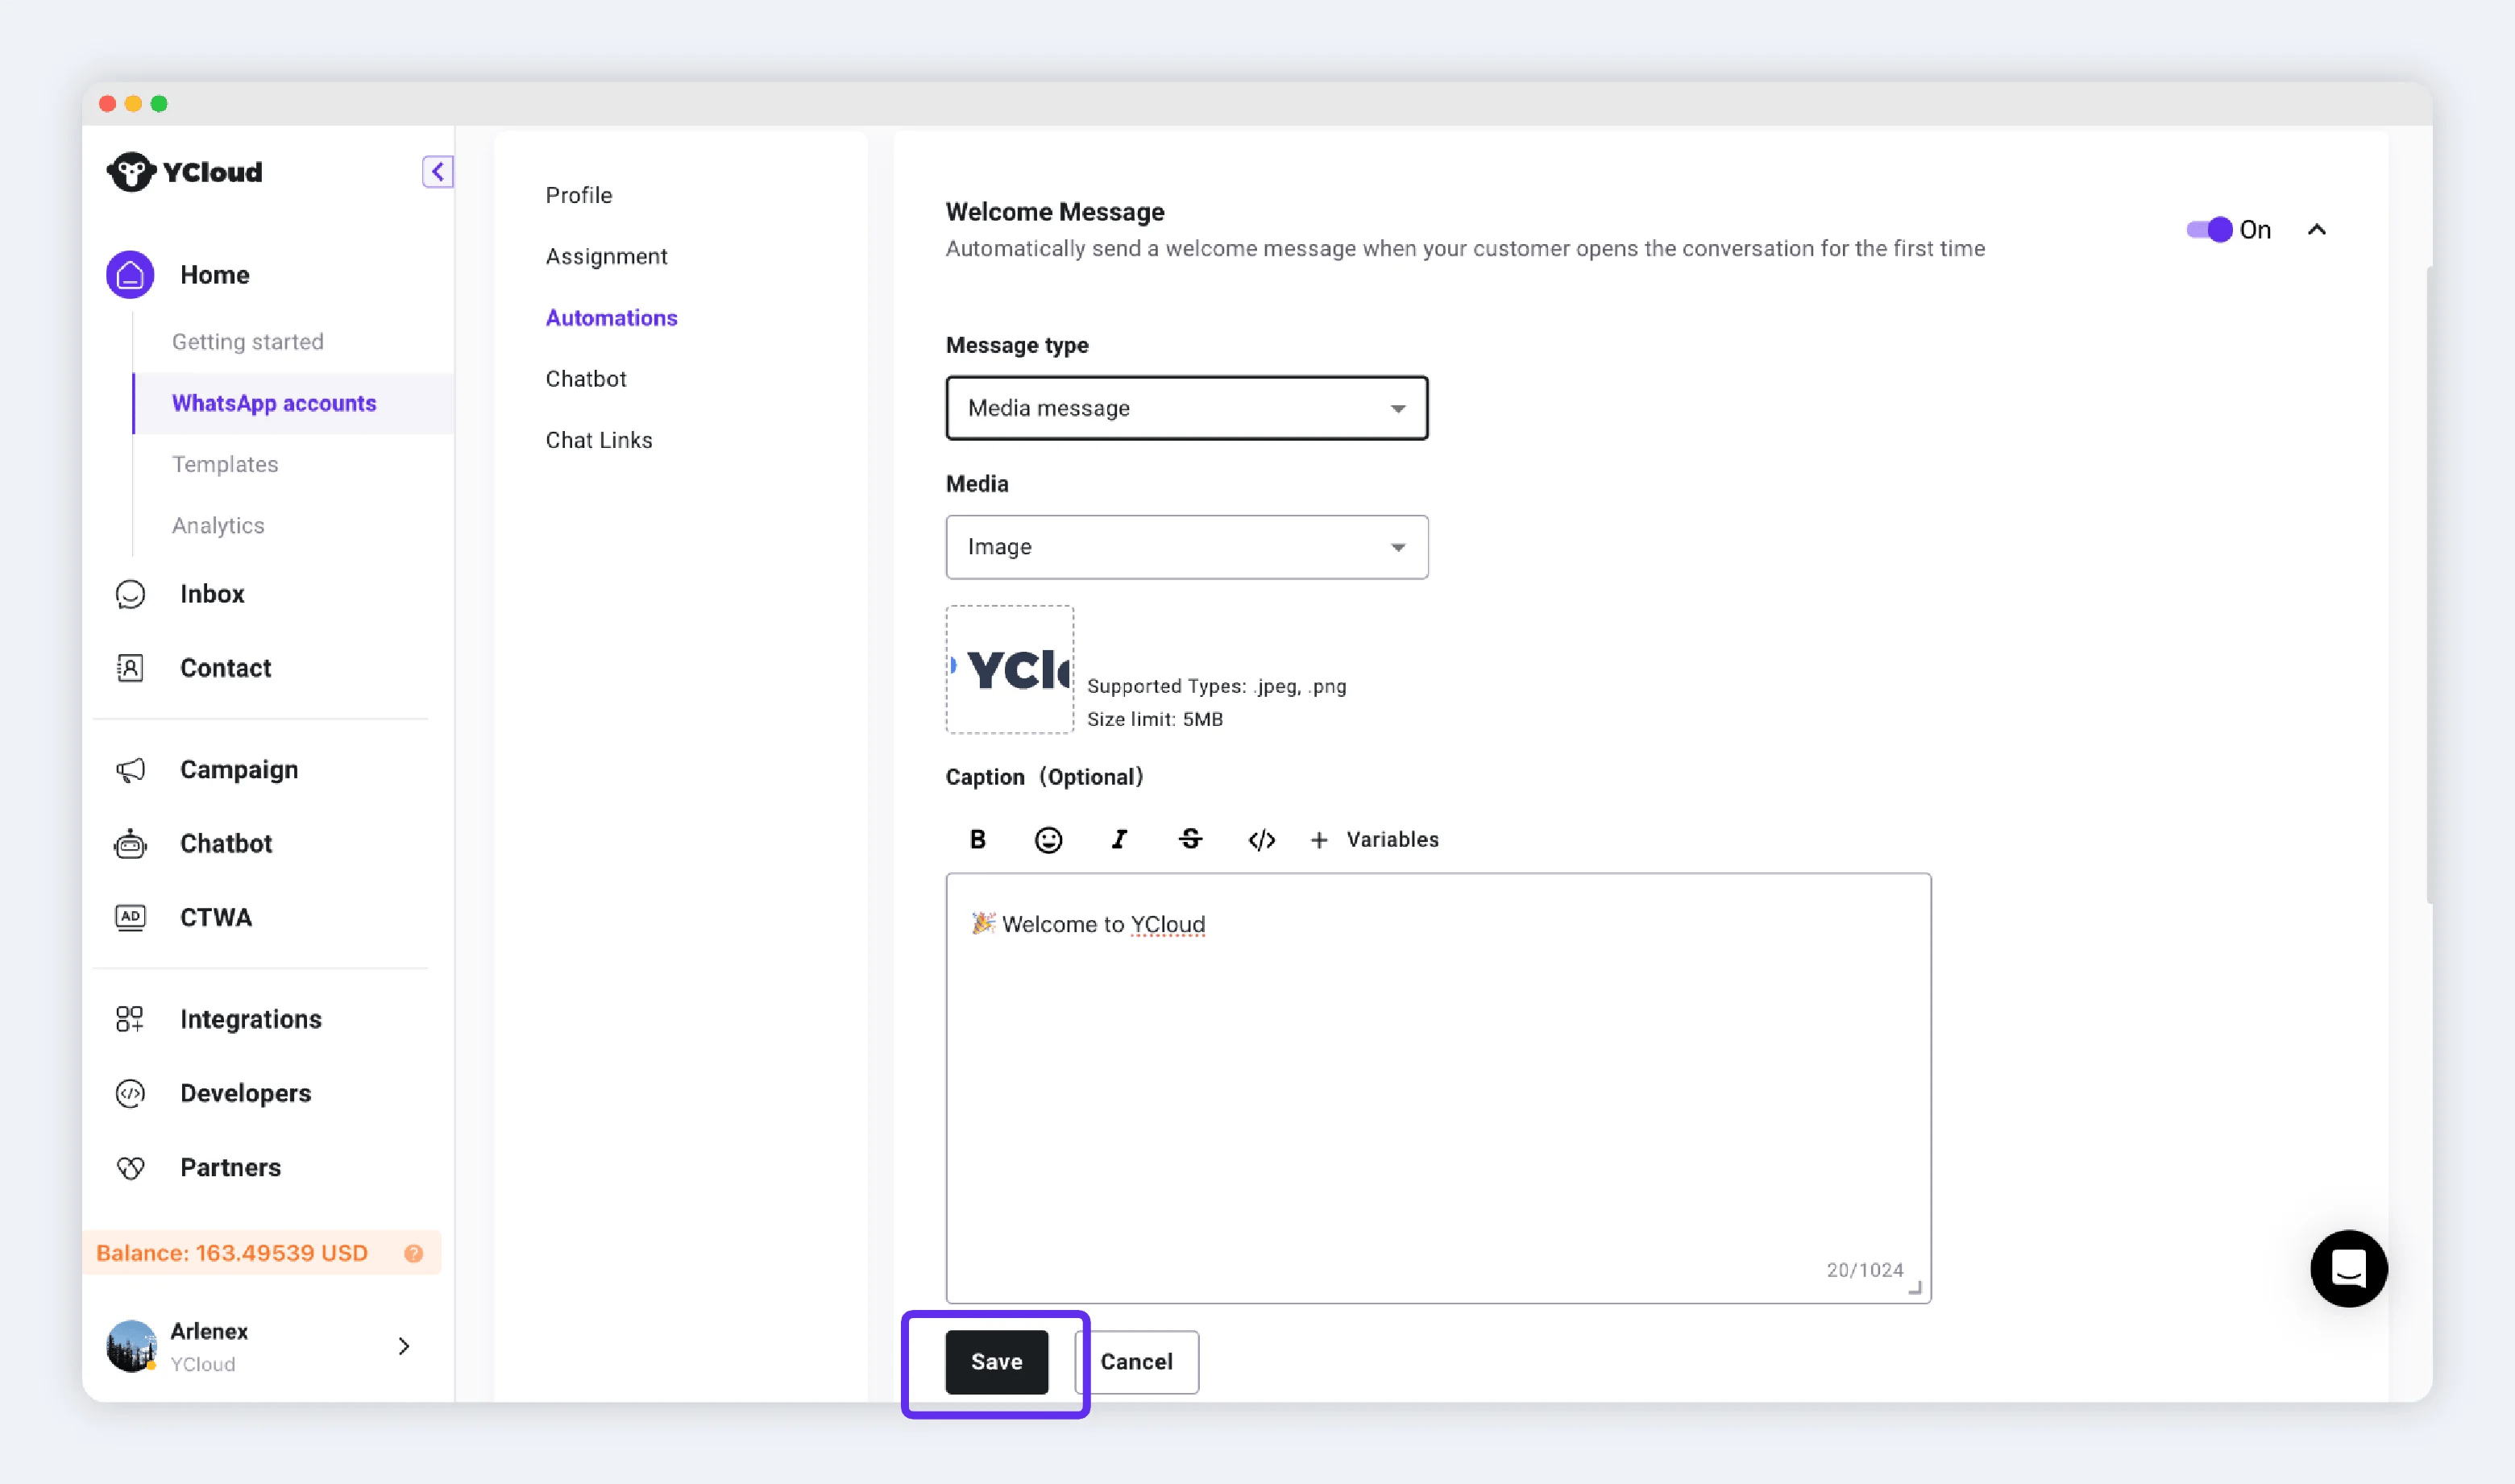
- Rich media message: Image/video/file + text type message.
- Interactive message: Interactive messages with buttons, such as quick reply buttons, view website buttons, list buttons.
Note: For interactive messages, if you want to use list buttons, the Header must be set to None or plain text Header.
Ice breakers
Ice breakers provide users with a way to start a conversation with a business through a list of common questions. When a user opens your chat window, a list of preset ice breaker phrases will appear in the user’s input box, and the user can send a message immediately by clicking on it.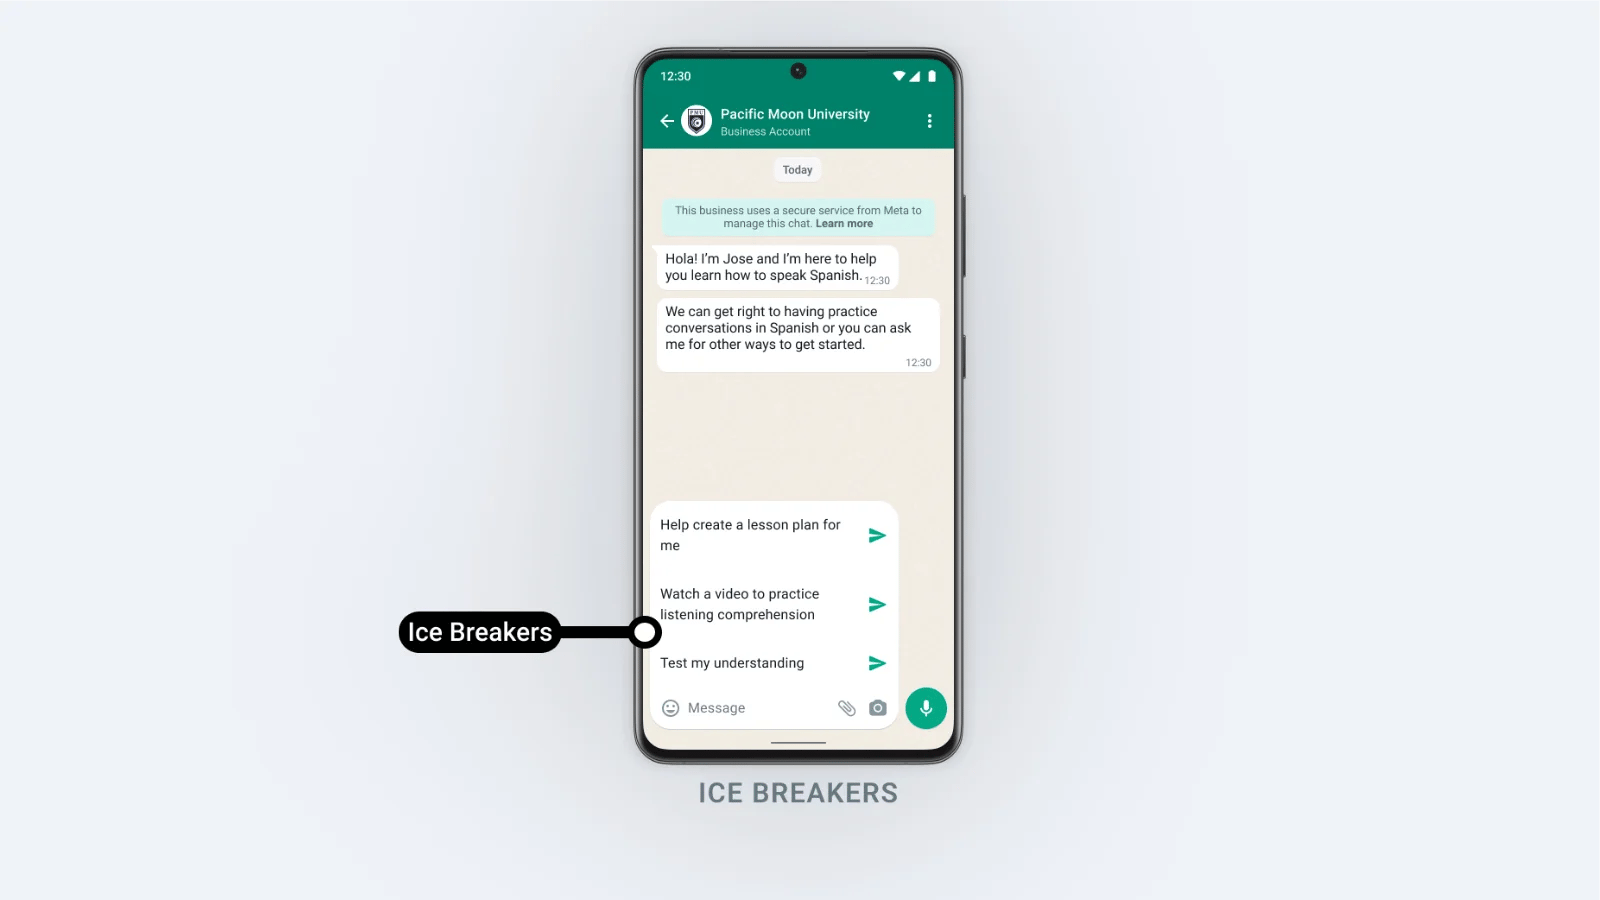
Steps
Step 1: Enable the ice breaker switch

Expand Ice breaker to review its prompts. The switch is off in this example.
Step 2: Set options
After setting the options, click Save.Auto-reply for unassigned conversations
When a conversation enters unassigned, which means no one is serving the conversation, the system automatically replies to the customer with a message to ensure timely response.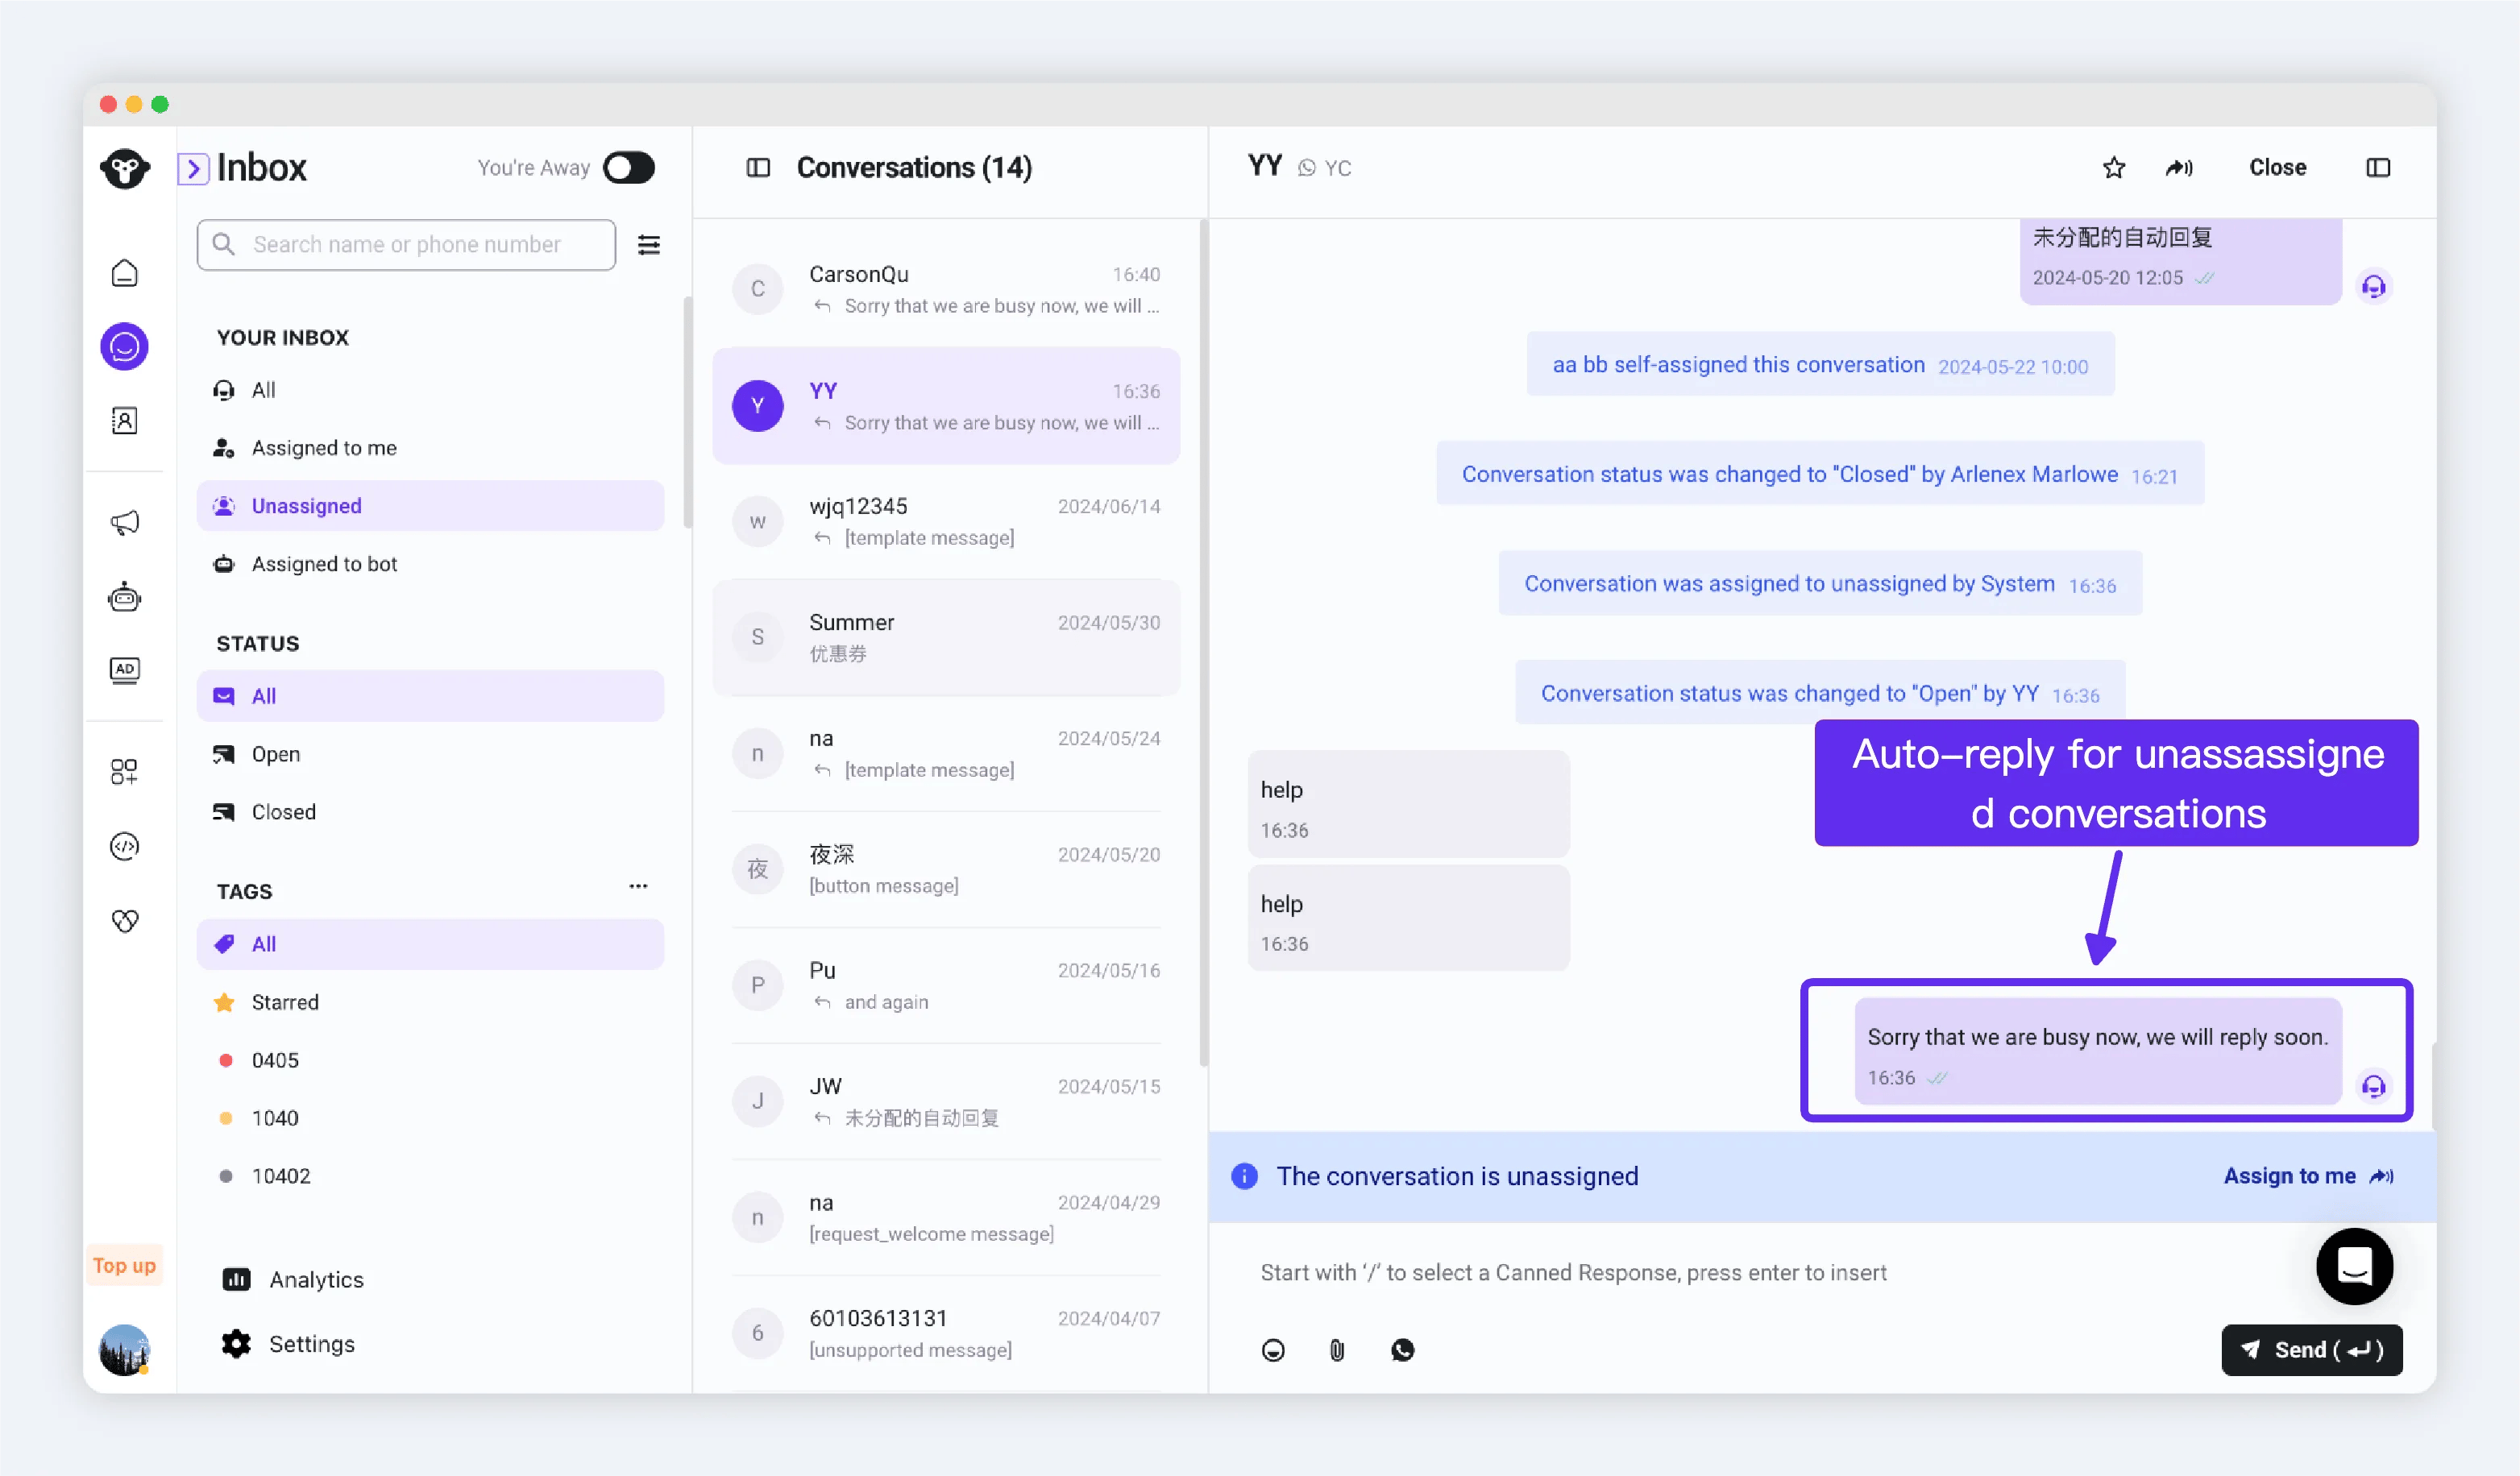
Steps
Step 1: Turn on the switch
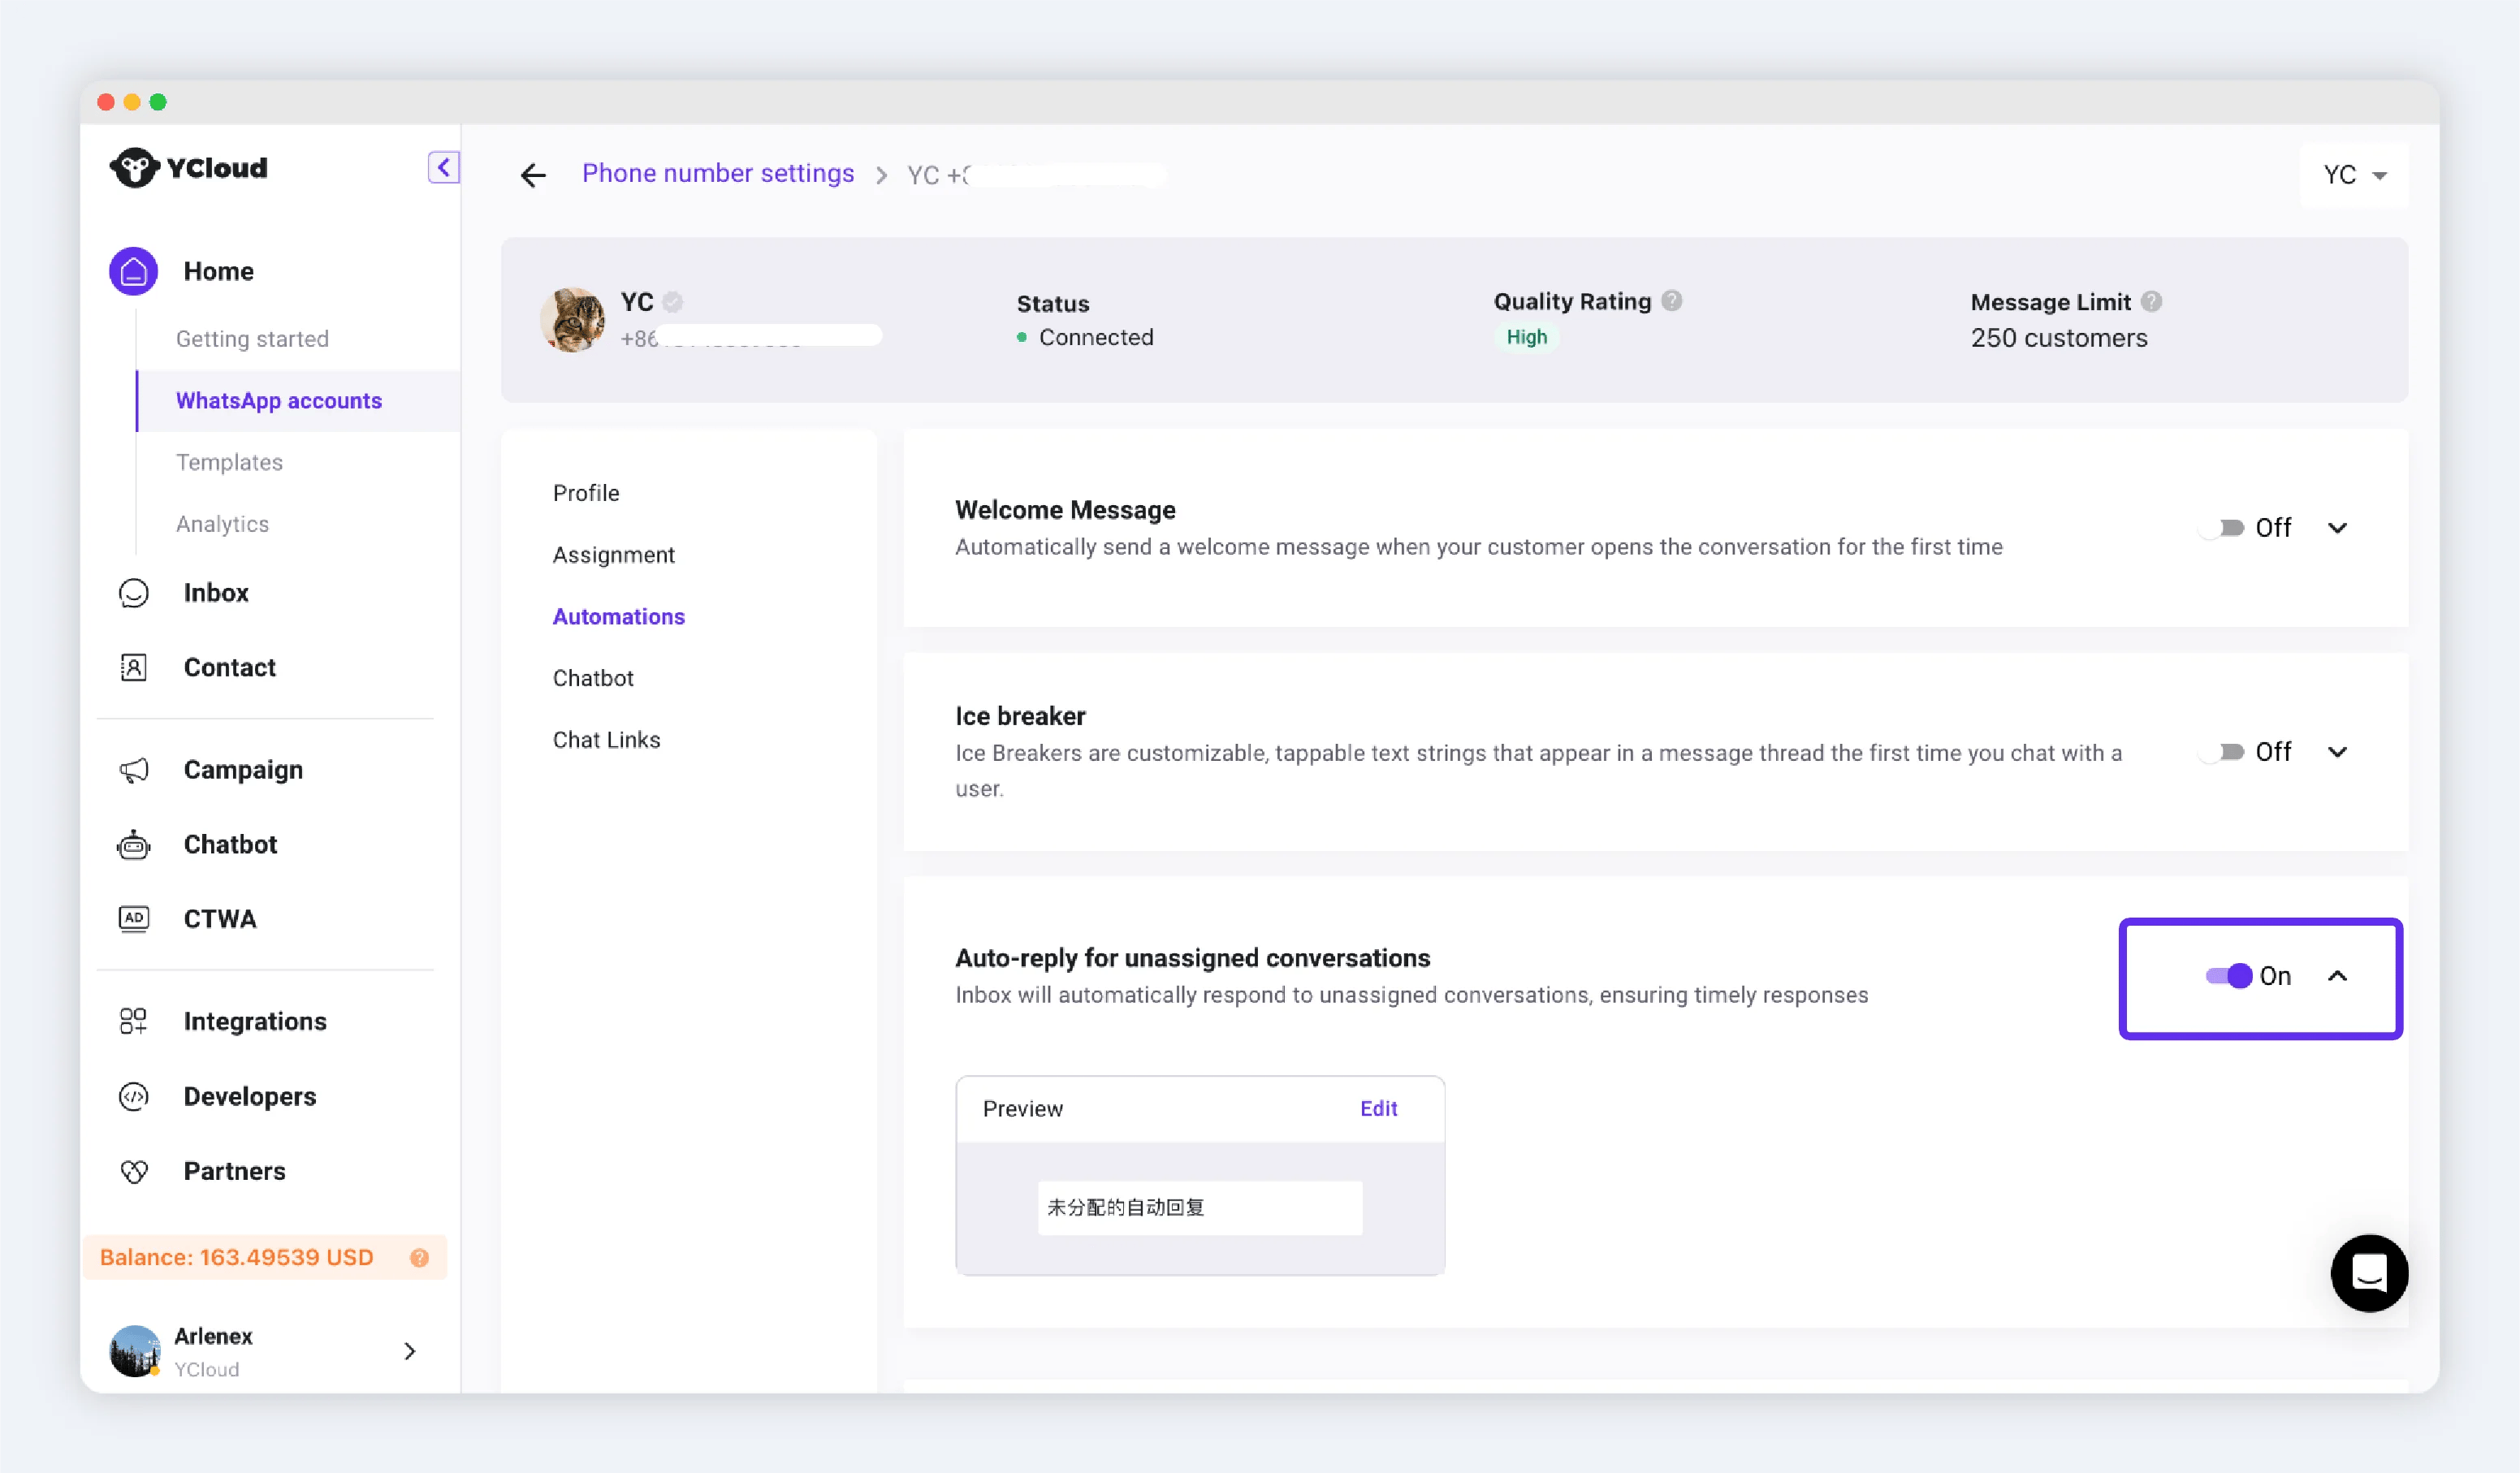
Step 2: Edit the auto-reply content
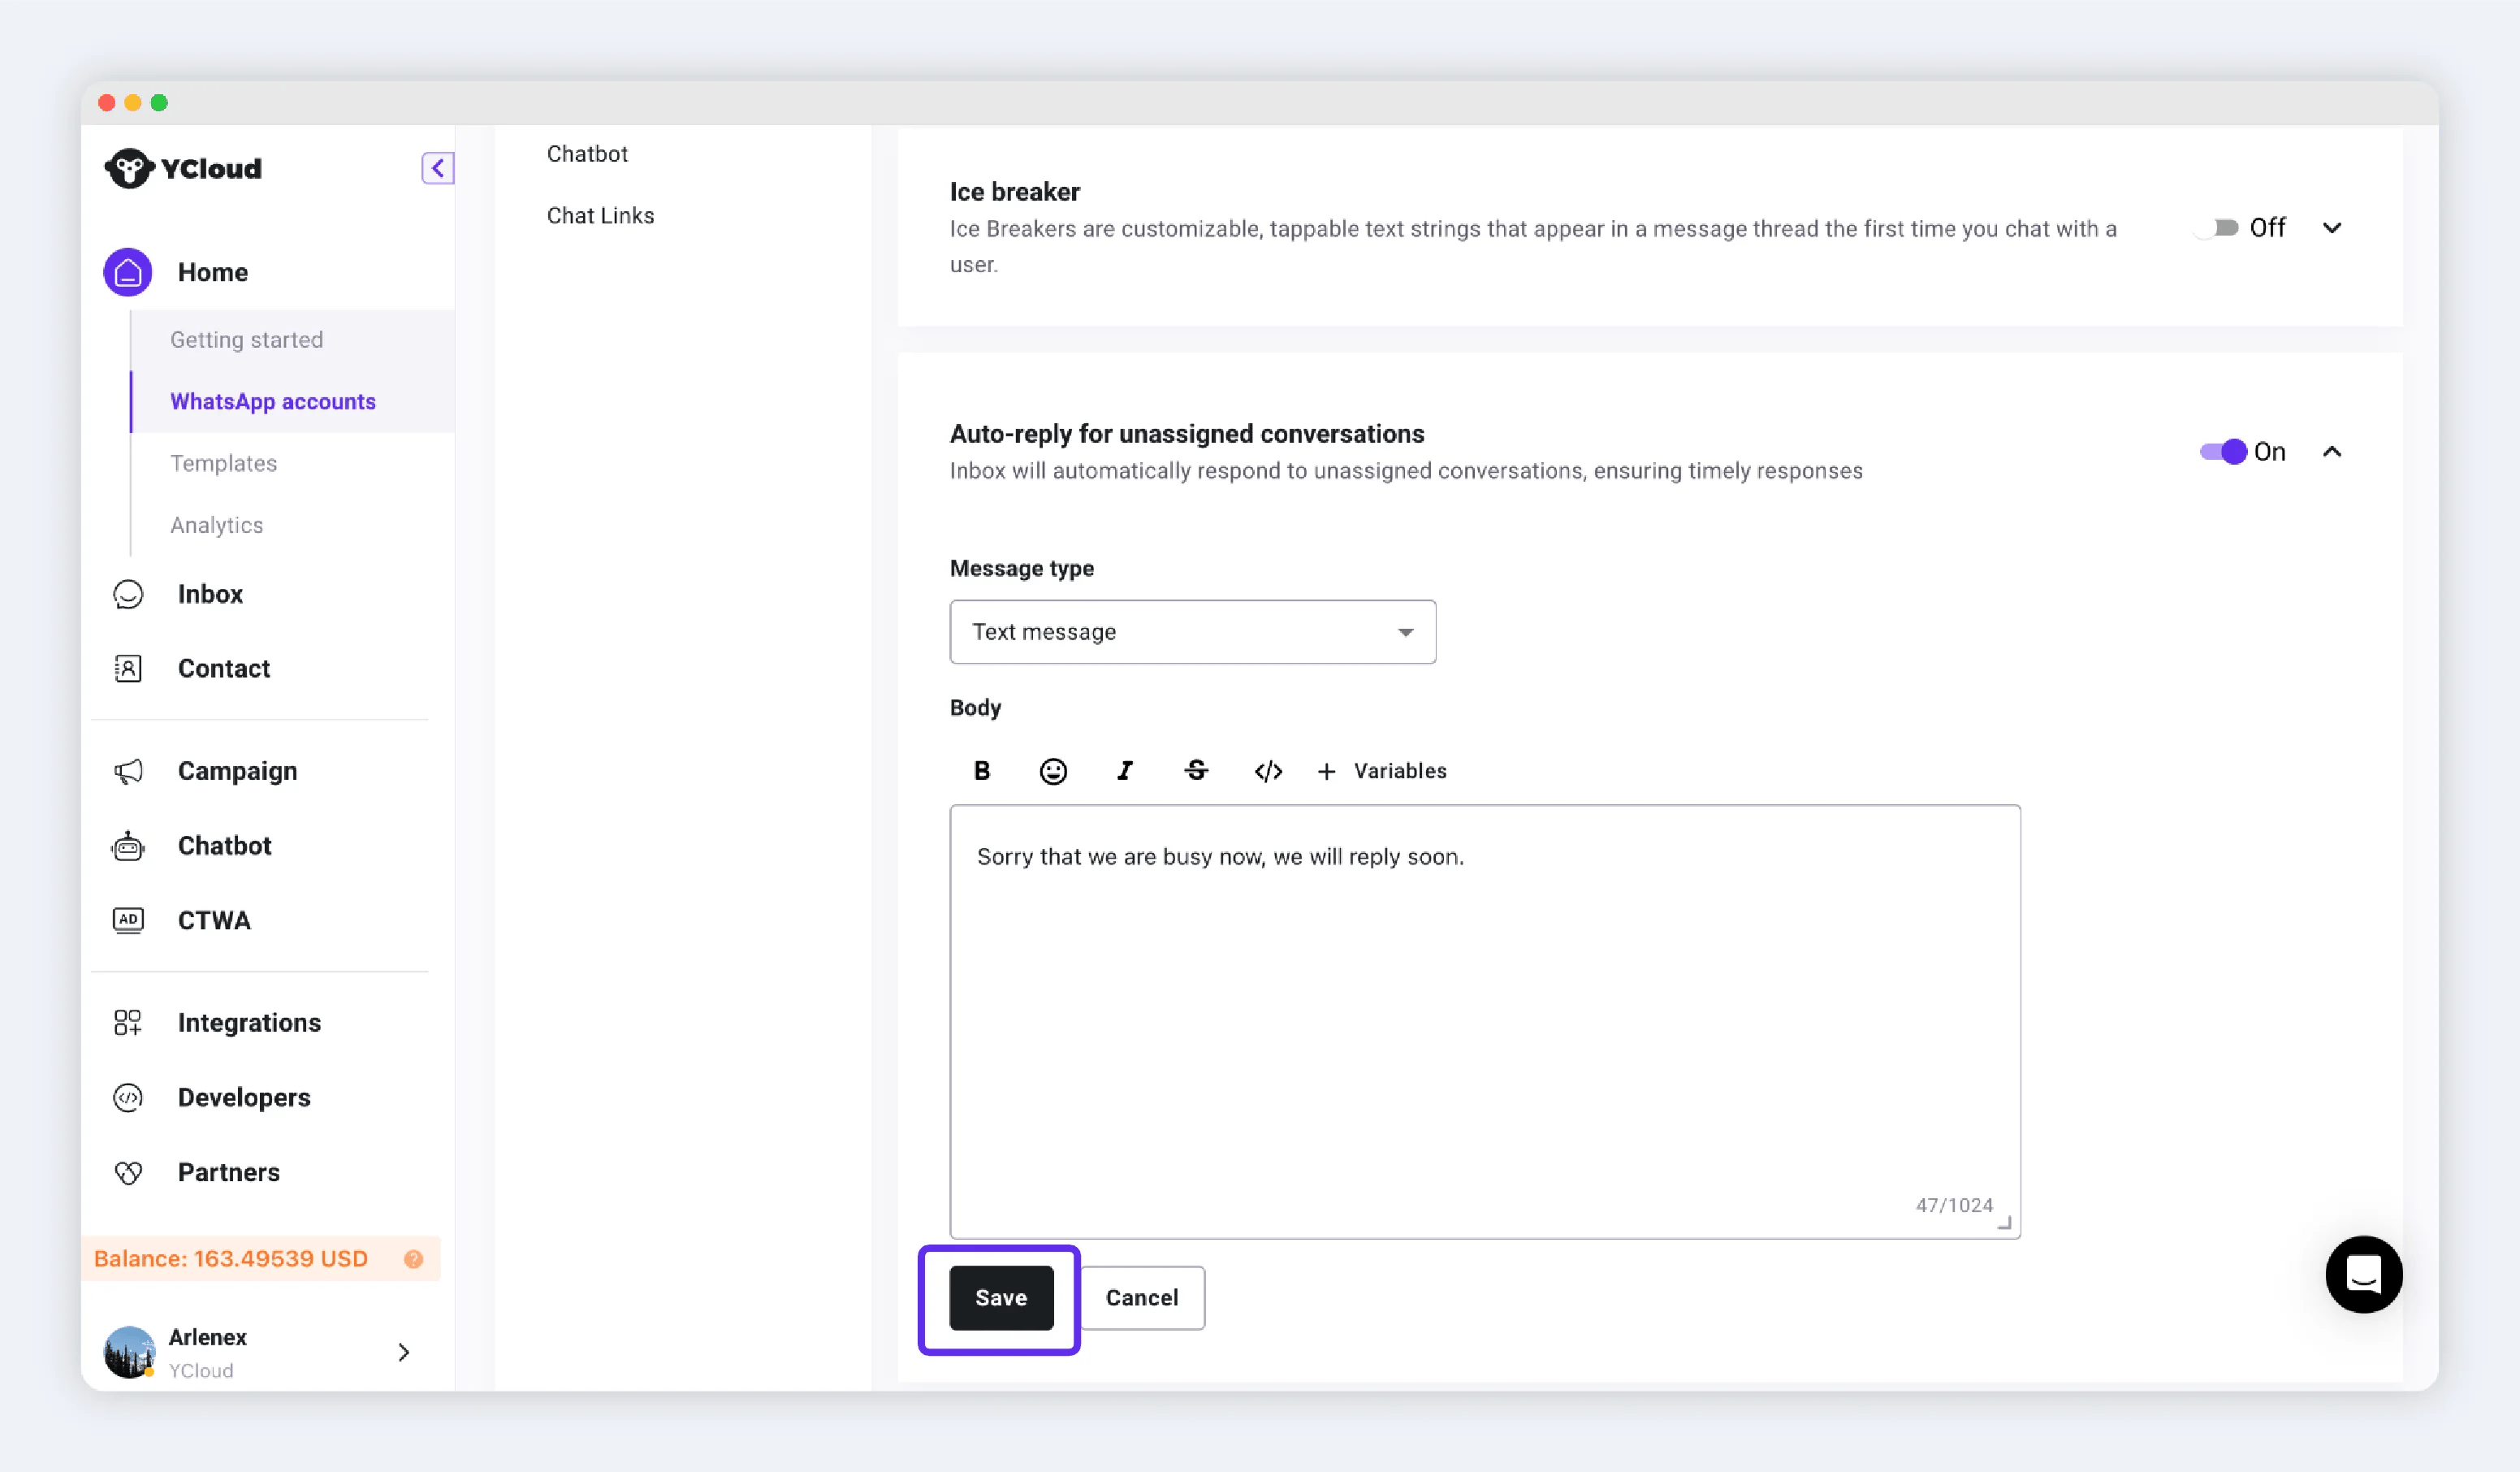
Click the Edit button to edit. Supported message types:- Text message: Pure text type message. Supports Emoji, bold, italic, etc.
- Rich media message: Image/video/file + text type message.
- Interactive message: Interactive messages with buttons, such as quick reply buttons, view website buttons, list buttons.
Auto-reply for in queue conversations
When this switch is turned on, conversations in the queue will receive an automatically sent message, notifying the customer that they are currently in a waiting state, ensuring timely responses.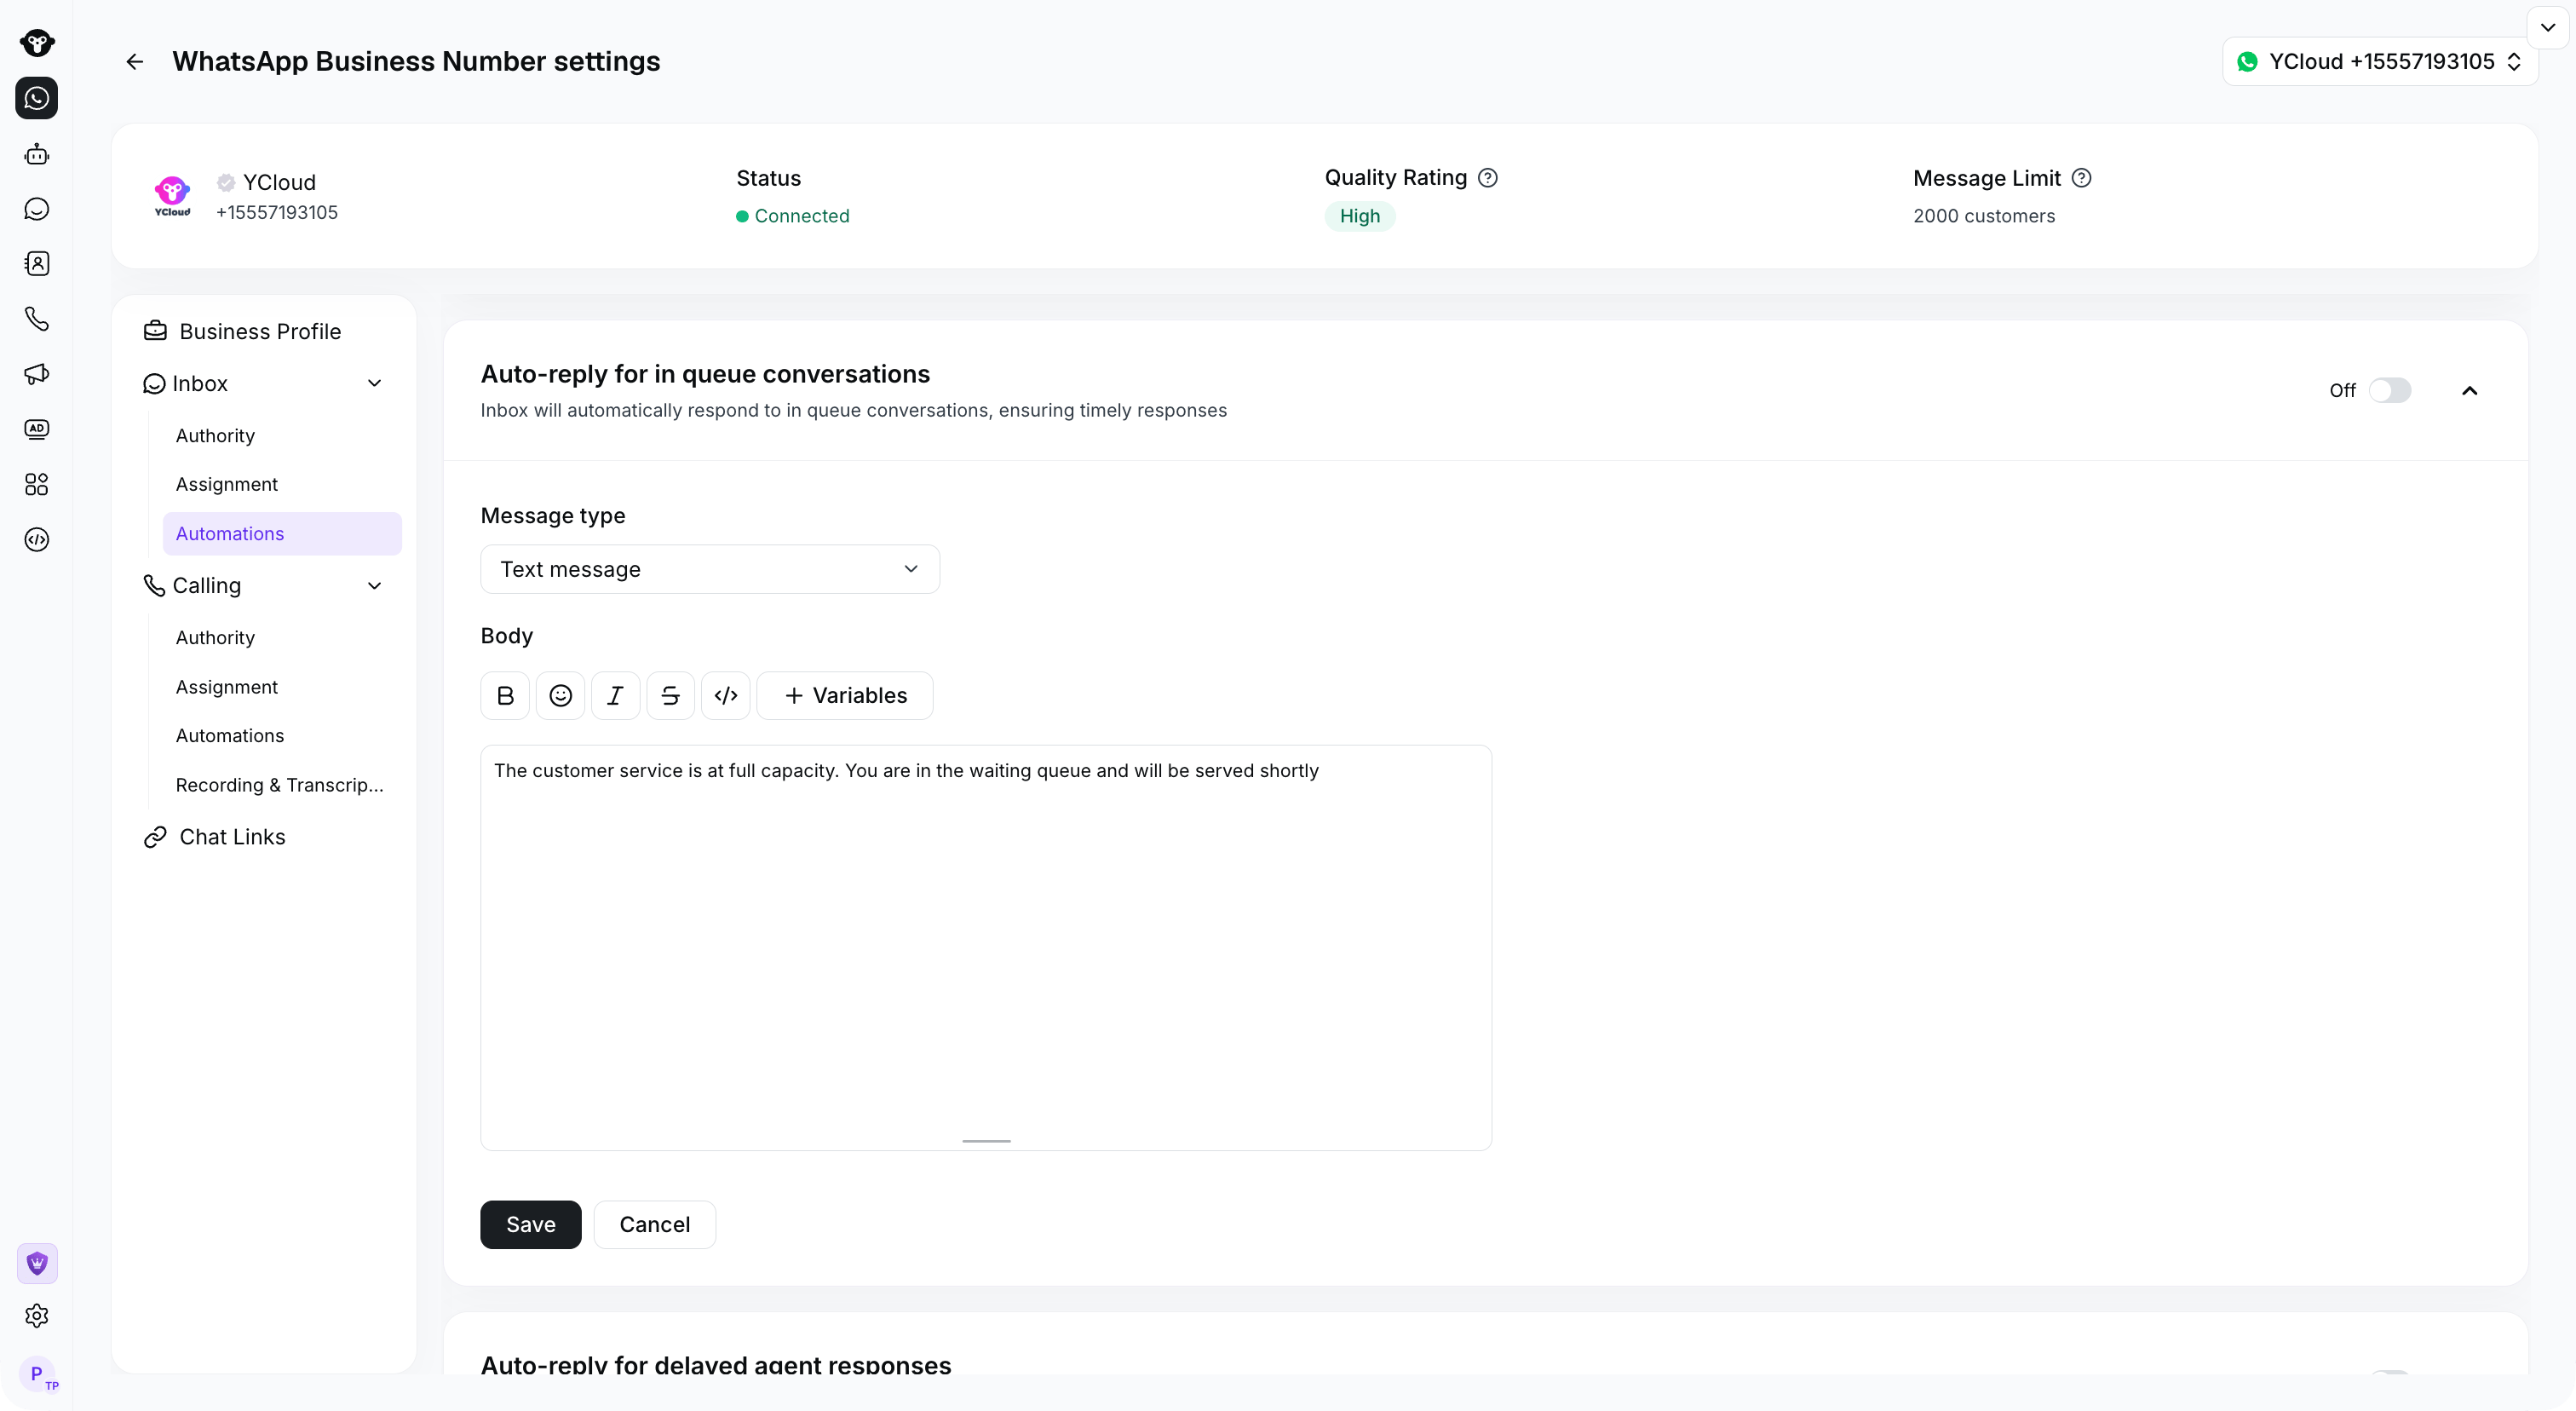
Expand Auto-reply for in queue conversations to review the message. The automation is off in this example.
Steps
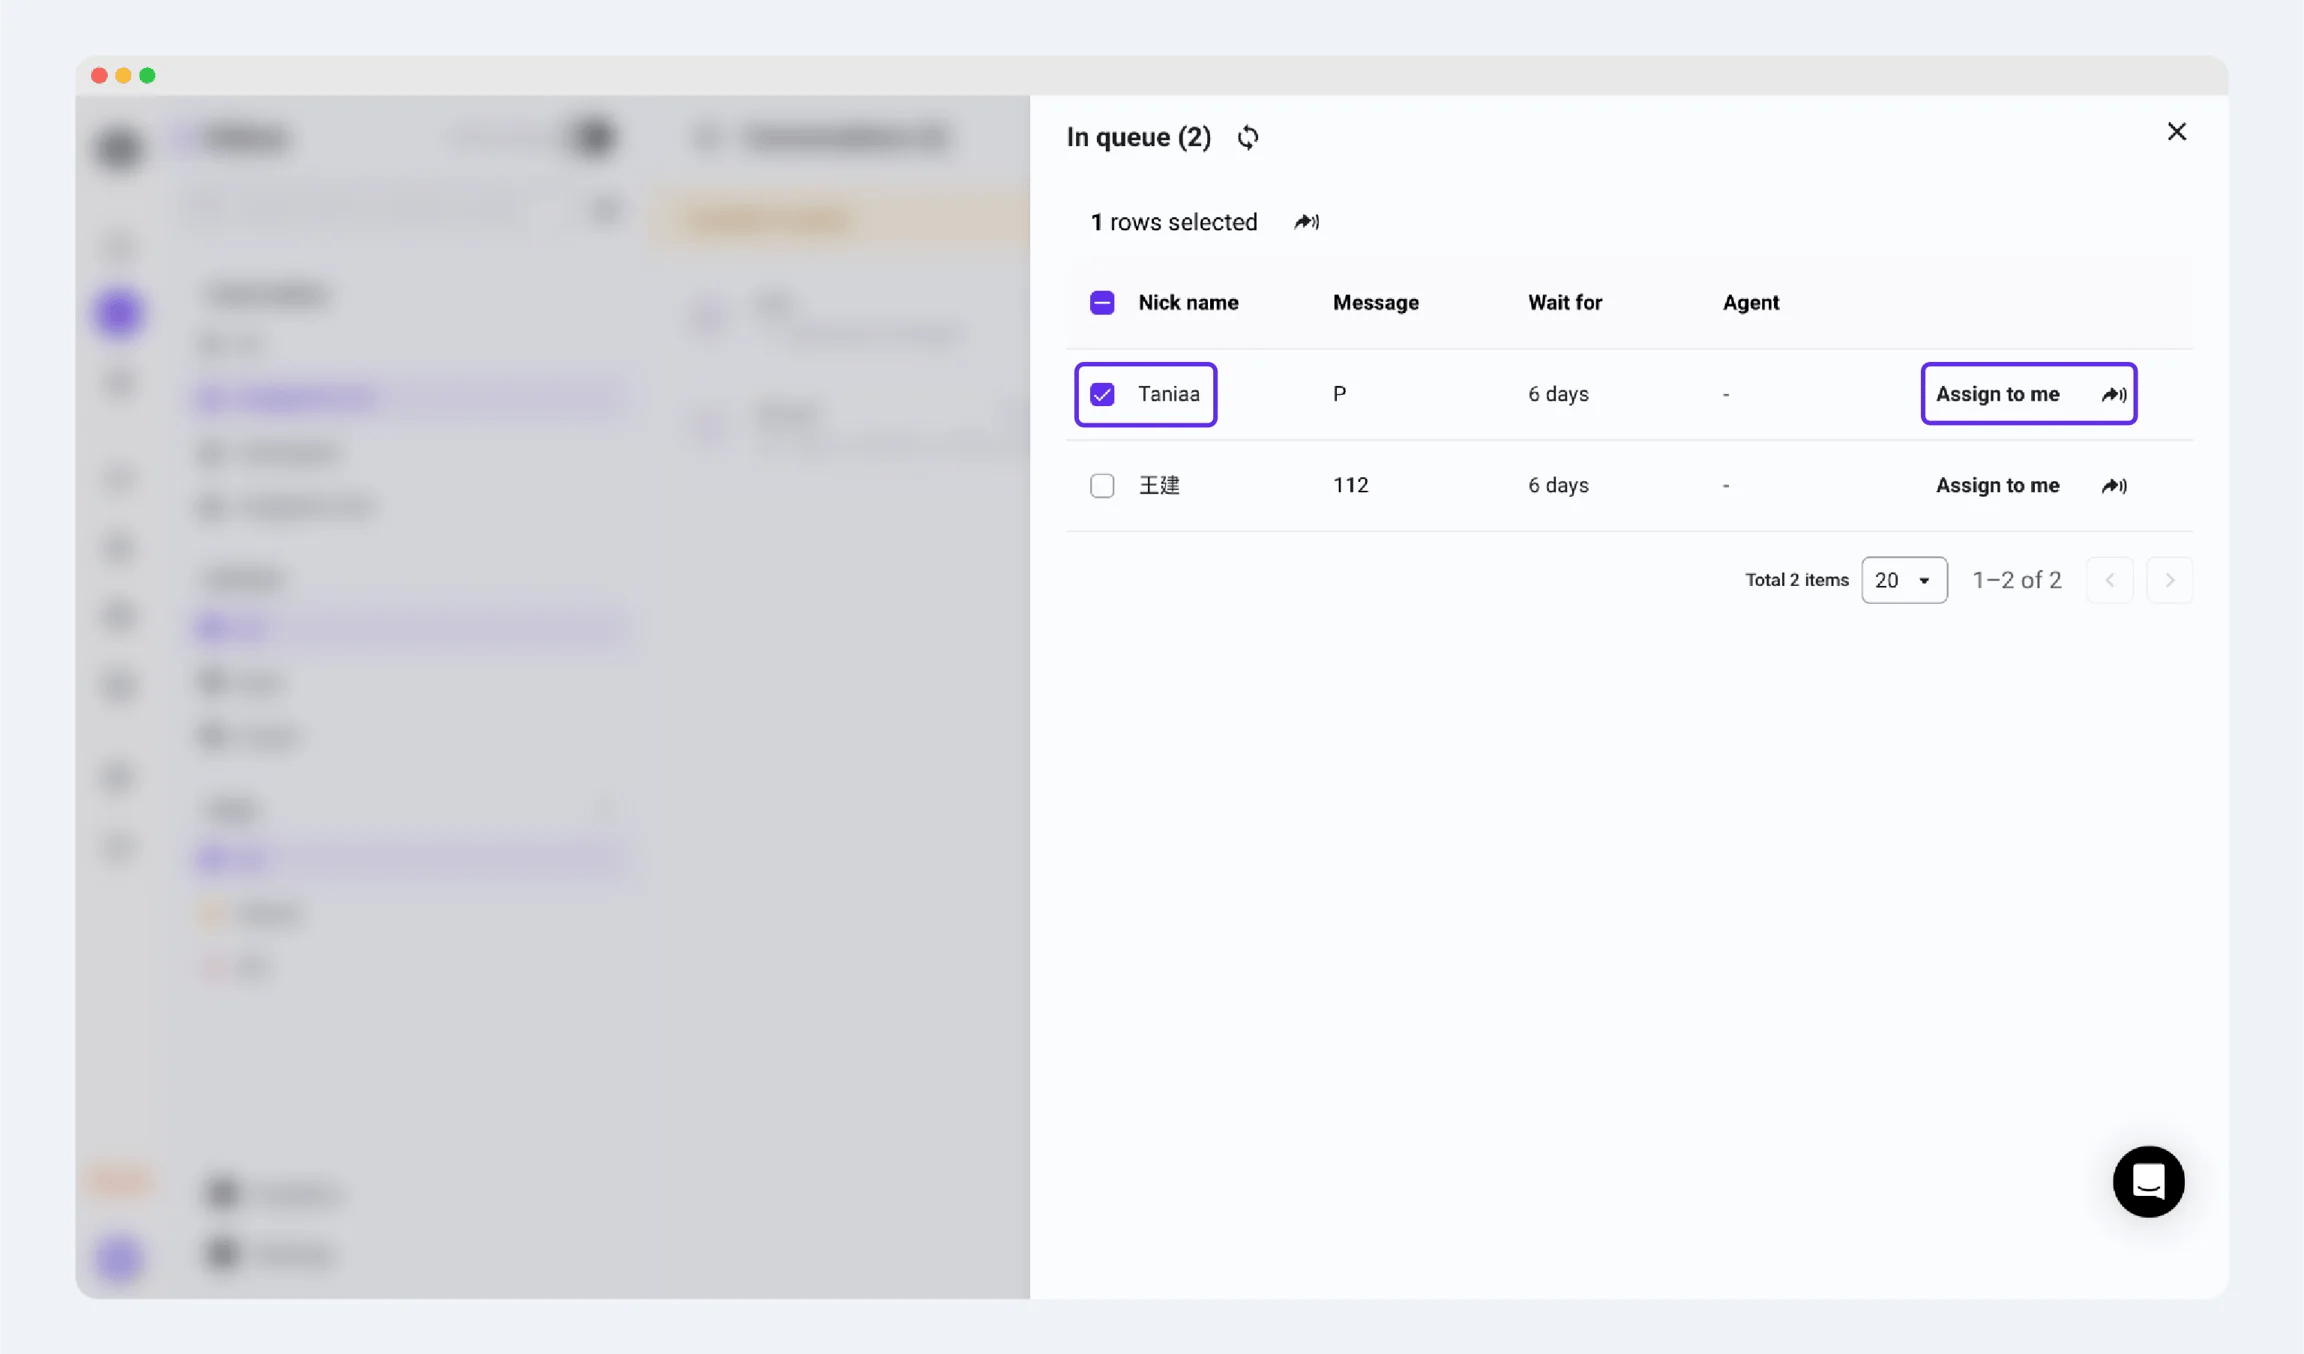
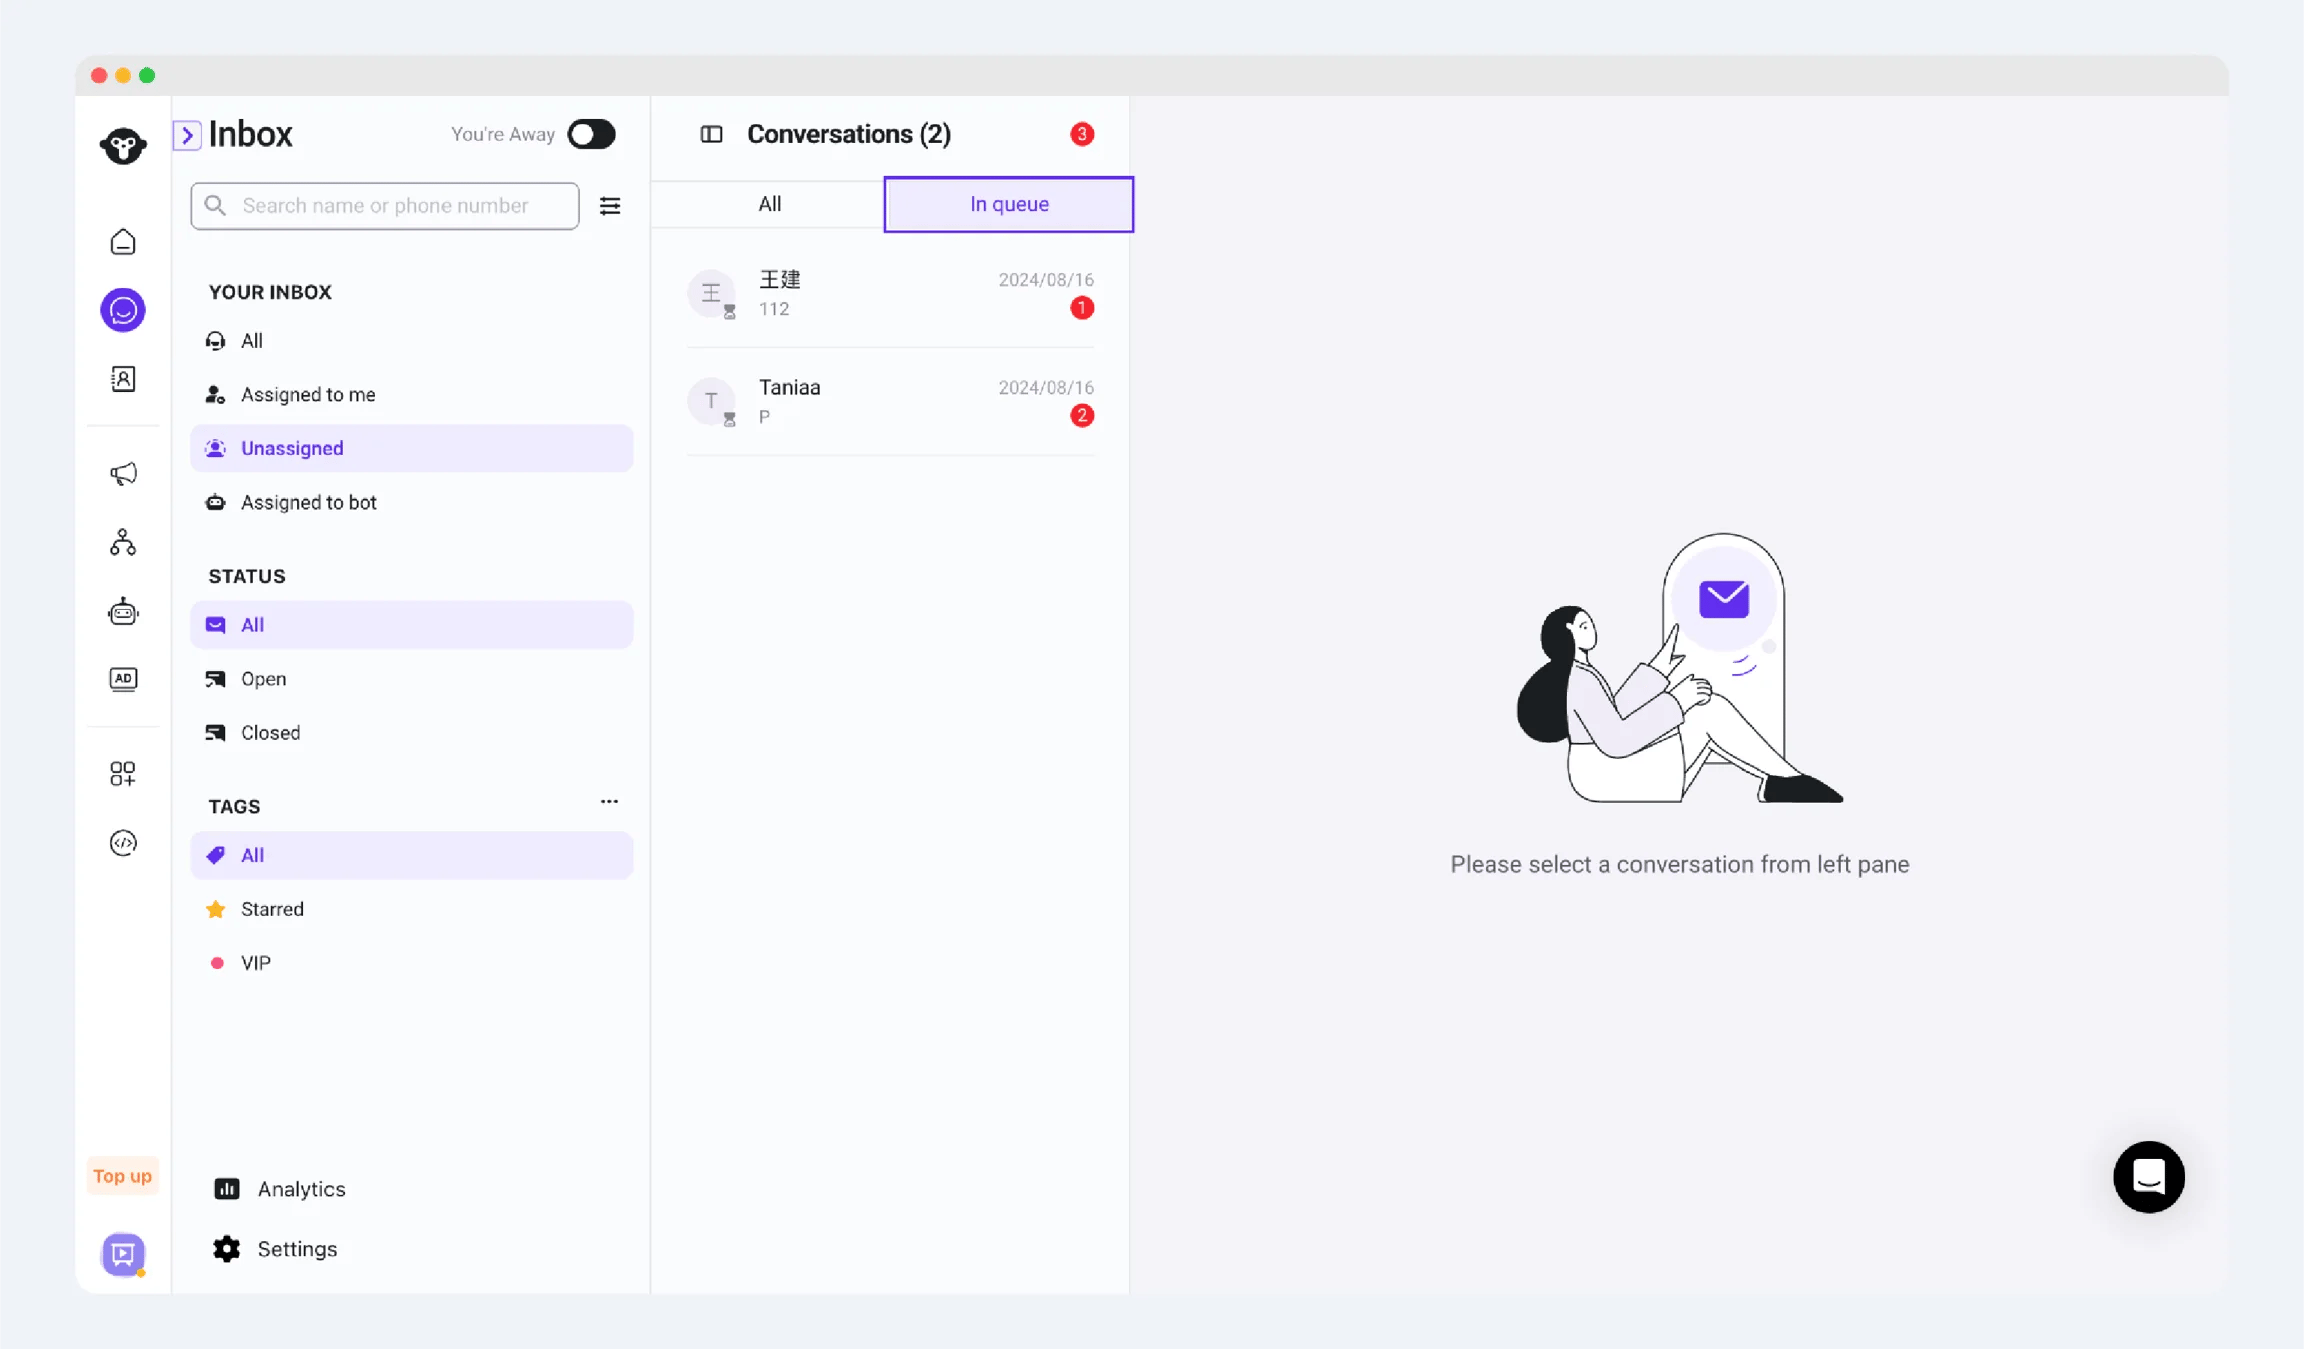
Method 1: When the reception limit is reached, the number of people currently in the queue will be displayed at the top of the staff member’s Inbox interface. Click on people in queue, select the conversation you want to transfer to yourself, and the transfer will be successful.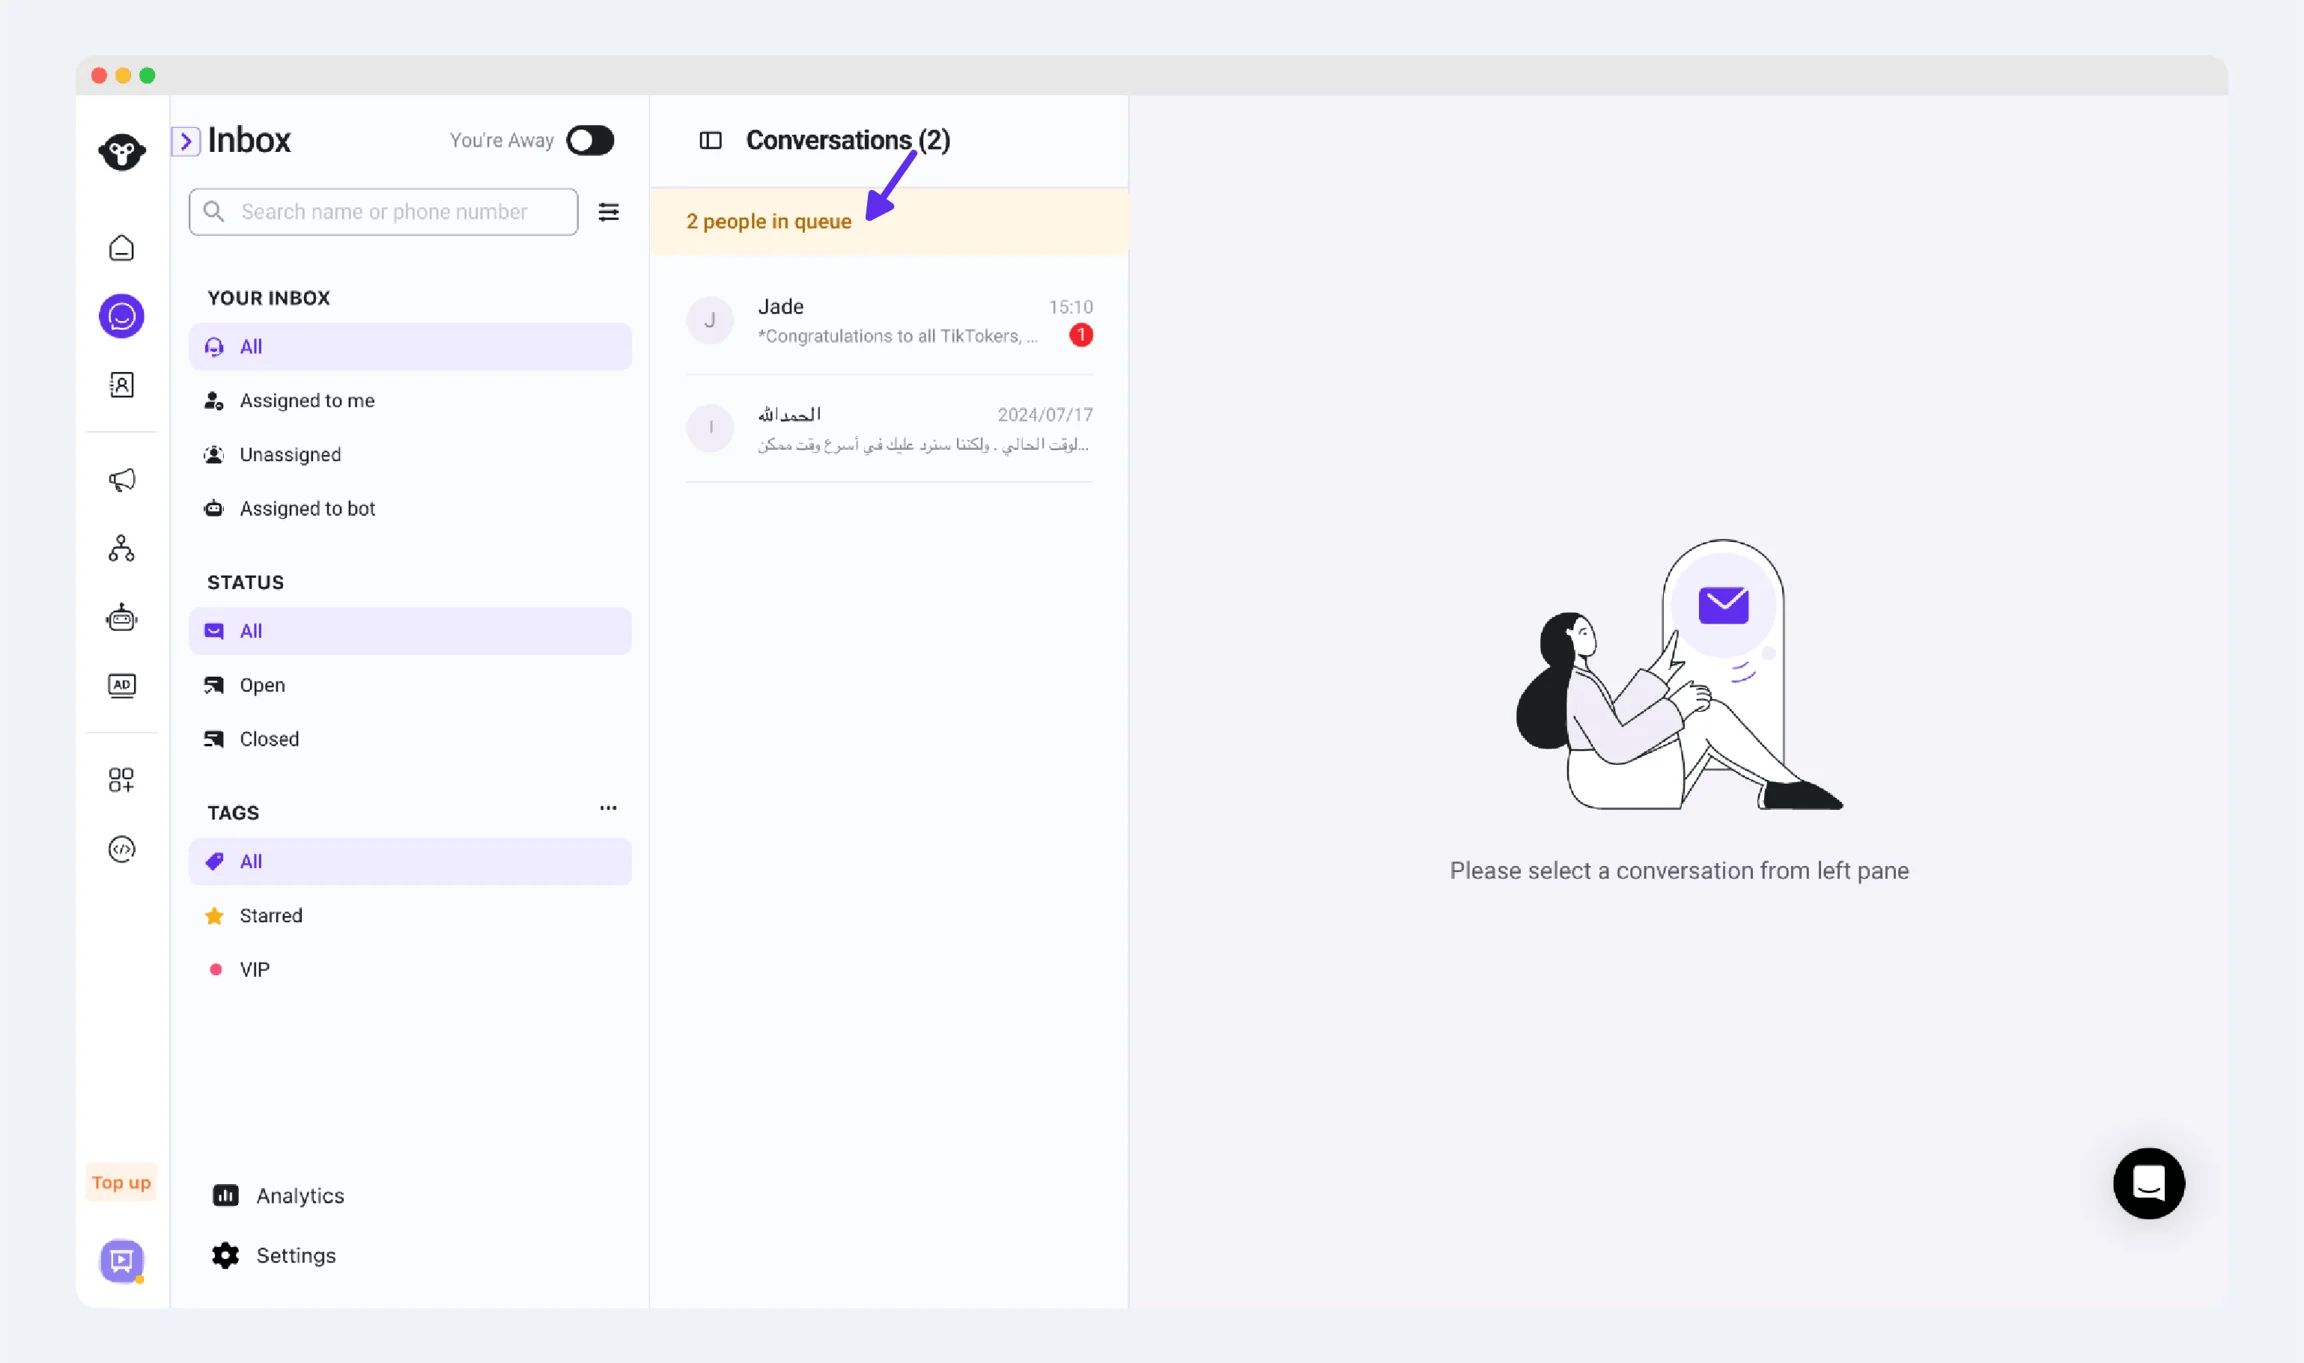
Auto-reply for delayed agent responses
If the customer’s message is not replied to by the agents within the specified time, the system will automatically send a message to the customer. You can set the waiting time for sending reminder messages.Steps
Step 1: Turn on the switch
Locate Auto-reply for delayed agent responses and turn on its switch. Expand the section to view its settings.Step 2: Set the waiting time and reply content
Waiting time: If the agent has not replied to the customer within the set time, the system will automatically reply.
Set the waiting duration and message type for delayed replies. The automation is off in this example.
- Text message: Pure text type message. Supports Emoji, bold, italic, etc.
- Rich media message: Image/video/file + text type message.
- Interactive message: Interactive messages with buttons, such as quick reply buttons, view website buttons, list buttons.
Auto-close Inbox conversations
In the case of agent is serving the conversation, if the customer does not reply within the set time, the system will automatically close the conversation. You can set the auto-close time.This setting does not apply to unassigned conversations and conversations assigned to bots. Unassigned conversations will not be automatically closed, and conversations assigned to bots have two closing methods:
- Close the conversation after the process is completed.
- Close the conversation if the customer does not respond to the bot for 10 minutes.
Steps
Step 1: Turn on the switch
Locate Auto-close Inbox conversations and turn on its switch. Expand the section to view its settings.Step 2: Edit the auto-close time
Supported configuration range: 1 minute to 72 hours. Recommended configuration parameter: 24 hours. After configuration, click Save.
Set the auto-close duration and its unit. The existing demonstration setting is 24 hours.
CSAT (Customer Satisfaction)
When CSAT automation is enabled, YCloud automatically sends a satisfaction survey after a conversation handled by a human agent is closed. CSAT surveys are not triggered for conversations handled by a bot.Configure CSAT automation
Step 1: Enable CSAT
Turn on the CSAT switch for the phone number.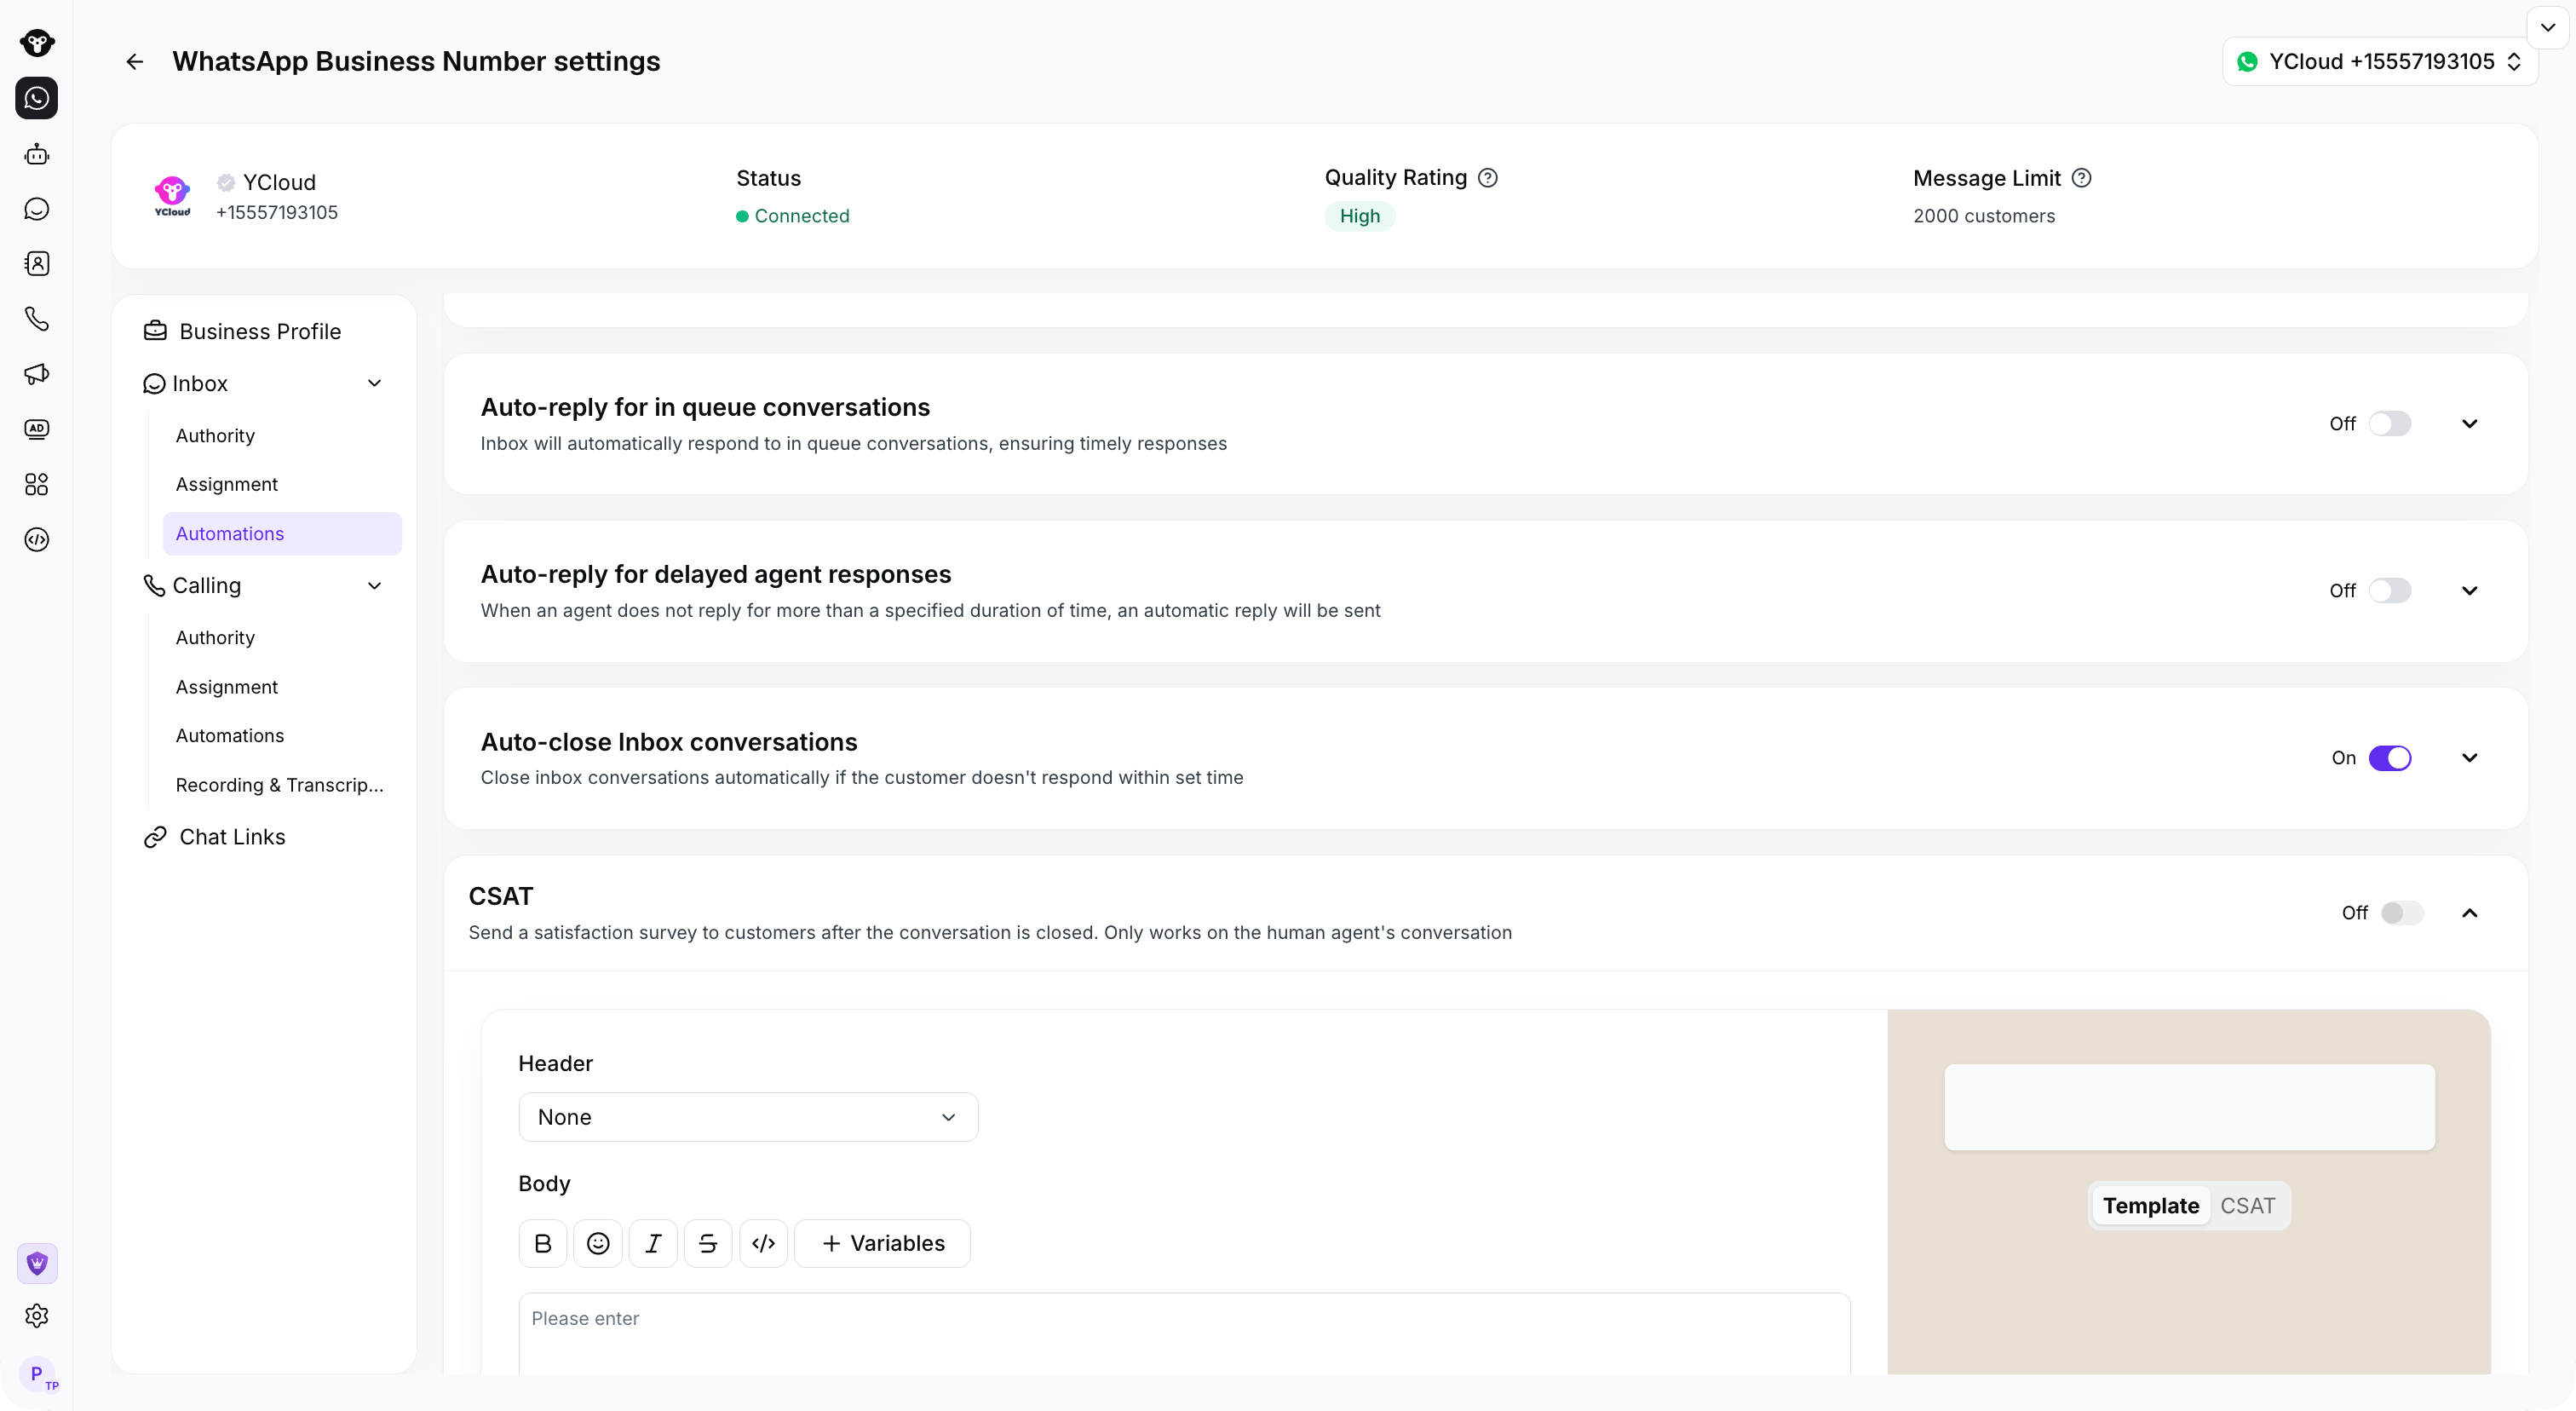
Expand CSAT under Inbox > Automations. The survey is off in this example.
Step 2: Configure the survey message
Customize the message sent to the customer and the button they select to open the survey.Step 3: Select the component language
Under CSAT form component, select the language used for the button and feedback fields displayed in the WhatsApp Flow. This allows you to present the survey in the language appropriate for your customers. You can also customize the Button text, such asRate.
Step 4: Choose the feedback components
Select one or more of the three available feedback components:
The selected components determine the fields customers see when they open the CSAT form.
Step 5: Set a valid response period
Enable Valid response period to define how long customers have to submit a response that counts toward CSAT results. Set the duration in hours and minutes. The response period starts when the CSAT survey is sent. Only responses received within the configured period are saved in Inbox and included in Analytics. Responses submitted after the period expires are not counted toward the CSAT score.Use a response period that gives customers enough time to provide feedback while preventing significantly delayed responses from affecting current service-performance reporting.
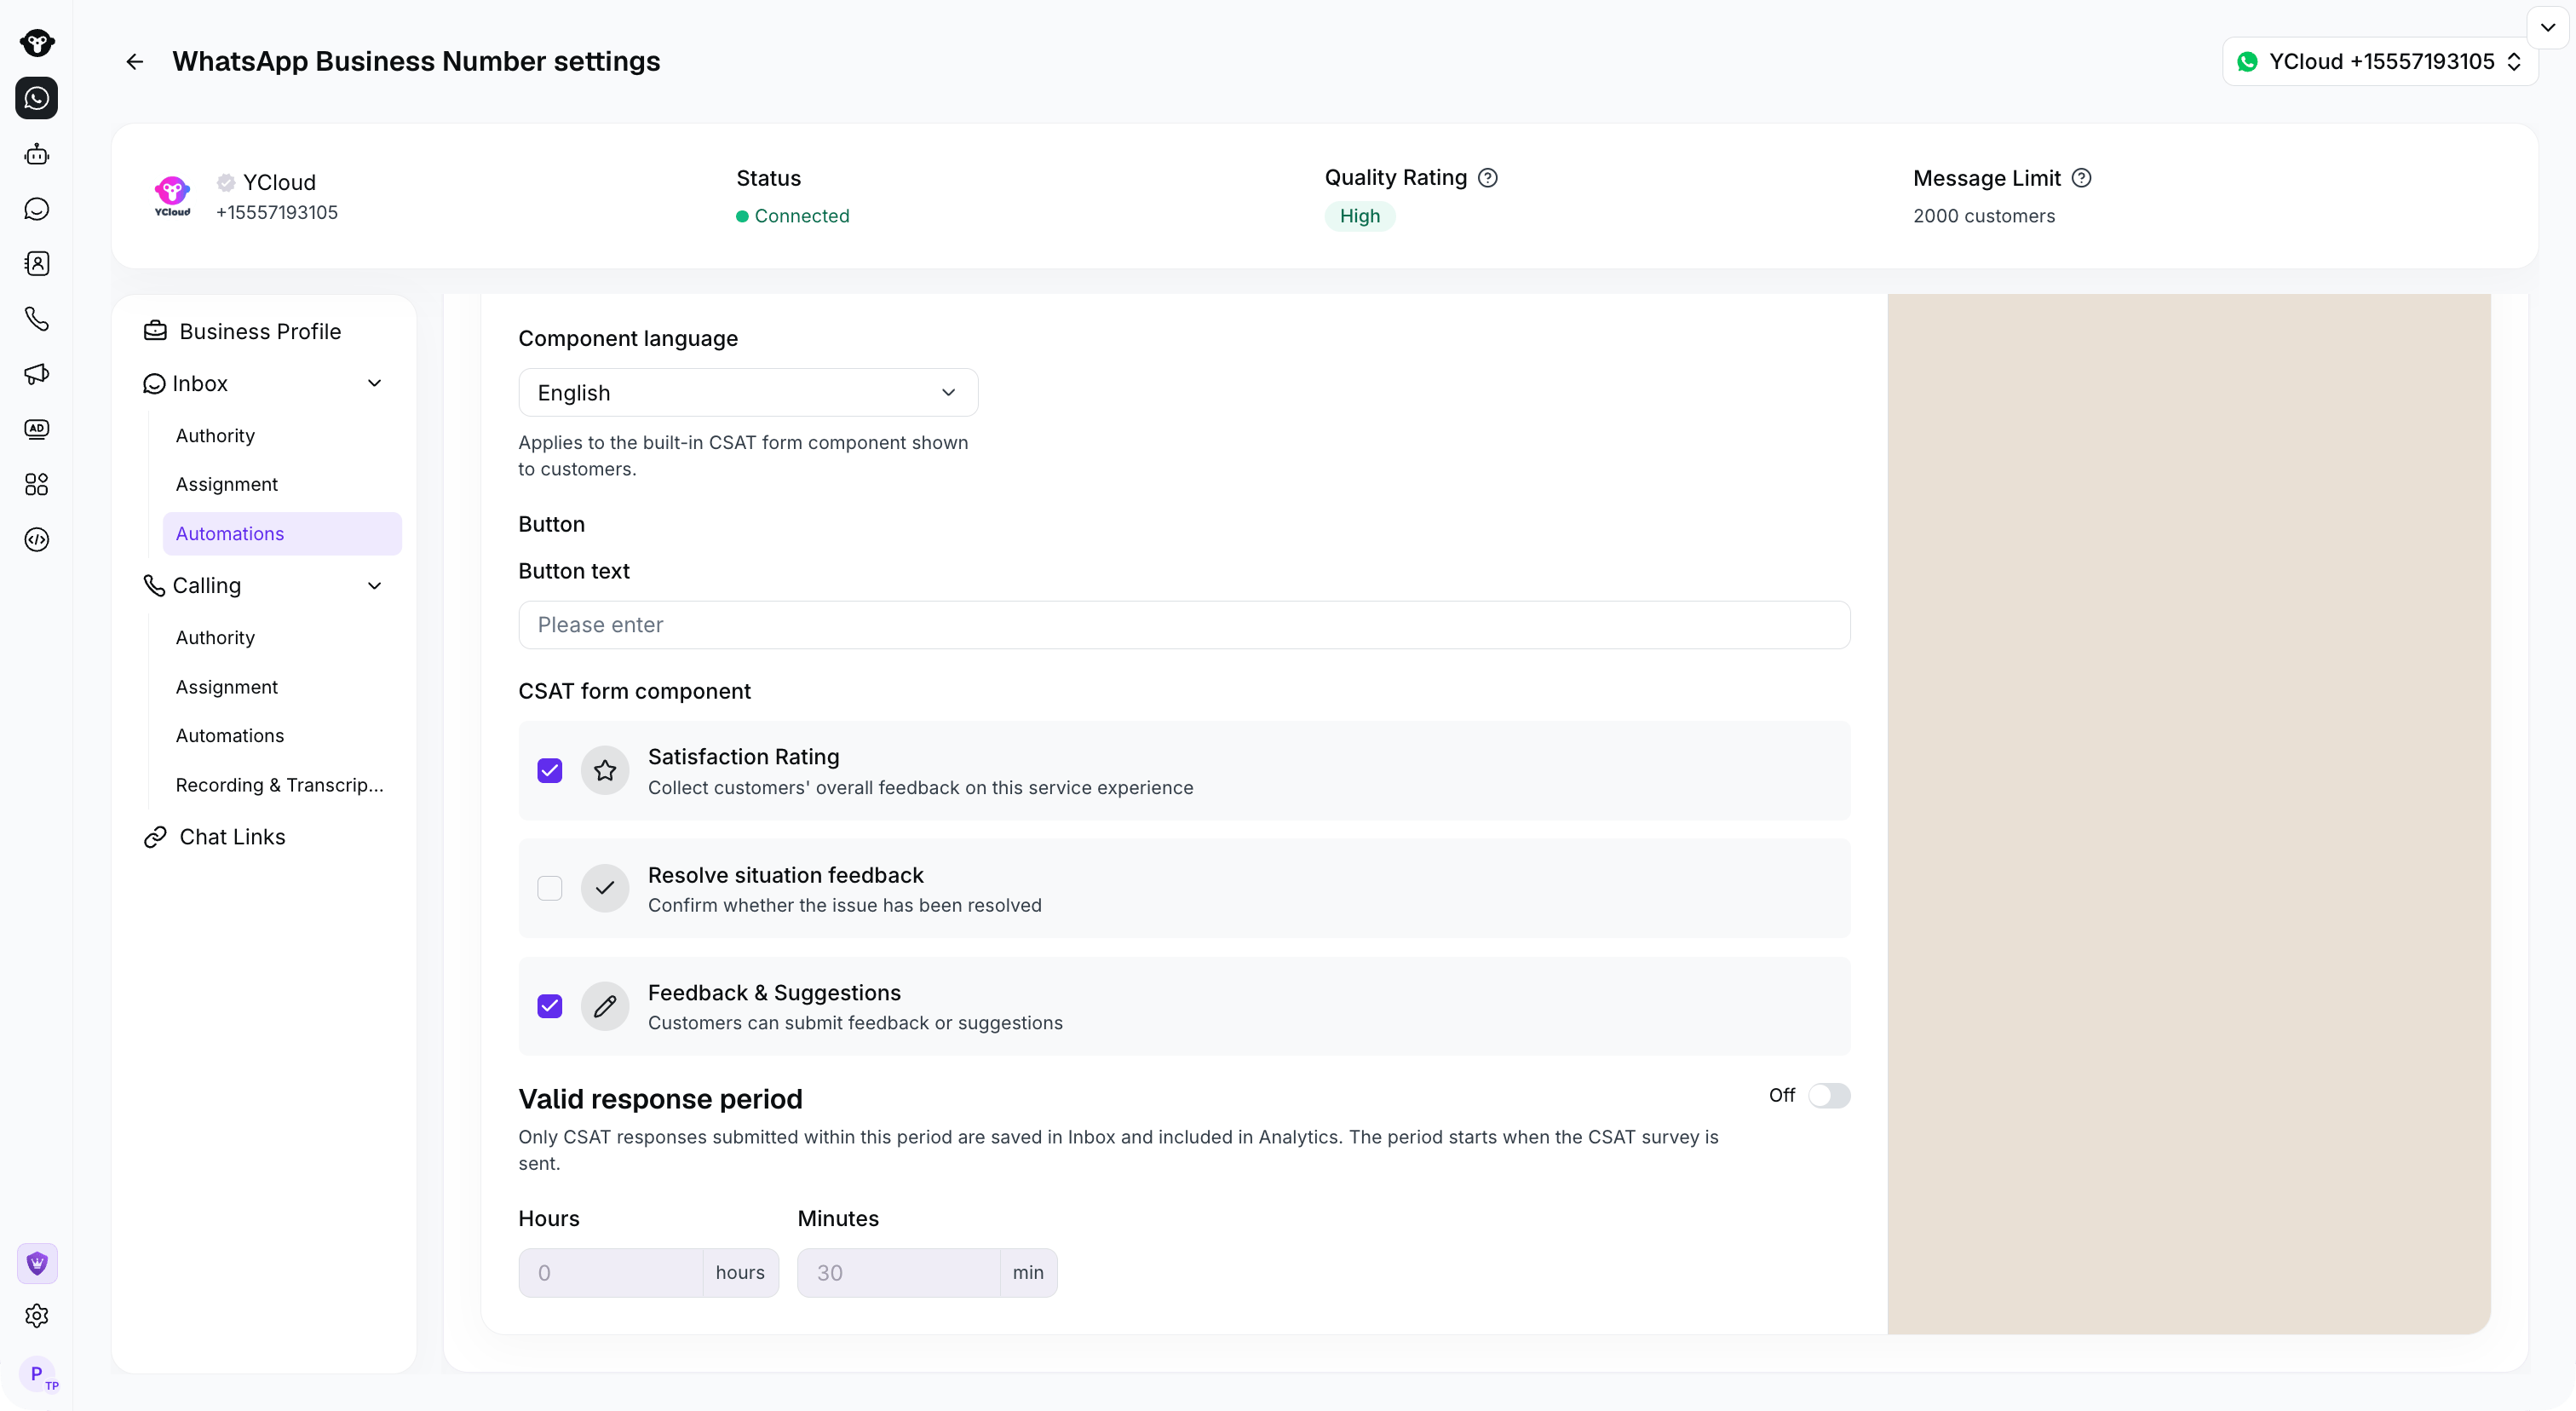
Choose the component language and feedback fields. The response-period switch is off in this example.