
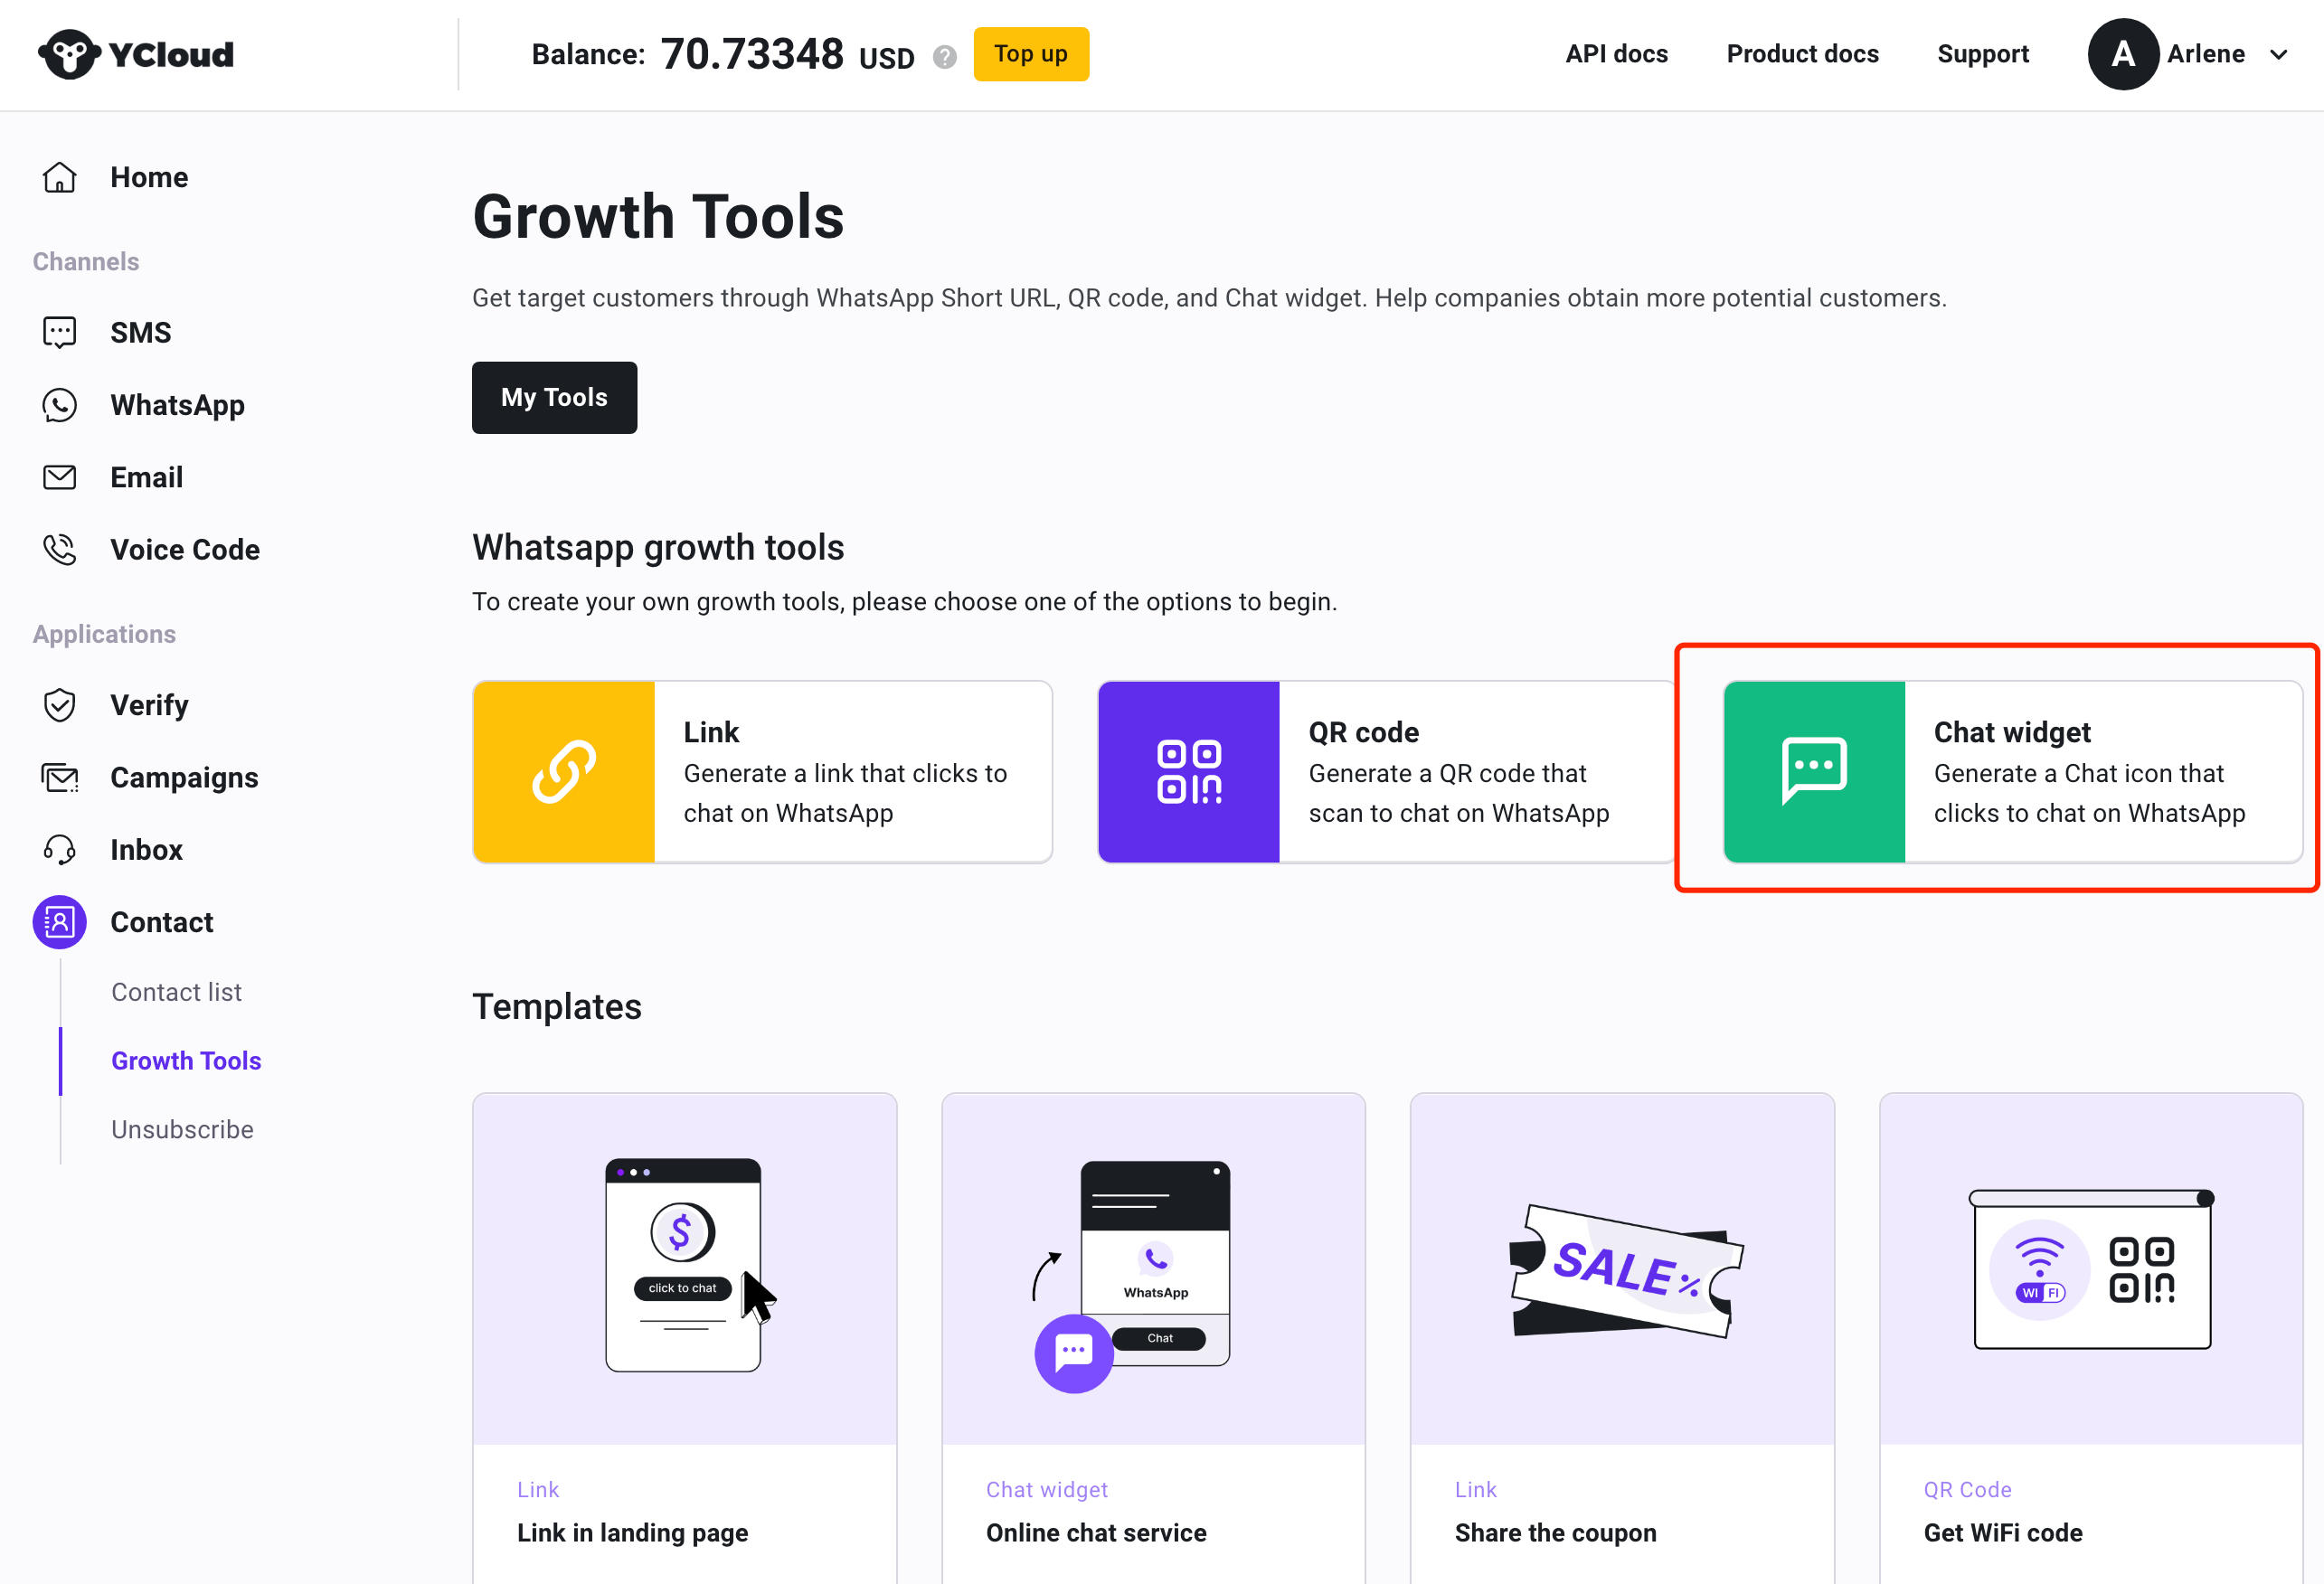
Create your Chat widget
Step1
Open the "Contacts" tab in the navigation bar and select "Growth Tools" to access the page. Then, select the "Chat widget" type of growth tool.
Step2
Fill in the relevant fields and preview the page's interface interaction on the right-hand side. Here, you can preview the page's effects from the user's perspective.

| Input | Description | Example |
|---|---|---|
| Name | Fill in the name of your chat widget, which will be displayed as default name if not modified: type + creation date. | Chat widget-welcome |
| Your WhatsApp phone number | You can enter any WhatsApp phone number in the format of country/region code + number (no spaces in between), or select from the pre-linked numbers.( Note that quick replies are not supported for unlinked numbers, and you cannot add the contact to your contact) | +447759398257 |
| Custom message | This message content will be displayed to users in the input box of WhatsApp. | Hello |
| Quick reply (optional) | You can set an automated reply message to be sent to users when they send you a message (only available for linked numbers). Emojis can be added to the message. | Hi!Nice to meet you. YCloud is a business messaging platform that powers meaningful communications and engagements for businesses |
After filling in all the necessary details, click "Next."
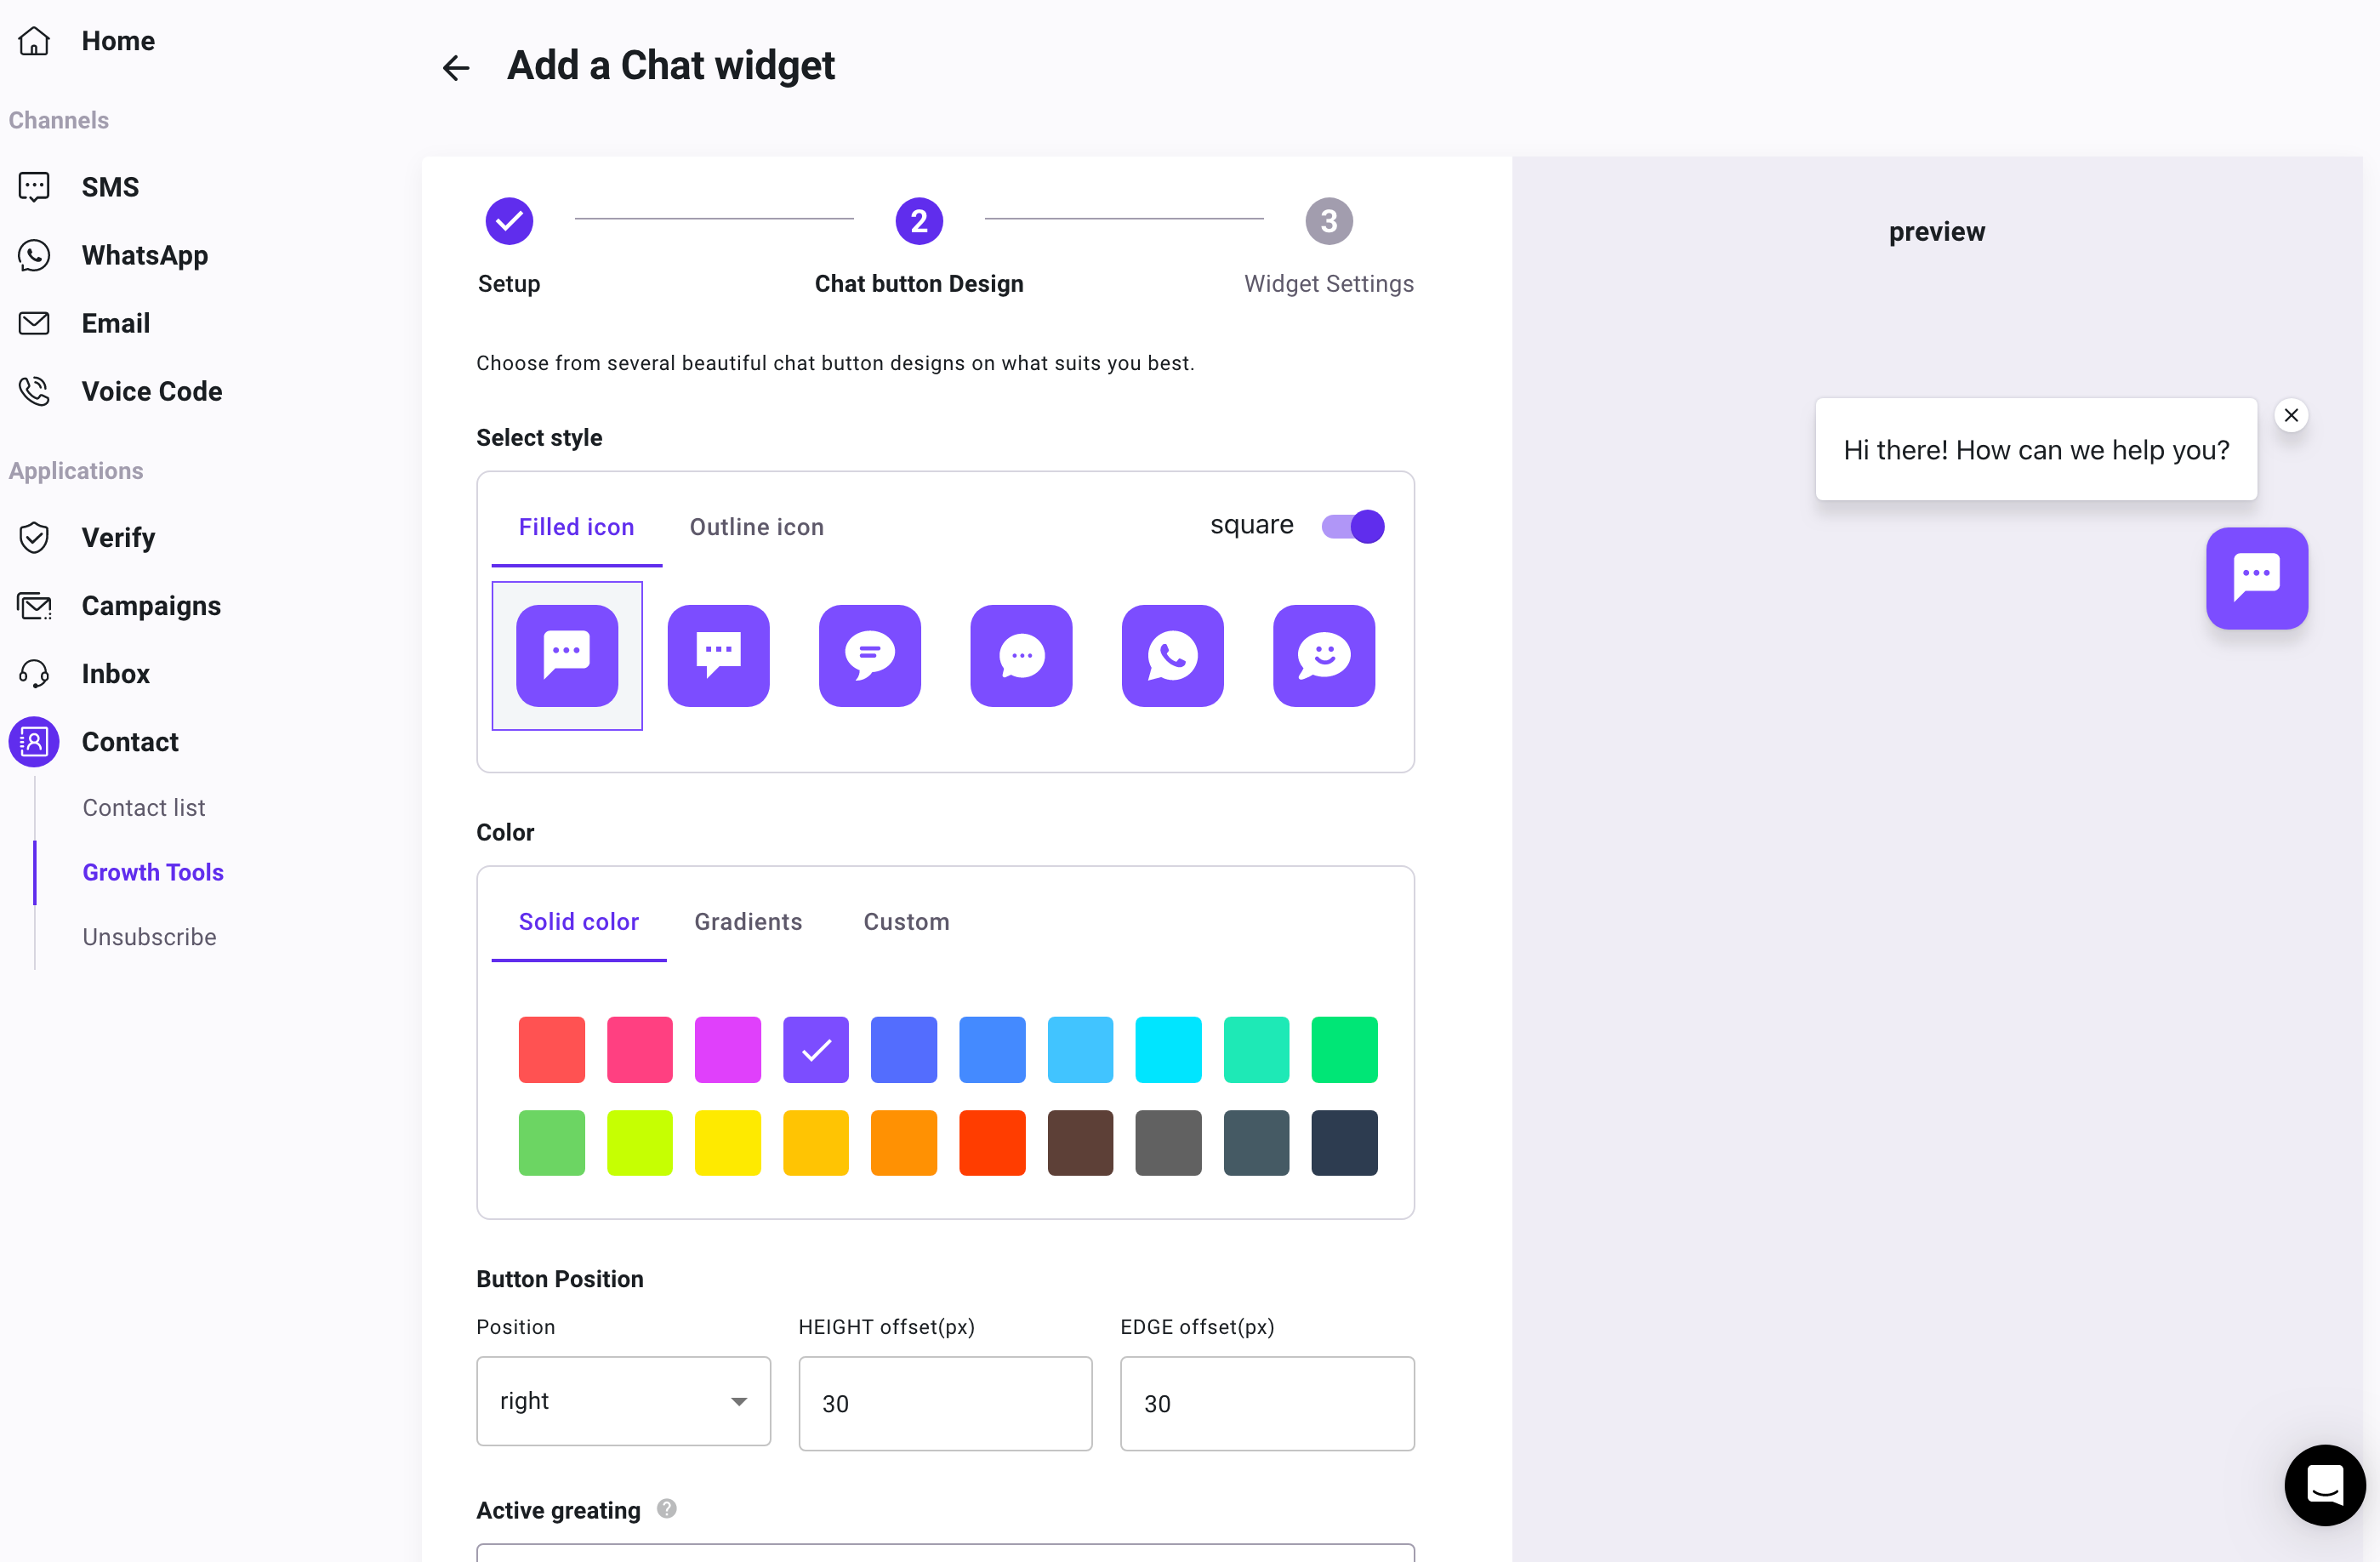
Step3
You can set the style of the chat widget button
- Set the button icon as a filled icon or outline icon
- Set the button color or customize it to your liking
- Adjust the distance of the button from the side and bottom of the page
- Active greeting, setting the time and specific content for the automatic greeting pop-up.
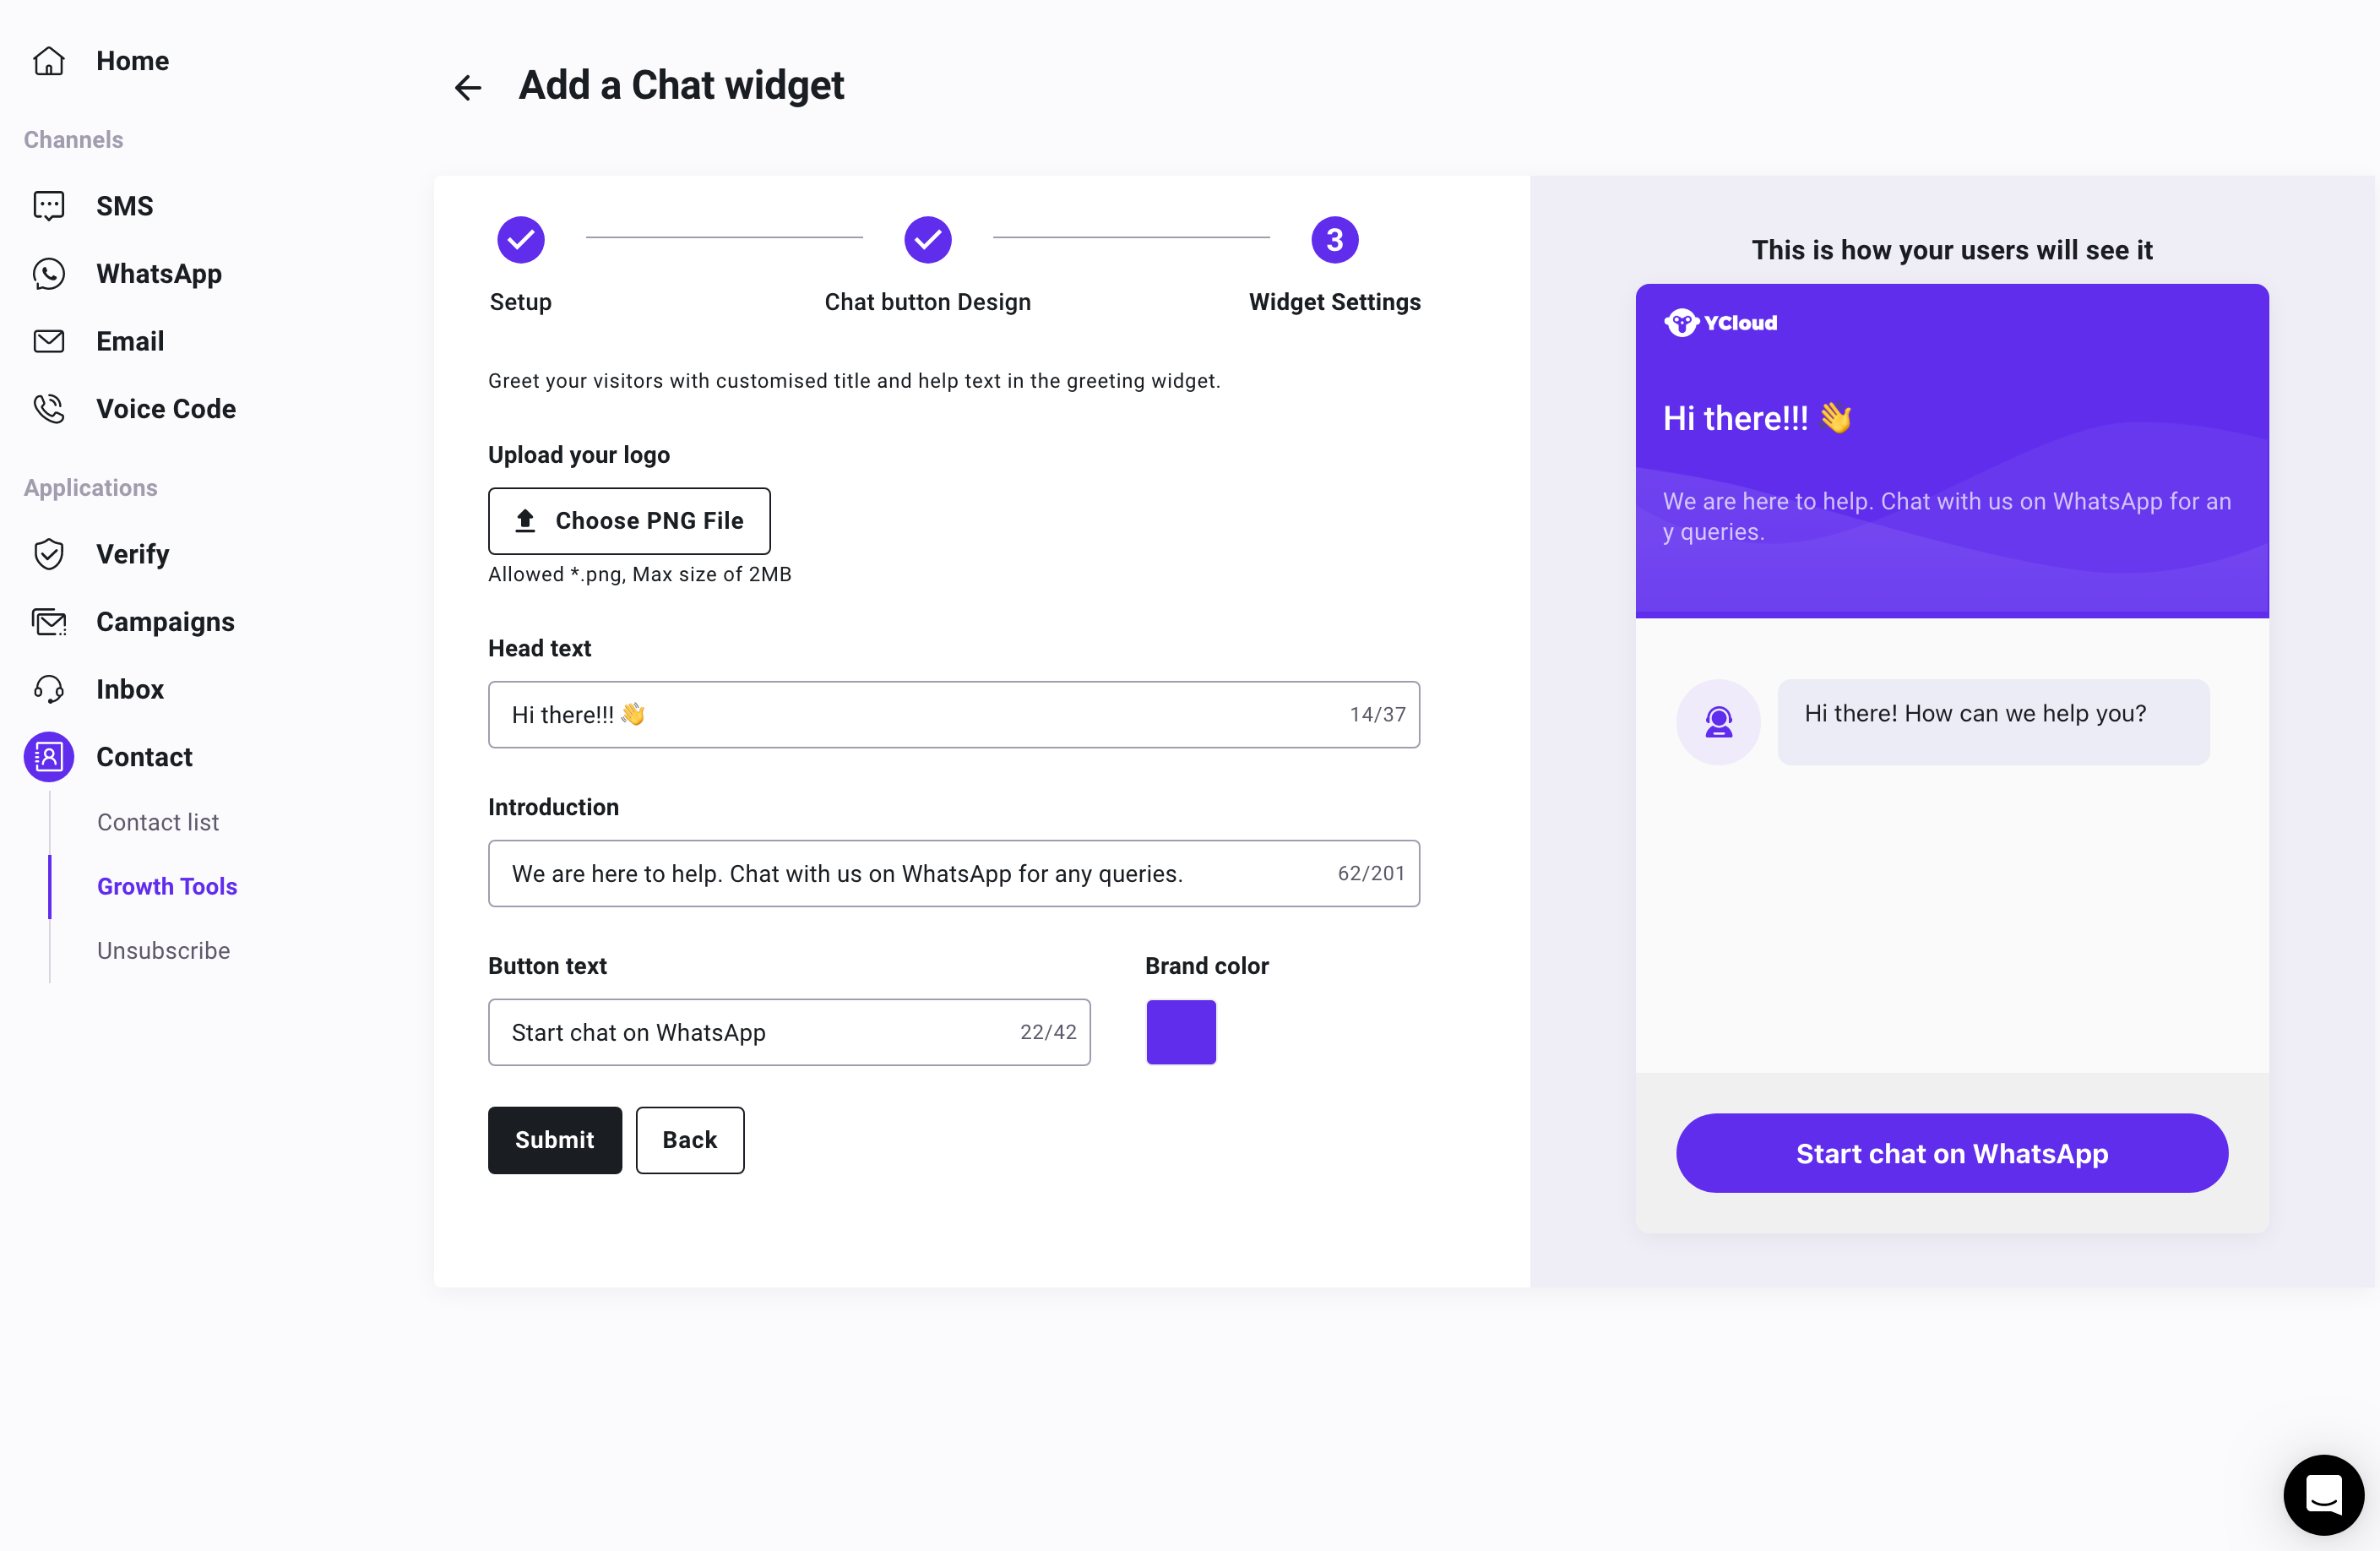
Step4
Customize the chat widget interface style and content:
- Upload your brand logo
- Edit the title and content of the welcome message
- Customize the button text and color for guiding customers to WhatsApp
Choose from preset options or create your own style
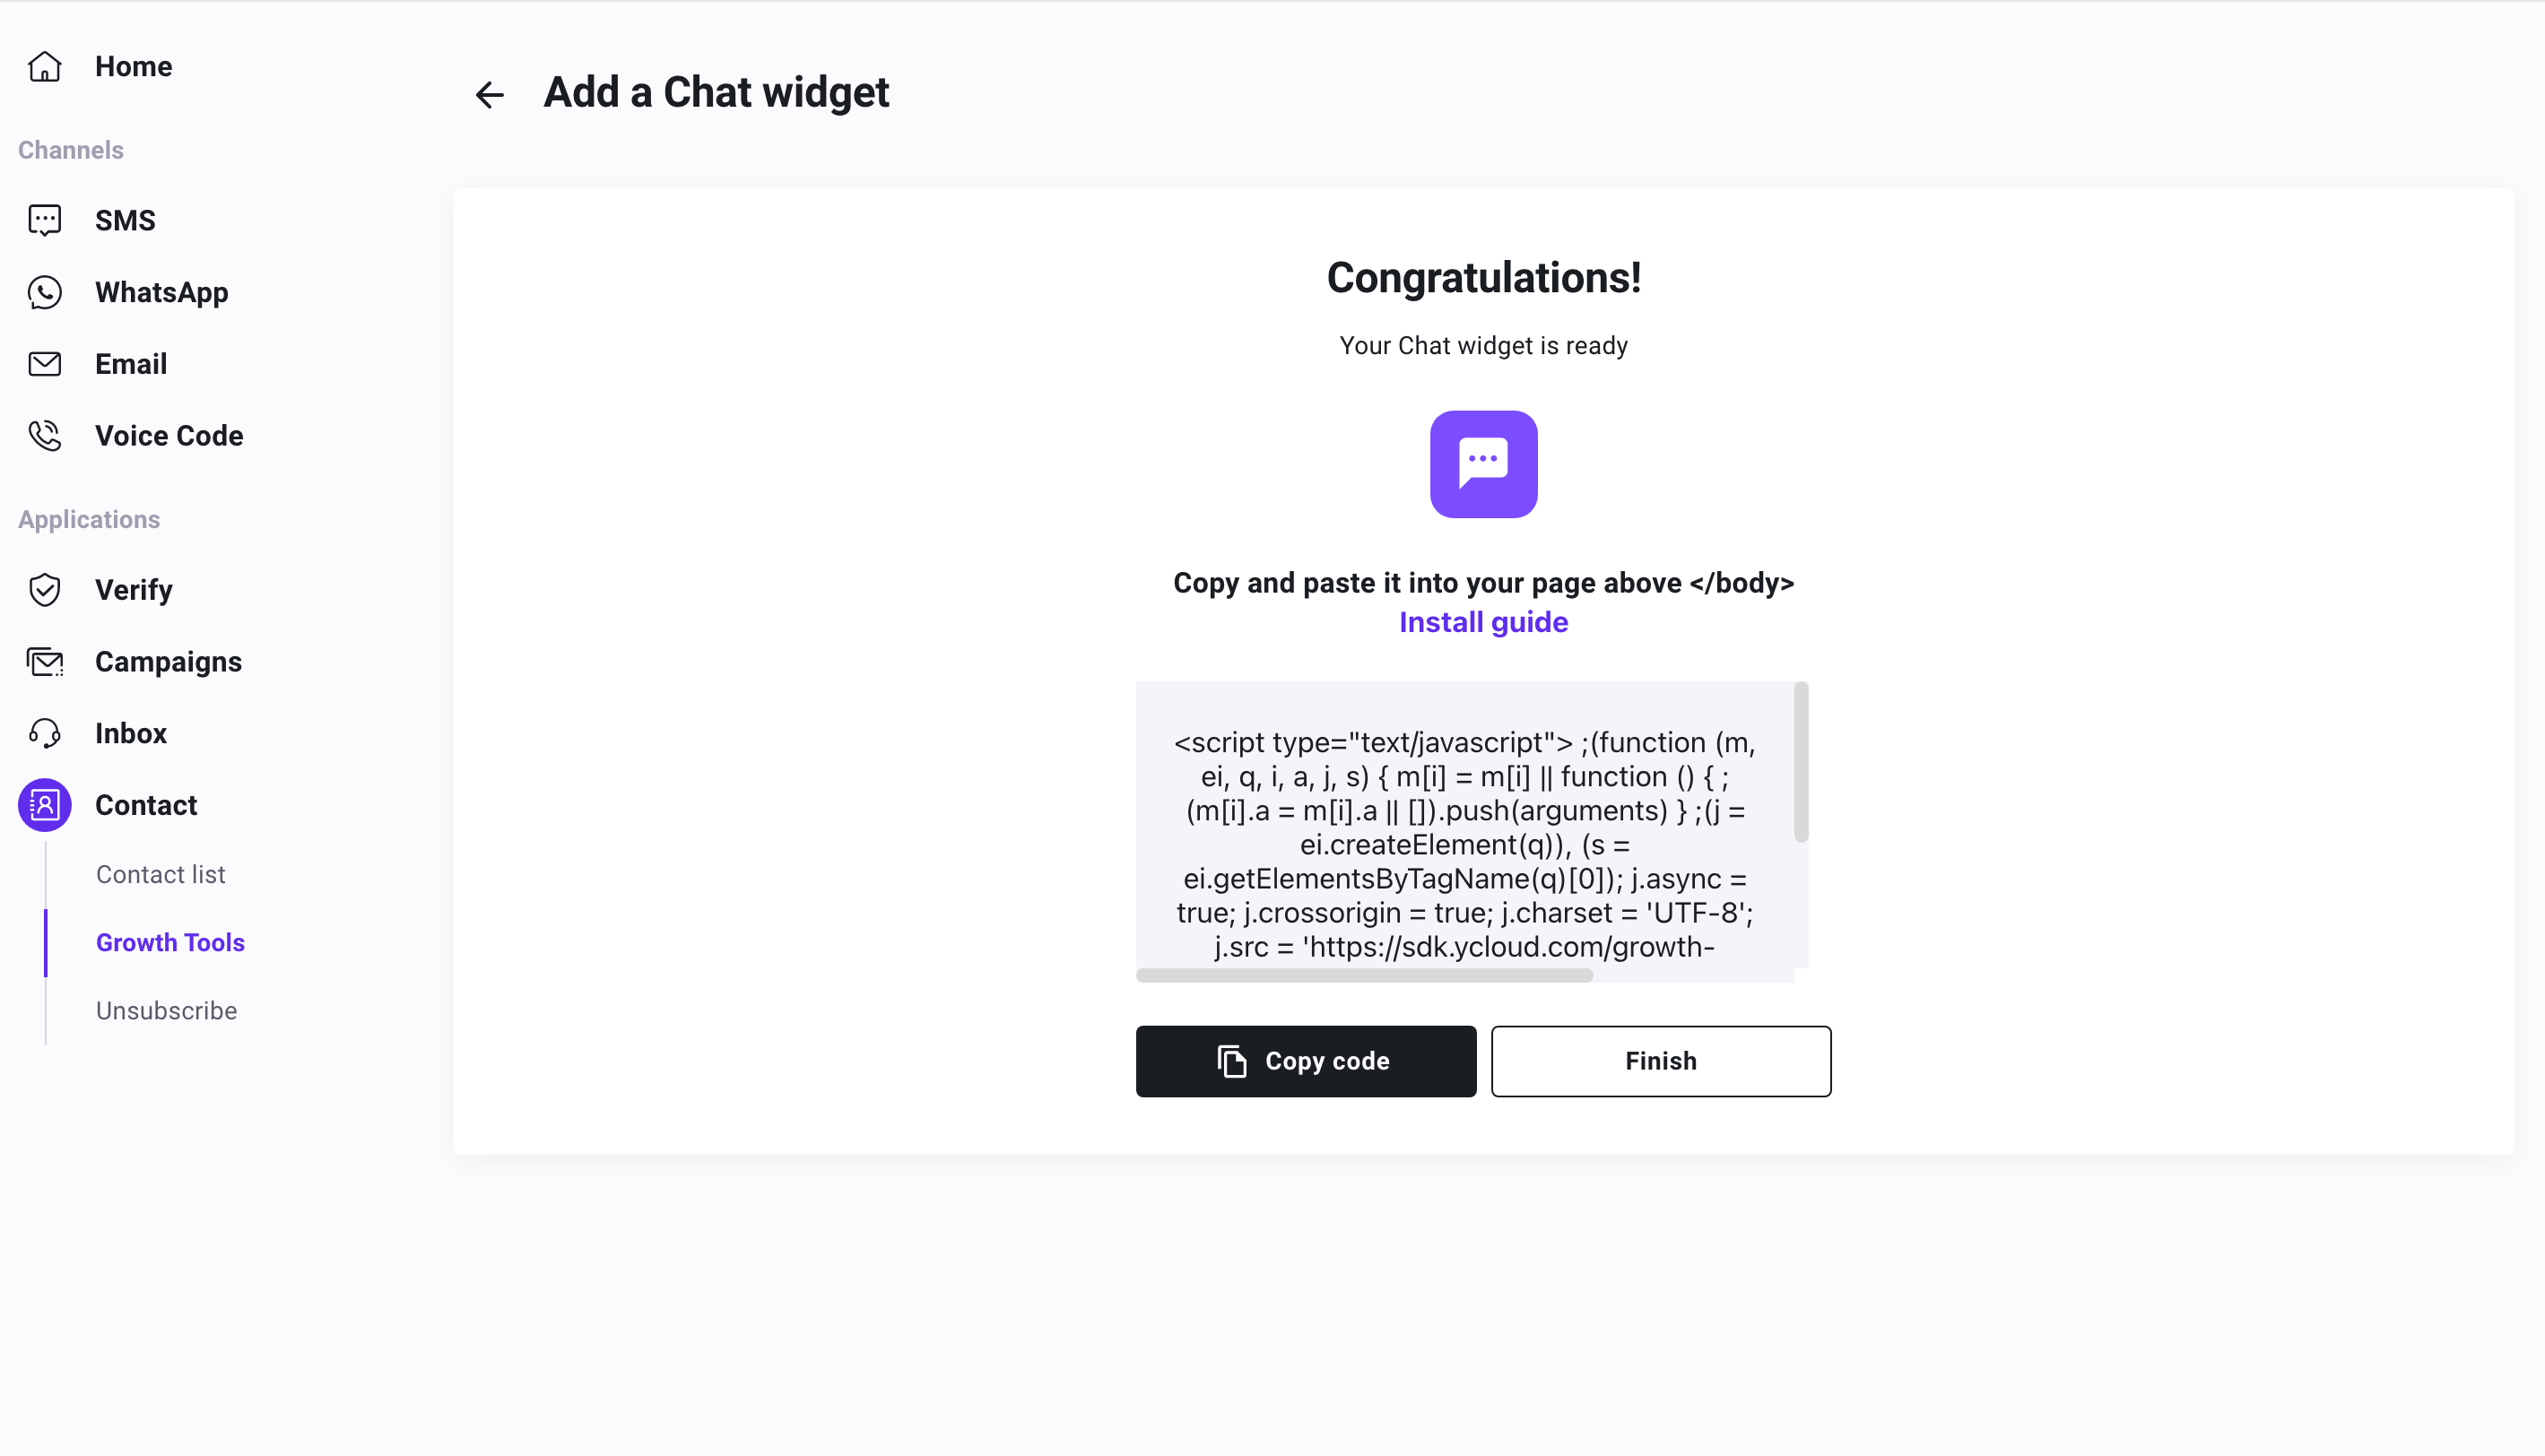
Step5
Once the Chat widget is generated successfully. Copy the code and paste it on the desired page. For more details, please refer to How to add chat widget to your website
Step6
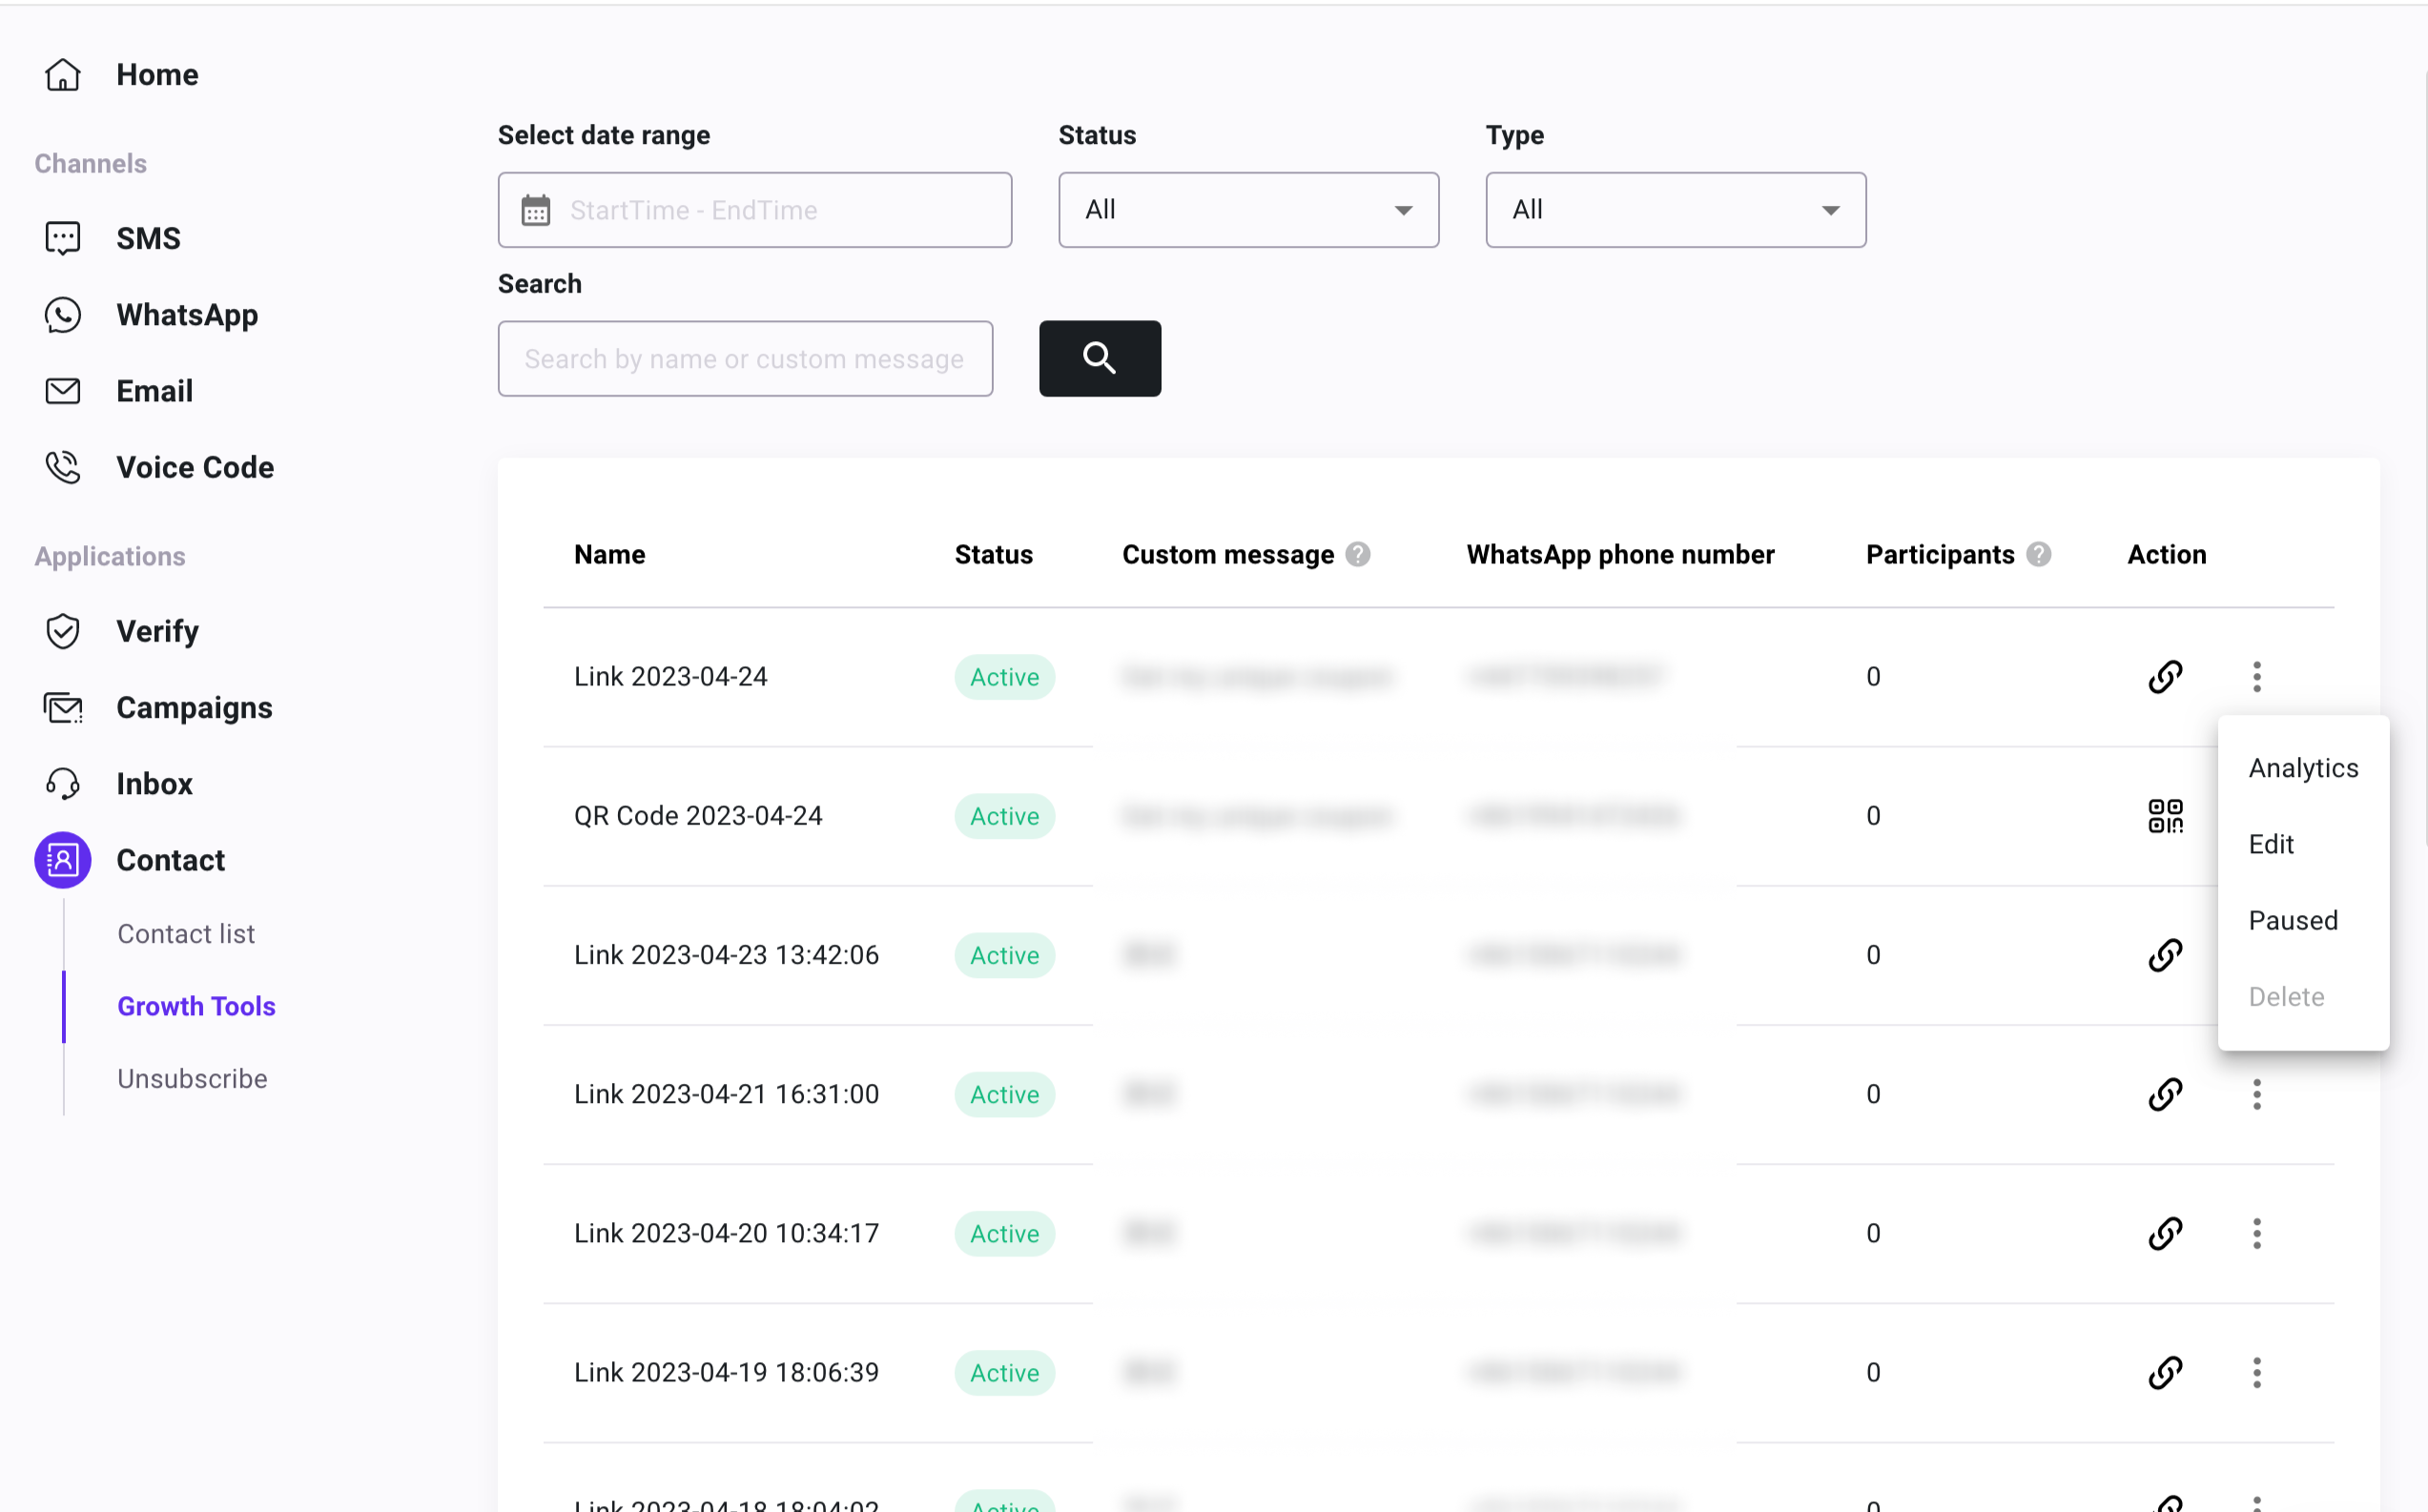
You can manage the generated growth tools through the tool list by clicking on the three dots icon in the "Actions" column to perform additional operations.
You can edit and modify the relevant content at any time.
Updated about 1 year ago